【Setting up Scatter for Web Applications】
If you are still using scatter-js please move over to scatterjs-core.
1、ScatterJS 分为以下5个部分:
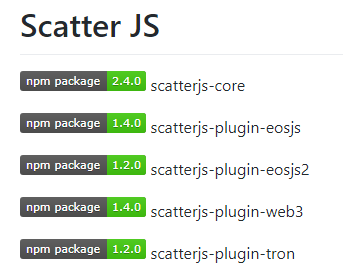
2、浏览器中可以通过 <script> 标签引入。
<script src="https://cdn.scattercdn.com/file/scatter-cdn/js/latest/scatterjs-core.min.js"></script>
<script src="https://cdn.scattercdn.com/file/scatter-cdn/js/latest/scatterjs-plugin-eosjs.min.js"></script>
<script src="https://cdn.scattercdn.com/file/scatter-cdn/js/latest/scatterjs-plugin-eosjs2.min.js"></script>
<script src="https://cdn.scattercdn.com/file/scatter-cdn/js/latest/scatterjs-plugin-web3.min.js"></script>
<script src="https://cdn.scattercdn.com/file/scatter-cdn/js/latest/scatterjs-plugin-tron.min.js"></script>
3、React项目可心通过 npm 安装。
npm i -S scatterjs-core
React项目引入区块链相关库。scatter 支持3种不同的区块链。
1)EOS
npm i -S scatterjs-plugin-eosjs
// OR
npm i -S scatterjs-plugin-eosjs2
2)Ethereum
npm i -S scatterjs-plugin-web3
3)TRON
npm i -S scatterjs-plugin-tron
4、导入 ScatterJS,为EOS交互做准备。
import ScatterJS from 'scatterjs-core';
import ScatterEOS from 'scatterjs-plugin-eosjs'

ScatterJS.plugins( new ScatterEOS() );
5、用 DAPP 去连接,并且获取 identity。
// Optional!
const connectionOptions = {initTimeout:10000}

ScatterJS.scatter.connect("Put_Your_App_Name_Here", connectionOptions).then(connected => {
    if(!connected) {
        // User does not have Scatter installed/unlocked.
        return false;
    }

    // Use `scatter` normally now.
    ScatterJS.scatter.getIdentity(...);
});
6、创建 eosjs 的 proxy
// Using a proxy wrapper
const eos = ScatterJS.scatter.eos(network, Eos, eosjsOptions);
7、Interaction Flow

8、完整流程Demo。
1)scatterjs-core、scatterjs-plugin-eosjs。
import ScatterJS from 'scatterjs-core';
import ScatterEOS from 'scatterjs-plugin-eosjs';
import Eos from 'eosjs';

// Don't forget to tell ScatterJS which plugins you are using.
ScatterJS.plugins( new ScatterEOS() );
2)设置要连接的区块链。
// Networks are used to reference certain blockchains.
// They let you get accounts and help you build signature providers.
const network = {
    blockchain:'eos',
    protocol:'https',
    host:'nodes.get-scatter.com',
    port:443,
    chainId:'aca376f206b8fc25a6ed44dbdc66547c36c6c33e3a119ffbeaef943642f0e906'
}
3)设置 AppName 连接 本地Scatter。
// First we need to connect to the user's Scatter.
ScatterJS.scatter.connect('My-App').then(connected => {
    // If the user does not have Scatter or it is Locked or Closed this will return false;
    if(!connected) return false;
);
4)获取 identity,并获取其中一个eos账户(account)。
  const scatter = ScatterJS.scatter;

   // Now we need to get an identity from the user.
   // We're also going to require an account that is connected to the network we're using.
   const requiredFields = { accounts:[network] };
   scatter.getIdentity(requiredFields).then(() => {

       // Always use the accounts you got back from Scatter. Never hardcode them even if you are prompting
       // the user for their account name beforehand. They could still give you a different account.
       const account = scatter.identity.accounts.find(x => x.blockchain === 'eos');
}).catch(error => { // The user rejected this request, or doesn't have the appropriate requirements. console.error(error); }); });
5)获取 eos 代理
     // You can pass in any additional options you want into the eosjs reference.
        const eosOptions = { expireInSeconds:60 };

        // Get a proxy reference to eosjs which you can use to sign transactions with a user's Scatter.
        const eos = scatter.eos(network, Eos, eosOptions);

        // ----------------------------
        // Now that we have an identity,
        // an EOSIO account, and a reference
        // to an eosjs object
6)此时,可以进行交易了。
     // Never assume the account's permission/authority. Always take it from the returned account.
        const transactionOptions = { authorization:[`${account.name}@${account.authority}`] };

        eos.transfer(account.name, 'helloworld', '1.0000 EOS', 'memo', transactionOptions).then(trx => {
            // That's it!
            console.log(`Transaction ID: ${trx.transaction_id}`);
        }).catch(error => {
            console.error(error);
        });
参考: