实验要求编写爬虫
要求1.使用threading函数(重点,实现多线程);2.使用geturl模块(这个无所谓,用requests都可以)
一.
import requests
link='https://www.cnblogs.com/echoDetected/'
headers={'User-Agent':'Mozilla/5.0 (Windows NT 10.0; Win64; x64) AppleWebKit/537.36 (KHTML, like Gecko) Chrome/71.0.3578.98 Safari/537.36'}#伪装成浏览器访问
r=requests.get(link,headers=headers)
print(r.text)
调用requests库,获取网页源代码,我们可以自定义headers头,来伪装成浏览器访问
二.
import requests
headers={'User-Agent':'Mozilla/5.0 (Windows NT 10.0; Win64; x64) AppleWebKit/537.36 (KHTML, like Gecko) Chrome/71.0.3578.98 Safari/537.36'}#定制响应头
r=requests.get('https://www.cnblogs.com/echoDetected/',headers=headers,timeout=20)#超时处理
print("文本编码:",r.encoding)
print("响应状态码:",r.status_code)
print("字符串方式的响应体:",r.text)
筛选内容进行打印
三.
使用BeautifulSoup库进行解析网页
from bs4 import BeautifulSoup
soup=BeautifulSoup(r.text,'lxml')
post=soup.find('span',class_='post-view-count').text.strip()#找到我们需要的属性
这里的代码对自己博客当前网页的文章阅读数进行爬取(只选中一个文章),并写入date.txt文件,'a+'代表写入时不会覆盖原文件
import requests
from bs4 import BeautifulSoup
link='https://www.cnblogs.com/echoDetected/'
headers={'User-Agent':'Mozilla/5.0 (Windows NT 10.0; Win64; x64) AppleWebKit/537.36 (KHTML, like Gecko) Chrome/71.0.3578.98 Safari/537.36'}
r=requests.get(link,headers=headers)

soup=BeautifulSoup(r.text,'lxml')
post=soup.find('span',class_='post-view-count').text.strip()#找到我们需要的属性

with open('date.txt','a+') as t:#写入文件
    t.write(post)
    t.close()
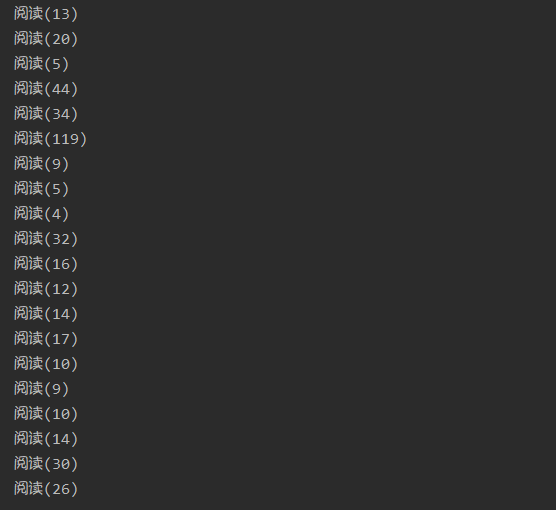
既然爬的数量太少了,我们就来爬取更多的阅读数。
调用re函数,返回匹配的所有字符,再以博客页面的page为变量,遍历两页上文章的阅读数
import re
import requests
for i in range(1,3):
    link='https://www.cnblogs.com/echoDetected/default.html?page='+str(i)
    headers={'user-agent':'Mozilla/5.0 (Windows NT 10.0; Win64; x64) AppleWebKit/537.36 (KHTML, like Gecko) Chrome/72.0.3626.109 Safari/537.36'}
    r=requests.get(link,headers=headers)
    html=r.text
    post=re.findall('<span class="post-view-count">(.*?)</span>',html)
    for i in post:
        print(i)
#爬取博客两页的阅读数
四.
爬取图片,视情况修改代码,原来的注释和自己的注释都在代码里
from urllib.request import urlopen    #注意这里的写法urllib不能直接写为import urllib要加上它的对象request
from bs4 import BeautifulSoup
import re
import time
import urllib.request
url = "https://www.cnblogs.com/echoDetected/p/13024533.html"
html = urllib.request.urlopen(url).read().decode('utf-8')
soup = BeautifulSoup(html, 'html.parser')
#是指定Beautiful的解析器为“html.parser”还有BeautifulSoup(markup,“lxml”)BeautifulSoup(markup, “lxml-xml”) BeautifulSoup(markup,“xml”)等等很多种
print(soup.prettify())#美化功能

# 用Beautiful Soup结合正则表达式来提取包含所有图片链接(img标签中,class=**,以.png结尾的链接)的语句
#find_all查找
#find()查找第一个匹配结果出现的地方,find_all()找到所有匹配结果出现的地方
#re模块中包含一个重要函数是compile(pattern [, flags]) ,该函数根据包含的正则表达式的字符串创建模式对象。可以实现更有效率的匹配。
links = soup.find_all('img', "", src=re.compile(r'.png$'))
print(links)

# 设置保存图片的路径,否则会保存到程序当前路径
path = r'C:/Users/ASUS/desktop/images/'  # 路径前的r是保持字符串原始值的意思,就是说不对其中的符号进行转义
for link in links:#使用attrs 获取标签属性
    print(link.attrs['src'])
    # 保存链接并命名,time.time()返回当前时间戳防止命名冲突
    #urlretrieve()方法直接将远程数据下载到本地
    #urlretrieve(url, filename=None, reporthook=None, data=None)
    urllib.request.urlretrieve(link.attrs['src'],path + '\%s.png' % time.time())  # 使用request.urlretrieve直接将所有远程链接数据下载到本地
print('==========图片已写本地文件夹==========')
五.
多线程爬取图片,效率更高,使用Queue队列线程安全队列
from queue import Queue
...
 page_queue = Queue(100)
    img_queue = Queue(1000)
...
使用threading模块下的thread来进行封装
import threading
...
class Consumer(threading.Thread):
...
etree.HTML解析字符串格式的HTML文档对象,转变为_Element对象,用于调用xpath()等方法
xpath()方法:
//:定位根节点;
/@:提取当前路径下标签属性值
from lxml import etree

...
tree = etree.HTML(html)
        imgs = tree.xpath('//div[@class="card-image"]//img[@class!="gif"]')
完整代码,取自爬知乎表情包的代码:
当然代码是改过的(#是我自己的注释),熟悉各种语法作用以后,完全可以拿来爬取其他网页的图片,这里我就去爬了下Y1ng大佬博客的封面图片,看看他参见过哪些ctf比赛
#省略调用模块

class Producer(threading.Thread):
    """
    生产者 - 图片地址
    """

    def __init__(self, page_queue, img_queue):
        super(Producer, self).__init__()
        self.page_queue = page_queue
        self.img_queue = img_queue

    def run(self):
        while True:
            if self.page_queue.empty():
                break
            url = self.page_queue.get()
            self.parse_page(url)

    def parse_page(self, url):
        """
        请求 解析 下载
        :param url:
        :return:
        """

        headers = {
            'User-Agent': 'Mozilla/5.0 (Windows NT 10.0; Win64; x64) AppleWebKit/537.36 (KHTML, like Gecko) Chrome/70.0.3538.110 Safari/537.36',
        }
        req = requests.get(url=url, headers=headers)
        html = req.text
        tree = etree.HTML(html)
        imgs = tree.xpath('//div[@class="card-image"]//img[@class!="gif"]')
        for img in imgs:
            img_url = img.get('src')#src
            #删除非法字符,图片文件名合法化
            alt = img_url.replace('.','')
            alt = alt.replace(':','')
            alt = alt.replace('/','')
            suffix = os.path.splitext(img_url)[1]#切片获得文件扩展名
            file_name = alt + suffix
            self.img_queue.put((img_url, file_name))


class Consumer(threading.Thread):
    """
    消费者 - 下载图片
    """

    def __init__(self, page_queue, img_queue):
        super(Consumer, self).__init__()
        self.page_queue = page_queue
        self.img_queue = img_queue

    def run(self):

        headers = {
            'User-Agent': 'Mozilla/5.0 (Windows NT 10.0; Win64; x64) AppleWebKit/537.36 (KHTML, like Gecko) Chrome/70.0.3538.110 Safari/537.36',
        }
        while True:
            if self.img_queue.empty() and self.page_queue.empty():
                break
            img_url, file_name = self.img_queue.get()
            req_img = requests.get(url=img_url, headers=headers)
            with open('images/' + file_name, 'wb') as fp:
                fp.write(req_img.content)
            print(file_name + '下载完成...')


def main():
    """
    主函数
    :return:
    """
    page_queue = Queue(100)
    img_queue = Queue(1000)
    for x in range(1, 101):
        url = 'https://www.gem-love.com/page/%d' % x#这里是赋值,相当于%(x),不是取模
        page_queue.put(url)


    for x in range(6):
        t = Producer(page_queue=page_queue, img_queue=img_queue)
        t.start()


    for x in range(4):
        t = Consumer(page_queue=page_queue, img_queue=img_queue)
        t.start()


if __name__ == '__main__':
    main()
嫌麻烦的话,可以将保存路径修改到桌面
