之前,由于所要访问的controller都是位于根目录下的controllers目录下,就像下面这样:
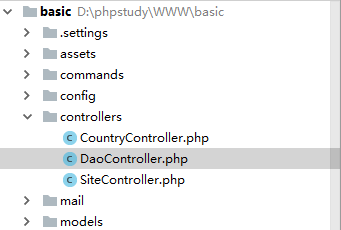
此时,我们可以直接通过 localhost/basic/web/index.php?r=dao/index 来访问图中DaoController.php里的actionIndex。
但是如果,我们将controller、view等有关联的独立出来作为一个模块Modules,那么又将怎样去处理呢。

就像上面这样,这个Site控制器里面的action又将如何访问呢。
1.建立目录
首先建立如上的目录结构,在api下的以及目录有三个文件夹和一个文件Module.php,这个php文件内容如下:
<?php

namespace appmodulesapi;

/**
 * api module definition class
 */
class Module extends yiibaseModule
{
    /**
     * @inheritdoc
     */
    public $controllerNamespace = 'appmodulesapicontrollers';

    /**
     * @inheritdoc
     */
    public function init()
    {
        parent::init();

        // custom initialization code goes here
    }
}
这个文件可以直接复制,无需作任何修改,只是注意红字部分的命名空间,不要写错了!
2.web.php
还记得项目根目录下的config文件夹下有个web.php文件么,添加如下字段:
<?php

$params = require __DIR__ . '/params.php';
$db = require __DIR__ . '/db.php';

$config = [
    'id' => 'basic',
    'basePath' => dirname(__DIR__),
    'bootstrap' => ['log'],
    'aliases' => [
        '@bower' => '@vendor/bower-asset',
        '@npm'   => '@vendor/npm-asset',
    ],
    'components' => [
        'request' => [
            // !!! insert a secret key in the following (if it is empty) - this is required by cookie validation
            'cookieValidationKey' => 'jjsYJ_ju0W8ifOv5mY3JBMI6DOppFlo6',
        ],
        'cache' => [
            'class' => 'yiicachingFileCache',
        ],
        'user' => [
            'identityClass' => 'appmodelsUser',
            'enableAutoLogin' => true,
        ],
        'errorHandler' => [
            'errorAction' => 'site/error',
        ],
        'mailer' => [
            'class' => 'yiiswiftmailerMailer',
            // send all mails to a file by default. You have to set
            // 'useFileTransport' to false and configure a transport
            // for the mailer to send real emails.
            'useFileTransport' => true,
        ],
        'log' => [
            'traceLevel' => YII_DEBUG ? 3 : 0,
            'targets' => [
                [
                    'class' => 'yiilogFileTarget',
                    'levels' => ['error', 'warning'],
                ],
            ],
        ],
        'db' => $db,
        /*
        'urlManager' => [
            'enablePrettyUrl' => true,
            'showScriptName' => false,
            'rules' => [
            ],
        ],
        */
    ],
    'modules' => [
        'api' => [
            'class' => 'appmodulesapiModule',
        ],
    ],
    'params' => $params,
];

if (YII_ENV_DEV) {
    // configuration adjustments for 'dev' environment
    $config['bootstrap'][] = 'debug';
    $config['modules']['debug'] = [
        'class' => 'yiidebugModule',
        // uncomment the following to add your IP if you are not connecting from localhost.
        //'allowedIPs' => ['127.0.0.1', '::1'],
    ];

    $config['bootstrap'][] = 'gii';
    $config['modules']['gii'] = [
        'class' => 'yiigiiModule',
        // uncomment the following to add your IP if you are not connecting from localhost.
        //'allowedIPs' => ['127.0.0.1', '::1'],
    ];
}

return $config;
为了避免看的时候出错,上面红字的“键”是出于同一级的,红字加粗的是我们为modules添加的相关配置信息,相当于在应用中注册了刚才定义的组件(api)。
3.api组件下的controllers
现在我们在Modules/api/controllers下新建一个SiteControllers.php,内容如下:
<?php

namespace appmodulesapicontrollers;

use yiiwebController;


class SiteController extends Controller
{
    public function actionIndex()
    {
        echo "hello world";
    }
}
注意命名空间就好~~~
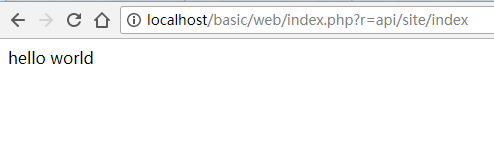
4.浏览器访问
最后就是浏览器访问这个actionIndex了,浏览器输入: http://localhost/basic/web/index.php?r=api/site/index
至此,结束~~~