原帖地址:http://www.cnblogs.com/Twmin/p/3178456.html

如图所见,对于一个程序员来说,不管你是做android.NETIOS,如果让你来做上图效果,
大家都会明白从哪里入手.
1:界面布局(分为3块,顶部标题栏、表单提交块、底部操作块).
2:控件使用(这个看项目需求了,这个界面主要使用了4种控件,按钮(Button)、复选框(CheckBox)、文本框(EditText)、文字(TextView)).
3:功能需求(一个静态登录页面,我们需要它能实现这几种功能,输入验证、数据验证、记住密码、自动登录).
好了,当对页面具体的布局到功能实现都清楚了,那我们就动手吧。
ps: 因为设计这个界面需要添加一些图片,所以必须的注意几个事项:图片名不能有大写字母,图片拷贝到如下路径:

如果对android布局不清楚的朋友,可以花10分钟把这篇文章看一下.http://www.cnblogs.com/wisekingokok/archive/2011/08/23/2150452.html
我个人比较喜欢LinearLayout(线性布局),打开设计页面,切换到代码模块.会发现项目为我们初始化使用相对布局(RelativeLayout).
但我们不需要它,改为如下:

1 <LinearLayout xmlns:android="http://schemas.android.com/apk/res/android"
2     android:layout_width="match_parent"
3     android:layout_height="match_parent"
4     android:orientation="vertical"
5     android:background="#FFFFFF" >
6     <!--代码分解:android:orientation="vertical" 设置此容器为单列模式 -->
7
8 </LinearLayout>
改过之后.我页面上就是一张空白的白纸了,我先从顶部设计开始,为了让整个页面看起来有层次感.
我希望层次结构是外面有一个父层,里面嵌套3个层,每个层分别代表(标题层、表单层、底部层)
 1 <LinearLayout xmlns:android="http://schemas.android.com/apk/res/android"
 2     android:layout_width="match_parent"
 3     android:layout_height="match_parent"
 4     android:orientation="vertical"
 5     android:background="#FFFFFF" >
 6     <!--代码分解:android:orientation="vertical" 设置此容器为单列模式 -->
 7
 8     <!--标题块开始 -->
 9     <LinearLayout
10     android:layout_width="fill_parent"
11     android:layout_height="wrap_content"
12     android:background="@drawable/bg_titlebar">
13     <!--代码分解:android:background="@drawable/bg_titlebar"给此容器设置背景图片 -->
14
15     <TextView
16     android:layout_gravity="center"
17     android:gravity="center_horizontal"
18     android:textColor="#ffffff"
19     android:textSize="20sp"
20     android:layout_width="fill_parent"
21     android:layout_height="wrap_content"
22     android:text="@string/app_login"/>
23     <!--代码分解:android:layout_gravity="center"子容器在父容器中垂直居中 -->
24     <!--代码分解:android:gravity="center_horizontal"TextView里面的内容居中显示-->
25     <!--代码分解:android:textColor="#ffffff"TextView控件内容的颜色-->
26     </LinearLayout>
27     <!--标题块结束 -->
28
29 </LinearLayout>
运行一下,看看现在效果怎么样.
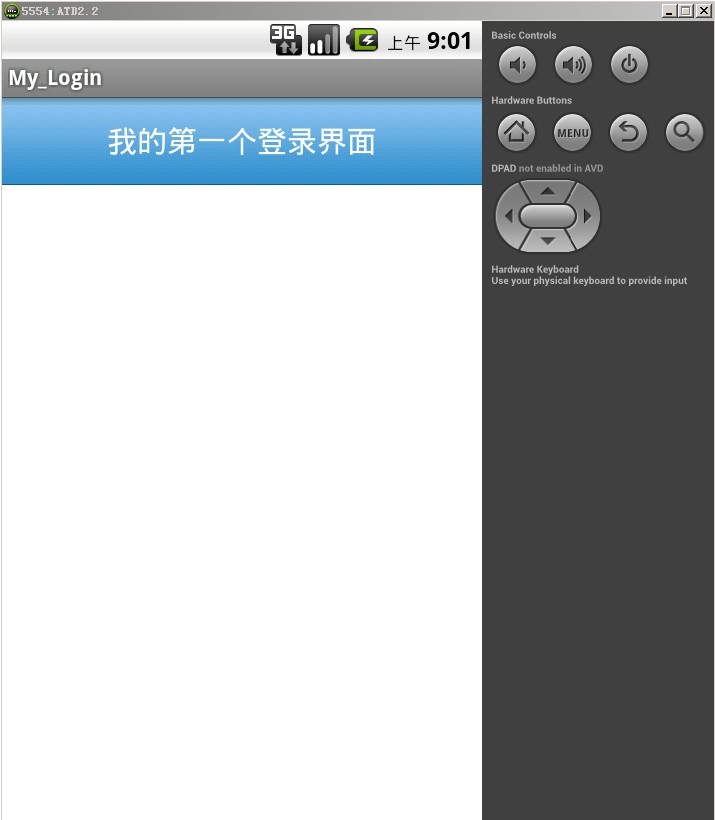
感觉还不错,继续设计表单提交块。
为了让整个页面有层次感,我将继续用一个层包住他,继续用线性.
 1 <LinearLayout xmlns:android="http://schemas.android.com/apk/res/android"
 2     android:layout_width="match_parent"
 3     android:layout_height="match_parent"
 4     android:orientation="vertical"
 5     android:background="#FFFFFF" >
 6     <!--代码分解:android:orientation="vertical" 设置此容器为单列模式 -->
 7
 8     <!--标题块开始 -->
 9     <LinearLayout
10     android:layout_width="fill_parent"
11     android:layout_height="wrap_content"
12     android:background="@drawable/bg_titlebar">
13     <!--代码分解:android:background="@drawable/bg_titlebar"给此容器设置背景图片 -->
14
15     <TextView
16     android:layout_gravity="center"
17     android:gravity="center_horizontal"
18     android:textColor="#ffffff"
19     android:textSize="20sp"
20     android:layout_width="fill_parent"
21     android:layout_height="wrap_content"
22     android:text="@string/app_login"/>
23     <!--代码分解:android:layout_gravity="center"子容器在父容器中垂直居中 -->
24     <!--代码分解:android:gravity="center_horizontal"TextView里面的内容居中显示-->
25     <!--代码分解:android:textColor="#ffffff"TextView控件内容的颜色-->
26     </LinearLayout>
27     <!--标题块结束 -->
28
29     <!--表单块开始 -->
30     <LinearLayout
31     android:orientation="vertical"
32     android:padding="20sp"
33     android:layout_width="fill_parent"
34     android:layout_height="wrap_content">
35     <!--代码分解:android:padding="10sp"为了不让层与层之间不那么紧凑,让它里面的子元素都距离它20sp -->
36     <!--代码分解:android:orientation="vertical"这个单列模式就完整体现出来了,嵌套在它里面的容器都是一个控件占据整行 -->
37
38     <EditText
39     android:id="@+id/edit_UserName"
40     android:hint="@string/edit_UserName"
41     android:layout_width="fill_parent"
42     android:singleLine="true"
43     android:layout_height="wrap_content">
44     </EditText>
45     <!--代码分解:android:id="@+id/edit_UserName"给控件设置一个id,因为我们后台需要根据id找到它并获取它的值 -->
46     <!--代码分解:android:hint="@string/edit_UserName"让控件默认显示数据,但是当鼠标点击控件,默认的数据会清空 -->
47     <!--代码分解:android:singleLine="true"让控件不自动换行 -->
48
49     <EditText
50     android:id="@+id/edit_UserPassword"
51     android:inputType="textPassword"
52     android:layout_width="fill_parent"
53     android:layout_marginTop="10sp"
54     android:layout_height="wrap_content"
55     android:singleLine="true"
56     android:hint="@string/edit_password" >
57     </EditText>
58     <!--代码分解:android:inputType="textPassword"因为是密码框,这里我针对密码框使用这个,还有更多可以去参考官方文档 -->
59     <!--代码分解:android:layout_marginTop="10sp"为了美观,距离我上个元素10sp -->
60
61
62     <!--文本框定义好了,还差一个勾选框和按钮,可是我的表单模块已经设置了单列模式.我可不想一个勾选框占据一行,按钮也跟着
63           占据一行,所以我们得在定一个容器,去装载2个控件在里面. -->
64
65     <LinearLayout
66     android:orientation="horizontal"
67     android:padding="20sp"
68     android:layout_width="fill_parent"
69     android:layout_height="wrap_content">
70     <!--代码分解:android:orientation="horizontal"刚才我们解释了单列模式,就是单个控件占据整行的宽度.
71            这个就是多列模式,在它里面的子元素在一行上面可以显示多个控件 -->
72
73     <CheckBox
74         android:id="@+id/checkbox_state"
75         android:layout_width="fill_parent"
76         android:layout_height="wrap_content"
77         android:layout_weight="1">
78     </CheckBox>
79     <!--代码分解:android:layout_weight="1"设置权重,这个容器里面如果就2个控件,每个都设置为1,
80     也就是每个占据百分之50的宽度 -->
81
82     <Button
83         android:id="@+id/button_ok"
84         android:layout_width="fill_parent"
85         android:layout_height="wrap_content"
86         android:layout_weight="1"
87         android:background="@drawable/btn_android_login"
88         android:textSize="18sp">
89    </Button>
90    </LinearLayout>
91    </LinearLayout>
92    <!--表单块结束-->
93
94 </LinearLayout>
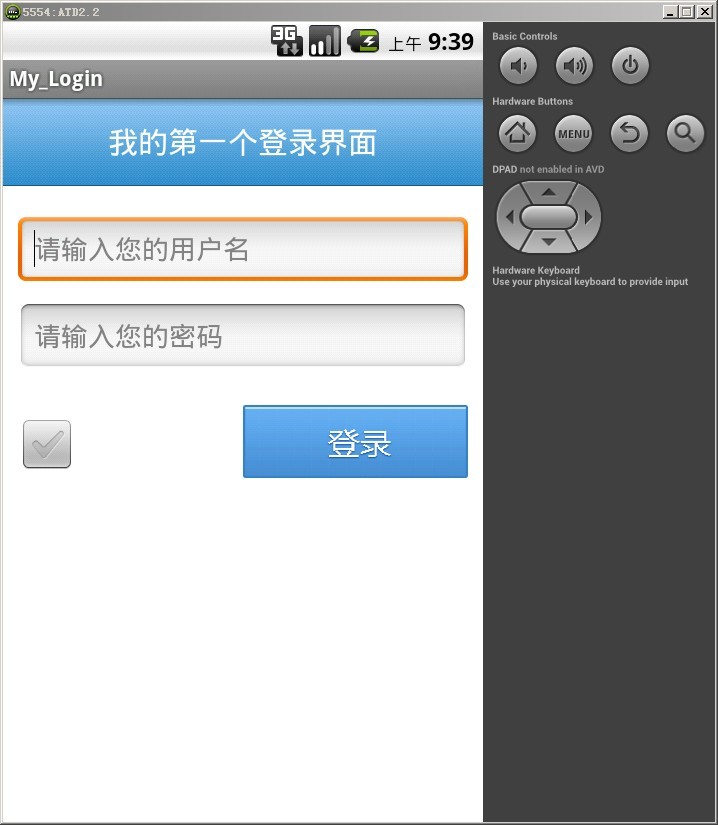
看下预览效果.
到这里先停一下,回顾刚才我说到的控件使用,对于.net程序员最大的障碍不是编程语言.
C#和java太多相似, 基本上java代码也都看得懂,如果做android,我们需要了解的第一步就是控件使用.
控件使用最好记住的方式就是拿自己以前设计界面控件和android的控件对比就知道了.
比如:TextView,我们就把他当作html的lable.主要用途用来展示文字.
EditText,和html的textbox一样,用于提供输入.
Button,就和html的button是一样的.
ps:对于以上几个控件,大家有时间可以琢个去了解它们的其他属性。
至于底部我就不记录了.大家可以根据自己的需求自由发挥.
界面设计完成之后,我们要去实现登录功能了,把目光锁定这个类:
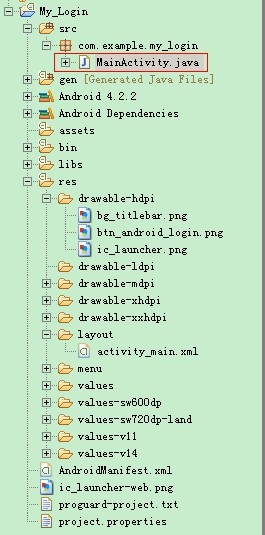
why? 他和activity_main.xml到底有什么关系? 难道是创建activity_main.xml系统会自动创建一个对应的.java文件吗?
如果不是,那以后我们添加一个xml页面,怎么让它关联.java文件?
就算要关联?那我们去哪里关联?怎么关联?
以上这些疑问不解决.那对我们来说.是一个非常大的困扰;

很好,已经知道项目如何配制起始页了;
但想想还是不对,就算配置了Activity,那跟我界面有什么关系?
因为我们启动程序呈现给我们的是界面阿,不是一堆类、文字、代码;
带这疑问,打开MainActivity.java这个文件,看它到底做什么.

赶紧整理一下整体思路,其实android开发,首先我们面对的应该是在AndroidManifest.xml中配置,然后在是Activity类,最后才是xml设计页面.
现在xml设计页面和Activity类的关系搞清楚了,那就实现登录功能吧.
实现思路大概如下:
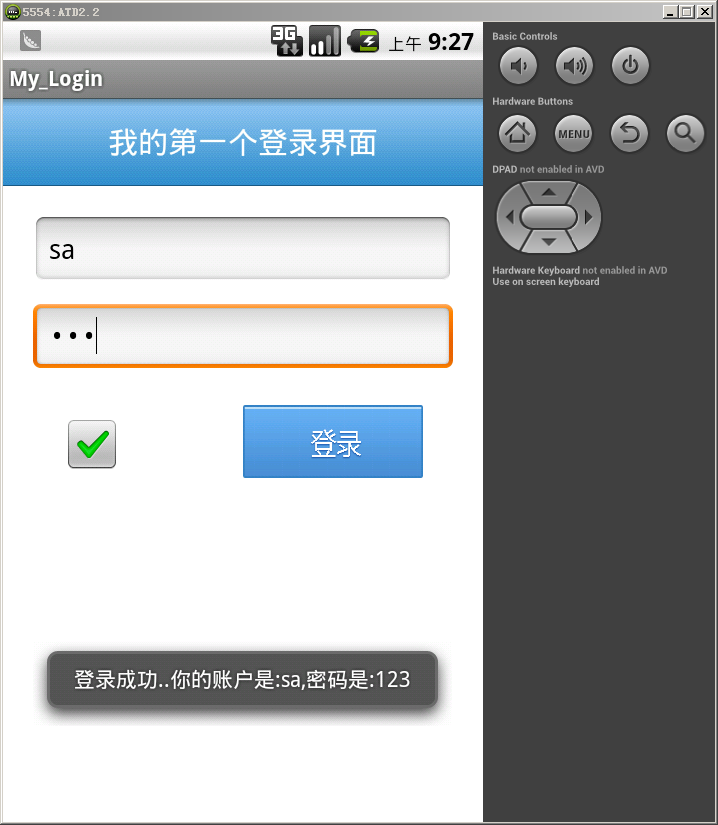
获取文本框的值--验证数据--判断勾选框是否勾选--提示
 1 package com.example.my_login;
 2
 3 import android.os.Bundle;
 4 import android.app.Activity;
 5 import android.content.Context;
 6 import android.content.SharedPreferences;
 7 import android.content.SharedPreferences.Editor;
 8 import android.view.Menu;
 9 import android.view.View;
10 import android.widget.Button;
11 import android.widget.CheckBox;
12 import android.widget.EditText;
13 import android.widget.Toast;
14 public class MainActivity extends Activity {
15     private EditText userName, password;//定义2个EditText对象.
16     private CheckBox rem_pw;//定义CheckBox对象
17     private Button button_ok;//定义Button对象
18     private SharedPreferences sp;/*SharedPreferences是一种轻型的数据存储方式,它的本质是基于XML文件存储key-value键值对数据,
19                                         通常用来存储一些简单的配置信息我们就用它来记住账户和密码*/
20
21     @Override
22     protected void onCreate(Bundle savedInstanceState) {
23         super.onCreate(savedInstanceState);
24         setContentView(R.layout.activity_main);
25         sp = this.getSharedPreferences("userInfo",MODE_PRIVATE);//第一个参数自定义的,第二个是打开方式,一般选择private方式.
26         rem_pw = (CheckBox) findViewById(R.id.checkbox_state);//根据之前设置id,获取页面上的CheckBox对象,指向我现在当前类定义的CheckBox
27         userName = (EditText) findViewById(R.id.edit_UserName);//同上
28         password = (EditText) findViewById(R.id.edit_UserPassword);//同上
29         button_ok = (Button)findViewById(R.id.button_ok);//同上
30
31         //登录按钮事件
32         button_ok.setOnClickListener(new View.OnClickListener(){
33             public void onClick(View v)
34             {
35                 //点击登录按钮,我们首先要判断是否输入了值,没有就提示用户,否则就登录.
36                 //userName.getText()这样就可以获取到文本框的值了,追加.toString()让它以字符串方式显示出来.保险起见trim()去掉空格
37                 if(userName.getText().toString().trim().equals("")&&password.getText().toString().trim().equals("")){
38                     showToast("请输入账户和密码..");
39                 }else{
40                     if(userName.getText().toString().trim().equals("sa")&&password.getText().toString().trim().equals("123")){
41                         //判断是否勾选了记住密码
42                         if(rem_pw.isChecked()){
43                             //记住用户名、密码、
44                               Editor editor = sp.edit();
45                               //editor.putString()2个参数是键值对,第一个是对应的键,后面就是值,
46                               editor.putString("USER_NAME", userName.getText().toString().trim());
47                               editor.putString("PASSWORD",password.getText().toString().trim());
48                               editor.commit();
49                               //检测密码是否记住成功
50                               showToast("登录成功..你的账户是:"+sp.getString("USER_NAME", "")+",密码是:"+sp.getString("PASSWORD", ""));
51                         }else{
52                              showToast("登录成功,你没选择记住密码");
53                         }
54
55
56                     }else{
57                         showToast("你输入的账户或密码错误,请重新输入..");
58                     }
59                 }
60             }
61         });
62     }
63
64     //提示类
65     private void showToast(CharSequence msg) {
66         Toast.makeText(this, msg, Toast.LENGTH_SHORT).show();
67     }
68
69     @Override
70     public boolean onCreateOptionsMenu(Menu menu) {
71         // Inflate the menu; this adds items to the action bar if it is present.
72         getMenuInflater().inflate(R.menu.main, menu);
73         return true;
74     }
75 }
最后执行: