最近在学习vue的一个实战项目,碰到一个express,当时很萌,就随便看了看................
expres是基于node 的一个web框架,
首先可以找到它的官网照着学习
这里只讲一些官网上没有的或者很晦涩的东西.........
1)模版引擎的使用
给出package.json的依赖
{
  "name": "demo",
  "version": "1.0.0",
  "description": "",
  "main": "demo01.js",
  "scripts": {
    "test": "echo "Error: no test specified" && exit 1"
  },
  "author": "",
  "license": "ISC",
  "dependencies": {
    "body-parser": "^1.18.2",
    "express": "^4.16.2",
    "hbs": "~2.3.1",
    "jade": "^1.11.0"
  }
}
你可以npm install 一下,
我这里要坐的就是使用express的路由兼模版引擎搭建一个小网站。
2)首先你的建立几个文件夹
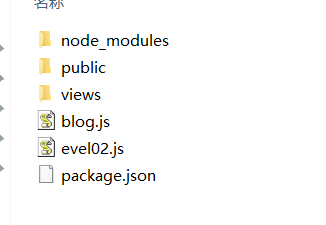
node_modules:这个就不解释了,你稍微使用个就知道了。
public:这个里面我们主要是放些css,images等文件
views:是视图文件(主要放一些)
blog.js:主要是数据(模拟数据)
evel02.js:就是我的启动文件(大家习惯的是app.js)
3)边看代码,遍解释
evel02.js
var express= require('express');

//http://www.jb51.net/article/58166.htm
var bodyParser = require('body-parser');

var path = require('path');

var app = express();


// hbs是express的众多模版之一,可以google一下去了解。
//可以去了解:https://www.cnblogs.com/chyingp/p/hbs-getting-started.html

var hbs = require('hbs');
//设置模版引擎
app.set("view engine",'html');
app.engine("html",hbs.__express);

//加载数据
var blogEngine = require('./blog');


//app.use(bodyParser());

// parse application/x-www-form-urlencoded
app.use(bodyParser.urlencoded({ extended: false }));
// parse application/json
app.use(bodyParser.json()) ;

app.get('/',function(req,res){
//  res.render('index');
  res.render('index',
  {
    tile:'最近的文章',
    entries:blogEngine.getBlogEntries()
  });
});

app.get('/about',function(req,res){
  //res.render('about');
  //渲染页面
  res.render('about',{title:"自我介绍"});
});

app.get('/article/:id',function(req,res){
//res.render('article');
var entry = blogEngine.getBlogEntry(req.params.id);
res.render("article",{title:entry.title,blog:entry});
});

//制定静态文件目录
//app.use(express.static('public'));
app.use(express.static(path.join(__dirname, 'public')));
//监听3000端口
app.listen(3000);
blog.js
var entries =[
  {"id":1,"title":"第一篇","body":"正文1","published":'4-1-2017'},
  {"id":2,"title":"第二篇","body":"正文2","published":'4-2-2017'},
  {"id":3,"title":"第三篇","body":"正文3","published":'4-3-2017'},
  {"id":4,"title":"第四篇","body":"正文4","published":'4-4-2017'},
  {"id":5,"title":"第五篇","body":"正文5","published":'4-5-2017'},
  {"id":6,"title":"第六篇","body":"正文6","published":'4-6-2017'},
  {"id":7,"title":"第七篇","body":"正文7","published":'4-7-2017'},
];
//倒出两个方法
exports.getBlogEntries = function(){
  return entries;
};

exports.getBlogEntry = function(id){
  for(var i =0;i<entries.length;i++){
    if(entries[i].id == id)
      return entries[i];
  }
};
views(是express的默认视图文件夹)

layout.html
<html>
<head>
   <title>{{title}}</title>
</head>
<body>
    {{{body}}}
   <footer>
      <p>
         <a href="/">首页</a> - <a href="/about">自我介绍</a>
      </p>
   </footer>
</body>
</html>
index.html
 <h1>文章列表</h1>
{{#each entries}}
   <p>
      <a href="/article/{{id}}">{{title}}</a><br/>
      Published: {{published}}
   </p>
{{/each}}
article.html
<!-- <!DOCTYPE html>
<!DOCTYPE html>
<html>
  <head>
    <meta charset="utf-8">
    <title></title>
  </head>
  <body>
    <p>34333</p>
    {{blog.title}}
  </body>
</html> -->


<h1>{{blog.title}}</h1>
Published: {{blog.published}}

<p/>

{{blog.body}}
about.html
<!-- <h1>自我介绍</h1>
{{title}}
<p>正文</p>
<img class="img" src="/images/q.jpg" alt=""> -->


<!DOCTYPE html>
<html>
  <head>
    <meta charset="utf-8">
    <title>{{title}}</title>
    <link rel="stylesheet" href="/css/style.css">
  </head>
  <body>
    <div class="">
      <h1>自我介绍</h1>
      <div class="">
        <img class="img" src="/images/q.jpg" alt="">
      </div>
    </div>
    <h3>w文件上传递</h3>
    <div class="">
      <form action="/pictures/upload" method="POST" enctype="multipart/form-data">
        Select an image to upload:
        <input type="file" name="image">
        <input type="submit" value="Upload Image">
      </form>
    </div>
  </body>
</html>
这里要解释一下,我的about.html模版是使用的html页面,当然你也可以使用hbs的模版
 <h1>自我介绍</h1>
{{title}}
<p>正文</p>
<img class="img" src="/images/q.jpg" alt="">
完整学习实例参考:http://blog.csdn.net/ganxunzou/article/details/42918015
(知识共享,知识的搬运工)
看完这片文章就在思考怎么将express与前端相结合起来呢???(我不轻易问问提的。。。。)
写个css的都知道前端框架有很多vue,angular,react,他们都有自己的路由机制,而且还是蛮好用的。。。。。
探究一番。。。。
文件目录:
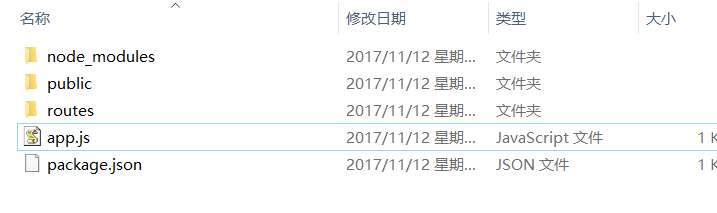
app.js
(这个是没有使用express的模版引擎的,我要做的就是使用express做接口数据层,使用前端路由,访问接口地址,进行数据获取)
var express = require("express");

var path =require("path");

var routes = require("./routes/index");//

var app = express();

app.use(express.static(path.join(__dirname,'public')));

app.use('/',routes);

app.listen(3001);
routes/index.js
var express = require('express');

var router = express.Router();

router.get('/',function(req,res,next){
  res.render('index',{
    title:'express'
  });
});

router.get('/foo',function(req,res,next){
  res.json({
    "name":"tom",
    "age":33
  })
});

router.get('/bar',function(req,res,next){
  res.send({
    "name":"bar",
    "age":33
  })
});
router.get('/goinfo',function(req,res,next){
  res.send({
    "name":"goinfo",
    "age":33
  })
});
module.exports =router;
看到这里可能有同学说这个和上面那个例子不是一样的吗????
不一样。。。区别就是res.send(),与res.render()的区别,并且我也没用express的模板引擎
res.send(),或者res.json()是还回数据,res.render()渲染页面
public:(主要存放一些资源文件)
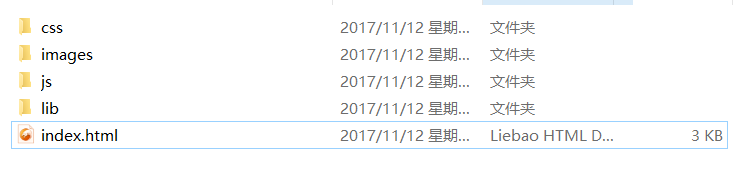
index.html
(使用vue框架,简单的搭建了几个页面,没有使用vue-cli,因为不是终点)
<!DOCTYPE html>
<html>
  <head>
    <meta charset="utf-8">
    <title></title>
    <script type="text/javascript">

    </script>
    <script type="text/javascript" src="../lib/vue2.js">  </script>
    <script type="text/javascript" src="../lib/vue_router.js">  </script>
    <script type="text/javascript" src="../lib/axios.min.js">  </script>
  </head>
  <body>
    <div class="">
    </div>
    <div class="" id="app">

    </div>
  </body>
</html>
<script type="text/javascript">

  const Home={
    template:'<div>this is home page</div>',
    // methods:{
    //   getData(){
    //     axios.get('/').then(function(res){
    //       console.log(res);
    //     }).catch(function(err){
    //       console.log(err);
    //     });
    //   }
    // },
    // mounted(){
    //   this.getData();
    // }

  };
  const foo={
    template:'<div>this is foo page</div>',
    methods:{
      getData(){
        axios.get('/foo').then(function(res){
          console.log(res);
        }).catch(function(err){
          console.log(err);
        });
      }
    },
    mounted(){
      this.getData();
    }
  };
  const bar={
    template:'<div>this is bar page</div>',
    methods:{
      getData(){
        axios.get('/bar').then(function(res){
          console.log(res);
        }).catch(function(err){
          console.log(err);
        });
      }
    },
    mounted(){
      this.getData();
    }
  };

  const goInfo={
    template:'<div>this is foo goInfo</div>',
    methods:{
      getData(){
        axios.get('/goInfo').then(function(res){
          console.log(res);
        }).catch(function(err){
          console.log(err);
        });
      }
    },
    mounted(){
      this.getData();
    }
  };
   const router =new VueRouter({
       mode:'history',
       routes:
     [
        {
          path:'/',
          name:'home',
          component:Home,
          // children:[
          //     {path:'foo',name:'foo',component:foo},
          // ]
        },
        {path:'foo',name:'foo',component:foo},
        {path:'/bar',name:'bar',component:bar},
        {path:'/goinfo',name:'goinfo',component:goInfo},
     ]
   })

  const mou = new Vue({
    el:"#app",
    router,
    template:`
      <div id="app">
        <h1>Name Routes</h1>
        <p>currnt route </p>
        <ul>
          <li>
            <router-link :to="{name:'home'}">home</router-link>
          </li>
          <li>
            <router-link :to="{name:'foo'}">foo</router-link>
          </li>
          <li>
            <router-link :to="{name:'bar'}">bar</router-link>
          </li>
          <li>
            <router-link :to="{name:'goinfo'}">goinfo</router-link>
          </li>
        </ul>
        <router-view></router-view>
      </div>
    `
  });
</script>
然后你直接在命令行输入: node app.js
访问localhost:3000
主要的已经讲完了,
接下来补充几点:
//若要设置HTTP头部信息
app.get('/htp',function(req,res){
  var body = "Hello world";
  res.setHeader("Content-Type","text/plain");
  res.setHeader('Content-Length',body.length);
  res.setHeader('expire',"nocache");
  res.send(body);
});
参考例子:http://www.cnblogs.com/KevinSong/p/4495729.html#3837987
例子源码地址:
https://github.com/EvalGitHub/myExpress