课程地址:TensorFlow 实现基于 CNN 数字识别的代码
课前准备:
wget https://devlab-1251520893.cos.ap-guangzhou.myqcloud.com/t10k-images-idx3-ubyte.gz
wget https://devlab-1251520893.cos.ap-guangzhou.myqcloud.com/t10k-labels-idx1-ubyte.gz
wget https://devlab-1251520893.cos.ap-guangzhou.myqcloud.com/train-images-idx3-ubyte.gz
wget https://devlab-1251520893.cos.ap-guangzhou.myqcloud.com/train-labels-idx1-ubyte.gz
CNN 模型构建


#!/usr/bin/python
# -*- coding: utf-8 -*

from __future__ import absolute_import
from __future__ import division
from __future__ import print_function

import argparse
import sys
import tempfile

from tensorflow.examples.tutorials.mnist import input_data

import tensorflow as tf

FLAGS = None


def deepnn(x):

  with tf.name_scope('reshape'):
    x_image = tf.reshape(x, [-1, 28, 28, 1])

  #第一层卷积层,卷积核为5*5,生成32个feature maps.
  with tf.name_scope('conv1'):
    W_conv1 = weight_variable([5, 5, 1, 32])
    b_conv1 = bias_variable([32])
    h_conv1 = tf.nn.relu(conv2d(x_image, W_conv1) + b_conv1) #激活函数采用relu

  # 第一层池化层,下采样2.
  with tf.name_scope('pool1'):
    h_pool1 = max_pool_2x2(h_conv1)

  # 第二层卷积层,卷积核为5*5,生成64个feature maps
  with tf.name_scope('conv2'):
    W_conv2 = weight_variable([5, 5, 32, 64])
    b_conv2 = bias_variable([64])
    h_conv2 = tf.nn.relu(conv2d(h_pool1, W_conv2) + b_conv2)#激活函数采用relu

  # 第二层池化层,下采样2.
  with tf.name_scope('pool2'):
    h_pool2 = max_pool_2x2(h_conv2)

  #第一层全连接层,将7x7x64个feature maps与1024个features全连接
  with tf.name_scope('fc1'):
    W_fc1 = weight_variable([7 * 7 * 64, 1024])
    b_fc1 = bias_variable([1024])

    h_pool2_flat = tf.reshape(h_pool2, [-1, 7*7*64])
    h_fc1 = tf.nn.relu(tf.matmul(h_pool2_flat, W_fc1) + b_fc1)

  #dropout层,训练时候随机让某些隐含层节点权重不工作
  with tf.name_scope('dropout'):
    keep_prob = tf.placeholder(tf.float32)
    h_fc1_drop = tf.nn.dropout(h_fc1, keep_prob)

  # 第二层全连接层,1024个features和10个features全连接
  with tf.name_scope('fc2'):
    W_fc2 = weight_variable([1024, 10])
    b_fc2 = bias_variable([10])

    y_conv = tf.matmul(h_fc1_drop, W_fc2) + b_fc2
  return y_conv, keep_prob

#卷积
def conv2d(x, W):
  return tf.nn.conv2d(x, W, strides=[1, 1, 1, 1], padding='SAME')

#池化
def max_pool_2x2(x):
  return tf.nn.max_pool(x, ksize=[1, 2, 2, 1],
                        strides=[1, 2, 2, 1], padding='SAME')
#权重
def weight_variable(shape):
  initial = tf.truncated_normal(shape, stddev=0.1)
  return tf.Variable(initial)

#偏置
def bias_variable(shape):
  initial = tf.constant(0.1, shape=shape)
  return tf.Variable(initial)
训练CNN 模型
#!/usr/bin/python
# -*- coding: utf-8 -*

from __future__ import absolute_import
from __future__ import division
from __future__ import print_function

import argparse
import sys
import tempfile

from tensorflow.examples.tutorials.mnist import input_data

import tensorflow as tf

import mnist_model

FLAGS = None


def main(_):
  mnist = input_data.read_data_sets(FLAGS.data_dir, one_hot=True)

  #输入变量,mnist图片大小为28*28
  x = tf.placeholder(tf.float32, [None, 784])

  #输出变量,数字是1-10
  y_ = tf.placeholder(tf.float32, [None, 10])

  # 构建网络,输入—>第一层卷积—>第一层池化—>第二层卷积—>第二层池化—>第一层全连接—>第二层全连接
  y_conv, keep_prob = mnist_model.deepnn(x)

  #第一步对网络最后一层的输出做一个softmax,第二步将softmax输出和实际样本做一个交叉熵
  #cross_entropy返回的是向量
  with tf.name_scope('loss'):
    cross_entropy = tf.nn.softmax_cross_entropy_with_logits(labels=y_,
                                                            logits=y_conv)

  #求cross_entropy向量的平均值得到交叉熵
  cross_entropy = tf.reduce_mean(cross_entropy)

  #AdamOptimizer是Adam优化算法:一个寻找全局最优点的优化算法,引入二次方梯度校验
  with tf.name_scope('adam_optimizer'):
    train_step = tf.train.AdamOptimizer(1e-4).minimize(cross_entropy)

  #在测试集上的精确度
  with tf.name_scope('accuracy'):
    correct_prediction = tf.equal(tf.argmax(y_conv, 1), tf.argmax(y_, 1))
    correct_prediction = tf.cast(correct_prediction, tf.float32)
  accuracy = tf.reduce_mean(correct_prediction)

  #将神经网络图模型保存本地,可以通过浏览器查看可视化网络结构
  graph_location = tempfile.mkdtemp()
  print('Saving graph to: %s' % graph_location)
  train_writer = tf.summary.FileWriter(graph_location)
  train_writer.add_graph(tf.get_default_graph())

  #将训练的网络保存下来
  saver = tf.train.Saver()
  with tf.Session() as sess:
    sess.run(tf.global_variables_initializer())
    for i in range(5000):
      batch = mnist.train.next_batch(50)
      if i % 100 == 0:
        train_accuracy = accuracy.eval(feed_dict={
            x: batch[0], y_: batch[1], keep_prob: 1.0})#输入是字典,表示tensorflow被feed的值
        print('step %d, training accuracy %g' % (i, train_accuracy))
      train_step.run(feed_dict={x: batch[0], y_: batch[1], keep_prob: 0.5})

    test_accuracy = 0
    for i in range(200):
      batch = mnist.test.next_batch(50)
      test_accuracy += accuracy.eval(feed_dict={x: batch[0], y_: batch[1], keep_prob: 1.0}) / 200;

    print('test accuracy %g' % test_accuracy)

    save_path = saver.save(sess,"mnist_cnn_model.ckpt")

if __name__ == '__main__':
  parser = argparse.ArgumentParser()
  parser.add_argument('--data_dir', type=str,
                      default='./',
                      help='Directory for storing input data')
  FLAGS, unparsed = parser.parse_known_args()
  tf.app.run(main=main, argv=[sys.argv[0]] + unparsed)
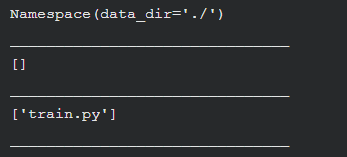
查看命令行解析结果:
  print(FLAGS)
  print("_______________________________")
  print(unparsed)
  print("_______________________________")
  print([sys.argv[0]] + unparsed)
  print("_______________________________")
执行train_mnist_model.py结果
Extracting ./train-images-idx3-ubyte.gz
Extracting ./train-labels-idx1-ubyte.gz
Extracting ./t10k-images-idx3-ubyte.gz
Extracting ./t10k-labels-idx1-ubyte.gz
Saving graph to: /tmp/tmpQCMtmP
step 0, training accuracy 0.08
step 100, training accuracy 0.08
step 200, training accuracy 0.2
step 300, training accuracy 0.2
step 400, training accuracy 0.22
step 500, training accuracy 0.32
step 600, training accuracy 0.46
step 700, training accuracy 0.78
step 800, training accuracy 0.98
step 900, training accuracy 0.92
step 1000, training accuracy 0.98
step 1100, training accuracy 1
step 1200, training accuracy 0.96
step 1300, training accuracy 1
step 1400, training accuracy 0.98
step 1500, training accuracy 0.96
step 1600, training accuracy 1
step 1700, training accuracy 0.98
step 1800, training accuracy 0.96
step 1900, training accuracy 0.98
step 2000, training accuracy 0.98
step 2100, training accuracy 1
step 2200, training accuracy 1
step 2300, training accuracy 0.98
step 2400, training accuracy 1
step 2500, training accuracy 0.98
step 2600, training accuracy 0.98
step 2700, training accuracy 1
step 2800, training accuracy 0.96
step 2900, training accuracy 0.94
step 3000, training accuracy 1
step 3100, training accuracy 0.98
step 3200, training accuracy 1
step 3300, training accuracy 0.98
step 3400, training accuracy 0.98
step 3500, training accuracy 0.96
step 3600, training accuracy 0.98
step 3700, training accuracy 1
step 3800, training accuracy 0.98
step 3900, training accuracy 1
step 4000, training accuracy 0.96
step 4100, training accuracy 1
step 4200, training accuracy 0.98
step 4300, training accuracy 0.98
step 4400, training accuracy 0.98
step 4500, training accuracy 0.98
step 4600, training accuracy 0.98
step 4700, training accuracy 1
step 4800, training accuracy 1
step 4900, training accuracy 1
test accuracy 0.987
测试 CNN 模型
下载 test_num.zip
cd /home/ubuntu
wget https://devlab-1251520893.cos.ap-guangzhou.myqcloud.com/test_num.zip
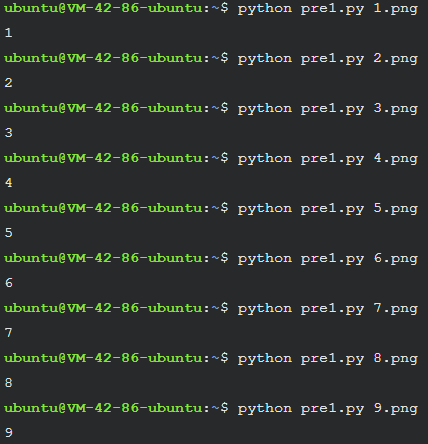
解压 测试图片包,其中 1-9.png 为 1-9 数字图片
unzip test_num.zip

predict_mnist_model.py
#!/usr/bin/python
# -*- coding: utf-8 -*

from __future__ import absolute_import
from __future__ import division
from __future__ import print_function

import argparse
import sys
import tempfile

from tensorflow.examples.tutorials.mnist import input_data

import tensorflow as tf

import mnist_model
from PIL import Image, ImageFilter

def load_data(argv):

    grayimage = Image.open(argv).convert('L')
    width = float(grayimage.size[0])
    height = float(grayimage.size[1])
    newImage = Image.new('L', (28, 28), (255))

    if width > height:
        nheight = int(round((20.0/width*height),0))
        if (nheigth == 0):
            nheigth = 1
        img = grayimage.resize((20,nheight), Image.ANTIALIAS).filter(ImageFilter.SHARPEN)
        wtop = int(round(((28 - nheight)/2),0))
        newImage.paste(img, (4, wtop))
    else:
        nwidth = int(round((20.0/height*width),0))
        if (nwidth == 0):
            nwidth = 1
        img = grayimage.resize((nwidth,20), Image.ANTIALIAS).filter(ImageFilter.SHARPEN)
        wleft = int(round(((28 - nwidth)/2),0))
        newImage.paste(img, (wleft, 4))

    tv = list(newImage.getdata())
    tva = [ (255-x)*1.0/255.0 for x in tv]
    return tva

def main(argv):

    imvalue = load_data(argv)

    x = tf.placeholder(tf.float32, [None, 784])
    y_ = tf.placeholder(tf.float32, [None, 10])
    y_conv, keep_prob = mnist_model.deepnn(x)

    y_predict = tf.nn.softmax(y_conv)
    init_op = tf.global_variables_initializer()
    saver = tf.train.Saver()
    with tf.Session() as sess:
        sess.run(init_op)
        saver.restore(sess, "mnist_cnn_model.ckpt")
        prediction=tf.argmax(y_predict,1)
        predint = prediction.eval(feed_dict={x: [imvalue],keep_prob: 1.0}, session=sess)
        print (predint[0])

if __name__ == "__main__":
    main(sys.argv[1])
其中可以去掉
y_ = tf.placeholder(tf.float32, [None, 10])
y_predict = tf.nn.softmax(y_conv)

6.png出现了识别错误
再用同样代码训练一次,6.png又能识别正确,可能是初始值的起始点对训练过程的影响
还有一个需要注意的点是:自己手写的测试图片在转成黑白图后还需要归一化浮点化,否则我的预测结果全为4
参考博客:
tensorflow命令行参数解析:
3.tensorflow代码中tf.app.run()什么意思
4.【Tensorflow】tf.app.run()与命令行参数解析
tempfile:
tf.summary:
2.用于cifar10的卷积神经网络-4.7TensorFlow的汇总类Summary和FileWriter用法
PIL:
2.Image.ANTIALIAS:利用Python批量生成任意尺寸的图片
3.ImageFilter.SHARPEN:锐化滤镜 SHARPEN
tf.train.Saver: