创建 Zend 项目
要创建 Zend 项目,首先要下载并解压 Zend Framework。
安装 Zend Framework
下载最新的 Zend Framework 1.12.20 源码包,(我们使用的是 Zend Framework 1,所以下面的内容都是基于 Zend 1)
解压到合适的地方(比如:/home/xxx/bin/).
注: /home/xxx/bin 是我偏爱的目录,如果你设定了自己的目录,就应该替换下面命令中相应的地方
$ tar -xzvf ZendFramework-1.12.20.tar.gz -C /home/xxx/bin
这样 Zend Framework 就安装在了 /home/xxx/bin/ZendFramework-1.12.20
注1:Zend Framework 各个版本下载
注2:$ 符号表示当前环境是 Linux 命令行终端,在等待输入一个人命令。
创建项目
在 Zend 安装目录下的 bin/ 目录下有 zf.sh 脚本文件,你需要在系统path目录下创建该文件的链接,然后就可以在命令行中任何地方使用zf命令创建项目了。
$ sudo ln -s /home/xxx/bin/ZendFramework-1.12.20/bin/zf.sh /usr/local/bin/zf
打开命令行(Ctrl + Alt + T),切换到你想创建项目的位置,假如你想在 ~/demo/ 目录下创建 Zend 项目:cd ~/demo/。
执行下面的命令创建 quickstart 项目:
$ zf create project quickstart
这样就创建了 /home/xxx/demo/quickstart,并且在 quickstart 目录下自动创建了 Zend 项目的一些目录结构。其项目结构如下:
quickstart
|-- application
|   |-- Bootstrap.php
|   |-- configs
|   |   `-- application.ini
|   |-- controllers
|   |   |-- ErrorController.php
|   |   `-- IndexController.php
|   |-- models
|   `-- views
|       |-- helpers
|       `-- scripts
|           |-- error
|           |   `-- error.phtml
|           `-- index
|               `-- index.phtml
|-- library
|-- public
|   |-- .htaccess
|   `-- index.php
`-- tests
    |-- application
    |   `-- bootstrap.php
    |-- library
    |   `-- bootstrap.php
    `-- phpunit.xml
此时,只是创建了 Zend 项目结构,你还需要把 Zend Framework 添加到 quickstart 项目中,有两种方式,一中是创建一个链接,把 zend 框架下的 library 目录链接到 quickstart/library ,另一种方式是直接复制 zend 框架下的 library 目录替换掉 quickstart/library。
# Symlink
$ cd library
$ ln -s /home/xxx/bin/ZendFramework-1.12.20/library/Zend .

# or copy
$ cd library
$ cp -r /home/xxx/bin/ZendFramework-1.12.20/library/Zend .
这样就可以看到 quickstart/library/Zend 目录了。
项目启动文件
Bootstrap 类定义了 Zend 项目启动时要初始化的资源和组件。默认地,Zend Framework 初始化了 Front Controller,然后它使用 application/controllers/ 作为寻找 action controller 的默认路径。这个类如下:
// application/Bootstrap.php

class Bootstrap extends Zend_Application_Bootstrap_Bootstrap
{
}
如你所见,这里面没有什么内容。
项目配置文件
默认配置文件放在:application/configs/application.ini,包含一些基本的指令,比如设置php环境,设置启动类,设置 action controller 等。文件内容如下:
; application/configs/application.ini

[production]
phpSettings.display_startup_errors = 0
phpSettings.display_errors = 0
includePaths.library = APPLICATION_PATH "/../library"
bootstrap.path = APPLICATION_PATH "/Bootstrap.php"
bootstrap.class = "Bootstrap"
appnamespace = "Application"
resources.frontController.controllerDirectory = APPLICATION_PATH "/controllers"
resources.frontController.params.displayExceptions = 0

[staging : production]

[testing : production]
phpSettings.display_startup_errors = 1
phpSettings.display_errors = 1

[development : production]
phpSettings.display_startup_errors = 1
phpSettings.display_errors = 1
关于这个文件有几个要点:
(1) 使用 ini 配置文件时,你可以直接引用常量,APPLICATION_PATH 就是一个常量。
(2) 这个文件被分成几个部分:production,staging,testing 和 development。后面三个包括了 production 的设置。不同的环境其配置分开,这样便于开发和调试。
Action Controller 控制器
应用程序的 action controller 定义了程序流程,把用户请求映射到合适的 model 和 view。
一个 action controller 应包含一个或多个以Action结尾的方法,这些方法可以通过 web 请求访问到。默认地,Zend Framework URLs 遵循 /controller/action 的模式,其中 controller 就映射 action controller 名字(以Controller作为后缀),而 action 就映射到 action 方法(以Action作为后缀)。
通常,需要一个 IndexController,它表示网站首页,和一个 ErrorController,它表示诸如 HTTP404、HTTP500 等错误页面.
初始 IndexController 代码如下:
// application/controllers/IndexController.php

class IndexController extends Zend_Controller_Action
{

    public function init()
    {
        /* Initialize action controller here */
    }

    public function indexAction()
    {
        // action body
    }
}
初始 ErrorController 代码如下:
// application/controllers/ErrorController.php

class ErrorController extends Zend_Controller_Action
{

    public function errorAction()
    {
        $errors = $this->_getParam('error_handler');

        switch ($errors->type) {
            case Zend_Controller_Plugin_ErrorHandler::EXCEPTION_NO_ROUTE:
            case Zend_Controller_Plugin_ErrorHandler::EXCEPTION_NO_CONTROLLER:
            case Zend_Controller_Plugin_ErrorHandler::EXCEPTION_NO_ACTION:

                // 404 error -- controller or action not found
                $this->getResponse()->setHttpResponseCode(404);
                $this->view->message = 'Page not found';
                break;
            default:
                // application error
                $this->getResponse()->setHttpResponseCode(500);
                $this->view->message = 'Application error';
                break;
        }

        $this->view->exception = $errors->exception;
        $this->view->request   = $errors->request;
    }
}
Views 视图
Zend Framework 中的 Views 是用普通 PHP 代码写的。View scripts 在 application/views/scripts/ 下面,它以控制器名字分文件夹组织起来。本例中,我们有一个 IndexController 和 ErrorController,因此相应地,也应在 View scripts 目录下有 index/ 和 error/ 子目录。在这个子目录中,又有每个 view scripts 文件,对应 Controller 中的 Action。本例中,使用 index/index.phtml 和 error/error.phtml。
下面是默认的 index/index.phtml view script:
<!-- application/views/scripts/index/index.phtml -->
<style>

    a:link,
    a:visited
    {
        color: #0398CA;
    }

    span#zf-name
    {
        color: #91BE3F;
    }

    div#welcome
    {
        color: #FFFFFF;
        background-image: url(http://framework.zend.com/images/bkg_header.jpg);
          600px;
        height: 400px;
        border: 2px solid #444444;
        overflow: hidden;
        text-align: center;
    }

    div#more-information
    {
        background-image: url(http://framework.zend.com/images/bkg_body-bottom.gif);
        height: 100%;
    }

</style>
<div id="welcome">
    <h1>Welcome to the <span id="zf-name">Zend Framework!</span><h1 />
    <h3>This is your project's main page<h3 />
    <div id="more-information">
        <p>
            <img src="http://framework.zend.com/images/PoweredBy_ZF_4LightBG.png" />
        </p>

        <p>
            Helpful Links: <br />
            <a href="http://framework.zend.com/">Zend Framework Website</a> |
            <a href="http://framework.zend.com/manual/en/">Zend Framework
                Manual</a>
        </p>
    </div>
</div>
error/error.phtml 稍微复杂一点,其中使用了php条件语句:
<!-- application/views/scripts/error/error.phtml -->
<!DOCTYPE html PUBLIC "-//W3C//DTD XHTML 1.0 Strict//EN";
    "http://www.w3.org/TR/xhtml1/DTD/xhtml1-strict.dtd>
<html xmlns="http://www.w3.org/1999/xhtml">
<head>
  <meta http-equiv="Content-Type" content="text/html; charset=utf-8" />
  <title>Zend Framework Default Application</title>
</head>
<body>
  <h1>An error occurred</h1>
  <h2><?php echo $this->message ?></h2>

  <?php if ('development' == $this->env): ?>

  <h3>Exception information:</h3>
  <p>
      <b>Message:</b> <?php echo $this->exception->getMessage() ?>
  </p>

  <h3>Stack trace:</h3>
  <pre><?php echo $this->exception->getTraceAsString() ?>
  </pre>

  <h3>Request Parameters:</h3>
  <pre><?php echo var_export($this->request->getParams(), 1) ?>
  </pre>
  <?php endif ?>

</body>
</html>
创建虚拟主机
对于 quickstart 项目,我们把它放在 apache 服务器上运行。
我们需要设置一个虚拟主机,这样就可以在浏览器中输入域名来访问我们的网站了。假设你已经配置好了 php+apache+mysql 运行环境,如果没有,请参考教程
假设我们的项目所映射的域名是:quickstart.local。
进入 apache 配置目录,创建配置文件:
cd /etc/apache2/sites-available/
sudo gedit quickstart.local.conf
然后复制下面的内容到该配置文件,注意:项目路径需要替换成你自己的项目路径:
<VirtualHost *:80>
	ServerName quickstart.local

	ServerAdmin webmaster@localhost
	DocumentRoot /home/xxx/demo/quickstart/public

	<Directory /home/xxx/demo/quickstart/public>
	AllowOverride all
	require all granted
	</Directory>

	ErrorLog ${APACHE_LOG_DIR}/error.log
	CustomLog ${APACHE_LOG_DIR}/access.log combined

</VirtualHost>
保存该文件,并且启用该配置:sudo a2ensite quickstart.local
然后打开hosts文件:sudo gedit /etc/hosts 添加一行:
127.0.0.1 quickstart.local
最后重启一下 apache 服务器:
sudo service apache2 restart
到此为止,这个项目就创建成功并且可运行了。
检验成果
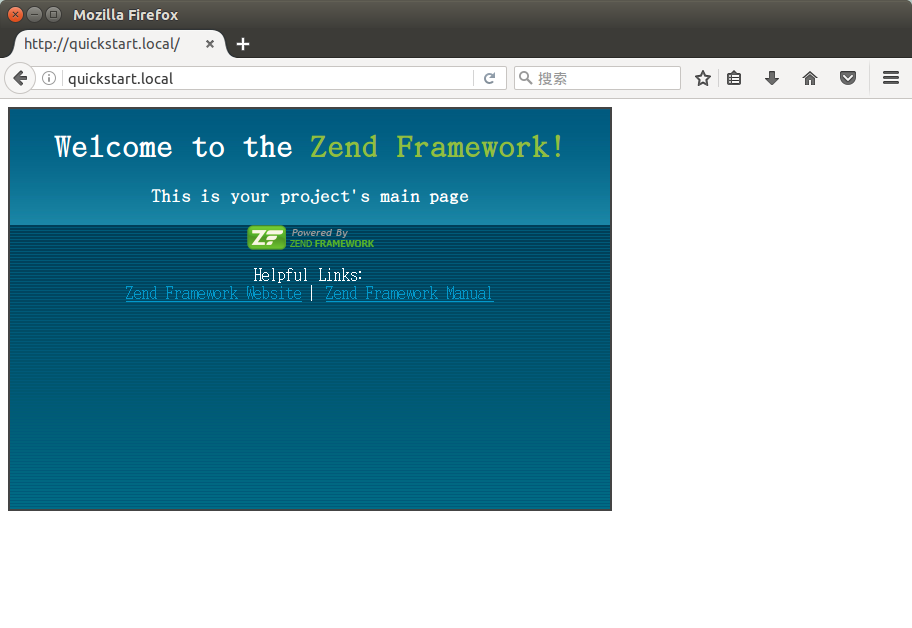
现在就可以访问你的项目网站了,打开浏览器输入http://quickstart.local,就能看到欢迎页了。
可能遇到的问题:
- 页面不显示:很有可能时项目目录的权限问题,使用
chmod -R 777 /home/xxx/demo/quickstart试试看。
创建一个 Layout
你可能注意到,上面的 view scripts 不是完整的 html 页面,这是故意设计的。我们只想让 action 只返回 action 本身要输出的内容,而不是整个应用程序页面。
现在来组成一个完整的 HTML 页面。我们使用一个全局的 layout 来作为网站统一的样式。
注: 下面的命令若无说明,默认是在当前项目根目录下执行的。
开始使用 Zend_Layout,首先让 bootstrap 来加载 Layout 资源。通过下面的命令可实现:
$zf enable layout
# Layouts have been enabled, and a default layout created at
# application/layouts/scripts/layout.phtml
# A layout entry has been added to the application config file.
此时,application/configs/application.ini 内容自动更新了:
; application/configs/application.ini

; Add to [production] section:
resources.layout.layoutPath = APPLICATION_PATH "/layouts/scripts"
这个指令告诉应用程序去 application/layouts/scripts 去寻找 layout。
我们还要启用 XHTML DocType 声明,为此,在 bootstrap 中加载该资源。在 bootstrap中添加资源的最简单的方法就是创建一个以init开头的方法。此时,我们使用 _initDoctype() 方法来初始化 doctype:
// application/Bootstrap.php

class Bootstrap extends Zend_Application_Bootstrap_Bootstrap
{
    protected function _initDoctype()
    {
    }
}
有了这个方法,还需要让 view 使用正确的 doctype,但是 view 从哪里来?最简单的方式就是初始化 View 资源;有了它,就可以把 view 对象放入 bootstrap 并使用它。
添加下行到 aplication/configs/application.ini 来创建 view 资源:
; application/configs/application.ini

; Add to [production] section:
resources.view[] =
然后再来充实一下 _initDoctype() 方法。
// application/Bootstrap.php

class Bootstrap extends Zend_Application_Bootstrap_Bootstrap
{
    protected function _initDoctype()
    {
        $this->bootstrap('view');
        $view = $this->getResource('view');
        $view->doctype('XHTML1_STRICT');
    }
}
然后,创建全局的 layout:
<!-- application/layouts/scripts/layout.phtml -->
<?php echo $this->doctype() ?>
<html xmlns="http://www.w3.org/1999/xhtml">
<head>
  <meta http-equiv="Content-Type" content="text/html; charset=utf-8" />
  <title>Zend Framework Quickstart Application</title>
  <?php echo $this->headLink()->appendStylesheet('/css/global.css') ?>
</head>
<body>
<div id="header" style="background-color: #EEEEEE; height: 30px;">
    <div id="header-logo" style="float: left">
        <b>ZF Quickstart Application</b>
    </div>
    <div id="header-navigation" style="float: right">
        <a href="<?php echo $this->url(
            array('controller'=>'guestbook'),
            'default',
            true) ?>">Guestbook</a>
    </div>
</div>

<?php echo $this->layout()->content ?>

</body>
</html>
使用headLink()来生成<link>元素。
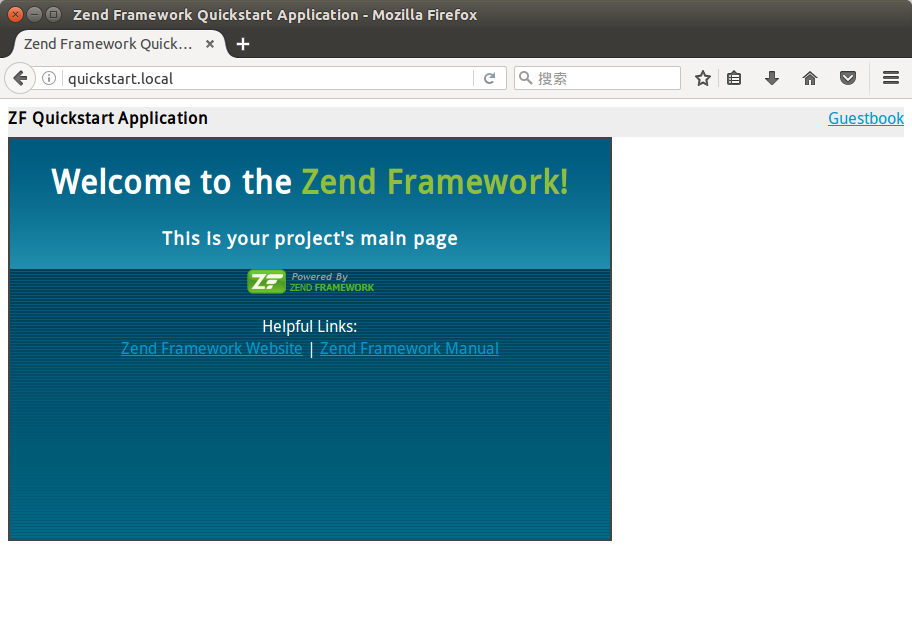
现在再打开浏览器并查看源代码,应该能看到 XHTML头部,<head> <title> <body>等部分。
创建一个 Model 和 Database Table
现在考虑一下guestbook的组成,它包含一些记录,每个记录由注释,时间戳,email地址等组成。我们把它存在数据库里,并有一个唯一id。我们希望能保存、获取所有记录。
因此,一个简单的 guestbook 模型 API 就像下面这样:
// application/models/Guestbook.php

class Application_Model_Guestbook
{
    protected $_comment;
    protected $_created;
    protected $_email;
    protected $_id;

    public function __set($name, $value);
    public function __get($name);

    public function setComment($text);
    public function getComment();

    public function setEmail($email);
    public function getEmail();

    public function setCreated($ts);
    public function getCreated();

    public function setId($id);
    public function getId();
}

class Application_Model_GuestbookMapper
{
    public function save(Application_Model_Guestbook $guestbook);
    public function find($id);
    public function fetchAll();
}
}
下面,我们可以开始思考如何设置数据库了。
首先要初始化 Db 资源。使用 zf configure db-adapter 命令:
zf configure db-adapter "adapter=Pdo_MySql&host=localhost&username=root&password=&dbname=guestbook" production

zf configure db-adapter "adapter=Pdo_MySql&host=localhost&username=root&password=&dbname=guestbook-test" testing

zf configure db-adapter "adapter=Pdo_MySql&host=localhost&username=root&password=&dbname=guestbook-dev" development
如果成功执行,那么在 application/configs/application.ini 中就能看到新增的几行配置:
//application/configs/application.ini

resources.db.adapter = "Pdo_MySql"
resources.db.params.host = "localhost"
resources.db.params.username = "root"
resources.db.params.password = ""
resources.db.params.dbname ="guestbook"
注:要把数据库密码设置成你自己的。
然后创建数据库,打开 phpMyadmin,创建数据库 guestbook,输入下面SQL语句并执行:
CREATE TABLE IF NOT EXISTS `guestbook` (
    `id` int(11) NOT NULL AUTO_INCREMENT,
    `email` varchar(32) NOT NULL DEFAULT 'noemail@test.com',
    `comment` varchar(200) NOT NULL,
    `created` timestamp NOT NULL DEFAULT CURRENT_TIMESTAMP,
    PRIMARY KEY (`id`)
) ENGINE=MyISAM  DEFAULT CHARSET=latin1 AUTO_INCREMENT=1 ;
接下来我们使用 Table Data Gateway 机制来连接数据源。Zend_Db_Table 提供了这个功能。
首先创建一个 Zend_Db_Table 类:
$ zf create db-table Guestbook guestbook
查看项目结构,发现多了一个 application/models/DbTable/ 目录,里面有一个 Guestbook.php 文件。其内容如下:
// application/models/DbTable/Guestbook.php

/**
* This is the DbTable class for the guestbook table.
*/
class Application_Model_DbTable_Guestbook extends Zend_Db_Table_Abstract
{
    /** Table name */
    protected $_name    = 'guestbook';
}
注意 Application_Model_DbTable 类前缀,它对应 application/models/DbTable 目录。
然后创建一个 Data Mapper。Data Mapper 映射对象到数据库。本例中,它将映射 model 到数据源。
$ zf create model GuestbookMapper
然后打开 application/models/GuestbookMapper.php 并输入以下内容:
// application/models/GuestbookMapper.php

class Application_Model_GuestbookMapper
{
    protected $_dbTable;

    public function setDbTable($dbTable)
    {
        if (is_string($dbTable)) {
            $dbTable = new $dbTable();
        }
        if (!$dbTable instanceof Zend_Db_Table_Abstract) {
            throw new Exception('Invalid table data gateway provided');
        }
        $this->_dbTable = $dbTable;
        return $this;
    }

    public function getDbTable()
    {
        if (null === $this->_dbTable) {
            $this->setDbTable('Application_Model_DbTable_Guestbook');
        }
        return $this->_dbTable;
    }

    public function save(Application_Model_Guestbook $guestbook)
    {
        $data = array(
            'email'   => $guestbook->getEmail(),
            'comment' => $guestbook->getComment(),
            'created' => date('Y-m-d H:i:s'),
        );

        if (null === ($id = $guestbook->getId())) {
            unset($data['id']);
            $this->getDbTable()->insert($data);
        } else {
            $this->getDbTable()->update($data, array('id = ?' => $id));
        }
    }

    public function find($id, Application_Model_Guestbook $guestbook)
    {
        $result = $this->getDbTable()->find($id);
        if (0 == count($result)) {
            return;
        }
        $row = $result->current();
        $guestbook->setId($row->id)
                  ->setEmail($row->email)
                  ->setComment($row->comment)
                  ->setCreated($row->created);
    }

    public function fetchAll()
    {
        $resultSet = $this->getDbTable()->fetchAll();
        $entries   = array();
        foreach ($resultSet as $row) {
            $entry = new Application_Model_Guestbook();
            $entry->setId($row->id)
                  ->setEmail($row->email)
                  ->setComment($row->comment)
                  ->setCreated($row->created);
            $entries[] = $entry;
        }
        return $entries;
    }
}
现在,创建 model 类,仍然使用 zf 命令:
$ zf create model Guestbook
打开刚刚创建的模型类: application/models/Guestbook.php 并添加以下代码:
// application/models/Guestbook.php

class Application_Model_Guestbook
{
    protected $_comment;
    protected $_created;
    protected $_email;
    protected $_id;

    public function __construct(array $options = null)
    {
        if (is_array($options)) {
            $this->setOptions($options);
        }
    }

    public function __set($name, $value)
    {
        $method = 'set' . $name;
        if (('mapper' == $name) || !method_exists($this, $method)) {
            throw new Exception('Invalid guestbook property');
        }
        $this->$method($value);
    }

    public function __get($name)
    {
        $method = 'get' . $name;
        if (('mapper' == $name) || !method_exists($this, $method)) {
            throw new Exception('Invalid guestbook property');
        }
        return $this->$method();
    }

    public function setOptions(array $options)
    {
        $methods = get_class_methods($this);
        foreach ($options as $key => $value) {
            $method = 'set' . ucfirst($key);
            if (in_array($method, $methods)) {
                $this->$method($value);
            }
        }
        return $this;
    }

    public function setComment($text)
    {
        $this->_comment = (string) $text;
        return $this;
    }

    public function getComment()
    {
        return $this->_comment;
    }

    public function setEmail($email)
    {
        $this->_email = (string) $email;
        return $this;
    }

    public function getEmail()
    {
        return $this->_email;
    }

    public function setCreated($ts)
    {
        $this->_created = $ts;
        return $this;
    }

    public function getCreated()
    {
        return $this->_created;
    }

    public function setId($id)
    {
        $this->_id = (int) $id;
        return $this;
    }

    public function getId()
    {
        return $this->_id;
    }
}
最后,我们创建一个 guestbook controller 查询并显示数据库中的结果:
$ zf create controller Guestbook
这将创建 application/controllers/GuestbookController.php,它有一个 IndexAction 方法,同时,在 application/views/scripts/guestbook 目录中创建了一个 index.phtml 文件。
打开 GuestbookController,在 IndexAction 中添加代码,显示所有的 guestbook 记录:
// application/controllers/GuestbookController.php

class GuestbookController extends Zend_Controller_Action
{
    public function indexAction()
    {
        $guestbook = new Application_Model_GuestbookMapper();
        $this->view->entries = $guestbook->fetchAll();
    }
}
打开 application/views/scripts/guestbook/index.phtml 添加以下内容:
<!-- application/views/scripts/guestbook/index.phtml -->

<p><a href="<?php echo $this->url(
    array(
        'controller' => 'guestbook',
        'action'     => 'sign'
    ),
    'default',
    true) ?>">Sign Our Guestbook</a></p>

Guestbook Entries: <br />
<dl>
    <?php foreach ($this->entries as $entry): ?>
    <dt><?php echo $this->escape($entry->email) ?></dt>
    <dd><?php echo $this->escape($entry->comment) ?></dd>
    <?php endforeach ?>
</dl>
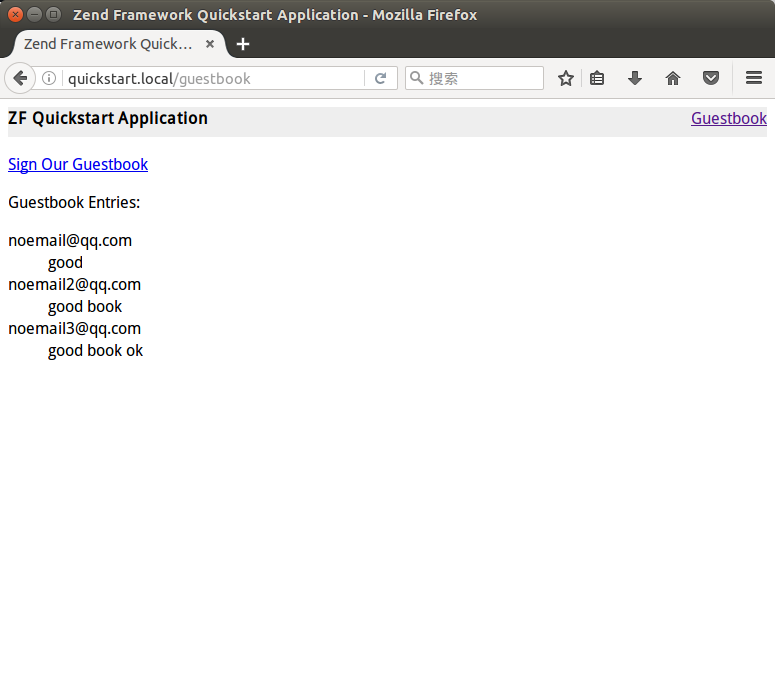
切换到浏览器,打开:http://guestbook.local/guestbook ,你应该看到这些内容:

发现没有数据,那就打开 phpMyadmin,插入一些数据再看看,复制下面的sql语句到phpmyadmin并执行:
INSERT INTO `guestbook`.`guestbook` (`id`, `email`, `comment`, `created`) VALUES (NULL, 'noemail@qq.com', 'good', CURRENT_TIMESTAMP),
(NULL, 'noemail2@qq.com', 'good book', CURRENT_TIMESTAMP),
(NULL, 'noemail3@qq.com', 'good book ok', CURRENT_TIMESTAMP);
刷新浏览器,结果如图所示,成功地从数据库读取数据并显示在页面上:
创建 Form
为了让 guestbook 更有用一些,我们需要一个表单来提交新的评论项。
首先,创建一个 form 类:
$ zf create form Guestbook
打开刚创建的 form 类 *application/forms/Guestbook.php *,添加下列代码:
// application/forms/Guestbook.php

class Application_Form_Guestbook extends Zend_Form
{
    public function init()
    {
        // Set the method for the display form to POST
        $this->setMethod('post');

        // Add an email element
        $this->addElement('text', 'email', array(
            'label'      => 'Your email address:',
            'required'   => true,
            'filters'    => array('StringTrim'),
            'validators' => array(
                'EmailAddress',
            )
        ));

        // Add the comment element
        $this->addElement('textarea', 'comment', array(
            'label'      => 'Please Comment:',
            'required'   => true,
            'validators' => array(
                array('validator' => 'StringLength', 'options' => array(0, 20))
                )
        ));

        // Add a captcha
        $this->addElement('captcha', 'captcha', array(
            'label'      => 'Please enter the 5 letters displayed below:',
            'required'   => true,
            'captcha'    => array(
                'captcha' => 'Figlet',
                'wordLen' => 5,
                'timeout' => 300
            )
        ));

        // Add the submit button
        $this->addElement('submit', 'submit', array(
            'ignore'   => true,
            'label'    => 'Sign Guestbook',
        ));

        // And finally add some CSRF protection
        $this->addElement('hash', 'csrf', array(
            'ignore' => true,
        ));
    }
}
上面代码定义了五个元素:email地址,评论输入框,验证码,提交按钮和CSRF保护字段。
下一步,添加 signAction 到 GuestbookController,它用于处理表单提交页面。使用 zf 命令创建:
$ zf create action sign Guestbook
创建了 signAction 和相应的 view script.
然后添加一些代码到 signAction,首先检查是否有POST或GET请求,然后若没有就简单地显示表单,若有,则验证提交的数据,并保存到数据库中
// application/controllers/GuestbookController.php

class GuestbookController extends Zend_Controller_Action
{
    // snipping indexAction()...

    public function signAction()
    {
        $request = $this->getRequest();
        $form    = new Application_Form_Guestbook();

        if ($this->getRequest()->isPost()) {
            if ($form->isValid($request->getPost())) {
                $comment = new Application_Model_Guestbook($form->getValues());
                $mapper  = new Application_Model_GuestbookMapper();
                $mapper->save($comment);
                return $this->_helper->redirector('index');
            }
        }

        $this->view->form = $form;
    }
}
当然,还需要编辑一下 view application/views/scripts/guestbook/sign.phtml
<!-- application/views/scripts/guestbook/sign.phtml -->

Please use the form below to sign our guestbook!

<?php
$this->form->setAction($this->url());
echo $this->form;
检查效果
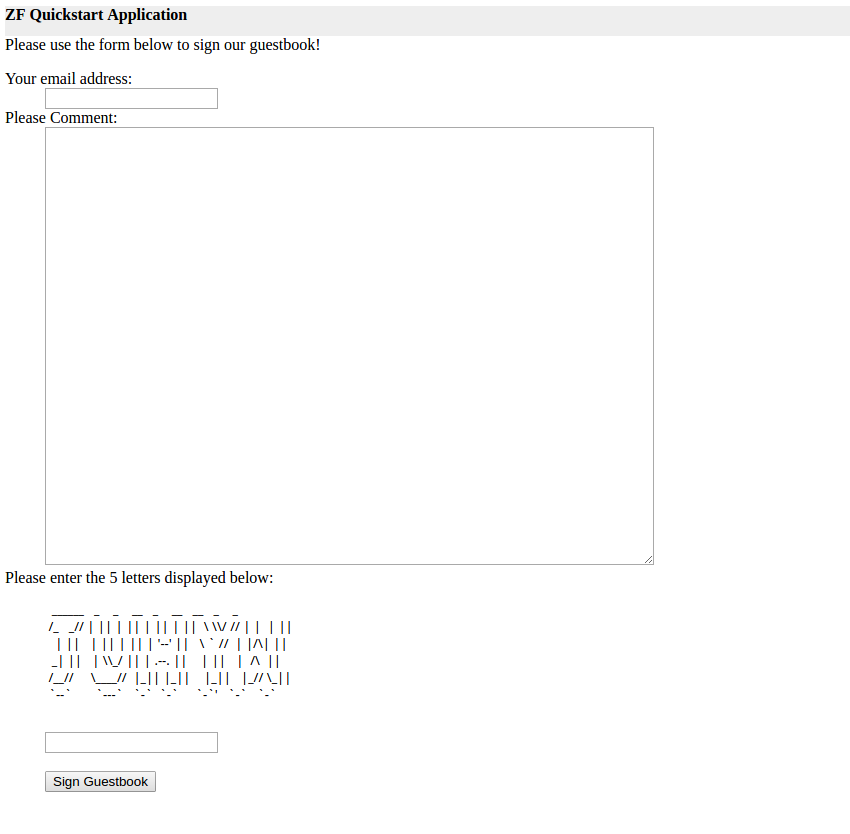
现在再打开浏览器:http://quickstart.local/guestbook/sign 看看,效果如下:
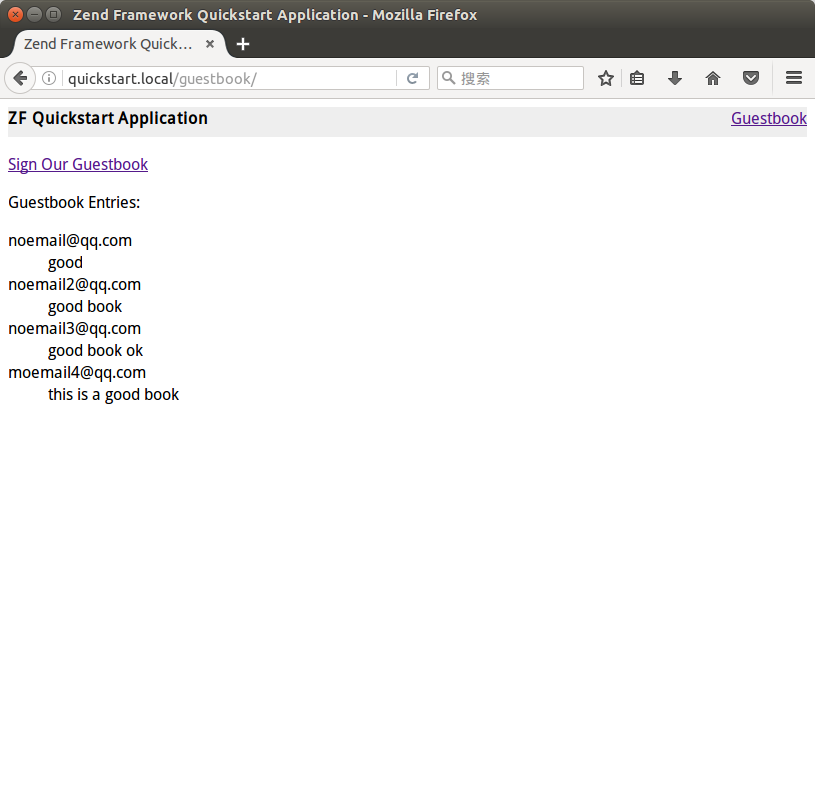
填写好表单点击提交,就能看到列表已经更新了:
注: 上面的验证码部分辨认很困难,其实只要复制一下粘贴到txt文档中就能看清楚了。
恭喜你!
你已经成功地使用 Zend Framework 的常用功能建立了一个简单的应用程序。Zend Framework 内置了很多组件,你可以直接用在你的项目中,这些组件包括 web services,搜索,PDF读取和创建,身份认证等等。可以在 文档参考 中找到更多相关的技术细节。
转载请注明来源:http://www.cnblogs.com/feifeifanye/p/6252633.html
英文原文链接:https://framework.zend.com/manual/1.12/en/learning.html