针对上一篇《应用十:Vue之Vue与TypeScript集成开发》的介绍,这里给大家分享一个在近期项目中封装的导入组件,参考组件源码来更好的熟悉.vue文件中脚本的语法。
组件源码:


<template>
  <div id="myImport">
    <el-button type="primary" plain @click="importDialogVisible = true">导入</el-button>
    <!-- 导入弹窗 -->
    <el-dialog :title="name + '导入'" :visible.sync="importDialogVisible" width="560px"
          :close-on-click-modal="false" @close="fileList = []">
      <div v-loading="loading" element-loading-text="正在导入">
        <div style="color: #2D2D2D;margin-bottom: 20px;">导入文件</div>
        <el-upload class="upload-demo"
            ref="upload"
            :action="url"
            name="file"
            :headers="importHeaders"
            :on-change="changeUpload"
            :on-success="uploadSuccess"
            :file-list="fileList"
            :limit="1"
            :multiple="false"
            :auto-upload="false"
          >
            <el-button slot="trigger" type="primary">选取文件</el-button>
            <div slot="tip" class="el-upload__tip"></div>
        </el-upload>
        <br>
        <div v-if="templateUrl"><span class="download-template" @click="templateDownload">{{name + '模板下载'}}</span></div>
        <el-button class="import-btn" type="primary" @click="submitUpload">导入</el-button>
      </div>
    </el-dialog>
  </div>
</template>

<script lang="ts">
import { Component, Prop, Emit, Vue, Ref } from 'vue-property-decorator'

@Component
export default class MyImport extends Vue {
  @Prop({ default: '' }) private url!: string  // 导入接口地址
  @Prop({ default: '' }) private templateUrl!: string  // 模板下接口地址
  @Prop({ default: '' }) private name!: string

  private loading: boolean = false
  private importDialogVisible: boolean = false
  private importHeaders:any = {'token': sessionStorage.getItem('token')}
  private fileList: Array<any> = []

  //  下载导入模板
  public templateDownload() {
    // TODO
  }

  @Ref() readonly upload!: any

  public changeUpload(file: File, fileList: Array<any>) {
    let index: number = file.name.lastIndexOf('.')
    let suffix: string = file.name.substring(index + 1).toUpperCase()
    if (suffix !== 'XLS' && suffix !== 'XLSX') {
      this.$message.error('只支持导入execl文件')
      this.upload.clearFiles()
      return false
    }
    this.fileList = fileList
  }

  public submitUpload() {
    if(this.fileList.length == 0) {
      this.$message.error('请选择要导入的文件')
      return false
    }
    this.loading = true
    this.upload.submit()
  }

  @Emit('uploadSuccess')
  public uploadSuccess(res: any) {
    this.loading = false
    this.importDialogVisible = false;
    return res
  }
}
</script>

<style lang="scss">
  #myImport {
    display: inline-block;
    margin-left: 10px;
    .download-template {
      color: #5C5C5C;
      font-size: 12px;
      border-bottom: 1px solid #5C5C5C;
      cursor: pointer;
    }
    .import-btn {
      position: relative;
      right: -420px;
    }
  }
</style>
如果对脚本语法还不是特别理解,可以回过头再去查看vue-property-decorator官方文档。
组件的使用:
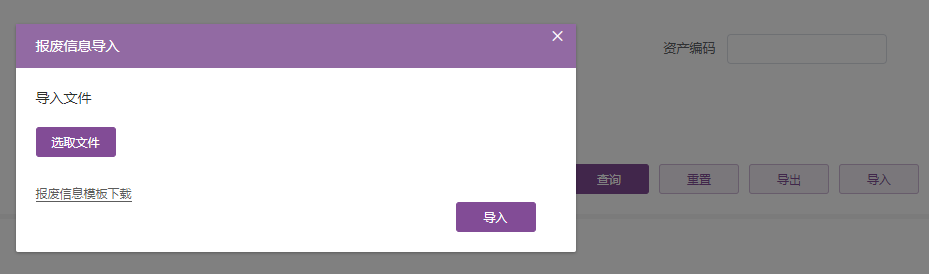
<div class="btn-form">
     <el-button type="primary" @click="queryTableData">查询</el-button>
     <el-button type="primary" plain @click="clearFormData">重置</el-button>
     <el-button type="primary" plain @click="exportTableData">导出</el-button>
     <!--导入组件-->
     <my-import :url="url" :templateUrl="templateUrl" :name="'报废信息'" @uploadSuccess="uploadSuccess"></my-import>
 </div>
效果: