Ubuntu16.04安装Nexus
1.准备环境
linux16.04版本
安装JDK8
2.下载安装包
官网:https://www.sonatype.com/nexus/repository-oss
下载地址:https://sonatype-download.global.ssl.fastly.net/repository/downloads-prod-group/3/nexus-3.29.2-02-unix.tar.gz(强烈推荐用迅雷)
根据需要自行下载
3.上传到你的linux服务器并进行解压

tar xvzf nexus-3.29.2-02-unix.tar.gz

4.启动Nexus
cd /nexus/nexus-3.29.2-02/bin/
sudo ./nexus run
其他命令:
Usage: ./nexus { console | start | stop | restart | status | dump }
启动nexus:
#./nexus start
关闭nexus:
#./nexus stop

运行成功后,会出现
Started Sonatype Nexus OSS 3.29.2-02
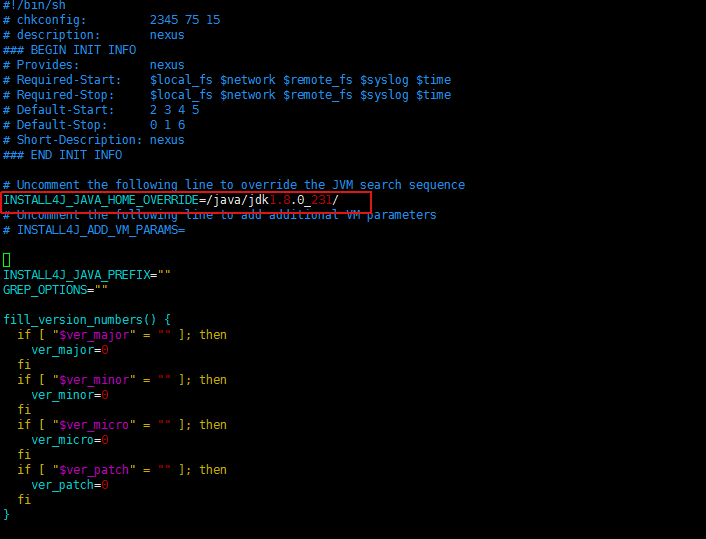
注意:如果遇到
Please define INSTALL4J_JAVA_HOME to point to a suitable JVM.
请重新配置下jdk路径
vi /nexus/nexus-3.29.2-02/bin/nexus
5.访问nexus UI界面
6.配置为Linux Service
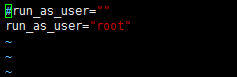
编辑bin/nexus.rc:
vi /nexus/nexus-3.29.2-02/bin/nexus.rc
#run_as_user=""
run_as_user="root"
注意:红色部分是用什么用户去执行
在/etc/init.d放nexus软连接
ln -s /nexus/nexus-3.29.2-02/bin/nexus /etc/init.d/nexus
运行服务
update-rc.d 参见:https://www.cnblogs.com/EasonJim/p/7573292.html
cd /etc/init.d
chmod 755 /etc/init.d/nexus  修改权限
update-rc.d nexus defaults  设置开启启动
service nexus start 启动服务(或者关机重启)
第一次查看密码:


复制这个密码,账号:admin
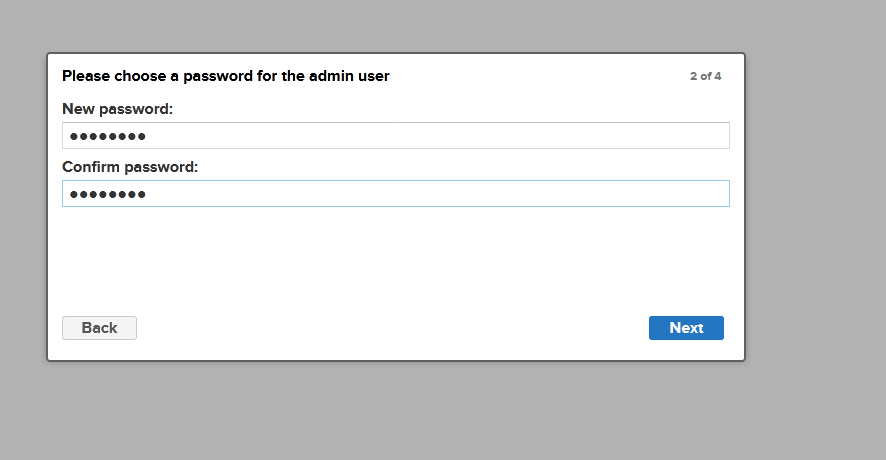
第一次登录修改密码
其他Nexus操作参考
https://www.jianshu.com/p/9740778b154f
https://blog.csdn.net/worn_xiao/article/details/79187982
附:
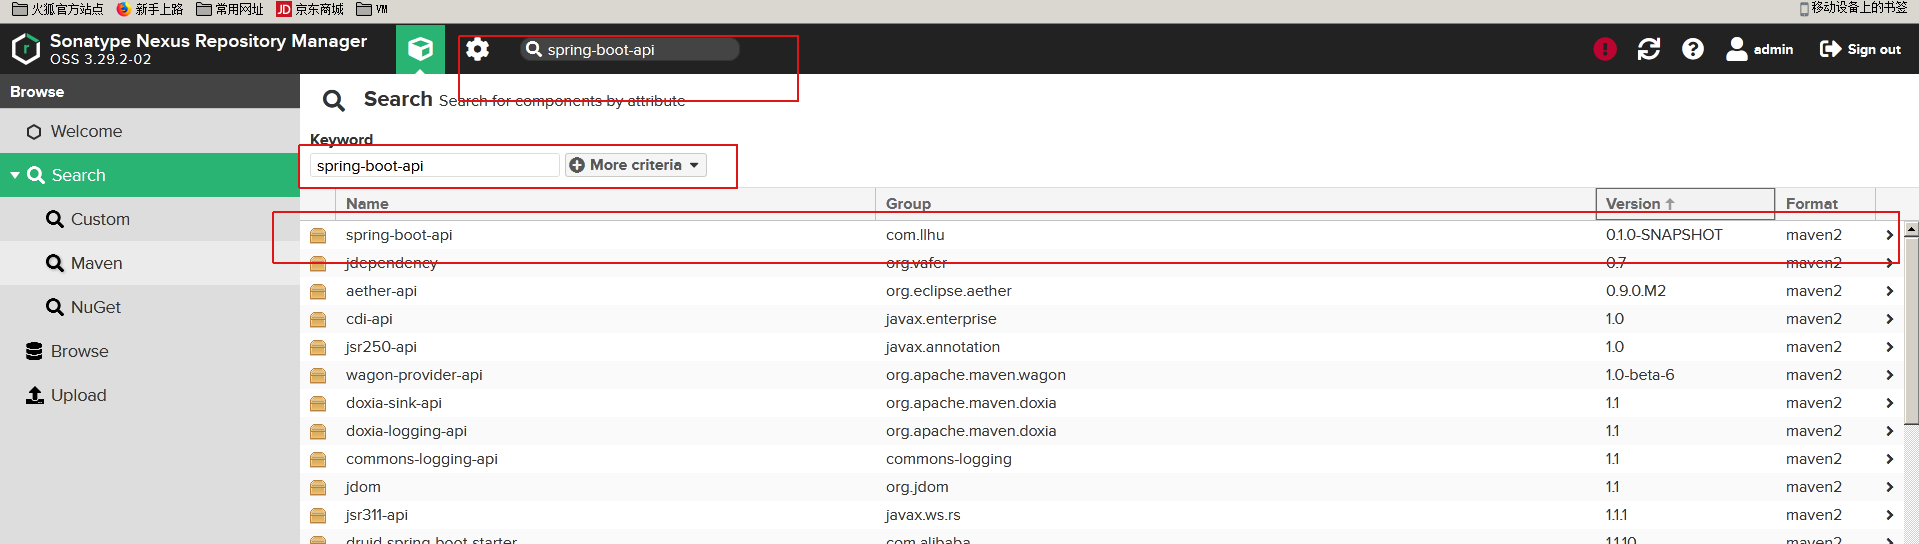
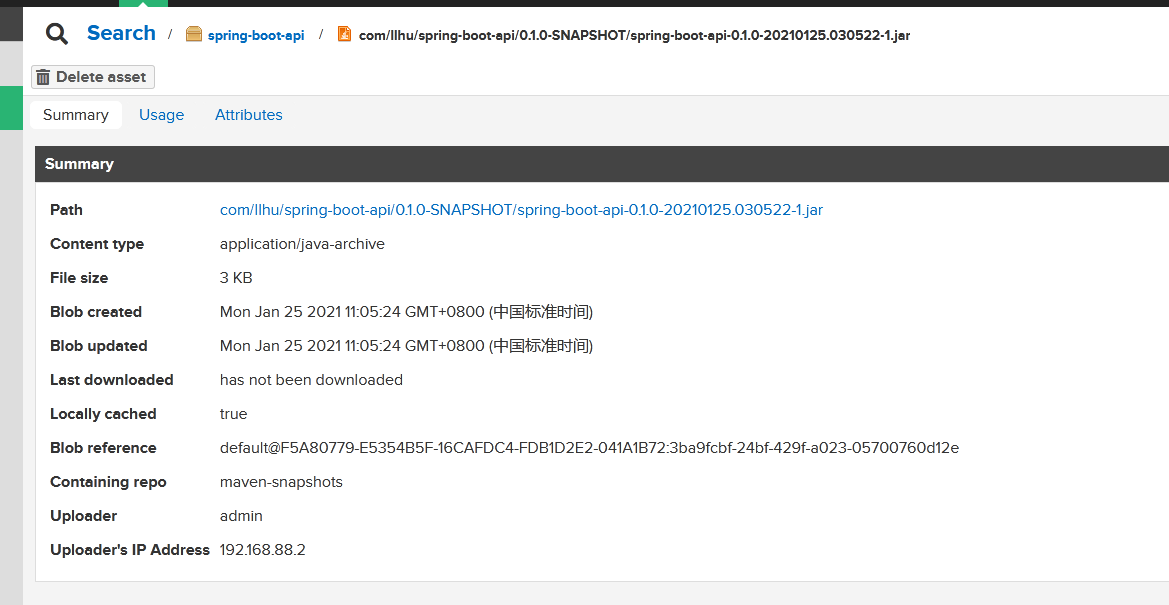
1.打包上传私库配置
maven setting 文件配置
<?xml version="1.0" encoding="UTF-8"?>
<settings xmlns="http://maven.apache.org/SETTINGS/1.0.0"
          xmlns:xsi="http://www.w3.org/2001/XMLSchema-instance"
          xsi:schemaLocation="http://maven.apache.org/SETTINGS/1.0.0 http://maven.apache.org/xsd/settings-1.0.0.xsd">
  <pluginGroups></pluginGroups>
  <proxies></proxies>
   <servers>
      <server>
        <id>releases</id>
        <username>admin</username>
        <password>admin123</password>
      </server>
      <server>
        <id>snapshots</id>
        <username>admin</username>
        <password>admin123</password>
      </server>
  </servers>
  <mirrors>
    <mirror>
      <id>vm</id>
      <mirrorOf>*</mirrorOf>
      <name>vm maven server</name>
      <url> http://192.168.88.84:8081/repository/maven-public/</url>
    </mirror>
     <mirror>
      <id>alimaven</id>
      <name>aliyun maven</name>
      <url>http://maven.aliyun.com/nexus/content/groups/public/</url>
      <mirrorOf>central</mirrorOf>
     </mirror>
    <mirror>
      <id>nexus-public-snapshots</id>
      <mirrorOf>public-snapshots</mirrorOf>
      <url>http://maven.aliyun.com/nexus/content/repositories/snapshots/</url>
    </mirror>
  </mirrors>
  <profiles></profiles>


</settings>
代码jar包配置
<?xml version="1.0" encoding="UTF-8"?>
<project xmlns="http://maven.apache.org/POM/4.0.0"
         xmlns:xsi="http://www.w3.org/2001/XMLSchema-instance"
         xsi:schemaLocation="http://maven.apache.org/POM/4.0.0 http://maven.apache.org/xsd/maven-4.0.0.xsd">
    <parent>
        <groupId>org.springframework.boot</groupId>
        <artifactId>spring-boot-starter-parent</artifactId>
        <version>2.0.6.RELEASE</version>
        <relativePath/>
    </parent>
    <modelVersion>4.0.0</modelVersion>
    <groupId>com.llhu</groupId>
    <artifactId>spring-boot-api</artifactId>
    <name>spring-boot-api</name>
    <version>0.1.0-SNAPSHOT</version>
    <packaging>jar</packaging>
    <dependencies>
        <dependency>
            <groupId>org.springframework.cloud</groupId>
            <artifactId>spring-cloud-starter-openfeign</artifactId>
            <optional>true</optional>
            <version>2.0.2.RELEASE</version>
        </dependency>
        <dependency>
            <groupId>org.projectlombok</groupId>
            <artifactId>lombok</artifactId>
            <version>1.18.8</version>
        </dependency>
        <dependency>
            <groupId>com.alibaba</groupId>
            <artifactId>fastjson</artifactId>
            <version>1.2.68</version>
            <scope>provided</scope>
        </dependency>
        <!--添加Swagger依赖 -->
        <dependency>
            <groupId>io.springfox</groupId>
            <artifactId>springfox-swagger2</artifactId>
            <version>2.7.0</version>
        </dependency>
        <dependency>
            <groupId>io.springfox</groupId>
            <artifactId>springfox-swagger-ui</artifactId>
            <version>2.7.0</version>
        </dependency>
    </dependencies>
    <distributionManagement>
        <repository>
            <id>releases</id>
            <name>Nexus Release Repository</name>
            <url>http://192.168.88.84:8081/repository/maven-releases/</url>
        </repository>
        <snapshotRepository>
            <id>snapshots</id>
            <name>Nexus Snapshot Repository</name>
            <url>http://192.168.88.84:8081/repository/maven-snapshots/</url>
        </snapshotRepository>
    </distributionManagement>
</project>
idea 打包
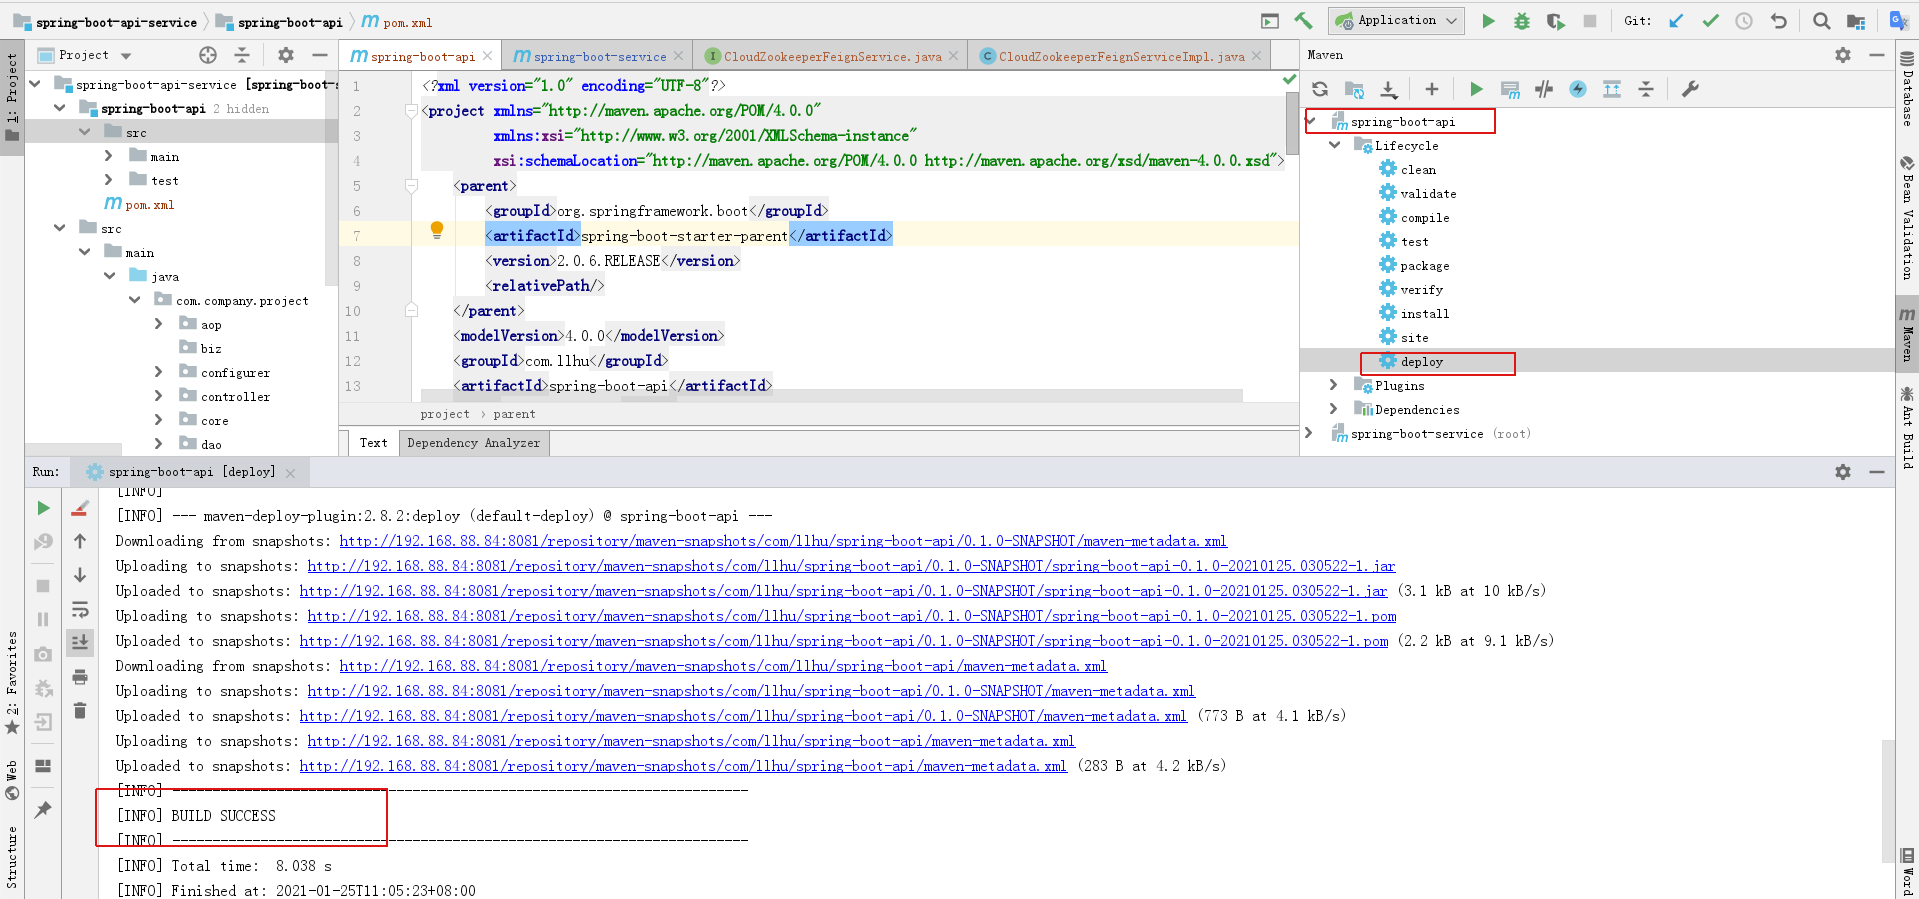
仓库