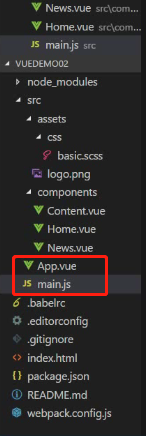
1、Vue环境搭建
搭建vue的开发环境:


	https://cn.vuejs.org/v2/guide/installation.html

	1、必须要安装nodejs


	2、搭建vue的开发环境 ,安装vue的脚手架工具   官方命令行工具

		npm install --global vue-cli  /   cnpm install --global vue-cli         (此命令只需要执行一次)


	3、创建项目   必须cd到对应的一个项目里面

		vue init webpack vue-demo01

		cd  vue-demo01

		cnpm install   /  npm install          如果创建项目的时候没有报错,这一步可以省略。如果报错了  cd到项目里面运行  cnpm install   /  npm install

		npm run dev


	4、另一种创建项目的方式   (推荐)  ***


		vue init webpack-simple vuedemo02

		cd  vuedemo02

		cnpm install   /  npm install

		npm run dev


cnpm  下载包的速度更快一些。


	地址:http://npm.taobao.org/

	安装cnpm:

	npm install -g cnpm --registry=https://registry.npm.taobao.org
2、绑定数据 绑定对象 循环数组渲染数据
3、Vue 及双向数据绑定 Vue事件介绍 以及Vue中的ref获取dom节点
4、Vue事件 定义方法 执行方法 获取数据 改变数据 执行方法传值 以及事件对象
5、 Vue中创建单文件组件 注册组件 以及组件的使用
6、Vue中组件的生命周期函数
7、Axios fetchJsonp请求数据
8、Vue父组件给子组件传值 Vue父组件给子组件传方法 Vue父组件把整个实例传给子组件
9、父组件主动获取子组件的数据和方法 子组件主动获取父组件的数据和方法
10、Vue非父子组件传值
11、Vue中的路由 以及默认路由跳转
官方文档:https://router.vuejs.org/zh/
vue路由配置:


	1.安装

	npm install vue-router  --save   / cnpm install vue-router  --save


	2、引入并 Vue.use(VueRouter)   (main.js)

		import VueRouter from 'vue-router'

		Vue.use(VueRouter)


	3、配置路由


		1、创建组件 引入组件


		2、定义路由  (建议复制s)

			const routes = [
			  { path: '/foo', component: Foo },
			  { path: '/bar', component: Bar },
			  { path: '*', redirect: '/home' }   /*默认跳转路由*/
			]

		3、实例化VueRouter

			const router = new VueRouter({
			  routes // (缩写)相当于 routes: routes
			})

		4、挂载


		new Vue({
		  el: '#app',
		  router,
		  render: h => h(App)
		})


		5 、根组件的模板里面放上这句话 即在App.vue里放   <router-view></router-view>


		6、路由跳转
		<router-link to="/foo">Go to Foo</router-link>
		 <router-link to="/bar">Go to Bar</router-link>
注:跟组件模板

12、Vue动态路由和 Get传值
1.1 动态路由的写法和获取值
动态路由写法
<router-link :to="'/content/'+key">{{key}}--{{item}}</router-link>
获取动态路由的值
console.log(this.$route.params);  /*获取动态路由传值*/
1.2 Get传值和获取值
Get 传值的写法
 <router-link :to="'/pcontent?id='+key">{{key}}--{{item}}</router-link>
获取值
 mounted(){

     //获取get传值
     console.log(this.$route.query);
}
13、Vue路由编程式的导航 以及vue路由History 模式 hash 模式
编程式的导航,是利用JavaScript跳转路由。
1.1编程式的导航的跳转方式
- this.$router.push({ path: 'news' })
- this.$router.push({ path: '/content/495' })
- { path: '/news', component: News,name:'news' }
- router.push({ name: 'news', params: { userId: 123 }})
- this.$router.push({ name: 'news'})
1.2 路由模式
设置此 界面上的页面路径会产生变化
const router = new VueRouter({
  mode: 'history',   /*hash模式改为history*/
  routes // (缩写)相当于 routes: routes
})