GET请求:
带参数的url请求:
import requests
data ={'name':'cheng','age':20}        #参数
response = requests.get('https://httpbin.org/get', params=data)
这样requests会给我们自动build这个网址,查看response.url 这个属性。会得到我们请求的代码
'https://httpbin.org/get?name=cheng&age=20'
解析JSON:
requests还提供了一个解析json的方法,用get方法请求 https://httpbin.org/get,它的返回结果是一个json的字符串,所以我们可以直接调用response.json方法得到。
# coding=utf-8
import json
import requests

response = requests.get('https://httpbin.org/get')
print(response.json()) #调用json方法
print(json.loads(response.text))
用json.loads把json数据转化字典方法,同样打印输出,发现和response.json()是一样的,其实response.json()就是通过一个json.loads()方法
获取二进制数据
Requests 会自动解码来自服务器的内容。大多数 unicode 字符集都能被无缝地解码。请求发出后,Requests 会基于 HTTP 头部对响应的编码作出有根据的推测。当你访问 r.text 之时,Requests 会使用其推测的文本编码。你可以找出 Requests 使用了什么编码,并且能够使用r.encoding 属性来改变它。
response.content()方法可以使你也能以字节的方式访问请求响应体,对于一些图片和视频 音频内容,需要用到content
https://ssl.gstatic.com/ui/v1/icons/mail/rfr/logo_gmail_lockup_default_1x.png 是一张gmail的图片 通过储存content属性就可以获得图片
# coding=utf-8
import json
import requests
response = requests.get('https://ssl.gstatic.com/ui/v1/icons/mail/rfr/logo_gmail_lockup_default_1x.png')
with open('gmail.png','wb') as f:   #注意这边是二进制的写入所以是wb
    f.write(response.content)
    f.close()
 成功写入了图片
添加headers
一些网站会检测请求方是不是机器,如果是机器,就不能成功访问,所以要添加headers伪装成浏览器
# coding=utf-8
import requests

headers = {
    'user-agent': 'Mozilla/5.0 (Windows NT 10.0; Win64; x64) AppleWebKit/537.36 (KHTML, like Gecko) Chrome/69.0.3497.92 Safari/537.36'}
response = requests.get('https://www.zhihu.com/', headers=headers)
添加上headers后的requests就可以伪装成浏览器了
post请求
# coding=utf-8
import requests

data = {'name':'cheng', 'age':20}   #
response = requests.post('https://httpbin.org/post', data=data)
print(response.text)
发送了post请求,返回结果: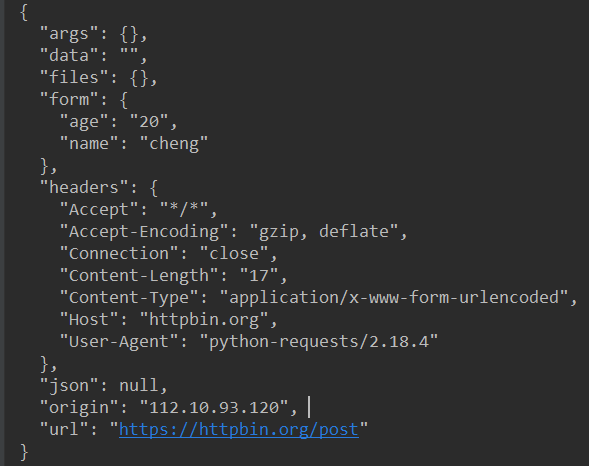
可以看到服务器接受了我们post的data,返回了一个json格式的数据.
response常用属性
# coding=utf-8
import requests

response = requests.get('http://www.cnki.net/old/')
print(type(response.status_code), response.status_code)
print(type(response.headers), response.status_code)
print(type(response.cookies), response.cookies)
print(type(response.url), response.url)
print(type(response.history), response.history)
输出结果:

可以看到服务器返回的状态码是int类型的数据,headers是一个字典类型,cookies ,请求的网址是一个字符串类型,history是浏览的历史
文件上传:
# coding=utf-8
import requests

file = {'file' :open('img.jpg', 'rb')}
response = requests.post('https://httpbin.org/')
print(response.text)
返回的结果中有file这个字典键值,对应的是我们上传的文件
cookies:
response.cookies是一个字典的形式,我们可以通过for循环把他们print出来
# coding=utf-8
import requests

response = requests.get('https://www.baidu.com/')
print(response)
print(response.cookies)
for key,value in response.cookies.items():
    print(key + '=' + value)
运行结果:

会话维持——session
模拟登陆
普通的get方式:
# coding=utf-8
import requests

requests.get('https://httpbin.org/cookies/set/number/123456')
response = requests.get('https://httpbin.org/cookies')
print(response.text)
这里,我们第一次请求网站,设置cookies,当第二次请求是,返回结果是:
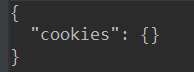
可以看到第二次请求的cookies是空,原因是我们发起了两次请求,这两个请求是完全独立的过程,他们两个是没有相关性的,可以把他们想象成用两个浏览器分别访问,相当于模拟了一个会话。
用session请求:
# coding=utf-8
import requests

s = requests.session()
s.get('https://httpbin.org/cookies/set/number/123456')
response = s.get('https://httpbin.org/cookies')
print(response.text)
运行结果:
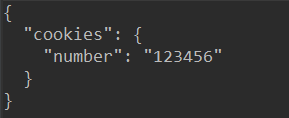
可以看到第二次请求的返回值就是第一次设置的值,可以把他们看作一个浏览器先后发出了请求,会话对象让你能够跨请求保持某些参数
证书验证:
有些网站访问时会出现证书错误的情况:
有两种方式可以解决:
一种是修改requests中的varify参数,使他为false:
# coding=utf-8
import requests
import urllib3
urllib3.disable_warnings()

response = requests.get('http://www.12306.cn', verify=False)
这样访问时会自动忽略网站的证书。但是requests还是用生成warning,提醒你证书是不安全的我们导入urllib3模块,用disable_warnings()方法
第二种是直接指定一个证书:
# coding=utf-8
import requests

response = requests.get('http://www.12306.cn', cert('path/server'))
代理设置
import requests

proxies = {
    'https': 'https://127.0.0.1:13386',
    'http':'https://127.0.0.1:12345'
}
response = requests.get('https://www.google.com/?hl=zh_cn', proxies=proxies)
直接添加一个proxies的字典就行
当代理有密码时,只要在修改values值,添加上用户名和密码
import requests

proxies = {
    'https': 'https://user:password@127.0.0.1:13386',
}
response = requests.get('https://www.google.com/',proxies=proxies)
如果是shadowsocks可以 pip install requests[socks] 然后将proxies修改成:
import requests

proxies = {
    'https': 'socks5:330330://127.0.0.1:13386',
}
response = requests.get('https://www.baidu.com/', proxies=proxies)
超时设置
import requests

response = requests.get('https://www.baidu.com/', timeout=0.2)
print(response.status_code)
限制了响应时间,如果大于0.2秒,会抛出异常
认证设置
import requests
from requests.auth import HTTPBasicAuth

response = requests.get(url, auth=HTTPBasicAuth('usr','password'))
response = requests.get(url, auth={'user':'12345'})
print(response.status_code)
这样的两种auth属性都行
异常处理
exception requests.RequestException(*args, **kwargs)[源代码]¶
There was an ambiguous exception that occurred while handling your request.

exception requests.ConnectionError(*args, **kwargs)[源代码]
A Connection error occurred.

exception requests.HTTPError(*args, **kwargs)[源代码]
An HTTP error occurred.

exception requests.URLRequired(*args, **kwargs)[源代码]
A valid URL is required to make a request.

exception requests.TooManyRedirects(*args, **kwargs)[源代码]
Too many redirects.

exception requests.ConnectTimeout(*args, **kwargs)[源代码]
The request timed out while trying to connect to the remote server.

Requests that produced this error are safe to retry.

exception requests.ReadTimeout(*args, **kwargs)[源代码]
The server did not send any data in the allotted amount of time.

exception requests.Timeout(*args, **kwargs)[源代码]
The request timed out.

Catching this error will catch both ConnectTimeout and ReadTimeout errors.