BigPipe 是 Facebook 开发的优化网页加载速度的技术。网上几乎没有用 node.js 实现的文章,实际上,不止于 node.js,BigPipe 用其他语言的实现在网上都很少见。以至于这技术出现很久以后,我还以为就是整个网页的框架先发送完毕后,用另一个或几个 ajax 请求再请求页面内的模块。直到不久前,我才了解到原来 BigPipe 的核心概念就是只用一个 HTTP 请求,只是页面元素不按顺序发送而已。
了解了这个核心概念就好办了,得益于 node.js 的异步特性,很容易就可以用 node.js 实现 BigPipe。本文会一步一步详尽地用例子来说明 BigPipe 技术的起因和一个基于 node.js 的简单实现。
我会用 express 来演示,简单起见,我们选用 jade 作为模版引擎,并且我们不使用引擎的子模版(partial)特性,而是以子模版渲染完成以后的 HTML 作为父模版的数据。
先建一个 nodejs-bigpipe 的文件夹,写一个 package.json 文件如下:
{
    "name": "bigpipe-experiment"
  , "version": "0.1.0"
  , "private": true
  , "dependencies": {
        "express": "3.x.x"
      , "consolidate": "latest"
      , "jade": "latest"
    }
}
运行 npm install 安装这三个库,consolidate 是用来方便调用 jade 的。
先做个最简单的尝试,两个文件:
app.js:
var express = require('express')
  , cons = require('consolidate')
  , jade = require('jade')
  , path = require('path')

var app = express()

app.engine('jade', cons.jade)
app.set('views', path.join(__dirname, 'views'))
app.set('view engine', 'jade')

app.use(function (req, res) {
  res.render('layout', {
      s1: "Hello, I'm the first section."
    , s2: "Hello, I'm the second section."
  })
})

app.listen(3000)
views/layout.jade
doctype html
head
title Hello, World!
style
section {
margin: 20px auto;
border: 1px dotted gray;
80%;
height: 150px;
}
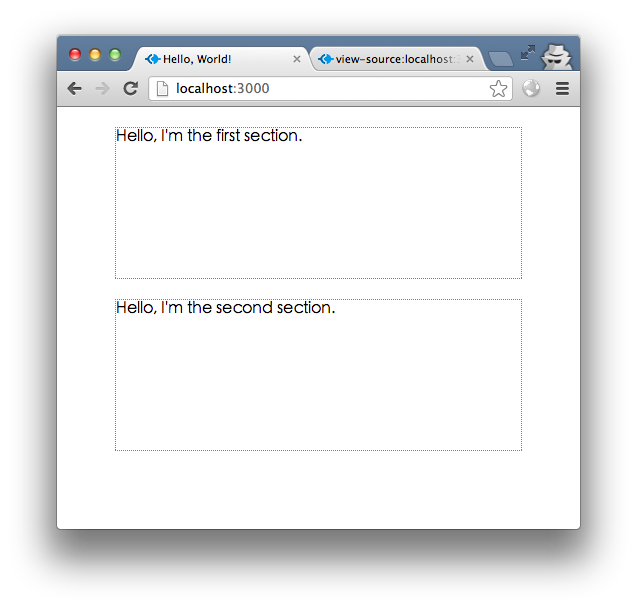
section#s1!=s1
section#s2!=s2
效果如下:
接下来我们把两个 section 模版放到两个不同的模版文件里:
views/s1.jade:
h1 Partial 1
.content!=content
views/s2.jade:
h1 Partial 2
.content!=content
在 layout.jade 的 style 里增加一些样式
section h1 {
  font-size: 1.5;
  padding: 10px 20px;
  margin: 0;
  border-bottom: 1px dotted gray;
}
section div {
  margin: 10px;
}
将 app.js 的 app.use() 部分更改为:
var temp = {
    s1: jade.compile(fs.readFileSync(path.join(__dirname, 'views', 's1.jade')))
  , s2: jade.compile(fs.readFileSync(path.join(__dirname, 'views', 's2.jade')))
}
app.use(function (req, res) {
  res.render('layout', {
      s1: temp.s1({ content: "Hello, I'm the first section." })
    , s2: temp.s2({ content: "Hello, I'm the second section." })
  })
})
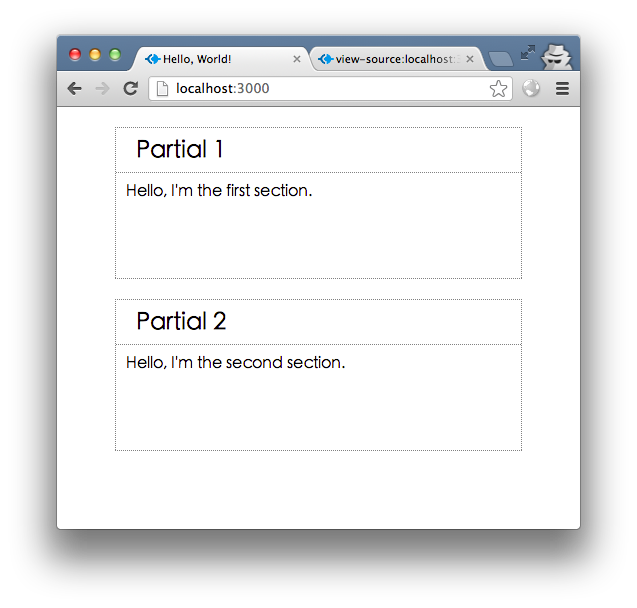
之前我们说“以子模版渲染完成以后的 HTML 作为父模版的数据”,指的就是这样,temp.s1 和temp.s2 两个方法会生成 s1.jade 和 s2.jade 两个文件的 HTML 代码,然后把这两段代码作为 layout.jade 里面 s1、s2 两个变量的值。
现在页面看起来是这样子:
一般来说,两个 section 的数据是分别获取的——不管是通过查询数据库还是 RESTful 请求,我们用两个函数来模拟这样的异步操作。
var getData = {
    d1: function (fn) {
        setTimeout(fn, 3000, null, { content: "Hello, I'm the first section." })
    }
  , d2: function (fn) {
        setTimeout(fn, 5000, null, { content: "Hello, I'm the second section." })
    }
}
这样一来,app.use() 里的逻辑就会比较复杂了,最简单的处理方式是:
app.use(function (req, res) {
  getData.d1(function (err, s1data) {
    getData.d2(function (err, s2data) {
      res.render('layout', {
          s1: temp.s1(s1data)
        , s2: temp.s2(s2data)
      })
    })
  })
})
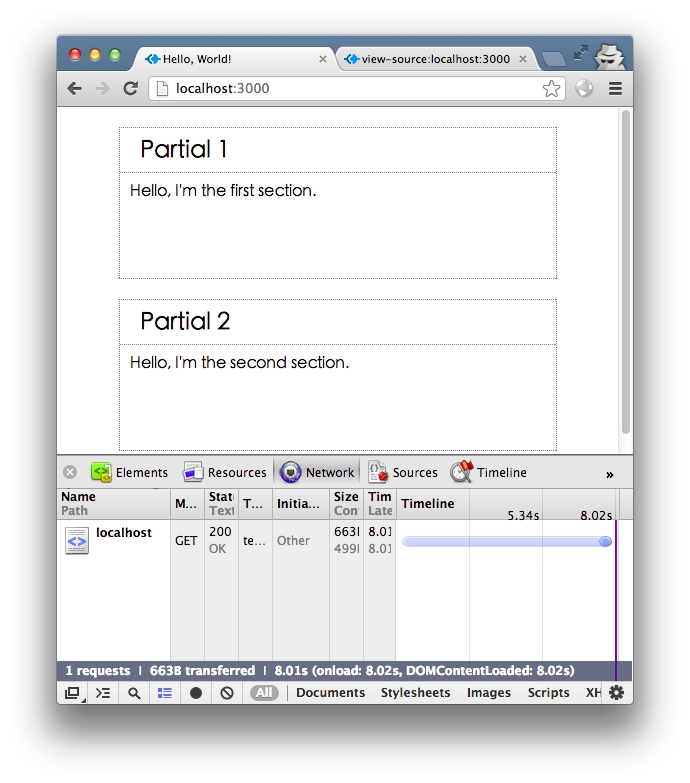
这样也可以得到我们想要的结果,但是这样的话,要足足 8 秒才会返回。
其实实现逻辑可以看出 getData.d2 是在 getData.d1 的结果返回后才开始调用,而它们两者并没有这样的依赖关系。我们可以用如 async 之类的处理 JavaScript 异步调用的库来解决这样的问题,不过我们这里就简单手写吧:
app.use(function (req, res) {
  var n = 2
    , result = {}
  getData.d1(function (err, s1data) {
    result.s1data = s1data
    --n || writeResult()
  })
  getData.d2(function (err, s2data) {
    result.s2data = s2data
    --n || writeResult()
  })
  function writeResult() {
    res.render('layout', {
        s1: temp.s1(result.s1data)
      , s2: temp.s2(result.s2data)
    })
  }
})
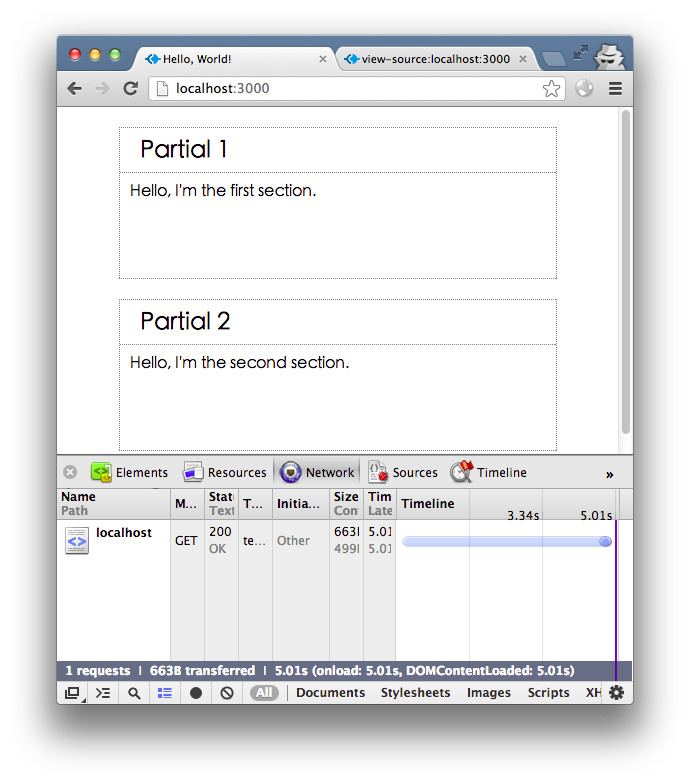
这样就只需 5 秒。
在接下来的优化之前,我们加入 jquery 库并把 css 样式放到外部文件,顺便,把之后我们会用到的浏览器端使用 jade 模板所需要的 runtime.js 文件也加入进来,在包含 app.js 的目录下运行:
mkdir static
cd static
curl http://code.jquery.com/jquery-1.8.3.min.js -o jquery.js
ln -s ../node_modules/jade/runtime.min.js jade.js
并且把 layout.jade 中的 style 标签里的代码拿出来放到 static/style.css 里,然后把 head 标签改为:
head
  title Hello, World!
  link(href="/static/style.css", rel="stylesheet")
  script(src="/static/jquery.js")
  script(src="/static/jade.js")
在 app.js 里,我们把它们两者的下载速度都模拟为两秒,在app.use(function (req, res) {之前加入:
var static = express.static(path.join(__dirname, 'static'))
app.use('/static', function (req, res, next) {
  setTimeout(static, 2000, req, res, next)
})
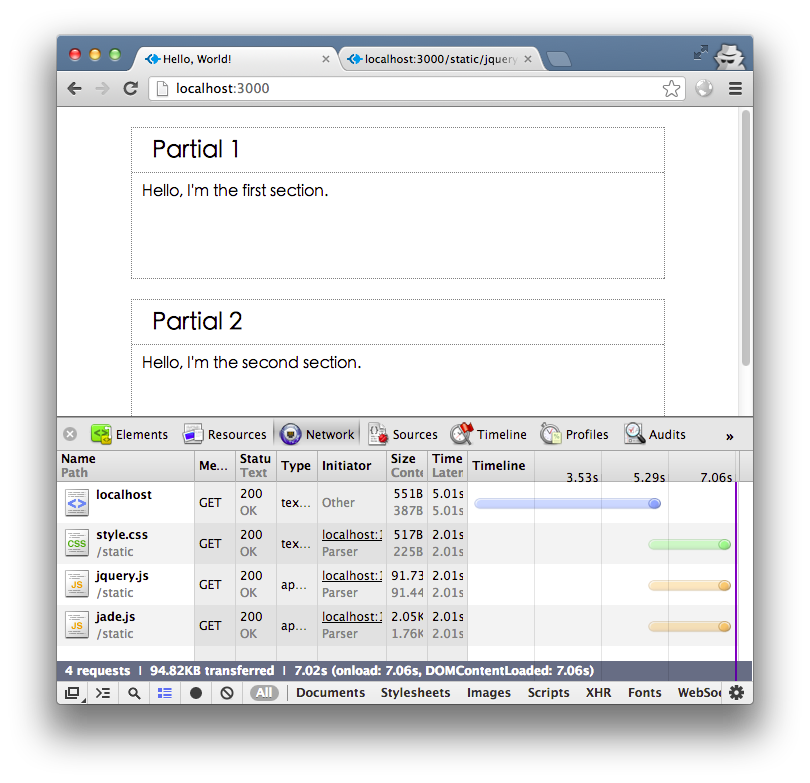
受外部静态文件的影响,我们的页面现在的加载时间为 7 秒左右。
如果我们一收到 HTTP 请求就把 head 部分返回,然后两个 section 等到异步操作结束后再返回,这是利用了 HTTP 的分块传输编码机制。在 node.js 里面只要使用 res.write() 方法就会自动加上 Transfer-Encoding: chunked 这个 header 了。这样就能在浏览器加载静态文件的同时,node 服务器这边等待异步调用的结果了,我们先删除 layout.jade 中的这 section 这两行:
section#s1!=s1
section#s2!=s2
因此我们在 res.render() 里也不用给 { s1: …, s2: … } 这个对象,并且因为 res.render() 默认会调用 res.end(),我们需要手动设置 render 完成后的回调函数,在里面用 res.write() 方法。layout.jade 的内容也不必在 writeResult() 这个回调函数里面,我们可以在收到这个请求时就返回,注意我们手动添加了 content-type 这个 header:
app.use(function (req, res) {
  res.render('layout', function (err, str) {
    if (err) return res.req.next(err)
    res.setHeader('content-type', 'text/html; charset=utf-8')
    res.write(str)
  })
  var n = 2
  getData.d1(function (err, s1data) {
    res.write('<section id="s1">' + temp.s1(s1data) + '</section>')
    --n || res.end()
  })
  getData.d2(function (err, s2data) {
    res.write('<section id="s2">' + temp.s2(s2data) + '</section>')
    --n || res.end()
  })
})
现在最终加载速度又回到大概 5 秒左右了。实际运行中浏览器先收到 head 部分代码,就去加载三个静态文件,这需要两秒时间,然后到第三秒,出现 Partial 1 部分,第 5 秒出现 Partial 2 部分,网页加载结束。就不给截图了,截图效果和前面 5 秒的截图一样。
但是要注意能实现这个效果是因为 getData.d1 比 getData.d2 快,也就是说,先返回网页中的哪个区块取决于背后的接口异步调用结果谁先返回,如果我们把 getData.d1 改成 8 秒返回,那就会先返回 Partial 2 部分,s1 和 s2 的顺序对调,最终网页的结果就和我们的预期不符了。
这个问题最终将我们引导到 BigPipe 上来,BigPipe 就是能让网页各部分的显示顺序与数据的传输顺序解耦的技术。
其基本思路就是,首先传输整个网页大体的框架,需要稍后传输的部分用空 div(或其他标签)表示:
res.render('layout', function (err, str) {
  if (err) return res.req.next(err)
  res.setHeader('content-type', 'text/html; charset=utf-8')
  res.write(str)
  res.write('<section id="s1"></section><section id="s2"></section>')
})
然后将返回的数据用 JavaScript 写入
getData.d1(function (err, s1data) {
  res.write('<script>$("#s1").html("' + temp.s1(s1data).replace(/"/g, '\"') + '")</script>')
  --n || res.end()
})
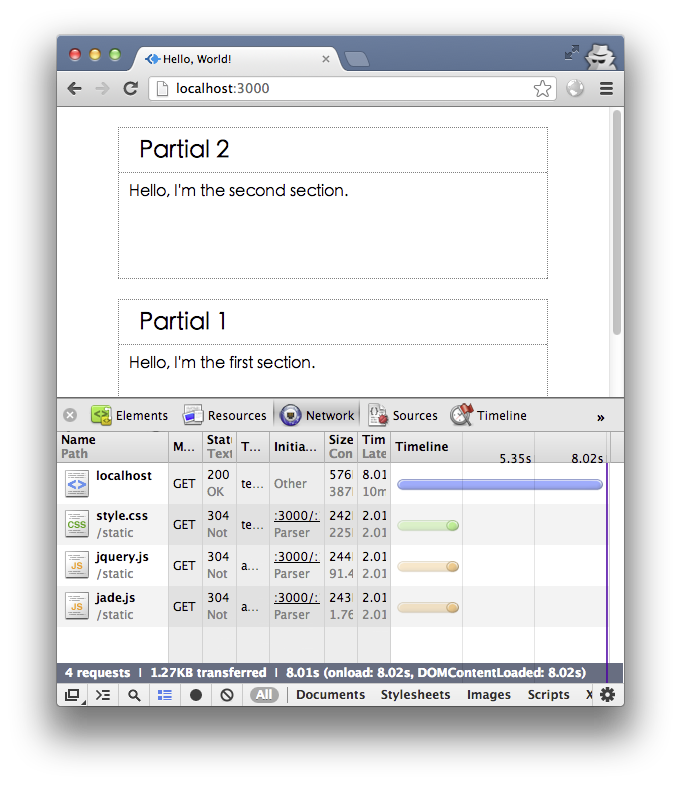
s2 的处理与此类似。这时你会看到,请求网页的第二秒,出现两个空白虚线框,第五秒,出现 Partial 2 部分,第八秒,出现 Partial 1 部分,网页请求完成。
至此,我们就完成了一个最简单的 BigPipe 技术实现的网页。
需要注意的是,要写入的网页片段有 script 标签的情况,如将 s1.jade 改为
h1 Partial 1
.content!=content
script
  alert("alert from s1.jade")
然后刷新网页,会发现这句 alert 没有执行,而且网页会有错误。查看源代码,知道是因为 <script>里面的字符串出现 </script> 而导致的错误,只要将其替换为 </script> 即可
res.write('<script>$("#s1").html("' + temp.s1(s1data).replace(/"/g, '\"').replace(/</script>/g, '<\/script>') + '")</script>')
以上我们便说明了 BigPipe 的原理和用 node.js 实现 BigPipe 的基本方法。而在实际中应该怎样运用呢?下面提供一个简单的方法,仅供抛砖引玉,代码如下:
var resProto = require('express/lib/response')
resProto.pipe = function (selector, html, replace) {
  this.write('<script>' + '$("' + selector + '").' +
    (replace === true ? 'replaceWith' : 'html') +
    '("' + html.replace(/"/g, '\"').replace(/</script>/g, '<\/script>') +
    '")</script>')
}
function PipeName (res, name) {
  res.pipeCount = res.pipeCount || 0
  res.pipeMap = res.pipeMap || {}
  if (res.pipeMap[name]) return
  res.pipeCount++
  res.pipeMap[name] = this.id = ['pipe', Math.random().toString().substring(2), (new Date()).valueOf()].join('_')
  this.res = res
  this.name = name
}
resProto.pipeName = function (name) {
  return new PipeName(this, name)
}
resProto.pipeLayout = function (view, options) {
  var res = this
  Object.keys(options).forEach(function (key) {
    if (options[key] instanceof PipeName) options[key] = '<span id="' + options[key].id + '"></span>'
  })
  res.render(view, options, function (err, str) {
    if (err) return res.req.next(err)
    res.setHeader('content-type', 'text/html; charset=utf-8')
    res.write(str)
    if (!res.pipeCount) res.end()
  })
}
resProto.pipePartial = function (name, view, options) {
  var res = this
  res.render(view, options, function (err, str) {
    if (err) return res.req.next(err)
    res.pipe('#'+res.pipeMap[name], str, true)
    --res.pipeCount || res.end()
  })
}
app.get('/', function (req, res) {
  res.pipeLayout('layout', {
      s1: res.pipeName('s1name')
    , s2: res.pipeName('s2name')
  })
  getData.d1(function (err, s1data) {
    res.pipePartial('s1name', 's1', s1data)
  })
  getData.d2(function (err, s2data) {
    res.pipePartial('s2name', 's2', s2data)
  })
})
还要在 layout.jade 把两个 section 添加回来:
section#s1!=s1
section#s2!=s2
这里的思路是,需要 pipe 的内容先用一个 span 标签占位,异步获取数据并渲染完成相应的 HTML 代码后再输出给浏览器,用 jQuery 的 replaceWith 方法把占位的 span 元素替换掉。
本文的代码在 https://github.com/undozen/bigpipe-on-node ,我把每一步做成一个 commit 了,希望你 clone 到本地实际运行并 hack 一下看看。因为后面几步涉及到加载顺序了,确实要自己打开浏览器才能体验到而无法从截图上看到(其实应该可以用 gif 动画实现,但是我懒得做了)。
关于 BigPipe 的实践还有很大的优化空间,比如说,要 pipe 的内容最好设置一个触发的时间值,如果异步调用的数据很快返回,就不需要用 BigPipe,直接生成网页送出即可,可以等到数据请求超过一定时间才用 BigPipe。使用 BigPipe 相比 ajax 即节省了浏览器到 node.js 服务器的请求数,又节省了 node.js 服务器到数据源的请求数。
原帖:https://github.com/undoZen/bigpipe-on-node