

<FrameLayout xmlns:android="http://schemas.android.com/apk/res/android"
    android:layout_width="match_parent"
    android:layout_height="match_parent" >


    <TextView
        android:layout_width="240dp"
        android:layout_height="240dp"
        android:layout_gravity="center"
        android:background="#fff"/>

    <TextView
        android:layout_width="200dp"
        android:layout_height="200dp"
        android:layout_gravity="center"
        android:background="#f00"/>

    <TextView
        android:layout_width="160dp"
        android:layout_height="160dp"
        android:layout_gravity="center"
        android:background="#0f0"/>

    <TextView
        android:layout_width="120dp"
        android:layout_height="120dp"
        android:layout_gravity="center"
        android:background="#00f"/>

     <TextView
        android:layout_width="80dp"
        android:layout_height="80dp"
        android:layout_gravity="center"
        android:background="#ff0"/>

     <TextView
        android:layout_width="40dp"
        android:layout_height="40dp"
        android:layout_gravity="center"
        android:background="#f0f"/>
</FrameLayout>
前言
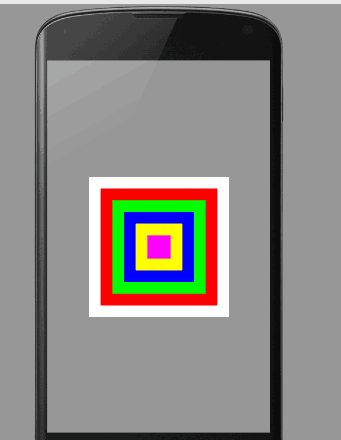
作为android六大布局中最为简单的布局之一,该布局直接在屏幕上开辟出了一块空白区域,
当我们往里面添加组件的时候,所有的组件都会放置于这块区域的左上角;
帧布局的大小由子控件中最大的子控件决定,
如果都组件都一样大的话,同一时刻就只能能看到最上面的那个组件了!
当然我们也可以为组件添加layout_gravity属性,从而制定组件的对其方式
帧布局在游戏开发方面用的比较多,等下后面会给大家演示一下比较有意思的两个实例
前景图像:
永远处于帧布局最顶的,直接面对用户的图像,,就是不会被覆盖的图片
常用属性:
android:foreground:设置该帧布局容器的前景图像
android:foregroundGravity:设置前景图像显示的位置