摘要:
最近spring-boot/cloud 项目中使用了mybatis-plus持久层框架,但是在开发中发现还是比较让你烦恼是一个个的去建对应的表实体类BaseEntity,BaseMapper,Service,Ctrooller,这些操作实在枯燥乏味而且尤其是实体特别容易由于粗心和手误导致不小心写错变量名,在写完代码测试时发现错误,比较麻烦,影响开发效率。这里mybatis-plus官网是提供了一个代码生成器插件,自从使用了它,效率提高不少!非常推荐使用,学习使用成本低。
mybatis-plus代码生成器的使用
[mybatis-plus官方网站](https://mybatis.plus/)
本文建立在了解mbatis持久层框架基础上。
使用软件环境
jdk 8
<spring-boot.version>2.1.6.RELEASE</spring-boot.version>
<spring-cloud.version>Greenwich.SR2</spring-cloud.version>
<lombok.version>1.18.12</lombok.version>
mybatis-plus代码生成器依赖
<mybatis-plus.version>3.3.2</mybatis-plus.version>
<dependency>
    <groupId>com.baomidou</groupId>
    <artifactId>mybatis-plus-boot-starter</artifactId>
    <version>${mybatis-plus.version}</version>
</dependency>
<dependency>
    <groupId>com.baomidou</groupId>
    <artifactId>mybatis-plus-generator</artifactId>
    <version>${mybatis-plus.version}</version>
</dependency>
<dependency>
    <groupId>org.apache.velocity</groupId>
    <artifactId>velocity-engine-core</artifactId>
    <version>2.2</version>
</dependency>
代码生成器Demo
直接上代码
/**
 * TODO mybait-plus代码生成器
 *
 <dependency>
     <groupId>com.baomidou</groupId>
     <artifactId>mybatis-plus-boot-starter</artifactId>
     <version>${mybatis-plus.version}</version>
 </dependency>
 <dependency>
     <groupId>com.baomidou</groupId>
     <artifactId>mybatis-plus-generator</artifactId>
     <version>${mybatis-plus.version}</version>
 </dependency>
 <dependency>
     <groupId>org.apache.velocity</groupId>
     <artifactId>velocity-engine-core</artifactId>
     <version>2.2</version>
 </dependency>
 *
 * @author: geekswg@qq.com
 * @since: 2020/7/27 22:05
 */
public class MyBatisPlusAutoGenerator {

    /**
     * <p>
     * 读取控制台内容
     * </p>
     *
     * @param tip 提示信息
     * @return 控制台输入信息
     */
    public static String scannerInput(String tip) {
        Scanner scanner = new Scanner(System.in);
        StringBuilder sbTips = new StringBuilder();
        sbTips.append("正在使用Mybatis-Plus代码生成器!
");
        sbTips.append("请输入需要自动生成的" + tip + ":");
        System.out.println(sbTips.toString());
        if (scanner.hasNext()) {
            String inputText = scanner.next();
            if (StrUtil.isNotEmpty(inputText)) {
                return inputText;
            }
        }
        throw new MybatisPlusException("请输入正确的" + tip + "!");
    }

    private static final String BASE_SRC_ROOT = "/src/main/java/";
    public void codeGenerate() {
        // 代码生成器
        AutoGenerator mpg = new AutoGenerator();

        // 全局配置
        GlobalConfig gc = new GlobalConfig();
        String projectPath = System.getProperty("user.dir");
        String baseSrc = projectPath + BASE_SRC_ROOT;
        gc.setOutputDir(baseSrc);
        gc.setAuthor("autoGenerateByMyBatisPlus");
        gc.setOpen(true);//生成完代码,打开资源管理器查看
        // gc.setSwagger2(true); 实体属性 Swagger2 注解
        mpg.setGlobalConfig(gc);

        // 数据源配置
        DataSourceConfig dsc = new DataSourceConfig();
        dsc.setUrl("jdbc:mysql://127.0.0.1:3306/db_geek?useUnicode=true&useSSL=false&characterEncoding=utf8&serverTimezone=GMT");
        // dsc.setSchemaName("public");
        // 8.X.X com.mysql.cj.jdbc.Driver  // com.mysql.jdbc.Driver
        dsc.setDriverName("com.mysql.cj.jdbc.Driver");//数据库驱动
        dsc.setUsername("root");//用户名
        dsc.setPassword("root");//密码
        mpg.setDataSource(dsc);

        // 包配置
        PackageConfig pc = new PackageConfig();
        pc.setParent("org.demo.springcloud"); //"com.baomidou.ant"
        //最终生成代码目录为 baseSrc/org/demo/springcloud/moduleName
        pc.setModuleName(scannerInput("模块名"));
        mpg.setPackageInfo(pc);
/**
 // 自定义配置
 InjectionConfig cfg = new InjectionConfig() {
@Override public void initMap() {
// to do nothing
}
};

 // 如果模板引擎是 freemarker
 String templatePath = "/templates/mapper.xml.ftl";
 // 如果模板引擎是 velocity
 // String templatePath = "/templates/mapper.xml.vm";

 // 自定义输出配置
 List<FileOutConfig> focList = new ArrayList<>();
 // 自定义配置会被优先输出
 focList.add(new FileOutConfig(templatePath) {
@Override public String outputFile(TableInfo tableInfo) {
// 自定义输出文件名 , 如果你 Entity 设置了前后缀、此处注意 xml 的名称会跟着发生变化!!
return projectPath + "/src/main/resources/mapper/" + pc.getModuleName()
+ "/" + tableInfo.getEntityName() + "Mapper" + StringPool.DOT_XML;
}
});

 cfg.setFileCreate(new IFileCreate() {
@Override public boolean isCreate(ConfigBuilder configBuilder, FileType fileType, String filePath) {
// 判断自定义文件夹是否需要创建
checkDir("调用默认方法创建的目录,自定义目录用");
if (fileType == FileType.MAPPER) {
// 已经生成 mapper 文件判断存在,不想重新生成返回 false
return !new File(filePath).exists();
}
// 允许生成模板文件
return true;
}
});

 cfg.setFileOutConfigList(focList);
 mpg.setCfg(cfg);
 **/
        // 配置模板
        TemplateConfig templateConfig = new TemplateConfig();

        // 配置自定义输出模板
        //指定自定义模板路径,注意不要带上.ftl/.vm, 会根据使用的模板引擎自动识别
        // templateConfig.setEntity("templates/entity2.java");
        // templateConfig.setService();
        // templateConfig.setController();

        templateConfig.setXml(null);
        mpg.setTemplate(templateConfig);

        // 策略配置
        StrategyConfig strategy = new StrategyConfig();
        strategy.setNaming(NamingStrategy.underline_to_camel);
        strategy.setColumnNaming(NamingStrategy.underline_to_camel);
        strategy.setEntityLombokModel(true);   //使用lombok插件
        strategy.setRestControllerStyle(true);//使用@RestController
        // 公共父类
//        strategy.setSuperControllerClass("你自己的父类控制器,没有就不用设置!");//BaseController
        // 写于父类中的公共字段
//        strategy.setSuperEntityColumns("id");
        strategy.setInclude(scannerInput("表名,多个英文逗号分割").split(","));
        strategy.setControllerMappingHyphenStyle(true);
        strategy.setTablePrefix(pc.getModuleName() + "_");
        mpg.setStrategy(strategy);
//        mpg.setTemplateEngine(new FreemarkerTemplateEngine());
        mpg.execute();
    }

    public static void main(String[] args) {
        new MyBatisPlusAutoGenerator().codeGenerate();
    }
}
直接右键运行该类的main方法执行后在控制台按提示输入
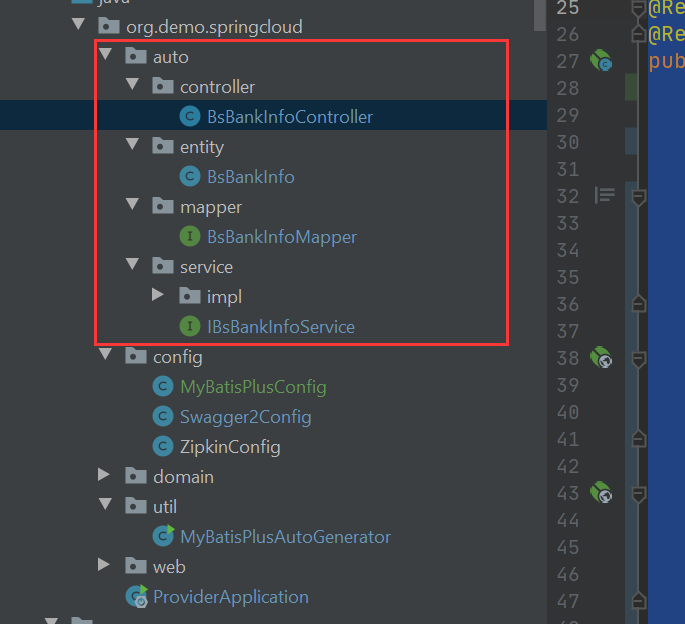
模块名、表名,即可生成相应的代码。
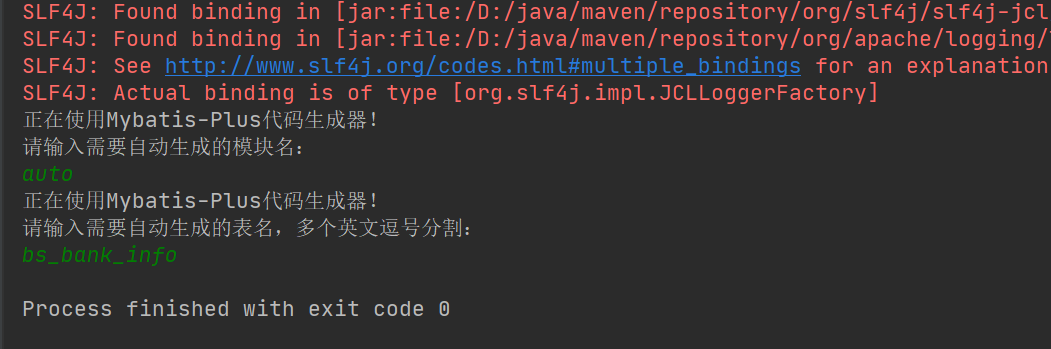
成功生成代码后会自动打开生成的目录文件夹

开始使用
使用自动生成的代码快速完成单表的CURD。CURD是一个数据库技术中的缩写词,一般的项目开发的各种参数的基本功能都是CURD。作用是用于处理数据的基本原子操作。
@RestController
@RequestMapping("/auto/bs-bank-info")
public class BsBankInfoController {

    @Resource
    BsBankInfoServiceImpl bankInfoService;

    /**
     * 查询列表
     * @param bsBankInfo
     * @return
     */
    @PostMapping("list")
    public Object list(@RequestBody BsBankInfo bsBankInfo){
        Wrapper queryWrapper = new QueryWrapper<>(bsBankInfo);
        return bankInfoService.list(queryWrapper);
    }
    @PostMapping("listbyPage")
    public Object listbyPage(@RequestBody BsBankInfo bsBankInfo){
        Page<BsBankInfo> pager = new Page(1,1);//这里测试固定了
        Wrapper queryWrapper = new QueryWrapper<>(bsBankInfo);
        return bankInfoService.page(pager ,queryWrapper);
    }
    @PostMapping("add")
    public Object add(@RequestBody BsBankInfo bsBankInfo){
        return bankInfoService.save(bsBankInfo);
    }
    @PostMapping("update")
    public Object update(@RequestBody BsBankInfo bsBankInfo){
        return bankInfoService.updateById(bsBankInfo);
    }
    @PostMapping("delete")
    public Object delete(@RequestBody BsBankInfo bsBankInfo){
        return bankInfoService.remove(new QueryWrapper<>(bsBankInfo));
    }
}
上面的代码示例是不是看起非常丝滑,简洁!
到此基本上单表的CURD简单完成了。这里只需要写controller里面写你的业务接口代码,其他部分的都是mybatis-plus代码生成器帮你自动生成的。
总结:
这里我用的是3.X版本,现在用的mybatis-plus还是主要以2.X比较多。2.X和3.X目前我直观了解到是
增删查改的方法名不太一样了
如
2.X insert 、selectList
3.X save、 list
代码生成器的区别