上两篇详细的说明了验证码的识别,不过我们采用的是方法二,下面采用方法一。注意和方法二的区别。
验证码识别方法一:
把标签转为向量,向量长度为40。(4位数字验证码)
验证码的生成和tf.record的制作这部分代码不变。
一、训练识别模型
首先新建一个nets2文件夹,使用文件夹下的nets_factory.py、alexnet.py,我们使用的是原始的alexnet,不需要修改
nets_factory.py
from __future__ import absolute_import
from __future__ import division
from __future__ import print_function
import functools

import tensorflow as tf

from nets2 import alexnet
from nets2 import cifarnet
from nets2 import inception
from nets2 import lenet
from nets2 import overfeat
from nets2 import resnet_v1
from nets2 import resnet_v2
from nets2 import vgg

slim = tf.contrib.slim

networks_map = {'alexnet_v2': alexnet.alexnet_v2,
                'cifarnet': cifarnet.cifarnet,
                'overfeat': overfeat.overfeat,
                'vgg_a': vgg.vgg_a,
                'vgg_16': vgg.vgg_16,
                'vgg_19': vgg.vgg_19,
                'inception_v1': inception.inception_v1,
                'inception_v2': inception.inception_v2,
                'inception_v3': inception.inception_v3,
                'inception_v4': inception.inception_v4,
                'inception_resnet_v2': inception.inception_resnet_v2,
                'lenet': lenet.lenet,
                'resnet_v1_50': resnet_v1.resnet_v1_50,
                'resnet_v1_101': resnet_v1.resnet_v1_101,
                'resnet_v1_152': resnet_v1.resnet_v1_152,
                'resnet_v1_200': resnet_v1.resnet_v1_200,
                'resnet_v2_50': resnet_v2.resnet_v2_50,
                'resnet_v2_101': resnet_v2.resnet_v2_101,
                'resnet_v2_152': resnet_v2.resnet_v2_152,
                'resnet_v2_200': resnet_v2.resnet_v2_200,
               }

arg_scopes_map = {'alexnet_v2': alexnet.alexnet_v2_arg_scope,
                  'cifarnet': cifarnet.cifarnet_arg_scope,
                  'overfeat': overfeat.overfeat_arg_scope,
                  'vgg_a': vgg.vgg_arg_scope,
                  'vgg_16': vgg.vgg_arg_scope,
                  'vgg_19': vgg.vgg_arg_scope,
                  'inception_v1': inception.inception_v3_arg_scope,
                  'inception_v2': inception.inception_v3_arg_scope,
                  'inception_v3': inception.inception_v3_arg_scope,
                  'inception_v4': inception.inception_v4_arg_scope,
                  'inception_resnet_v2':
                  inception.inception_resnet_v2_arg_scope,
                  'lenet': lenet.lenet_arg_scope,
                  'resnet_v1_50': resnet_v1.resnet_arg_scope,
                  'resnet_v1_101': resnet_v1.resnet_arg_scope,
                  'resnet_v1_152': resnet_v1.resnet_arg_scope,
                  'resnet_v1_200': resnet_v1.resnet_arg_scope,
                  'resnet_v2_50': resnet_v2.resnet_arg_scope,
                  'resnet_v2_101': resnet_v2.resnet_arg_scope,
                  'resnet_v2_152': resnet_v2.resnet_arg_scope,
                  'resnet_v2_200': resnet_v2.resnet_arg_scope,
                 }


def get_network_fn(name, num_classes, weight_decay=0.0, is_training=False):
  """Returns a network_fn such as `logits, end_points = network_fn(images)`.

  Args:
    name: The name of the network.
    num_classes: The number of classes to use for classification.
    weight_decay: The l2 coefficient for the model weights.
    is_training: `True` if the model is being used for training and `False`
      otherwise.

  Returns:
    network_fn: A function that applies the model to a batch of images. It has
      the following signature:
        logits, end_points = network_fn(images)
  Raises:
    ValueError: If network `name` is not recognized.
  """
  if name not in networks_map:
    raise ValueError('Name of network unknown %s' % name)
  func = networks_map[name]
  @functools.wraps(func)
  def network_fn(images):
    arg_scope = arg_scopes_map[name](weight_decay=weight_decay)
    with slim.arg_scope(arg_scope):
      return func(images, num_classes, is_training=is_training)
  if hasattr(func, 'default_image_size'):
    network_fn.default_image_size = func.default_image_size

  return network_fn
主要就是将原来的nets改成nets2,在代码中我已高亮显示
alexnet.py
from __future__ import absolute_import
from __future__ import division
from __future__ import print_function

from tensorflow.contrib import layers
from tensorflow.contrib.framework.python.ops import arg_scope
from tensorflow.contrib.layers.python.layers import layers as layers_lib
from tensorflow.contrib.layers.python.layers import regularizers
from tensorflow.contrib.layers.python.layers import utils
from tensorflow.python.ops import array_ops
from tensorflow.python.ops import init_ops
from tensorflow.python.ops import nn_ops
from tensorflow.python.ops import variable_scope

trunc_normal = lambda stddev: init_ops.truncated_normal_initializer(0.0, stddev)


def alexnet_v2_arg_scope(weight_decay=0.0005):
  with arg_scope(
      [layers.conv2d, layers_lib.fully_connected],
      activation_fn=nn_ops.relu,
      biases_initializer=init_ops.constant_initializer(0.1),
      weights_regularizer=regularizers.l2_regularizer(weight_decay)):
    with arg_scope([layers.conv2d], padding='SAME'):
      with arg_scope([layers_lib.max_pool2d], padding='VALID') as arg_sc:
        return arg_sc


def alexnet_v2(inputs,
               num_classes=1000,
               is_training=True,
               dropout_keep_prob=0.5,
               spatial_squeeze=True,
               scope='alexnet_v2'):
  """AlexNet version 2.

  Described in: http://arxiv.org/pdf/1404.5997v2.pdf
  Parameters from:
  github.com/akrizhevsky/cuda-convnet2/blob/master/layers/
  layers-imagenet-1gpu.cfg

  Note: All the fully_connected layers have been transformed to conv2d layers.
        To use in classification mode, resize input to 224x224. To use in fully
        convolutional mode, set spatial_squeeze to false.
        The LRN layers have been removed and change the initializers from
        random_normal_initializer to xavier_initializer.

  Args:
    inputs: a tensor of size [batch_size, height, width, channels].
    num_classes: number of predicted classes.
    is_training: whether or not the model is being trained.
    dropout_keep_prob: the probability that activations are kept in the dropout
      layers during training.
    spatial_squeeze: whether or not should squeeze the spatial dimensions of the
      outputs. Useful to remove unnecessary dimensions for classification.
    scope: Optional scope for the variables.

  Returns:
    the last op containing the log predictions and end_points dict.
  """
  with variable_scope.variable_scope(scope, 'alexnet_v2', [inputs]) as sc:
    end_points_collection = sc.original_name_scope + '_end_points'
    # Collect outputs for conv2d, fully_connected and max_pool2d.
    with arg_scope(
        [layers.conv2d, layers_lib.fully_connected, layers_lib.max_pool2d],
        outputs_collections=[end_points_collection]):
      net = layers.conv2d(
          inputs, 64, [11, 11], 4, padding='VALID', scope='conv1')
      net = layers_lib.max_pool2d(net, [3, 3], 2, scope='pool1')
      net = layers.conv2d(net, 192, [5, 5], scope='conv2')
      net = layers_lib.max_pool2d(net, [3, 3], 2, scope='pool2')
      net = layers.conv2d(net, 384, [3, 3], scope='conv3')
      net = layers.conv2d(net, 384, [3, 3], scope='conv4')
      net = layers.conv2d(net, 256, [3, 3], scope='conv5')
      net = layers_lib.max_pool2d(net, [3, 3], 2, scope='pool5')

      # Use conv2d instead of fully_connected layers.
      with arg_scope(
          [layers.conv2d],
          weights_initializer=trunc_normal(0.005),
          biases_initializer=init_ops.constant_initializer(0.1)):
        net = layers.conv2d(net, 4096, [5, 5], padding='VALID', scope='fc6')
        net = layers_lib.dropout(
            net, dropout_keep_prob, is_training=is_training, scope='dropout6')
        net = layers.conv2d(net, 4096, [1, 1], scope='fc7')
        net = layers_lib.dropout(
            net, dropout_keep_prob, is_training=is_training, scope='dropout7')
        net = layers.conv2d(
            net,
            num_classes, [1, 1],
            activation_fn=None,
            normalizer_fn=None,
            biases_initializer=init_ops.zeros_initializer(),
            scope='fc8')

      # Convert end_points_collection into a end_point dict.
      end_points = utils.convert_collection_to_dict(end_points_collection)
      if spatial_squeeze:
        net = array_ops.squeeze(net, [1, 2], name='fc8/squeezed')
        end_points[sc.name + '/fc8'] = net
      return net, end_points


alexnet_v2.default_image_size = 224
直接使用alexnet的源码,不需任何修改。
train.py
import os
import tensorflow as tf
from PIL import Image
from nets2 import nets_factory
import numpy as np

# 不同字符数量
CHAR_SET_LEN = 10
# 图片高度
IMAGE_HEIGHT = 60
# 图片宽度
IMAGE_WIDTH = 160
# 批次
BATCH_SIZE = 25
# tfrecord文件存放路径
TFRECORD_FILE = "F:/PyCharm-projects/第十周/train.tfrecords"

# placeholder
x = tf.placeholder(tf.float32, [None, 224, 224])
y0 = tf.placeholder(tf.float32, [None])
y1 = tf.placeholder(tf.float32, [None])
y2 = tf.placeholder(tf.float32, [None])
y3 = tf.placeholder(tf.float32, [None])

# 学习率
lr = tf.Variable(0.003, dtype=tf.float32)


# 从tfrecord读出数据
def read_and_decode(filename):
    # 根据文件名生成一个队列
    filename_queue = tf.train.string_input_producer([filename])
    reader = tf.TFRecordReader()
    # 返回文件名和文件
    _, serialized_example = reader.read(filename_queue)
    features = tf.parse_single_example(serialized_example,
                                       features={
                                           'image': tf.FixedLenFeature([], tf.string),
                                           'label0': tf.FixedLenFeature([], tf.int64),
                                           'label1': tf.FixedLenFeature([], tf.int64),
                                           'label2': tf.FixedLenFeature([], tf.int64),
                                           'label3': tf.FixedLenFeature([], tf.int64),
                                       })
    # 获取图片数据
    image = tf.decode_raw(features['image'], tf.uint8)
    # tf.train.shuffle_batch必须确定shape
    image = tf.reshape(image, [224, 224])
    # 图片预处理
    image = tf.cast(image, tf.float32) / 255.0
    image = tf.subtract(image, 0.5)
    image = tf.multiply(image, 2.0)
    # 获取label
    label0 = tf.cast(features['label0'], tf.int32)
    label1 = tf.cast(features['label1'], tf.int32)
    label2 = tf.cast(features['label2'], tf.int32)
    label3 = tf.cast(features['label3'], tf.int32)

    return image, label0, label1, label2, label3

# 获取图片数据和标签
image, label0, label1, label2, label3 = read_and_decode(TFRECORD_FILE)

# 使用shuffle_batch可以随机打乱
image_batch, label_batch0, label_batch1, label_batch2, label_batch3 = tf.train.shuffle_batch(
    [image, label0, label1, label2, label3], batch_size=BATCH_SIZE,
    capacity=50000, min_after_dequeue=10000, num_threads=1)

# 定义网络结构
train_network_fn = nets_factory.get_network_fn(
    'alexnet_v2',
    num_classes=CHAR_SET_LEN*4,
    weight_decay=0.0005,
    is_training=True)

with tf.Session() as sess:
    # inputs: a tensor of size [batch_size, height, width, channels]
    X = tf.reshape(x, [BATCH_SIZE, 224, 224, 1])
    # 数据输入网络得到输出值
    logits, end_points = train_network_fn(X)

    # 把标签转成one_hot的形式
    one_hot_labels0 = tf.one_hot(indices=tf.cast(y0, tf.int32), depth=CHAR_SET_LEN)
    one_hot_labels1 = tf.one_hot(indices=tf.cast(y1, tf.int32), depth=CHAR_SET_LEN)
    one_hot_labels2 = tf.one_hot(indices=tf.cast(y2, tf.int32), depth=CHAR_SET_LEN)
    one_hot_labels3 = tf.one_hot(indices=tf.cast(y3, tf.int32), depth=CHAR_SET_LEN)

    # 把标签转成长度为40的向量
    label_40 = tf.concat([one_hot_labels0, one_hot_labels1, one_hot_labels2, one_hot_labels3], 1)

    # 计算loss
    loss_40 = tf.reduce_mean(tf.nn.sigmoid_cross_entropy_with_logits(logits=logits, labels=label_40))

    # 优化total_loss
    optimizer = tf.train.AdamOptimizer(learning_rate=lr).minimize(loss_40)

    # 计算准确率
    correct_prediction_40 = tf.equal(tf.argmax(one_hot_labels0, 1), tf.argmax(logits, 1))
    accuracy_40 = tf.reduce_mean(tf.cast(correct_prediction_40, tf.float32))

    # 用于保存模型
    saver = tf.train.Saver()
    # 初始化
    sess.run(tf.global_variables_initializer())

    # 创建一个协调器,管理线程
    coord = tf.train.Coordinator()
    # 启动QueueRunner, 此时文件名队列已经进队
    threads = tf.train.start_queue_runners(sess=sess, coord=coord)

    for i in range(4001):
        # 获取一个批次的数据和标签
        b_image, b_label0, b_label1, b_label2, b_label3 = sess.run(
            [image_batch, label_batch0, label_batch1, label_batch2, label_batch3])
        # 优化模型
        sess.run(optimizer, feed_dict={x: b_image, y0: b_label0, y1: b_label1, y2: b_label2, y3: b_label3})

        # 每迭代50次计算一次loss和准确率
        if i % 50 == 0:
            # 每迭代2000次降低一次学习率
            if i % 2000 == 0:
                sess.run(tf.assign(lr, lr / 3))
            acc, loss_ = sess.run([accuracy_40, loss_40], feed_dict={x: b_image,
                                                                y0: b_label0,
                                                                y1: b_label1,
                                                                y2: b_label2,
                                                                y3: b_label3})
            learning_rate = sess.run(lr)
            print("Iter:%d  Loss:%.3f  Accuracy:%.2f, Learning_rate:%.4f" % (i, loss_, acc, learning_rate))

            # 保存模型
            # if acc0 > 0.90 and acc1 > 0.90 and acc2 > 0.90 and acc3 > 0.90:
            if i == 4000:
                saver.save(sess, "./captcha/models/crack_captcha.model", global_step=i)
                break

                # 通知其他线程关闭
    coord.request_stop()
    # 其他所有线程关闭之后,这一函数才能返回
    coord.join(threads)
和原来的程序略有不同,主要就是在网络结构那里,输入需要乘4,CHAR_SET_LEN*4,标签、loss、以及准确率都需要修改
二、测试模型
import os
import tensorflow as tf
from PIL import Image
from nets2 import nets_factory
import numpy as np
import matplotlib.pyplot as plt

# 不同字符数量
CHAR_SET_LEN = 10
# 图片高度
IMAGE_HEIGHT = 60
# 图片宽度
IMAGE_WIDTH = 160
# 批次
BATCH_SIZE = 1
# tfrecord文件存放路径
TFRECORD_FILE = "F:/PyCharm-projects/第十周/test.tfrecord"

# placeholder
x = tf.placeholder(tf.float32, [None, 224, 224])


# 从tfrecord读出数据
def read_and_decode(filename):
    # 根据文件名生成一个队列
    filename_queue = tf.train.string_input_producer([filename])
    reader = tf.TFRecordReader()
    # 返回文件名和文件
    _, serialized_example = reader.read(filename_queue)
    features = tf.parse_single_example(serialized_example,
                                       features={
                                           'image': tf.FixedLenFeature([], tf.string),
                                           'label0': tf.FixedLenFeature([], tf.int64),
                                           'label1': tf.FixedLenFeature([], tf.int64),
                                           'label2': tf.FixedLenFeature([], tf.int64),
                                           'label3': tf.FixedLenFeature([], tf.int64),
                                       })
    # 获取图片数据
    image = tf.decode_raw(features['image'], tf.uint8)
    # 没有经过预处理的灰度图
    image_raw = tf.reshape(image, [224, 224])
    # tf.train.shuffle_batch必须确定shape
    image = tf.reshape(image, [224, 224])
    # 图片预处理
    image = tf.cast(image, tf.float32) / 255.0
    image = tf.subtract(image, 0.5)
    image = tf.multiply(image, 2.0)
    # 获取label
    label0 = tf.cast(features['label0'], tf.int32)
    label1 = tf.cast(features['label1'], tf.int32)
    label2 = tf.cast(features['label2'], tf.int32)
    label3 = tf.cast(features['label3'], tf.int32)

    return image, image_raw, label0, label1, label2, label3

# 获取图片数据和标签
image, image_raw, label0, label1, label2, label3 = read_and_decode(TFRECORD_FILE)

# 使用shuffle_batch可以随机打乱
image_batch, image_raw_batch, label_batch0, label_batch1, label_batch2, label_batch3 = tf.train.shuffle_batch(
    [image, image_raw, label0, label1, label2, label3], batch_size=BATCH_SIZE,
    capacity=50000, min_after_dequeue=10000, num_threads=1)

# 定义网络结构
train_network_fn = nets_factory.get_network_fn(
    'alexnet_v2',
    num_classes=CHAR_SET_LEN*4,
    weight_decay=0.0005,
    is_training=False)

with tf.Session() as sess:
    # inputs: a tensor of size [batch_size, height, width, channels]
    X = tf.reshape(x, [BATCH_SIZE, 224, 224, 1])
    # 数据输入网络得到输出值
    logits, end_points = train_network_fn(X)

    # 预测值
    # 因为一次看40维的向量有点奇怪,因此,将这个40维的向量进行拆分
    # 拆分的起始位置是第0行的位置0,取10个数
    logits0 = tf.slice(logits, [0, 0], [-1, 10])
    # 拆分的起始位置是第0行的位置10
    logits1 = tf.slice(logits, [0, 10], [-1, 10])
    logits2 = tf.slice(logits, [0, 20], [-1, 10])
    logits3 = tf.slice(logits, [0, 30], [-1, 10])

    # one-hot编码,获取最大的数(其实就是1)的位置
    predict0 = tf.argmax(logits0, 1)
    predict1 = tf.argmax(logits1, 1)
    predict2 = tf.argmax(logits2, 1)
    predict3 = tf.argmax(logits3, 1)

    # 初始化
    sess.run(tf.global_variables_initializer())
    # 载入训练好的模型
    saver = tf.train.Saver()
    saver.restore(sess, './captcha/models/crack_captcha.model-4000')

    # 创建一个协调器,管理线程
    coord = tf.train.Coordinator()
    # 启动QueueRunner, 此时文件名队列已经进队
    threads = tf.train.start_queue_runners(sess=sess, coord=coord)

    for i in range(10):
        # 获取一个批次的数据和标签
        b_image, b_image_raw, b_label0, b_label1, b_label2, b_label3 = sess.run([image_batch,
                                                                                 image_raw_batch,
                                                                                 label_batch0,
                                                                                 label_batch1,
                                                                                 label_batch2,
                                                                                 label_batch3])
        # 显示图片
        img = Image.fromarray(b_image_raw[0], 'L')
        plt.imshow(img)
        plt.axis('off')
        plt.show()
        # 打印标签
        print('label:', b_label0, b_label1, b_label2, b_label3)
        # 预测
        label0, label1, label2, label3 = sess.run([predict0, predict1, predict2, predict3], feed_dict={x: b_image})
        # 打印预测值
        print('predict:', label0, label1, label2, label3)

        # 通知其他线程关闭
    coord.request_stop()
    # 其他所有线程关闭之后,这一函数才能返回
    coord.join(threads)
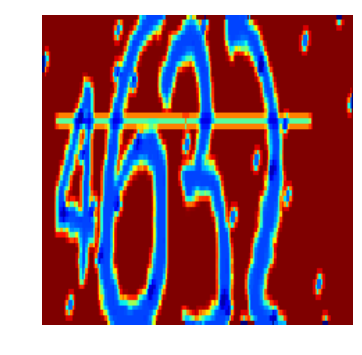
label: [4] [6] [3] [2]
predict: [4] [6] [3] [1]
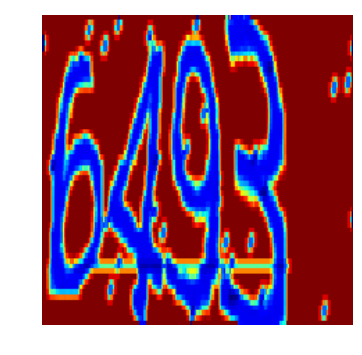
label: [6] [4] [9] [3]
predict: [6] [4] [9] [3]
....