服务器环境
服务器版本:CentOS Linux release 7.2.1511 (Core)
内核版本:3.10.0-327.el7.x86_64
1、搭建docker
(1)编辑/etc/sysctl.conf,添加如下内容
net.bridge.bridge-nf-call-ip6tables = 1
net.bridge.bridge-nf-call-iptables = 1
net.ipv4.ip_forward = 1
执行下面命令
modprobe br_netfilter
sysctl -p
(2)安装docker的yum源
yum install -y yum-utils device-mapper-persistent-data lvm2
yum-config-manager
    --add-repo
    https://download.docker.com/linux/centos/docker-ce.repo
(3)查看docker的版本
yum list docker-ce.x86_64  --showduplicates |sort -r
 * updates: mirrors.aliyun.com
Loading mirror speeds from cached hostfile
Loaded plugins: fastestmirror
Installed Packages
 * extras: mirrors.aliyun.com
 * epel: mirrors.aliyun.com
docker-ce.x86_64            3:18.09.0-3.el7                    docker-ce-stable
docker-ce.x86_64            18.06.1.ce-3.el7                   docker-ce-stable
docker-ce.x86_64            18.06.1.ce-3.el7                   @docker-ce-stable
docker-ce.x86_64            18.06.0.ce-3.el7                   docker-ce-stable
docker-ce.x86_64            18.03.1.ce-1.el7.centos            docker-ce-stable
docker-ce.x86_64            18.03.0.ce-1.el7.centos            docker-ce-stable
docker-ce.x86_64            17.12.1.ce-1.el7.centos            docker-ce-stable
docker-ce.x86_64            17.12.0.ce-1.el7.centos            docker-ce-stable
docker-ce.x86_64            17.09.1.ce-1.el7.centos            docker-ce-stable
docker-ce.x86_64            17.09.0.ce-1.el7.centos            docker-ce-stable
docker-ce.x86_64            17.06.2.ce-1.el7.centos            docker-ce-stable
docker-ce.x86_64            17.06.1.ce-1.el7.centos            docker-ce-stable
docker-ce.x86_64            17.06.0.ce-1.el7.centos            docker-ce-stable
docker-ce.x86_64            17.03.3.ce-1.el7                   docker-ce-stable
docker-ce.x86_64            17.03.2.ce-1.el7.centos            docker-ce-stable
docker-ce.x86_64            17.03.1.ce-1.el7.centos            docker-ce-stable
docker-ce.x86_64            17.03.0.ce-1.el7.centos            docker-ce-stable
 * base: mirrors.aliyun.com
Available Packages
(4)安装最新版本docker
yum makecache fast

yum install -y --setopt=obsoletes=0
  docker-ce-18.06.1.ce-3.el7

systemctl start docker
systemctl enable docker
(5)确认下iptables filter表中FOWARD链的默认策略(pllicy)为ACCEPT
iptables -nvL
Chain FORWARD (policy ACCEPT 0 packets, 0 bytes)
 pkts bytes target     prot opt in     out     source               destination
 255K   14M CATTLE_NETWORK_POLICY  all  --  *      *       10.42.0.0/16         10.42.0.0/16
1300K 1914M CATTLE_FORWARD  all  --  *      *       0.0.0.0/0            0.0.0.0/0
 786K  406M DOCKER-USER  all  --  *      *       0.0.0.0/0            0.0.0.0/0
 786K  406M DOCKER-ISOLATION-STAGE-1  all  --  *      *       0.0.0.0/0            0.0.0.0/0
 433K  109M ACCEPT     all  --  *      docker0  0.0.0.0/0            0.0.0.0/0            ctstate RELATED,ESTABLISHED
 2130  113K DOCKER     all  --  *      docker0  0.0.0.0/0            0.0.0.0/0
 351K  296M ACCEPT     all  --  docker0 !docker0  0.0.0.0/0            0.0.0.0/0
  716 37220 ACCEPT     all  --  docker0 docker0  0.0.0.0/0            0.0.0.0/0
2、搭建rancher的server端
(1)用docker搭建rancher
docker run -d --restart=always -p 8080:8080 rancher/server
(2)出现下面的错误,下面为docker错误日志
Dec 10 15:42:31 iZbp10cnscbfblnh5buomfZ dockerd: time="2018-12-10T15:42:31.530843247+08:00" level=error msg="Handler for POST /v1.38/containers/create returned error: mkdir /var/lib/docker/overlay2/6f1ba4b09228e52acc14d12f40f9af6754781f6b253a878d9e98e292c6fc41fb-init/merged/dev/shm: invalid argument"
查了很多资料,确认原因为存储驱动的问题,改为devicemapper就搞定了
修改文件/etc/docker/daemon.json
cat /etc/docker/daemon.json
{
  "registry-mirrors": ["https://quv6i4g3.mirror.aliyuncs.com"],
  "storage-driver": "devicemapper"
}
去掉启动选择存储驱动的启动参数,修改完成如下
cat /usr/lib/systemd/system/docker.service
[Unit]
Description=Docker Application Container Engine
Documentation=https://docs.docker.com
After=network-online.target firewalld.service
Wants=network-online.target

[Service]
Type=notify
# the default is not to use systemd for cgroups because the delegate issues still
# exists and systemd currently does not support the cgroup feature set required
# for containers run by docker
ExecStart=/usr/bin/dockerd -H tcp://0.0.0.0:2375 -H unix:///var/run/docker.sock
ExecReload=/bin/kill -s HUP $MAINPID
# Having non-zero Limit*s causes performance problems due to accounting overhead
# in the kernel. We recommend using cgroups to do container-local accounting.
LimitNOFILE=infinity
LimitNPROC=infinity
LimitCORE=infinity
# Uncomment TasksMax if your systemd version supports it.
# Only systemd 226 and above support this version.
#TasksMax=infinity
TimeoutStartSec=0
# set delegate yes so that systemd does not reset the cgroups of docker containers
Delegate=yes
# kill only the docker process, not all processes in the cgroup
KillMode=process
# restart the docker process if it exits prematurely
Restart=on-failure
StartLimitBurst=3
StartLimitInterval=60s

[Install]
WantedBy=multi-user.target
(3)重新启动docker,就可以了
systemctl restart docker
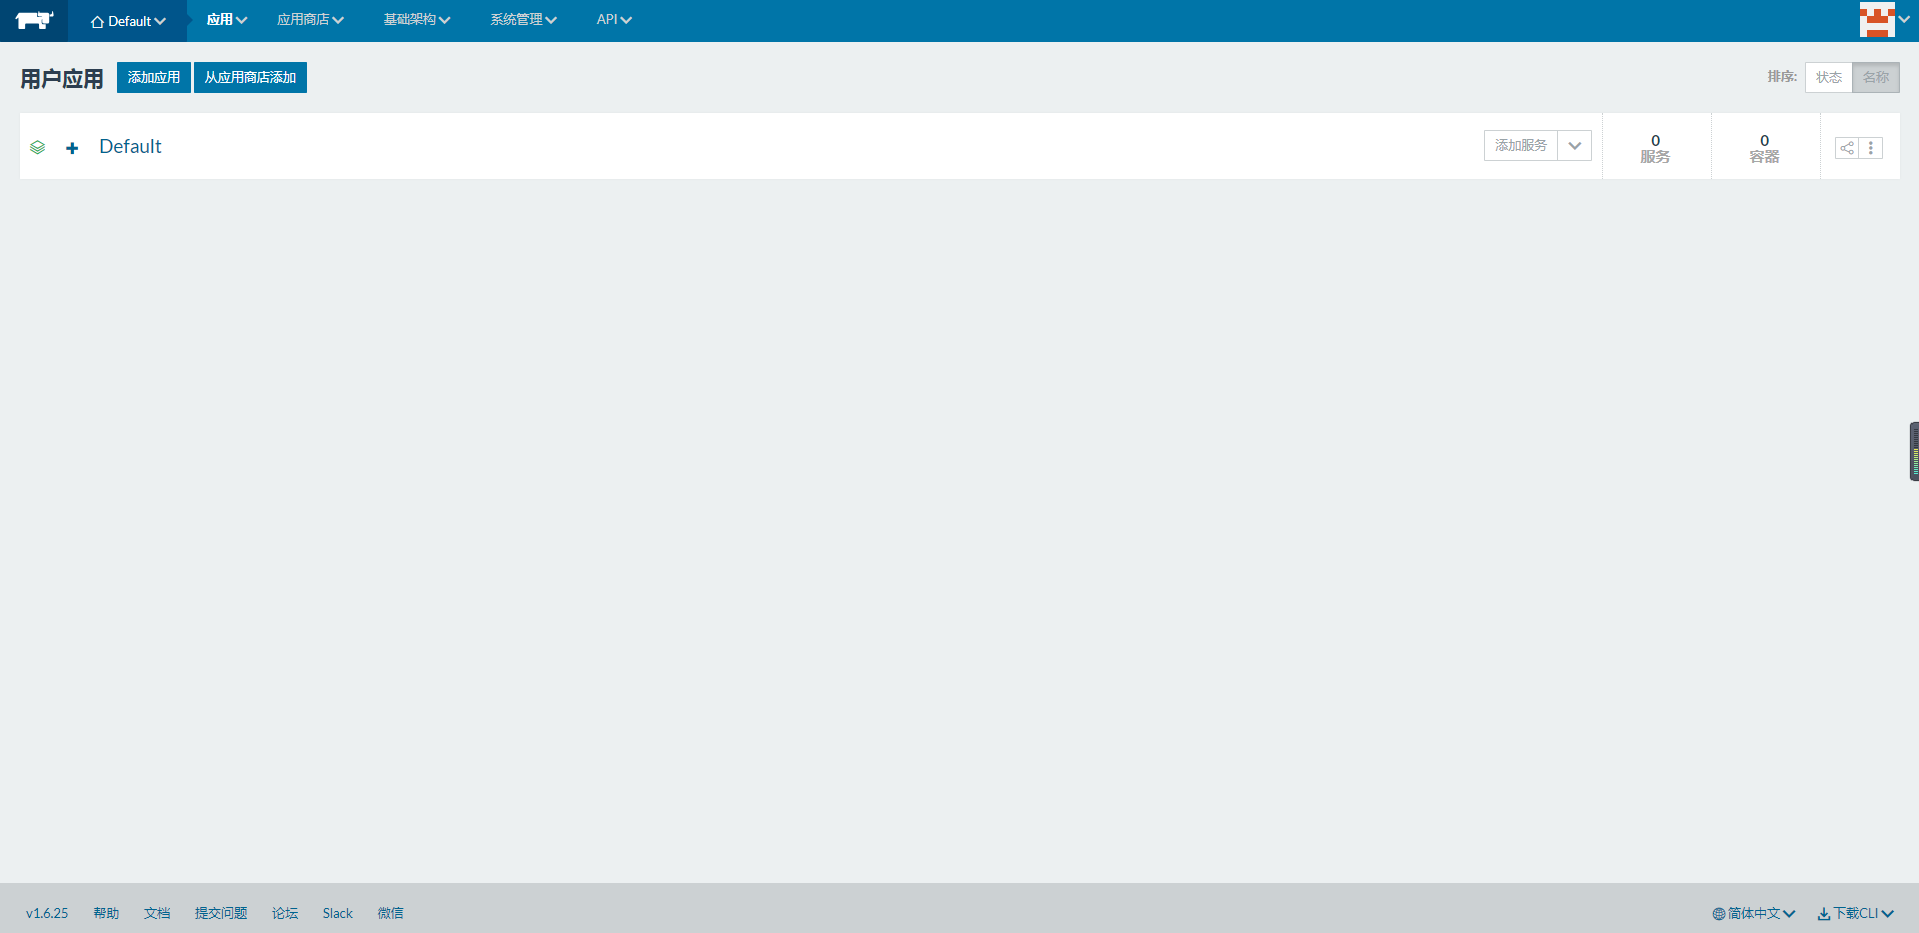
(4)server端搭建完成,用ip+端口直接可以访问rancher
(5)自己配置下用户权限
3、配置rancher的client端
(1)基础架构->主机->添加主机
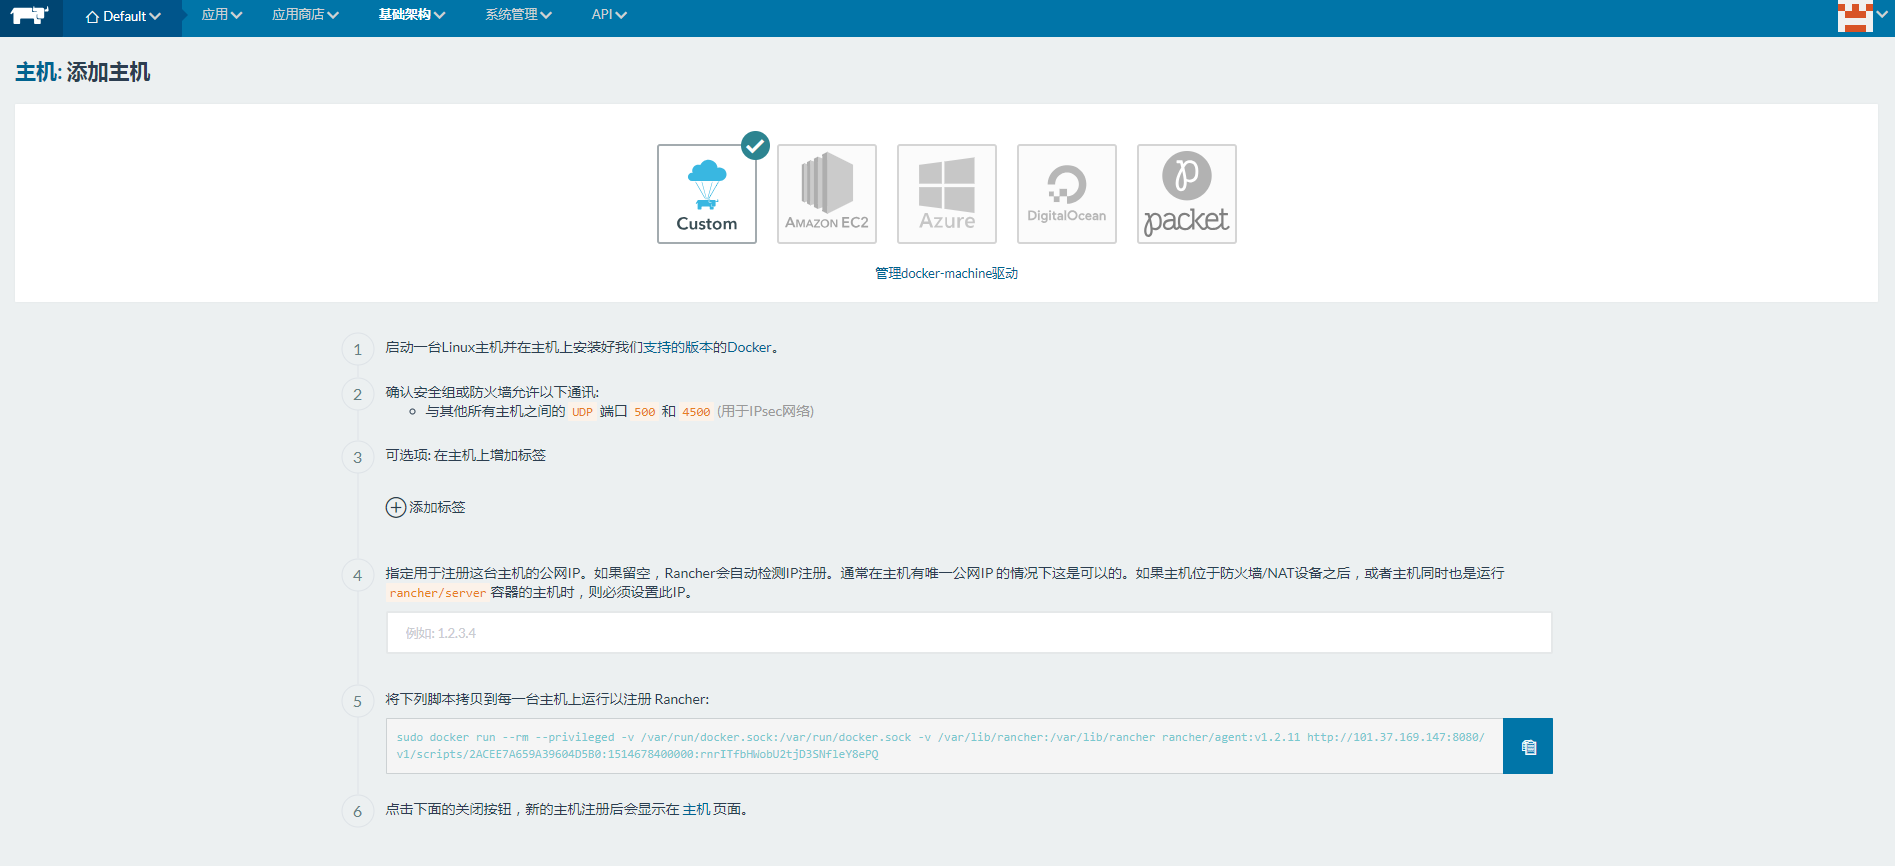
(2)复制上面的命令在要添加client端的服务器运行,出现如下的错误:
INFO: Running Agent Registration Process, CATTLE_URL=http://xx.xx.xx.xx:8080/v1
INFO: Attempting to connect to: http://xx.xx.xx.xx:8080/v1
ERROR: http://xx.xx.xx.xx:8080/v1 is not accessible (Failed to connect to xx.xx.xx.xx port 8080: Connection timed out)
curl地址看下:
curl -k -i http://xx.xx.xx.xx:8080/v1
HTTP/1.1 401 Unauthorized
Content-Type: application/json; charset=utf-8
Date: Tue, 11 Dec 2018 02:47:40 GMT
Expires: Thu, 01 Jan 1970 00:00:00 GMT
Set-Cookie: PL=rancher;Path=/
Www-Authenticate: Basic realm="Enter API access key and secret key as username and password"
X-Api-Schemas: http://xx.xx.xx.xx:8080/v1/schemas
X-Rancher-Version: v1.6.25
Content-Length: 177

{"id":"6df18d62-d509-499c-8805-bdbf0b4e5783","type":"error","links":{},"actions":{},"status":401,"code":"Unauthorized","message":"Unauthorized","detail":null,"baseType":"error"}
curl -k -i http://xx.xx.xx.xx:8080/v1/scripts/2ACEE7A659A39604D5B0:1514678400000:rnrITfbHWobU2tjD3SNfleY8ePQ
HTTP/1.1 200 OK
Content-Type: text/plain
Date: Tue, 11 Dec 2018 02:48:09 GMT
Expires: Thu, 01 Jan 1970 00:00:00 GMT
Set-Cookie: PL=rancher;Path=/
Vary: Accept-Encoding, User-Agent
Www-Authenticate: Basic realm="Enter API access key and secret key as username and password"
X-Api-Schemas: http://xx.xx.xx.xx:8080/v1/schemas
X-Rancher-Version: v1.6.25
Content-Length: 268

#!/bin/sh

export CATTLE_REGISTRATION_ACCESS_KEY="registrationToken"
export CATTLE_REGISTRATION_SECRET_KEY="2ACEE7A659A39604D5B0:1514678400000:rnrITfbHWobU2tjD3SNfleY8ePQ"
export CATTLE_URL="http://xx.xx.xx.xx:8080/v1"
export DETECTED_CATTLE_AGENT_IP="192.168.0.1"
查了大量资料,开放与其他所有主机之间的 UDP 端口 500 和 4500,也尝试关闭了防火墙还是不行
最后找到了原因,进入rancher的server的容器内,发现容器的网络不通
docker exec -it cca2d5cea45c /bin/bash
ping百度ping不通
重启server端和client端的docker,就可以了
systemctl restart docker

OK!rancher简单的搭建完成,这些在本地虚拟机搭建完全没有问题,到线上环境还是出现不少的坑@=@