python实现HTTP请求的三中方式:urllib2/urllib、httplib/urllib 以及Requests
urllib2/urllib实现
urllib2和urllib是python两个内置的模块,要实现HTTP功能,实现方式是以urllib2为主,urllib为辅
1 首先实现一个完整的请求与响应模型
- urllib2提供基础函数urlopen,
import urllib2
response = urllib2.urlopen('http://www.cnblogs.com/guguobao')
html = response.read()
print html
- 改进,分两步:请求和响应
#!coding:utf-8
import urllib2
#请求
request = urllib2.Request('http://www.cnblogs.com/guguobao')
#响应
response = urllib2.urlopen(request)
html = response.read()
print html
- 上面使用GET请求,下面改为POST请求,使用urllib。
#!coding:utf-8
import urllib
import urllib2
url = 'http://www.cnblogs.com/login'
postdata = {'username' : 'qiye',
           'password' : 'qiye_pass'}
#info 需要被编码为urllib2能理解的格式,这里用到的是urllib
data = urllib.urlencode(postdata)
req = urllib2.Request(url, data)
response = urllib2.urlopen(req)
html = response.read()
-
- 然而运行结果没有输出,因为服务器拒绝你的访问,需要检验请求头信息,来判断是否是来自浏览器的请求
2 请求头headers处理
-
把上面的列子添加User-Agent域和Referer域信息
- User-Agent:有些服务器或Proxy会检查该值是否是浏览器发出的信息
- Content-Type:在使用REST接口时,服务器会检查该值,确定HTTP body用什么解析。否则报错,拒绝回应。取值详情:http://www.runoob.com/http/http-content-type.html
- Referer:服务器检查防盗链
#coding:utf-8
#请求头headers处理:设置一下请求头中的User-Agent域和Referer域信息
import urllib
import urllib2
url = 'http://www.xxxxxx.com/login'
user_agent = 'Mozilla/4.0 (compatible; MSIE 5.5; Windows NT)'
referer='http://www.xxxxxx.com/'
postdata = {'username' : 'qiye',
           'password' : 'qiye_pass'}
# 将user_agent,referer写入头信息
headers={'User-Agent':user_agent,'Referer':referer}
data = urllib.urlencode(postdata)
req = urllib2.Request(url, data,headers)
response = urllib2.urlopen(req)
html = response.read()
3 Cookie处理
- urllib2对Cookie的处理也是自动,使用CookieJar函数进行Cookie的管理,如果需要得到某个Cookie项的值,可以这样:
import urllib2,cookielib

cookie = cookielib.CookieJar()
opener = urllib2.build_opener(urllib2.HTTPCookieProcessor(cookie))
response = opener.open('http://www.zhihu.com')
for item in cookie:
    print item.name+':'+item.name
- 但有时遇到情况,我们不想让urllib2自动处理,我们想自己添加Cookie的内容,可以通过设置请求头中的cookie域来做
import urllib2,cookielib
opener = urllib2.build_opener()
opener.addheaders.append(('Cookie','email='+'helloguguobao@gmail.com'))#Cookie和email替换什么值都可以,但不能没有
req = urllib2.Request('http://www.zhihu.com')
response = opener.open(req)
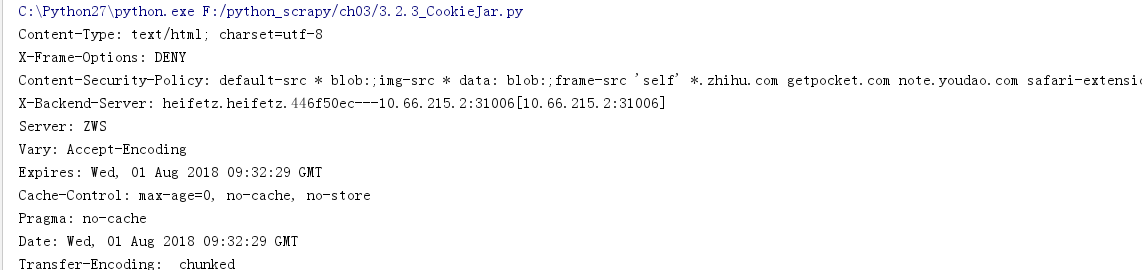
print response.headers
retdata = response.read()
- 运行截图
4 设置Timeout超时
- 在python2.6及新版中,urlopen函数提供对Timeout的设置:
import urllib2
request=urllib2.Request('http://www.zhihu.com')
response = urllib2.urlopen(request,timeout=2)
html=response.read()
print html
5 获取HTTP响应码
- 只要使用urlopen返回的response对象的getcode()方法就可以得到HTTP返回码。
import urllib2
try:
    response = urllib2.urlopen('http://www.google.com')
    print response
except urllib2.HTTPError as e:
    if hasattr(e, 'code'):
        print 'Error code:',e.code
6. 重定向
- urllib2默认情况下会对HTTP 3XX返回码自动进行重定向动作。要检测是否发生重定向动作,只要检查一下Response的URL和Request的URL是否一致:
import urllib2
response = urllib2.urlopen('http://www.zhihu.cn')
isRedirected = response.geturl() == 'http://www.zhihu.cn'
- 如果不想自动重定向,可以自定义HTTPRedirectHandler类:
import urllib2
class RedirectHandler(urllib2.HTTPRedirectHandler):
    def http_error_301(self, req, fp, code, msg, headers):
        pass
    def http_error_302(self, req, fp, code, msg, headers):
        result =urllib2.HTTPRedirectHandler.http_error_301(self,req,fp,code,msg,headers)
        result.status =code
        result.newurl = result.geturl()
        return result

opener = urllib2.build_opener(RedirectHandler)
opener.open('http://www.zhihu.cn')
7 Proxy的设置
- 在做爬虫开发中,可能会用到代理。urllib2默认会使用环境变量http_proxy来设置HTTP Proxy。但是我们一般不采用这种方法,而是使用ProxyHandler在程序中动态设置代理
import urllib2
proxy = urllib2.ProxyHandler({'http': '127.0.0.1:1080'})# 运行时需要把socketsocks关闭系统代理。并使用1080端口,或者直接退出socketsocks软件
opener = urllib2.build_opener(proxy)
urllib2.install_opener(opener)
response = urllib2.urlopen('http://www.zhihu.com/')
print response.read()
这里要注意一个细节,使用urllib2.install_opener()会设置urllib2的全局opener,之后,所有的HTTP访问都会使用这个代理,这样很方便,但是,想在程序中使用两个不同的代理,就不能使用install_opener去更改全局的设置,而是直接调用urllib2.open()
import urllib2
proxy = urllib2.ProxyHandler({'http': '127.0.0.1:1080'})
opener = urllib2.build_opener(proxy,)
response = opener.open("http://www.google.com/")
print response.read()
运行时需要把socketsocks关闭系统代理。