一、新建Maven项目
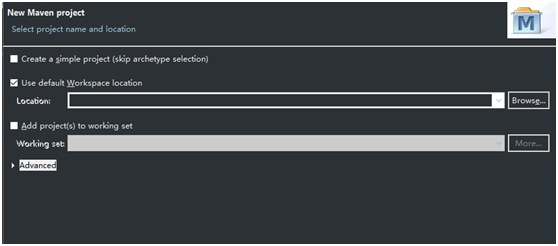

com.guo.shiro
ShiroWeb
二、在pom中添加依赖
1.添加servlet支持
<!-- https://mvnrepository.com/artifact/javax.servlet/javax.servlet-api -->
<dependency>
    <groupId>javax.servlet</groupId>
    <artifactId>javax.servlet-api</artifactId>
    <version>3.1.0</version>
</dependency>
2.添加 jsp支持
<dependency>
       <groupId>javax.servlet.jsp</groupId>
       <artifactId>javax.servlet.jsp-api</artifactId>
       <version>2.3.1</version>
   </dependency>
3.添加jstl支持
<!-- https://mvnrepository.com/artifact/javax.servlet/jstl -->
<dependency>
    <groupId>javax.servlet</groupId>
    <artifactId>jstl</artifactId>
    <version>1.2</version>
</dependency>
4.添加log4j支持
<!-- https://mvnrepository.com/artifact/log4j/log4j -->
<dependency>
    <groupId>log4j</groupId>
    <artifactId>log4j</artifactId>
    <version>1.2.17</version>
</dependency>
5.common-logging支持
<!-- https://mvnrepository.com/artifact/commons-logging/commons-logging -->
<dependency>
    <groupId>commons-logging</groupId>
    <artifactId>commons-logging</artifactId>
    <version>1.2</version>
</dependency>
暂时就引入这么多
三、将文件目录修改一下
将jdk1.8换成jre1.7
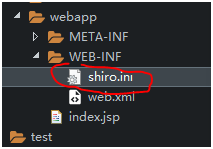
新建个动态web项目,将其META-INF 和web.xml 拷贝到Maven webapp目录下,然后将以前的index.jsp删除再手动新建个index.jsp,完成后截图如下

在index.jsp中 敲入HelloWorld,启动tomcat运行正确,说明环境搭建的没问题。
四、配置 (看文档)
1. 在web.xml添加监听
<listener>
    <listener-class>org.apache.shiro.web.env.EnvironmentLoaderListener</listener-class>
</listener>
  <!--过滤-->
<filter>
    <filter-name>ShiroFilter</filter-name>
    <filter-class>org.apache.shiro.web.servlet.ShiroFilter</filter-class>
</filter>
<!--配置要过滤哪些-->
<filter-mapping>
    <filter-name>ShiroFilter</filter-name>
    <url-pattern>/*</url-pattern>
</filter-mapping>
2.在pom.xml添加shiro核心包
<!-- https://mvnrepository.com/artifact/org.apache.shiro/shiro-core -->
<dependency>
    <groupId>org.apache.shiro</groupId>
    <artifactId>shiro-core</artifactId>
    <version>1.4.0</version>
</dependency>
3. 在pom.xml添加shiro web支持
<!-- https://mvnrepository.com/artifact/org.apache.shiro/shiro-web -->
<dependency>
    <groupId>org.apache.shiro</groupId>
    <artifactId>shiro-web</artifactId>
    <version>1.4.0</version>
</dependency>
4. 在pom.xml添加slf4j支持
<!-- https://mvnrepository.com/artifact/org.slf4j/slf4j-api -->
<dependency>
    <groupId>org.slf4j</groupId>
    <artifactId>slf4j-api</artifactId>
    <version>1.7.25</version>
</dependency>
5.将log4j.properties赋值到resource文件夹下
五、在WEB-INF下新建shiro.ini配置文件
六、过滤器中添加shiro支持(旧版本需添加,新版本不用)
在web.xml中的<filter>标签中 添加如下代码
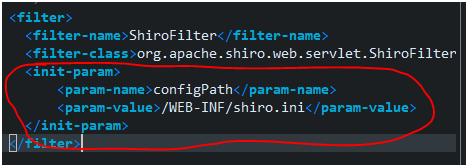
每次请求都经过shiro过滤
七、shiro添加如下
  [main]
authc.loginUrl=/login   表示身份验证没有通过,跳转到/login请求
八、在src/main/java下新建com.guo.servlet LoginServlet.java
 package com.guo.servlet;
import java.io.IOException;
import javax.servlet.ServletException;
import javax.servlet.http.HttpServlet;
import javax.servlet.http.HttpServletRequest;
import javax.servlet.http.HttpServletResponse;
public class LoginServlet extends HttpServlet {
         private static final long serialVersionUID = 1L;
         @Override
         protected void doGet(HttpServletRequest req, HttpServletResponse resp) throws ServletException, IOException {
                   System.out.println("login doget");
                   req.getRequestDispatcher("login.jsp").forward(req, resp);
         }
         @Override
         protected void doPost(HttpServletRequest req, HttpServletResponse resp) throws ServletException, IOException {
         }
}
九、servlet传统web.xml配置
<servlet>
      <servlet-name>loginServlet</servlet-name>
      <servlet-class>com.guo.servlet.LoginServlet</servlet-class>
  </servlet>

  <servlet-mapping>
      <servlet-name>loginServlet</servlet-name>
      <url-pattern>/login</url-pattern>
</servlet-mapping>
十、新建个login.jsp 来测试
<%@ page language="java" contentType="text/html; charset=UTF-8"
    pageEncoding="UTF-8"%>
<!DOCTYPE html PUBLIC "-//W3C//DTD HTML 4.01 Transitional//EN" "http://www.w3.org/TR/html4/loose.dtd">
<html>
<head>
<meta http-equiv="Content-Type" content="text/html; charset=UTF-8">
<title>Insert title here</title>
</head>
<body>
<form action="login" method="post">
    userName:<input type="text" name="userName"/><br/>
    password:<input type="password" name="password"/><br/>
    <input type="submit" value="登录"/>
</form>
</body>
</html>
流程:因为过滤器每次servlet请求都经过authc.loginUrl=/login处理,如果用户没有登录, 跳转到web.xml,根据servlet映射跳转到LoginServlet.java,执行doGet方法转发到login.jsp
为什么不从ini直接跳转到jsp呢? 后面再解释
十一、再在shiro.ini继续添加 用户 角色权限
[users]
Robin=123456,admin
jack=123,teacher
Tom=234
Li=345
[roles]
admin=user:*    //表示admin角色拥有 user用户的所有权限
teacher=student:*
[urls]
/login=anon     // anon不受限
/admin=authc   //表示admin这个角色是authc受限的
测试一下 输入http://localhost:8080/ShiroWeb/admin 输出结果

因为admin受限 所以请求admin,过滤器shiro给它拦截了要进行身份认证,偏偏用户没有登入,通过[main]
authc.loginUrl=/login 这个配置,请求到/login,跳转到了LoginServlet.java的doGet,进而转发到了login.jsp,所以显示上图的界面。
十二、登录实现
上节没有用户登录,所以请求admin受限 跳转到了登录页面,这节我们实现登录功能
1.在LoginServlet doPost方法中添加如下代码
System.out.println("login dopost");
                   String userName=req.getParameter("userName");
                   String password=req.getParameter("password");
                   Subject subject=SecurityUtils.getSubject();
                   UsernamePasswordToken token=new UsernamePasswordToken(userName, password);
                   try{
                            subject.login(token);
                            resp.sendRedirect("success.jsp");
                   }catch(Exception e){
                            e.printStackTrace();
                            req.setAttribute("errorInfo", "用户名或者密码错误");
                            req.getRequestDispatcher("login.jsp").forward(req, resp);
                   }
这里只做模拟,所以获取的密码是ini的[users]中的用户名密码,实际项目中是要从数据库users表中获取,以后章节会讲。
2.登录成功跳转success.jsp界面,这里添加个success.jsp
<%@ page language="java" contentType="text/html; charset=UTF-8"
    pageEncoding="UTF-8"%>
<!DOCTYPE html PUBLIC "-//W3C//DTD HTML 4.01 Transitional//EN" "http://www.w3.org/TR/html4/loose.dtd">
<html>
<head>
<meta http-equiv="Content-Type" content="text/html; charset=UTF-8">
<title>Insert title here</title>
</head>
<body>
欢迎你!
</body>
</html>
3.请求admin,要新建个AdminServlet
package com.guo.servlet;

import java.io.IOException;

import javax.servlet.ServletException;
import javax.servlet.http.HttpServlet;
import javax.servlet.http.HttpServletRequest;
import javax.servlet.http.HttpServletResponse;

import org.apache.shiro.SecurityUtils;
import org.apache.shiro.authc.UsernamePasswordToken;
import org.apache.shiro.subject.Subject;


public class AdminServlet extends HttpServlet{

         /**
          *
          */
         private static final long serialVersionUID = 1L;

         @Override
         protected void doGet(HttpServletRequest req, HttpServletResponse resp) throws ServletException, IOException {
                   System.out.println("admin do get");
         }

         @Override
         protected void doPost(HttpServletRequest req, HttpServletResponse resp) throws ServletException, IOException {
                   System.out.println("admin do post");
         }

}
4.相应的web.xml也要配置AdminServlet
        <servlet>
                   <servlet-name>adminServlet</servlet-name>
                   <servlet-class>com.guo.servlet.AdminServlet</servlet-class>
         </servlet>

         <servlet-mapping>
                   <servlet-name>adminServlet</servlet-name>
                   <url-pattern>/admin</url-pattern>
         </servlet-mapping>
5.测试
输入http://localhost:8080/ShiroWeb/admin 是不能请求的,跳回登录页面
输入http://localhost:8080/ShiroWeb/login 跳到登录页面
输入用户名密码登录跳转到success.jsp成功后
再次输入http://localhost:8080/ShiroWeb/admin 这时后台显示
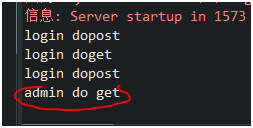 表示请求成功
十三、上述admin是身份认证,这节要讲的是角色roles认证和权限认证,(权限认证,加上身份认证和角色认证总共三个)
1.上节讲了下表中前两个过滤名字,每个过滤名字都对应一个类
比如[main]
authc.loginUrl=/login中的loginUrl就是org.apache.shiro.web.filter.authc.AnonymousFilter类中的一个参数属性。

2.在[main]中添加角色认证
roles.unauthorizedUrl=/unauthorized.jsp
表示 角色认证未通过请求url指定到/unauthorized.jsp,当然也可以像authc.loginUrl=/login这样指定到servlet请求,跳转到servlet处理。这里简单点写个jsp,角色验证未通过跳转到unauthorized.jsp。
3.新建个unauthorized.jsp
<%@ page language="java" contentType="text/html; charset=UTF-8"
    pageEncoding="UTF-8"%>
<!DOCTYPE html PUBLIC "-//W3C//DTD HTML 4.01 Transitional//EN" "http://www.w3.org/TR/html4/loose.dtd">
<html>
<head>
<meta http-equiv="Content-Type" content="text/html; charset=UTF-8">
<title>Insert title here</title>
</head>
<body>
认证未通过,或者权限不足
</body>
</html>
4.在ini的[main]中添加
perms.unauthorizedUrl=/unauthorized.jsp 权限认证,和上节 角色认证一样都跳转到unauthorized.jsp
5.在ini的[url]中添加如下链接
/student=roles[teacher] 表示请求studend这个url 需要角色roles teacher的登录,换句话说,就是角色teacher的用户名密码登录成功后,才能请求student
6.测试
因为[main]
authc.loginUrl=/login
roles.unauthorizedUrl=/unauthorized.jsp
perms.unauthorizedUrl=/unauthorized.jsp 这是有顺序的,先进行身份认证才能进行角色认证
输入http://localhost:8080/ShiroWeb/login 先进行身份认证,输入Tom 234,因为Tom没有teacher角色。所以再次输入http://localhost:8080/ShiroWeb/student 请求student时

返回login请求,重新输入有teacher角色的用户 jack,登录成功后,再次输入http://localhost:8080/ShiroWeb/student,因为我们什么都没写,所以报404错误 表示student请求成功。
7.再来写一个权限认证,在[url]下添加
/teacher=perms["user:create"] 表示要有["user:create"]这个权限,才能请求teacher
测试 先身份验证http://localhost:8080/ShiroWeb/login 输入jack 123,没有 ["user:create"]这个权限的用户 ,当请求http://localhost:8080/ShiroWeb/teacher 时显示
再次测试,输入有权限的用户名密码Robin 123456,登录成功后请求http://localhost:8080/ShiroWeb/teacher,显示404错误就说明请求teacher成功了。