项目中用到Elasticsearch提供索引搜索服务,由于项目要部署在docker中,希望elasticsearch也能够搭建在docker环境中,经过学习,成功在docker环境中完成elasticsearch集群环境的搭建。
特将搭建过程记录如下:
参考文章:https://segmentfault.com/a/1190000018606414
本文将使用Docker容器(使用docker-compose编排)快速部署Elasticsearch 集群,可用于开发环境(单机多实例)或生产环境部署。
注意,6.x版本已经不能通过 -Epath.config 参数去指定配置文件的加载位置,文档说明:
For the archive distributions, the config directory location defaults to
$ES_HOME/config. The location of the >config directorycan be changedvia theES_PATH_CONFenvironment variable as follows:ES_PATH_CONF=/path/to/my/config ./bin/elasticsearch
Alternatively, you can export the ES_PATH_CONF environment variable via the command line or via your shell profile.
即交给环境变量 ES_PATH_CONF 来设定了(官方文档),单机部署多个实例且不使用容器的同学多多注意。
一、环境准备
安装docker及docker-compose
docker的安装请参考博文:https://www.cnblogs.com/guoxiangyue/p/9829221.html
docker-compose安装:
官网安装步骤地址:https://docs.docker.com/compose/install/#install-compose
1、执行以下命令安装最新版本:
# curl -L "https://github.com/docker/compose/releases/download/1.23.2/docker-compose-$(uname -s)-$(uname -m)" -o /usr/local/bin/docker-compose
要安装指定版本, 替换1.23.2为你选择的版本
2、赋权Apply executable permissions to the binary
# chmod +x /usr/local/bin/docker-compose
3、Optionally, install command completion for the bash and zsh shell.
4、测试(查看版本)Test the installation
# docker-compose --version

打印出docker-compose的版本信息,即为安装成功。
二、创建数据目录
在本机中创建Elasticsearch数据的存储目录
1、创建数据/日志目录/插件目录 这里我们部署2个节点
#  mkdir /usr/local/elasticsearch/data/{es01,es02} -p
#  mkdir /usr/local/elasticsearch/logs/{es01,es02} -p
#  mkdir /usr/local/elasticsearch/plugins/{es01,es02} -p
2、赋予目录读写权限
读写权限这里,为了方便,直接赋予 777
#  cd  /usr/local/elasticsearch
#  chmod 0777 data/* -R && chmod 0777 logs/* -R && chmod 0777 plugins/* -R
3、为防止jvm报错,进行以下配置
#  echo vm.max_map_count=262144 >> /etc/sysctl.conf
#  sysctl -p
三、docker-compse 编排服务
1、准备编排文件
#  cd  /usr/local/elasticsearch
#  vim docker-compose.yml
2、编排文件参数说明
依赖镜像:(这里使用6.8.6版本)
image: docker.elastic.co/elasticsearch/elasticsearch:6.8.6
集群名称:
- cluster.name=knowledgebase
节点名称、是否可作为主节点、是否存储数据
- node.name=node01
- node.master=true
- node.data=true
锁定进程的物理内存地址避免交换(swapped)来提高性能
- bootstrap.memory_lock=true
开启cors以便使用Head插件
- http.cors.enabled=true
- http.cors.allow-origin=*
JVM内存大小配置
- "ES_JAVA_OPTS=-Xms512m -Xmx512m"
由于5.2.1后的版本是不支持多播的,所以需要手动指定集群各节点的tcp数据交互地址,用于集群的节点发现和failover,默认缺省9300端口,如设定了其它端口需另行指定,这里我们直接借助容器通信,也可以将各节点的9300映射至宿主机,通过网络端口通信。
- "discovery.zen.ping.unicast.hosts=elasticsearch_n0,elasticsearch_n1,elasticsearch_n2"
- "discovery.zen.minimum_master_nodes=2"
完整的docker-compose.yml文件:
version: '2'
services:
  es01:
    image: docker.elastic.co/elasticsearch/elasticsearch:6.8.6
    container_name: es01
    privileged: true
    restart: always
    environment:
      - cluster.name=knowledgebase
      - node.name=node01
      - node.master=true
      - node.data=true
      - bootstrap.memory_lock=true
      - http.cors.enabled=true
      - http.cors.allow-origin=*
      - "ES_JAVA_OPTS=-Xms512m -Xmx512m"
      - "discovery.zen.ping.unicast.hosts=es01,es02"
      - "discovery.zen.minimum_master_nodes=1"
    ulimits:
      memlock:
        soft: -1
        hard: -1
    volumes:
      - ./data/es01:/usr/share/elasticsearch/data
      - ./config/es01/elasticsearch.yml:/usr/share/elasticsearch/config/elasticsearch.yml
      - ./logs/es01:/usr/share/elasticsearch/logs
      - ./plugins/es01:/usr/share/elasticsearch/plugins
    ports:
      - 9200:9200
      - 9300:9300
  es02:
    image: docker.elastic.co/elasticsearch/elasticsearch:6.8.6
    container_name: es02
    privileged: true
    restart: always
    environment:
      - cluster.name=knowledgebase
      - node.name=node02
      - node.master=true
      - node.data=true
      - bootstrap.memory_lock=true
      - http.cors.enabled=true
      - http.cors.allow-origin=*
      - "ES_JAVA_OPTS=-Xms512m -Xmx512m"
      - "discovery.zen.ping.unicast.hosts=es01,es02"
      - "discovery.zen.minimum_master_nodes=1"
    ulimits:
      memlock:
        soft: -1
        hard: -1
    volumes:
      - ./data/es02:/usr/share/elasticsearch/data
      - ./config/es02/elasticsearch.yml:/usr/share/elasticsearch/config/elasticsearch.yml
      - ./logs/es02:/usr/share/elasticsearch/logs
      - ./plugins/es02:/usr/share/elasticsearch/plugins
    depends_on:
      - es01
    ports:
      - 9201:9200
      - 9301:9300
Elasticsearch集群启动的时候,需要主节点启动成功后,其他节点才能启动并join到集群里,因此在配置文件里要保证这一点,官网Control startup and shutdown order in Compose这篇文章介绍了如何控制启动和关闭顺序的问题,我这里是通过配置restart: always和depends_on来控制顺序的,这个办法比较简单。
这里我们分别为node1/node2开放宿主机的9200/9201作为http服务端口,各实例的tcp数据传输用默认的9300通过容器管理通信。
3、分别编写每个节点的elasticsearch.yml配置
编写node1的配置文件
#  cd /usr/local/elasticsearch/config/es01
#  vim elasticsearch.yml
在elasticsearch.yml中写入以下内容:
cluster.name: knowledgebase
node.name: es01
node.master: true
node.data: false
path.data: /usr/share/elasticsearch/data
path.logs: /usr/share/elasticsearch/logs
bootstrap.memory_lock: true
network.host: 0.0.0.0
http.port: 9200
transport.tcp.port: 9300
discovery.zen.ping.unicast.hosts: ["es01", "es02"]

http.cors.enabled: true
http.cors.allow-origin: "*"

xpack.security.enabled: false
xpack.security.transport.ssl.enabled: false
编写node2的配置文件
#  cd /usr/local/elasticsearch/config/es02
#  vim  elasticsearch.yml
在elasticsearch.yml中写入以下内容:
cluster.name: knowledgebase
node.name: es02
node.master: true
node.data: false
path.data: /usr/share/elasticsearch/data
path.logs: /usr/share/elasticsearch/logs
bootstrap.memory_lock: true
network.host: 0.0.0.0
http.port: 9200
transport.tcp.port: 9300
discovery.zen.ping.unicast.hosts: ["es01", "es02"]

http.cors.enabled: true
http.cors.allow-origin: "*"

xpack.security.enabled: false
xpack.security.transport.ssl.enabled: false
四、创建并启动服务
#  cd /usr/local/elasticsearch
#  docker-compose up -d
执行完成后,查看容器状态
# docker-compose ps

查看集群状态
访问 http://192.168.56.32:9200/_cat/nodes?v 即可查看集群状态:192.168.56.32 是我的服务地址

PS. 使用Head插件观察:
Head插件的安装请查看博文:https://www.cnblogs.com/guoxiangyue/p/10037928.html
安装完成后,访问Elasticsearch集群:
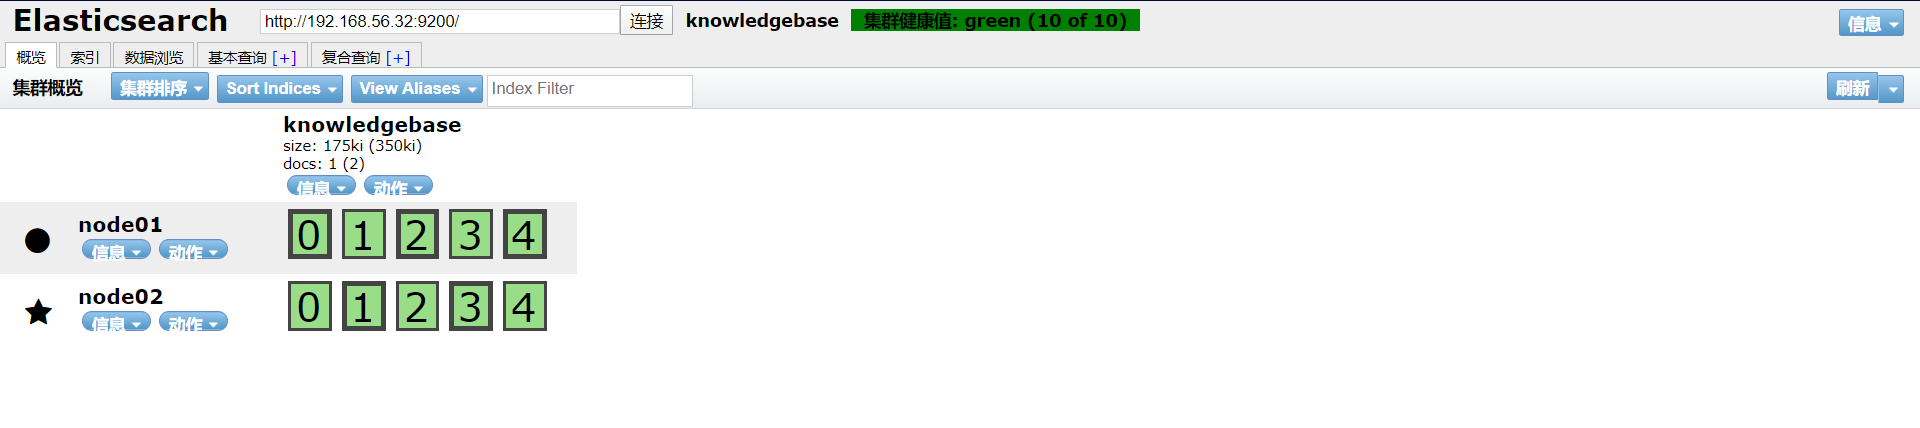
成功访问!至此docker环境下搭建Elasticsearch集群配置完成。