最近需要将Python人证对比模型移植安卓端.安卓端需要使用openCV简单的人像提取处理.在配置openCV前首先需要配置NDK环境.
NDK的介绍(http://www.cnblogs.com/leaven/archive/2010/05/27/1744855.html)
JNI与NDK详细介绍: http://blog.csdn.net/carson_ho/article/details/73250163
一 NDK在Ubuntu的配置
参考: http://blog.csdn.net/jq_ak47/article/details/52349189
二 NDK在IntelliJ IDEA中的配置
参考: http://blog.csdn.net/yipatshi/article/details/54585049
三 NDK开发实例
参考: http://www.cnblogs.com/xiaoxiaoqingyi/p/6524165.html
在main/java下创建创建一个NDKUtils.Java类:
public class NDKUtils {
    public native String invokeCmethod();

    static {
        System.loadLibrary("NDKUtils");
    }
}
右键选择 External Tools ---> javah
会在app目录下生成jni目录和目录内一个com_**_demo_utils_NDKUtils.h文件
复制.h 文件修改后缀名为 .c (该文件就是C 语言的实现文件)
修改com_**_demo_utils_NDKUtils.c内容:
JNIEXPORT jstring JNICALL Java_com_**_demo_utils_NDKUtils_jniInit
  (JNIEnv *env, jobject obj){
                       return (*env)->NewStringUTF(env,"NDK 获取Native 字符串");
                       }
将jni目录拷贝至main/java目录下.
在jni目录下新建Android.mk和Application.mk:
Android.mk:
LOCAL_PATH:=$(call my-dir)
include $(CLEAR_VARS)
LOCAL_MODULE := NDKUtils
LOCAL_SRC_FILES := com_**_demo_utils_NDKUtils.c
include $(BUILD_SHARED_LIBRARY)
Application.mk:
APP_PLATFORM := android-23
APP_ABI := armeabi
在IntelliJ IDEA的命令窗口(Terminal)执行:
cd app/src/main/
继续输入:
ndk-build
该命令是编译C文件,然后生成 .so 文件,生成在 appsrcmainlibs 目录下。
完成后会在main目录下生成libs和obj两个目录.
配置build.gradle 文件,在android {}中添加:
    sourceSets{
        main{
            jni.srcDirs = [] // disable automatic ndk-build call, which ignore our Android.mk
            jniLibs.srcDir 'src/main/libs'
        }
    }
在MainActivity中使用:
package com.***.opencvdemo;

import android.support.v7.app.AppCompatActivity;
import android.os.Bundle;
import android.widget.TextView;

public class MainOpencvActivity extends AppCompatActivity {

    @Override
    protected void onCreate(Bundle savedInstanceState) {
        super.onCreate(savedInstanceState);
        setContentView(R.layout.activity_main_opencv);

        NDKUtils ndk = new NDKUtils();

        TextView text = (TextView) findViewById(R.id.tv);
        text.setText(ndk.invokeCmethod());

    }
}
运行程序会输出字符串: NDK 获取Native 字符串
以上测试成功.
四 Android+openCV
首先下载openCV包,地址:http://opencv.org/
最新的3.3,我下载了3.2
opencv配置参考: http://www.cnblogs.com/xiaoxiaoqingyi/p/6676096.html
NDKUtils.Java代码:
package com.***.opencvdemo;

public class NDKUtils {
    //public native String invokeCmethod();
    public static native int[] gray(int[] buf, int w, int h);
    static {
        //System.loadLibrary("NDKUtils");
        System.loadLibrary("OpenCV");//导入生成的链接库文件

    }
}
右键选择 External Tools ---> javah 同上,把生成目录jni拷贝到 src/main.
复制.h文件 修改后缀名为 .cpp (.c文件编译会报错) 参考: https://stackoverflow.com/questions/30219754/ubuntu-no-such-file-or-directory-include-string
编辑 com_***_opencvdemo_NDKUtils.cpp:
#include <jni.h>
#include <string>
#include <iostream>
#include <stdio.h>
#include <stdlib.h>
#include <opencv2/opencv.hpp>

using namespace cv;

extern "C"

  JNIEXPORT jintArray JNICALL Java_com_***_opencvdemo_NDKUtils_gray(
          JNIEnv *env, jclass obj, jintArray buf, int w, int h) {

      jint *cbuf;
      cbuf = env->GetIntArrayElements(buf, JNI_FALSE );
      if (cbuf == NULL) {
          return 0;
      }

      Mat imgData(h, w, CV_8UC4, (unsigned char *) cbuf);

      uchar* ptr = imgData.ptr(0);
      for(int i = 0; i < w*h; i ++){
          //计算公式:Y(亮度) = 0.299*R + 0.587*G + 0.114*B
          //对于一个int四字节,其彩色值存储方式为:BGRA
          int grayScale = (int)(ptr[4*i+2]*0.299 + ptr[4*i+1]*0.587 + ptr[4*i+0]*0.114);
          ptr[4*i+1] = grayScale;
          ptr[4*i+2] = grayScale;
          ptr[4*i+0] = grayScale;
      }

      int size = w * h;
      jintArray result = env->NewIntArray(size);
      env->SetIntArrayRegion(result, 0, size, cbuf);
      env->ReleaseIntArrayElements(buf, cbuf, 0);
      return result;
  }
把 sdk/native 目录 拷贝到 项目的 jni 目录下.
修改:
Android.mk:
LOCAL_PATH:=$(call my-dir)

include $(CLEAR_VARS)
OpenCV_INSTALL_MODULES := on
OpenCV_CAMERA_MODULES := off
OPENCV_LIB_TYPE :=STATIC

ifeq ("$(wildcard $(OPENCV_MK_PATH))","")
include $(LOCAL_PATH)/native/jni/OpenCV.mk
else
include $(OPENCV_MK_PATH)
endif
LOCAL_MODULE := OpenCV
LOCAL_SRC_FILES := com_***_opencvdemo_NDKUtils.cpp
LOCAL_LDLIBS +=  -lm -llog
include $(BUILD_SHARED_LIBRARY)
Application.mk:
APP_STL := gnustl_static
APP_CPPFLAGS := -frtti -fexceptions
APP_PLATFORM := android-9
ndk-build:生成.so文件
MainOpencvActivity:
package com.***.opencvdemo;

import android.graphics.Bitmap;
import android.graphics.drawable.BitmapDrawable;
import android.support.v7.app.AppCompatActivity;
import android.os.Bundle;
import android.widget.ImageView;

public class MainOpencvActivity extends AppCompatActivity {

    @Override
    protected void onCreate(Bundle savedInstanceState) {
        super.onCreate(savedInstanceState);
        setContentView(R.layout.activity_main_opencv);

        Bitmap bitmap = ((BitmapDrawable) getResources().getDrawable(
                R.mipmap.aaa)).getBitmap();
        int w = bitmap.getWidth(), h = bitmap.getHeight();
        int[] pix = new int[w * h];
        bitmap.getPixels(pix, 0, w, 0, 0, w, h);
        int [] resultPixes= NDKUtils.gray(pix,w,h);
        Bitmap result = Bitmap.createBitmap(w,h, Bitmap.Config.RGB_565);
        result.setPixels(resultPixes, 0, w, 0, 0,w, h);

        ImageView img = (ImageView)findViewById(R.id.image2);
        img.setImageBitmap(result);

    }
}
附加 activity_main_opencv.xml:
<?xml version="1.0" encoding="utf-8"?>
<android.support.constraint.ConstraintLayout
        xmlns:android="http://schemas.android.com/apk/res/android"
        xmlns:tools="http://schemas.android.com/tools"
        xmlns:app="http://schemas.android.com/apk/res-auto"
        android:layout_width="match_parent"
        android:layout_height="match_parent"
        tools:context="com.***.opencvdemo.MainOpencvActivity">

    <TextView
            android:layout_width="wrap_content"
            android:layout_height="wrap_content"
            android:text="调用openCV灰度化"
            app:layout_constraintBottom_toBottomOf="parent"
            app:layout_constraintLeft_toLeftOf="parent"
            app:layout_constraintRight_toRightOf="parent"
            app:layout_constraintTop_toTopOf="parent"/>

    <TextView
            android:layout_width="wrap_content"
            android:layout_height="wrap_content"
            android:id="@+id/tv"
            android:text="原图"
            app:layout_constraintBottom_toBottomOf="parent"
            app:layout_constraintLeft_toLeftOf="parent"
            app:layout_constraintRight_toRightOf="parent"
            app:layout_constraintTop_toTopOf="parent"
            app:layout_constraintVertical_bias="0.1"/>

    <ImageView
            android:scaleType="centerInside"
            android:layout_width="0dp"
            android:layout_height="180dp"
            android:id="@+id/image1"
            android:src="@mipmap/aaa"
            android:layout_margin="10dp"
            app:layout_constraintBottom_toBottomOf="parent"
            app:layout_constraintLeft_toLeftOf="parent"
            app:layout_constraintRight_toRightOf="parent"
            app:layout_constraintTop_toTopOf="parent"
            app:layout_constraintVertical_bias="0.2" />

    <ImageView
            android:scaleType="centerInside"
            android:layout_width="0dp"
            android:layout_height="180dp"
            android:id="@+id/image2"
            android:src="@mipmap/aaa"
            android:layout_margin="10dp"
            app:layout_constraintBottom_toBottomOf="parent"
            app:layout_constraintLeft_toLeftOf="parent"
            app:layout_constraintRight_toRightOf="parent"
            app:layout_constraintTop_toTopOf="parent"
            app:layout_constraintVertical_bias="0.8" />

</android.support.constraint.ConstraintLayout>
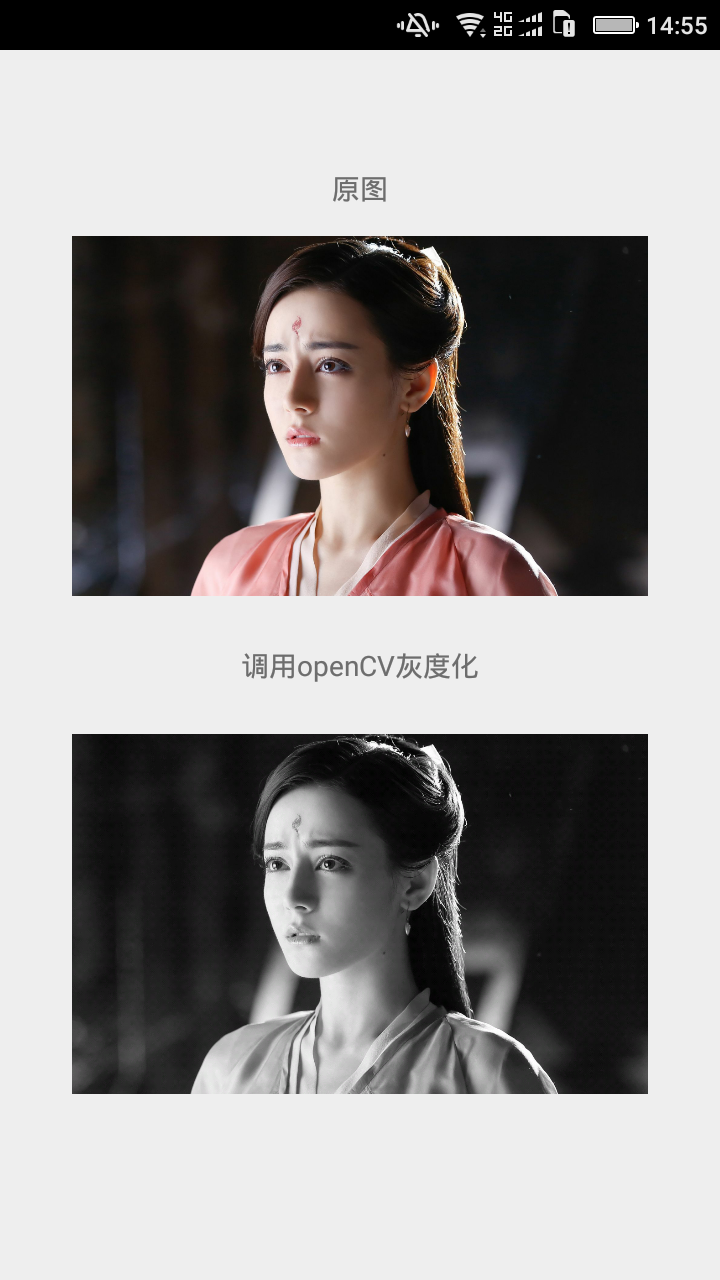
运行效果: