一.下拉刷新效果
假设页面为index文件,那么代码如下:
index.json:
{
  "enablePullDownRefresh": true
}
index.js:
//下拉刷新
  onPullDownRefresh: function () {
    wx.showNavigationBarLoading() //在标题栏中显示加载

    //模拟加载
    setTimeout(function () {
      // complete
      wx.hideNavigationBarLoading() //完成停止加载
      wx.stopPullDownRefresh() //停止下拉刷新
    }, 1000);
  },
效果图附上:

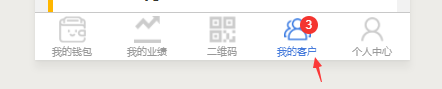
二.导航栏红色圈圈数字标记效果
假设页面为red文件,那么代码如下:
red.js:
onShow: function () {
    wx.setTabBarBadge({
      index: 3,//导航栏的索引值
      text: '3'//你所需要添加的数字
    })
}
效果图附上:
三.保存图片到相册效果
假设页面为picture文件,那么代码如下:
picture.js
wx.saveImageToPhotosAlbum({
      filePath: "http://.......",
      success: function(res) {
        wx.showToast({
          title: '图片保存成功',
          icon: 'success',
          duration: 2000 //持续的时间
        })
      },
      fail: function (err) {
        console.log(err)
        wx.showToast({
          title: '图片保存失败',
          icon: 'none',
          duration: 2000//持续的时间
        })
      }
    })
效果图如下:

四.粘贴板效果
假设页面为copy文件,那么代码如下:
copy.js:
//粘贴板操作
    wx.setClipboardData({
      data: "需要复制的内容",
      success: function(res) {
        wx.showToast({
          title: '地址已复制到粘贴板',
          icon: 'none',
          duration: 2000
        })
      }
    })
效果图如下:

五.拨打电话效果
假设页面为photo文件,那么代码如下:
photo.js:
//点击事件
playphoto: function() {
     wx.makePhoneCall({
          phoneNumber: '110' //仅为示例
     })
}
效果图没有:

六.扫码效果
假设页面为code文件,那么代码如下:
code.js:
// 允许从相机和相册扫码
wx.scanCode({
  success (res) {
    console.log(res)
  }
})

// 只允许从相机扫码
wx.scanCode({
  onlyFromCamera: true,
  success (res) {
    console.log(res)
  }
})
效果图如图微信扫码
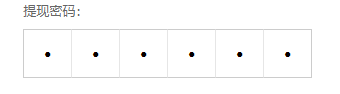
七.微信支付密码六个框效果
假设页面为pay文件,那么代码如下:
pay.wxml:
<form bindsubmit="formSubmit">
                <view class='content'>
                  <block wx:for="{{Length}}" wx:key="item">
                    <input class='iptbox' value="{{Value.length>=index+1?Value[index]:''}}" disabled password='{{ispassword}}' catchtap='Tap'></input>
                  </block>
                </view>
                <input name="password" password="{{true}}" class='ipt' maxlength="{{Length}}" focus="{{isFocus}}" bindinput="Focus"></input>
                <view>
                  <button class="btn-area" formType="submit" bindtap='submit'>提交</button>
                </view>
</form>
pay.js:
Focus(e) {
    var that = this;
    console.log("输入"+e.detail.value);
    var inputValue = e.detail.value;
    that.setData({
      Value: inputValue,
    })
  },
  Tap() {
    var that = this;
    that.setData({
      isFocus: true,
    })
  },
  formSubmit(e) {
    console.log("form表单" +e.detail.value.password);
  },
效果图如下:

八.总结
博主遇到的大致就只有这些了,其实还有很多,微信有很多需要我们发掘的地方,下次博主再遇到一些特殊的,将会一一补充进来,希望对大家有用,觉得学到了的,麻烦点个关注或推荐,博主经常更新,欢迎常来逛逛!