1. 安装nginx
1.1 通过yum安装
[root@yaoxiang ~]# yum install nginx
1.2 查看nginx的版本
[root@yaoxiang ~]# nginx -v
nginx version: nginx/1.12.2
nginx的版本必须高于1.9.0,因为从1.9开始nginx就支持对TCP的转发,而到了1.9.13时,UDP转发也支持了。
1.3 查看默认编译参数
[root@yaoxiang ~]# nginx -V
nginx version: nginx/1.12.2
built by gcc 4.8.5 20150623 (Red Hat 4.8.5-16) (GCC)
built with OpenSSL 1.0.2k-fips  26 Jan 2017
TLS SNI support enabled
configure arguments: --prefix=/usr/share/nginx --sbin-path=/usr/sbin/nginx --modules-path=/usr/lib64/nginx/modules --conf-path=/etc/nginx/nginx.conf --error-log-path=/var/log/nginx/error.log --http-log-path=/var/log/nginx/access.log --http-client-body-temp-path=/var/lib/nginx/tmp/client_body --http-proxy-temp-path=/var/lib/nginx/tmp/proxy --http-fastcgi-temp-path=/var/lib/nginx/tmp/fastcgi --http-uwsgi-temp-path=/var/lib/nginx/tmp/uwsgi --http-scgi-temp-path=/var/lib/nginx/tmp/scgi --pid-path=/run/nginx.pid --lock-path=/run/lock/subsys/nginx --user=nginx --group=nginx --with-file-aio --with-ipv6 --with-http_auth_request_module --with-http_ssl_module --with-http_v2_module --with-http_realip_module --with-http_addition_module --with-http_xslt_module=dynamic --with-http_image_filter_module=dynamic --with-http_geoip_module=dynamic --with-http_sub_module --with-http_dav_module --with-http_flv_module --with-http_mp4_module --with-http_gunzip_module --with-http_gzip_static_module --with-http_random_index_module --with-http_secure_link_module --with-http_degradation_module --with-http_slice_module --with-http_stub_status_module --with-http_perl_module=dynamic --with-mail=dynamic --with-mail_ssl_module --with-pcre --with-pcre-jit --with-stream=dynamic --with-stream_ssl_module --with-google_perftools_module --with-debug --with-cc-opt='-O2 -g -pipe -Wall -Wp,-D_FORTIFY_SOURCE=2 -fexceptions -fstack-protector-strong --param=ssp-buffer-size=4 -grecord-gcc-switches -specs=/usr/lib/rpm/redhat/redhat-hardened-cc1 -m64 -mtune=generic' --with-ld-opt='-Wl,-z,relro -specs=/usr/lib/rpm/redhat/redhat-hardened-ld -Wl,-E'
nginx实现TCP/UDP的转发依靠的是Stream模块,查看默认编译参数中是含有--with-stream参数,可以看到上面的参数里含有--with-stream=dynamic,说明已动态加载Stream模块
2. 修改nginx配置
2.1 增加stream块
[root@yaoxiang ~]# vim /etc/nginx/nginx.conf
...
events {
    worker_connections 1024;
}
stream {
#定义被代理的服务器组upstream 组名
upstream dns {
 # zone   dns 64k;
  server 172.27.9.204:4005;#代理的服务器地址
  server 172.27.9.204:4006 weight=5;#weight 权重,默认都是1
  server 172.27.9.204:4007 max_fails=3 fail_timeout=30s;#max_fails - NGINX将服务器标记为不可用的连续失败尝试次数。fail_timeout为NGINX认为服务器不可用的时间长度。
  server 172.27.9.204:4008 backup;#backup 备用服务器,其他服务器不可用时,才会收到转发
}

server {
  listen 4000 udp;#监听udp4000端口,如不加udp则默认监听tcp

  proxy_responses 1;#1代表需要回应,并将回应转发;0代表不需要回应

  proxy_timeout 20s;#回应超时时间,超时未回应暂停转发

  proxy_pass dns;#代理服务器、服务器组

  proxy_buffer_size 512k;#响应缓冲区大小,如果后端发送的响应头过大可以尝试增加此缓冲。

}

}
http {
...}
2.2 负载均衡策略
-
round-robin(轮询)——默认,Nginx使用轮询算法负载均衡通信。因为是默认方法,所以没有round-robin指令;只创建upstream配置块在顶级stream上下文并像之前步骤添加server指令。
-
last_conn(最少连接)——Nginx选择当前活跃连接数较少的服务器。
-
least_tome——Nginx选择最低平均延迟和最少活跃连接的服务器。最低活跃连接基于least_time指令的以下参数计算:
-
connect——连接upstream服务器的时间
-
first_byte——接收第一个数据字节的时间
-
last_byte——从服务器接收完整响应的时间
-
-
hash——Nginx基于用户定义键选择服务器,例如,源IP地址
例子:采用最少连接和hash负载均衡策略
upstream dns {
 last_conn;#最少连接策略
 server 172.27.9.204:4005;#代理的服务器地址
 server 172.27.9.204:4006;
 server 172.27.9.204:4007;
 server 172.27.9.204:4008;
 }
upstream stream_backend {

    hash $remote_addr;

    server backend1.example.com:12345;

    server backend2.example.com:12345;

    server backend3.example.com:12346;

}
3.启动nginx
[root@yaoxiang nginx]# sudo nginx
nginx: [emerg] bind() to 0.0.0.0:80 failed (98: Address already in use)
出现以上提示说明端口被占用,修改nginx.conf里http模块中的端口号
4. 测试
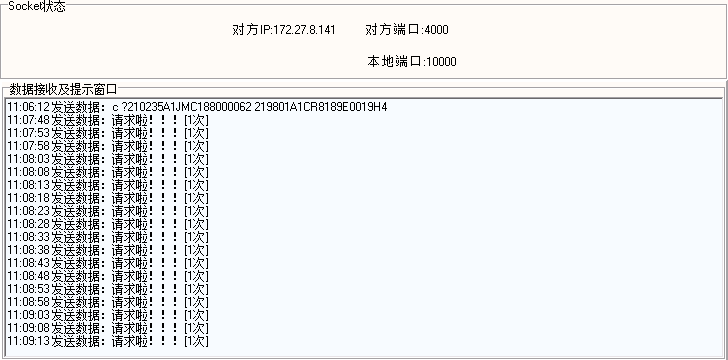
4.1 向nginx主机发送报文
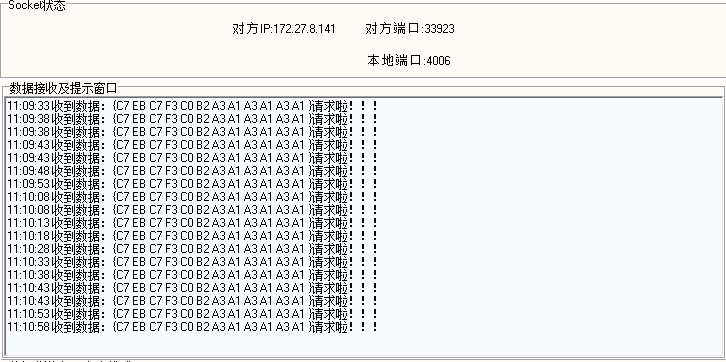
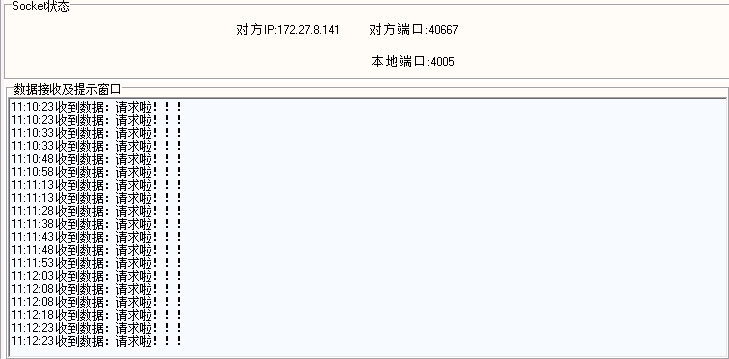
4.2 可以看到代理服务器组主机的不同端口都接收到了
4006端口
4005端口
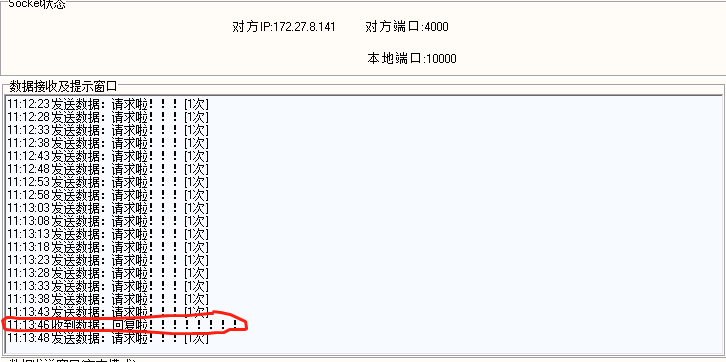
4.3 接收端代理服务器向nginx主机回复消息
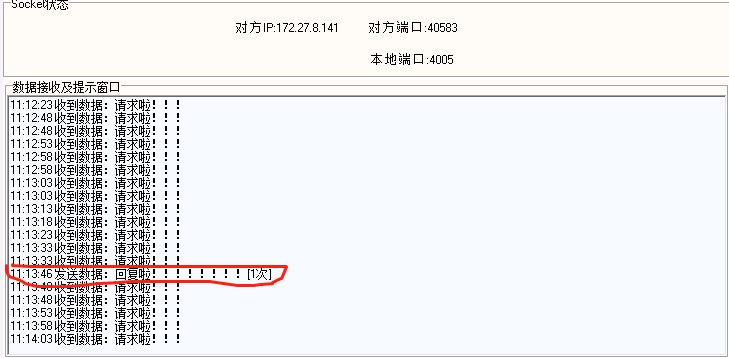
4.4 可以看到发送端收到了回复