在netty中有我们一般有两种发送数据的方式,即使用ChannelHandlerContext或者Channel的write方法,这两种方法都能发送数据,那么其有什么区别呢。这儿引用netty文档中的解释如下。

这个通俗一点的解释呢可以说ChannelHandlerContext执行写入方法时只会执行当前handler之前的OutboundHandler。而Channel则会执行所有的OutboundHandler。下面我们可以通过例子来理解
1.建立一个netty服务端
public class Server {

    public static void main(String[] args) throws InterruptedException {
        ServerBootstrap serverBootstrap = new ServerBootstrap();
        ChannelFuture channelFuture = serverBootstrap.group(new NioEventLoopGroup(1) , new NioEventLoopGroup(10))
                .channel(NioServerSocketChannel.class)
                .handler(new LoggingHandler())
                .childHandler(new InitialierHandler()) //即步骤2中的类
                .bind(8080)
                .sync();
        channelFuture.channel().closeFuture().sync();
    }
}
2.创建ChannelInitializer
在这个类中我们添加了四个处理器 这儿注意顺序 (具体类在步骤3)
public class InitialierHandler extends ChannelInitializer<SocketChannel> {
    @Override
    protected void initChannel(SocketChannel socketChannel) throws Exception {
        socketChannel.pipeline().addLast(new RequestChannelHandler1());
        socketChannel.pipeline().addLast(new ResponseChannelHandler1());
        socketChannel.pipeline().addLast(new RequestChannelHandler2());
        socketChannel.pipeline().addLast(new ResponseChannelHandler2());
    }
}
顺序分别为 in1 →out1→ in2 →out2 这儿用图来增加理解 (netty会自动区分in或是out类型)

3. 分别创建2个 int Handler 2个out handler
RequestChannelHandler1(注意后面业务会修改方法具体内容)
public class RequestChannelHandler1 extends ChannelInboundHandlerAdapter {
    @Override
    public void channelRead(ChannelHandlerContext ctx , Object msg) throws Exception {
        System.out.println("请求处理器1");
        super.channelRead(ctx,msg);
    }
}
RequestChannelHandler2(注意后面业务会修改方法具体内容)
public class RequestChannelHandler2 extends ChannelInboundHandlerAdapter {
    @Override
    public void channelRead(ChannelHandlerContext ctx , Object msg) throws Exception {
        System.out.println("请求处理器2");super.channelRead(ctx,msg);
    }
}
ResponseChannelHandler1
public class ResponseChannelHandler1 extends ChannelOutboundHandlerAdapter {
    @Override
    public void write(ChannelHandlerContext ctx , Object msg , ChannelPromise promise) throws Exception {
        System.out.println("响应处理器1");
        ByteBuf byteMsg = (ByteBuf) msg;
        byteMsg.writeBytes("增加请求1的内容".getBytes(Charset.forName("gb2312")));
        super.write(ctx,msg,promise);
    }
}
ResponseChannelHandler2
public class ResponseChannelHandler2 extends ChannelOutboundHandlerAdapter {
    @Override
    public void write(ChannelHandlerContext ctx , Object msg , ChannelPromise promise) throws Exception {
        System.out.println("响应处理器2");
        ByteBuf byteMsg = (ByteBuf) msg;
        byteMsg.writeBytes("增加请求2的内容".getBytes(Charset.forName("gb2312")));
        super.write(ctx,msg,promise);
    }
}
4.检验
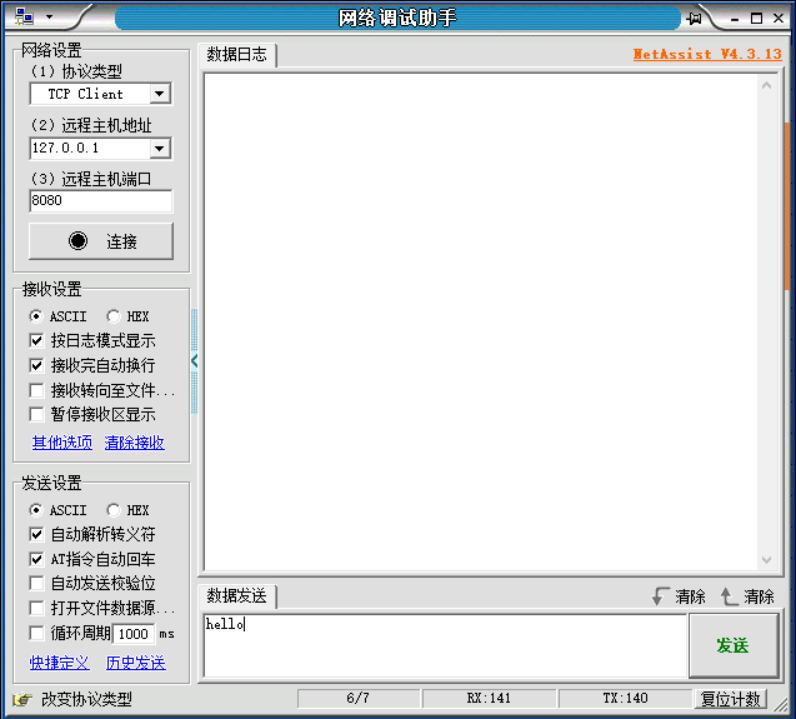
可以使用调试器来调试请求,例如网络调试助手

我们一共创建了四个Handler 且类型以及顺序为 in1 → out1 →in2 →out2 ,按照netty的定义。可实验如下
4.1 in1中调用ChannelHandlerContext(只会调用其之前的handler)的方法则out1,out2都不会调用,in1中调用Channel(所有都会调用)的方法则会out1,out2都调用
我们将in1 read方法内容改为如下
@Override
    public void channelRead(ChannelHandlerContext ctx , Object msg) throws Exception {
        System.out.println("请求处理器1");
        ctx.writeAndFlush(Unpooled.copiedBuffer("hello word1" , Charset.forName("gb2312")));
        super.channelRead(ctx,msg);
    }
in2 read方法改为如下
 public void channelRead(ChannelHandlerContext ctx , Object msg) throws Exception {
        System.out.println("请求处理器2");
        super.channelRead(ctx,msg);
    }
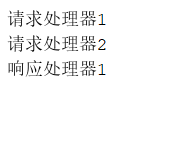
使用网络调试后发现控制台打印如下 并没有经过out1和out2

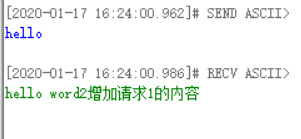
而网络调试控制台打印如下 ,我们只接收到了hello word原始内容

然后将in1中的ChannelHandlerContext改为Channel后则控制台和网络调试控制台打印分别如下
public void channelRead(ChannelHandlerContext ctx , Object msg) throws Exception {
        System.out.println("请求处理器1");
        ctx.channel().writeAndFlush(Unpooled.copiedBuffer("hello word1" , Charset.forName("gb2312")));
        super.channelRead(ctx,msg);
    }


控制台中两次响应的处理已经打印,并且返回内容已经被分别加上out处理器中的信息
4.2 in2中调用ChannelHandlerContext(只会调用其之前的handler)的方法则out1会调用,out2不会调用,in2中调用Channel(所有都会调用)的方法则会out1,out2都调用
这儿我们将in1 与in2稍作修改
in1 read方法改为如下
public void channelRead(ChannelHandlerContext ctx , Object msg) throws Exception {
        System.out.println("请求处理器1");
        super.channelRead(ctx,msg);
    }
in2 read方法改为如下
    public void channelRead(ChannelHandlerContext ctx , Object msg) throws Exception {
        System.out.println("请求处理器2");
        ctx.writeAndFlush(Unpooled.copiedBuffer("hello word2" , Charset.forName("gb2312")));
        super.channelRead(ctx,msg);
    }
使用网络调试工具访问后控制台和网络调试控制台分别打印如下


可以发现idea控制台只打印了out1 网络调试控制台也只增加了请求1的内容。
至于将ChannelHandlerContext则和4.1中效果一致,out1和out2都会执行,这儿就不在写了
5.源码简略分析
通过上面的案例应该就很明确这两者的差别了,我们这儿可以简要看下源码步骤。
5.1 pipeline.addLast()
上面我们通过socketChannel.pipeline().addLast 添加了我们的Handler,顾名思义就是将我们的处理器添加到末尾(netty内部使用一个链表存储)。我们可以看下其源码
public final ChannelPipeline addLast(EventExecutorGroup executor, ChannelHandler... handlers) {
        ObjectUtil.checkNotNull(handlers, "handlers");

        for (ChannelHandler h: handlers) {
            if (h == null) {
                break;
            }
            addLast(executor, null, h);
        }
        return this;
    }
上面循环是可能传入多个,根据这个可以得知,我们传入多个的时候也是根据参数顺序来的。我们可以接着看addLast(executor,null,h)方法。
public final ChannelPipeline addLast(EventExecutorGroup group, String name, ChannelHandler handler) {
        final AbstractChannelHandlerContext newCtx;
        synchronized (this) {
            checkMultiplicity(handler);

            newCtx = newContext(group, filterName(name, handler), handler);

            addLast0(newCtx);
            ....
        }
        callHandlerAdded0(newCtx);
        return this;
    }
这儿就是将我们传入的handler包装了成了一个AbstractChannelHandlerContext (数据类型是一个双向链表),然后执行了addLast0方法。
private void addLast0(AbstractChannelHandlerContext newCtx) {
        AbstractChannelHandlerContext prev = tail.prev;
        newCtx.prev = prev;
        newCtx.next = tail;
        prev.next = newCtx;
        tail.prev = newCtx;
    }
这儿的代码就比较简单,就是将当前的handler插入到tail节点与倒数第二个节点之间。这样当前的handler就成为了倒数第二个节点,以后每加一个handler都会成为新的倒数第2个节点。这儿注意tail节点由一个专门的TailContext维护。
既然处理器已经添加,我们就可以看下其如何工作的吧
5.2 ChannelHandlerContext.writeAndFlush方法
private void write(Object msg, boolean flush, ChannelPromise promise) {
        //注意flush为true
        ........

        final AbstractChannelHandlerContext next = findContextOutbound(flush ?
                (MASK_WRITE | MASK_FLUSH) : MASK_WRITE);
        final Object m = pipeline.touch(msg, next);
        EventExecutor executor = next.executor();
        if (executor.inEventLoop()) {
            if (flush) {
                next.invokeWriteAndFlush(m, promise);
            } else {
                next.invokeWrite(m, promise);
            }
        } else {
           .......
        }
    }
这里面的逻辑可以发现主要分为两步,第一步找到下一个执行的handler,第二部执行这个handler的write方法。我们主要看下查找next的方法,即这个findContextOutbound()方法,点进去看下
 private AbstractChannelHandlerContext findContextOutbound(int mask) {
        AbstractChannelHandlerContext ctx = this;
        do {
            ctx = ctx.prev;
        } while ((ctx.executionMask & mask) == 0);
        return ctx;
    }
可以看到 这里面会不断的查找当前handlerContext的前一个满足写操作的handler。找到满足的后就会返回。
比如我们现在有个handler链是这样的head→in1→out1→in2→out2→in3→out3→tail 。我们在in3中写入,那in3的pre就是out2,如果满足条件就会将out2返回,不满足就会→in2→out1→in1这样不断往前查找
5.3Channel.writeAndFlush方法
这个方法根据上面的结论会从handler链的tail开始调用,其实这个也很好理解,上面的ChannelHanderContext本身就是链表结构,所以支持查找当前的节点的前后节点。而这个Channel并不是链表结构,所以只能从tail开始一个一个找了。
  @Override
    public final ChannelFuture writeAndFlush(Object msg) {
        return tail.writeAndFlush(msg);
    }
这里面调用的tail的write方法,我们看下tail
final AbstractChannelHandlerContext tail;
这就是5.2中我们说的tail节点,那最终会调用的也就是5.2中的write方法,只是这个this从当前的channelContextHandler变为了tail