一、传统编程使用代理解决目标类增强问题
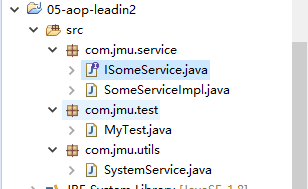


1 //主业务接口
2 public interface ISomeService {
3     // 目标方法
4     void doFirst();
5     // 目标方法
6     void doSecond();
7 }
 1 //目标类
 2 public class SomeServiceImpl implements ISomeService {
 3
 4     @Override
 5     public void doFirst() {
 6         // TODO Auto-generated method stub
 7         System.out.println("执行doFirst()方法");
 8     }
 9
10     @Override
11     public void doSecond() {
12         System.out.println("执行doSecond()方法");
13     }
14
15 }
 1 public class SystemService {
 2
 3     public  static void doLog() {
 4         System.out.println("执行日志代码");
 5     }
 6
 7     public  static void doTx() {
 8         System.out.println("执行事务代码");
 9     }
10 }
 1 import java.lang.reflect.InvocationHandler;
 2 import java.lang.reflect.Method;
 3 import java.lang.reflect.Proxy;
 4
 5 import com.jmu.service.ISomeService;
 6 import com.jmu.service.SomeServiceImpl;
 7 import com.jmu.utils.SystemService;
 8
 9 public class MyTest {
10
11     public static void main(String[] args) {
12         // TODO Auto-generated method stub
13         ISomeService target=new SomeServiceImpl();
14         ISomeService service=(ISomeService) Proxy.newProxyInstance(target.getClass().getClassLoader(),target.getClass().getInterfaces(), new InvocationHandler() {
15             //织入weaving:将系统级服务切入到主业务逻辑中
16             @Override
17             public Object invoke(Object proxy, Method method, Object[] args) throws Throwable {
18                 // TODO Auto-generated method stub
19                 SystemService.doTx();
20                 //执行目标方法
21                 Object result = method.invoke(target, args);
22                 SystemService.doLog();
23                 return result;
24             }
25         });
26        service.doFirst();
27        System.out.println("---------------");
28        service.doSecond();
29     }
30
31 }
二、AOP术语
(1)切面(Aspect)
切面泛指业务逻辑。常用的切面有通知(Advice)和顾问(Advisor)。实际上就是对主业务逻辑的一种增强。
(2)织入(Weaving)
织入指将切面代码插入到目标对象的过程。
(3)连接点(JoinPoint)
连接点指可以被切面织入的方法。通常业务接口中的方法均为连接点。
(4)切入点(Pointcut)
切入点指切面具体织入的方法。被标记为final的方法不能作为连接点和切点。
(5)目标对象(Target)
目标对象指将被增强的对象。
(6)通知(Advice)
通知是切面的一实现。,可以完成简单织入功能。通知定义了增强代码切入带目标代码的时间点,是目标方法执行之前执行,还是之后执行等。通知类型不同,切入的时间不同。
切入点定义切入的位置,通知定义切入的时间。
(7)顾问(Advisor)
顾问是切面的另一种实现,能够将通知以更为复杂的方式织入到目标对象中,是将通知包装为更复杂切面的装置器。
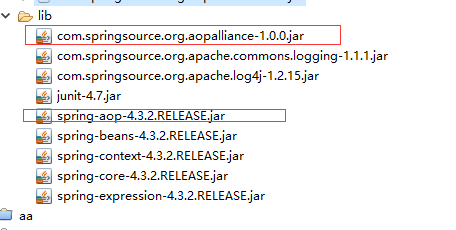
三、AOP编程环境的搭建
四、通知(Advice)的详解
(1)前置通知(MethodBeforeAdvice)
 1 import java.lang.reflect.Method;
 2
 3 import org.springframework.aop.MethodBeforeAdvice;
 4
 5 //前置通知
 6 public class MyMethodBeforeAdvice implements MethodBeforeAdvice {
 7     // 当前方method:法在目标方法执行之前执行
 8     // method:目标方法
 9     // args:目标方法的参数列表
10     // target:目标对象
11     @Override
12     public void before(Method method, Object[] args, Object target) throws Throwable {
13         // TODO Auto-generated method stub
14         // 对于目标方法增强的代码写于此
15         System.out.println("执行前置通知方法");
16     }
17
18 }
 1 <!-- 注册目标对象 -->
 2     <bean id="someService" class="com.jmu.aop01.SomeServiceImpl" />
 3
 4     <!-- 注册切面:通知 -->
 5     <bean id="myAdvice" class="com.jmu.aop01.MyMethodBeforeAdvice" />
 6
 7     <!-- 生成代理对象 -->
 8     <bean id="serviceProxy" class="org.springframework.aop.framework.ProxyFactoryBean">
 9         <!-- <property name="targetName" ref="someService"></property> -->
10         <!-- 指定目标对象 -->
11         <property name="target" ref="someService"></property>
12         <!-- 指定切面 -->
13         <property name="interceptorNames" value="myAdvice"></property>
14     </bean>
 1 import org.junit.Test;
 2 import org.springframework.context.ApplicationContext;
 3 import org.springframework.context.support.ClassPathXmlApplicationContext;
 4
 5 public class MyTest {
 6
 7     @Test
 8     public void test01() {
 9         //创建容器对象
10         String resource = "com/jmu/aop01/applicationContext.xml";
11         ApplicationContext ac=new ClassPathXmlApplicationContext(resource);
12         ISomeService service=(ISomeService) ac.getBean("serviceProxy");
13         service.doFirst();
14         System.out.println("----------");
15         service.doSecond();
16     }
17
18 }
输出:
执行前置通知方法
执行doFirst()方法
----------
执行前置通知方法
执行doSecond()方法
(2)后置通知(AfterReturningAdvice)
后置通知:可以获取到目标方法的返回结果,但无法改变目标方法的结果
1 //主业务接口
2 public interface ISomeService {
3     // 目标方法
4     void doFirst();
5     // 目标方法
6     String doSecond();
7 }
 1 //目标类
 2 public class SomeServiceImpl implements ISomeService {
 3
 4     @Override
 5     public void doFirst() {
 6         // TODO Auto-generated method stub
 7         System.out.println("执行doFirst()方法");
 8     }
 9
10     @Override
11     public String doSecond() {
12         System.out.println("执行doSecond()方法");
13      return "ABCD";
14     }
15
16 }
 1 import java.lang.reflect.Method;
 2 //后置通知:可以获取到目标方法的返回结果,但无法改变目标方法的结果
 3 public class MyAfterReturningAdvice implements org.springframework.aop.AfterReturningAdvice {
 4     // 在目标方法之后执行
 5     // returnValue:目标方法的返回值
 6     @Override
 7     public void afterReturning(Object returnValue, Method method, Object[] args, Object target) throws Throwable {
 8         // TODO Auto-generated method stub
 9         System.out.println("执行后置通知方法 reurnValue= "+returnValue);
10         if (returnValue!=null) {
11             returnValue = ((String) returnValue).toLowerCase();
12             System.out.println("修改过的结果returnValue="+returnValue);
13         }
14     }
15
16 }
 1 <!-- 注册目标对象 -->
 2     <bean id="someService" class="com.jmu.aop02.SomeServiceImpl" />
 3
 4     <!-- 注册切面:通知 -->
 5     <bean id="myAdvice" class="com.jmu.aop02.MyAfterReturningAdvice" />
 6
 7     <!-- 生成代理对象 -->
 8     <bean id="serviceProxy" class="org.springframework.aop.framework.ProxyFactoryBean">
 9         <property name="target" ref="someService"></property>
10         <property name="interceptorNames" value="myAdvice"></property>
11     </bean>
 1 import org.junit.Test;
 2 import org.springframework.context.ApplicationContext;
 3 import org.springframework.context.support.ClassPathXmlApplicationContext;
 4
 5 public class MyTest {
 6
 7     @Test
 8     public void test01() {
 9         //创建容器对象
10         String resource = "com/jmu/aop02/applicationContext.xml";
11         ApplicationContext ac=new ClassPathXmlApplicationContext(resource);
12         ISomeService service=(ISomeService) ac.getBean("serviceProxy");
13         service.doFirst();
14         System.out.println("----------");
15         String result = service.doSecond();
16         System.out.println(result);
17     }
18
19 }
输出:
执行doFirst()方法
执行后置通知方法 reurnValue= null
----------
执行doSecond()方法
执行后置通知方法 reurnValue= ABCD
修改过的结果returnValue=abcd
(3)环绕通知(MethodInterceptor)
环绕通知:可以修改目标方法的返回结果
 1 import org.aopalliance.intercept.MethodInterceptor;
 2 import org.aopalliance.intercept.MethodInvocation;
 3 //环绕通知:可以修改目标方法的返回结果
 4 public class MyMethodIntercepter implements MethodInterceptor {
 5
 6     @Override
 7     public Object invoke(MethodInvocation invocation) throws Throwable {
 8         // TODO Auto-generated method stub
 9         System.out.println("执行环绕通知:目标方法执行之前");
10         //执行目标方法
11         Object result = invocation.proceed();
12         System.out.println("执行环绕通知:目标方法执行之后");
13         if (result!=null) {
14             result=((String)result).toLowerCase();
15         }
16         return result;
17     }
18
19 }
输出:
1 执行环绕通知:目标方法执行之前
2 执行doFirst()方法
3 执行环绕通知:目标方法执行之后
4 ----------
5 执行环绕通知:目标方法执行之前
6 执行doSecond()方法
7 执行环绕通知:目标方法执行之后
8 abcd
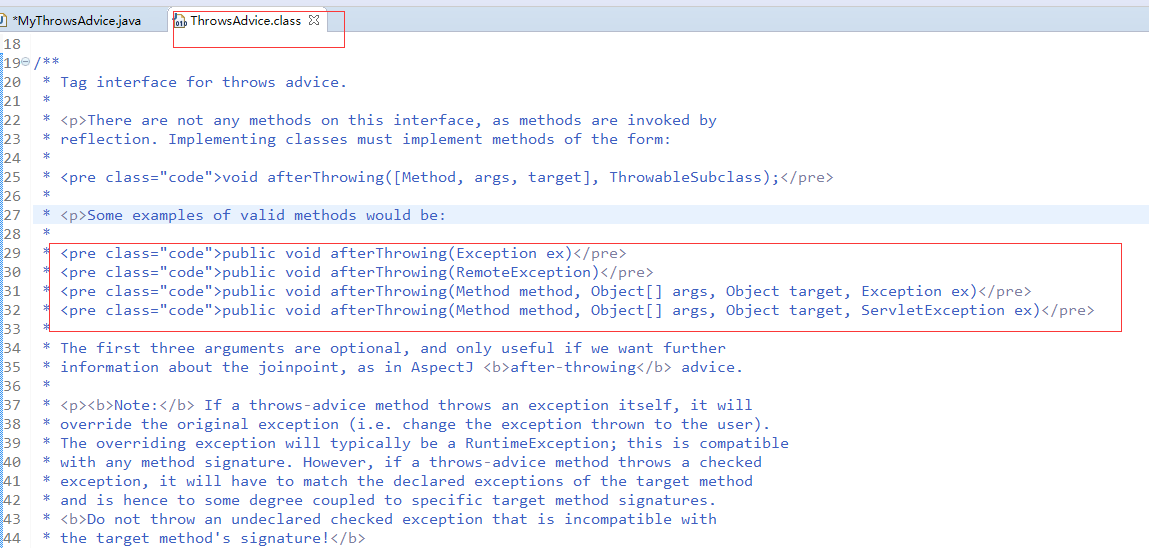
(4)异常通知(ThrowsAdvice)
a、
异常分2种:
- 运行时异常,不进行处理,也可以通过编译。若一个类继承自RunTimeException,则该异常就是运行时异常
- 编译时异常(受查异常 Checked Exception),不进行处理,不能通过编译。若一个类继承自Exception,则该异常就是受查异常

1 import org.springframework.aop.ThrowsAdvice;
2
3 public class MyThrowsAdvice implements ThrowsAdvice {
4
5     //当目标方法抛出与指定类型的异常具有is-a关系的异常时,执行当前方法
6     public void afterThrowing(Exception ex) {
7         System.out.println("执行异常通知方法");
8     }
9 }
1 @Override
2     public void doFirst() {
3         // TODO Auto-generated method stub
4         System.out.println("执行doFirst()方法"+3/0);
5     }
输出:
执行异常通知方法
b、捕获自定义异常
 1 public class UserException extends Exception {
 2
 3     public UserException() {
 4         super();
 5         // TODO Auto-generated constructor stub
 6     }
 7
 8     public UserException(String message) {
 9         super(message);
10         // TODO Auto-generated constructor stub
11     }
12
13 }
 1 public class UsernameException extends UserException {
 2
 3     public UsernameException() {
 4         super();
 5         // TODO Auto-generated constructor stub
 6     }
 7
 8     public UsernameException(String message) {
 9         super(message);
10         // TODO Auto-generated constructor stub
11     }
12
13 }
 1 public class PasswordException extends UserException {
 2
 3     public PasswordException() {
 4         super();
 5         // TODO Auto-generated constructor stub
 6     }
 7
 8     public PasswordException(String message) {
 9         super(message);
10         // TODO Auto-generated constructor stub
11     }
12
13 }
1 //主业务接口
2 public interface ISomeService {
3     // 目标方法
4     boolean login(String username,String password)throws UserException;
5
6 }
 1 public class SomeServiceImpl implements ISomeService {
 2
 3     @Override
 4     public boolean login(String username, String password) throws UserException {
 5         // TODO Auto-generated method stub
 6         if(!"Jane".equals(username)){
 7              throw new UsernameException("用户名输入错误!");
 8         }
 9         if(!"aaa".equals(password)){
10              throw new PasswordException("密码输入错误!");
11         }
12     /*    double a=3/0;*/
13         return true;
14     }
15
16 }
 1 import org.springframework.aop.ThrowsAdvice;
 2
 3 public class MyThrowsAdvice implements ThrowsAdvice {
 4
 5     // 当目标方法抛出UsernameException异常时,执行当前方法
 6     public void afterThrowing(UsernameException ex) {
 7         System.out.println("发生用户名异常 ex=" + ex.getMessage());
 8     }
 9
10     // 当目标方法抛出PasswordException异常时,执行当前方法
11     public void afterThrowing(PasswordException ex) {
12         System.out.println("发生密码异常 ex=" + ex.getMessage());
13     }
14
15     // 当目标方法抛出其他异常时,执行当前方法
16     public void afterThrowing(Exception ex) {
17         System.out.println("发生异常 ex=" + ex.getMessage());
18     }
19
20 }
 1 import org.junit.Test;
 2 import org.springframework.context.ApplicationContext;
 3 import org.springframework.context.support.ClassPathXmlApplicationContext;
 4
 5 public class MyTest {
 6
 7     @Test
 8     public void test01() throws UserException{
 9         //创建容器对象
10         String resource = "com/jmu/aop05/applicationContext.xml";
11         ApplicationContext ac=new ClassPathXmlApplicationContext(resource);
12         ISomeService service=(ISomeService) ac.getBean("serviceProxy");
13         service.login("gad", "aaa");
14     }
15
16 }
测试:
service.login("gad", "aaa");
输出:
发生用户名异常 ex=用户名输入错误!
在SomeServiceImpl中加入
double a=3/0;
输出:
发生异常 ex=/ by zero
c、异常的两种处理方式
控制台输出异常
 1 public class MyTest {
 2
 3     @Test
 4     public void test01() {
 5         //创建容器对象
 6         String resource = "com/jmu/aop05/applicationContext.xml";
 7         ApplicationContext ac=new ClassPathXmlApplicationContext(resource);
 8         ISomeService service=(ISomeService) ac.getBean("serviceProxy");
 9         try {
10             service.login("Jane", "111");
11         } catch (UserException e) {
12             // TODO Auto-generated catch block
13             e.printStackTrace();
14         }
15     }
16
17 }
虚拟机不通过
 1 import org.junit.Test;
 2 import org.springframework.context.ApplicationContext;
 3 import org.springframework.context.support.ClassPathXmlApplicationContext;
 4
 5 public class MyTest {
 6
 7     @Test
 8     public void test01() throws UserException{
 9         //创建容器对象
10         String resource = "com/jmu/aop05/applicationContext.xml";
11         ApplicationContext ac=new ClassPathXmlApplicationContext(resource);
12         ISomeService service=(ISomeService) ac.getBean("serviceProxy");
13         service.login("Jane", "1111");
14     }
15
16 }
五、为目标方法织入多个通知
 1 <!-- 注册目标对象 -->
 2     <bean id="someService" class="com.jmu.aop06.SomeServiceImpl" />
 3
 4     <!-- 注册切面:通知 -->
 5     <bean id="myBeforeAdvice" class="com.jmu.aop06.MyMethodBeforeAdvice" />
 6     <bean id="myAfterAdvice" class="com.jmu.aop06.MyAfterReturningAdvice" />
 7
 8     <!-- 生成代理对象 -->
 9     <bean id="serviceProxy" class="org.springframework.aop.framework.ProxyFactoryBean">
10         <property name="target" ref="someService"></property>
11         <property name="interceptorNames" value="myBeforeAdvice,myAfterAdvice"></property>
12
13         <!-- <property name="interceptorNames">
14             <array>
15                 <value>myBeforeAdvice</value>
16                 <value>myAfterAdvice</value>
17             </array>
18         </property> -->
19     </bean>
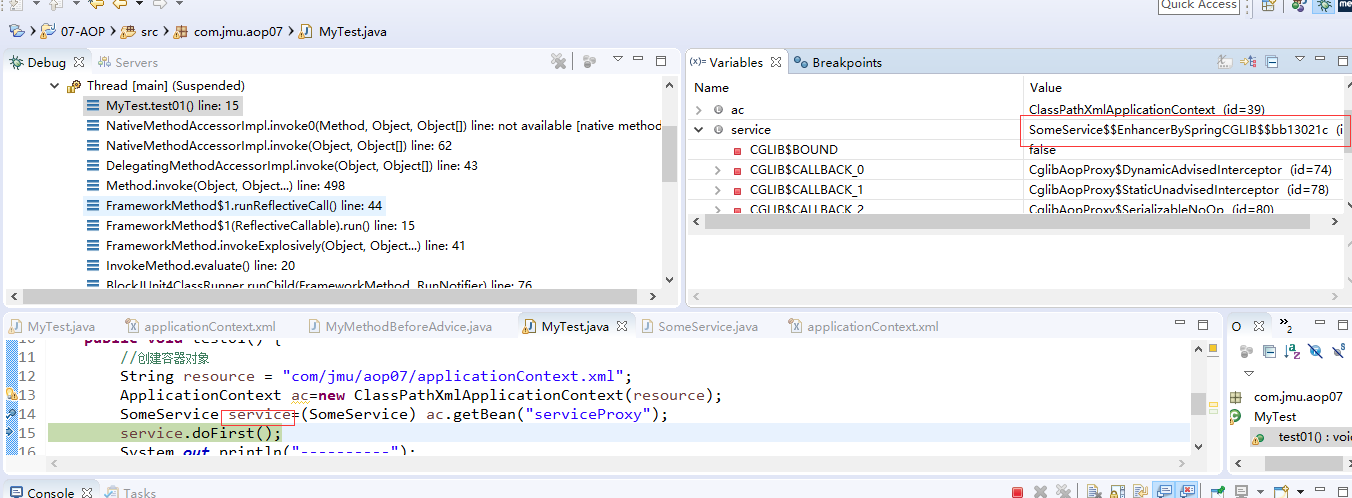
六、无接口使用CGLIB代理
之前
改
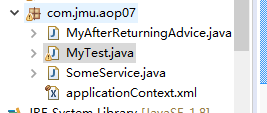
 1 //目标类
 2 public class SomeService {
 3
 4     public void doFirst() {
 5         // TODO Auto-generated method stub
 6         System.out.println("执行doFirst()方法");
 7     }
 8
 9     public String doSecond() {
10         System.out.println("执行doSecond()方法");
11         return "ABCD";
12     }
13
14 }
 1 <!-- 注册目标对象 -->
 2     <bean id="someService" class="com.jmu.aop07.SomeService" />
 3
 4     <!-- 注册切面:通知 -->
 5     <bean id="myAdvice" class="com.jmu.aop07.MyAfterReturningAdvice" />
 6
 7     <!-- 生成代理对象 -->
 8     <bean id="serviceProxy" class="org.springframework.aop.framework.ProxyFactoryBean">
 9         <property name="target" ref="someService"></property>
10         <property name="interceptorNames" value="myAdvice"></property>
11     </bean>
 1 import org.junit.Test;
 2 import org.springframework.context.ApplicationContext;
 3 import org.springframework.context.support.ClassPathXmlApplicationContext;
 4
 5 public class MyTest {
 6
 7     @Test
 8     public void test01() {
 9         //创建容器对象
10         String resource = "com/jmu/aop07/applicationContext.xml";
11         ApplicationContext ac=new ClassPathXmlApplicationContext(resource);
12         SomeService service=(SomeService) ac.getBean("serviceProxy");
13         service.doFirst();
14         System.out.println("----------");
15         String result = service.doSecond();
16         System.out.println(result);
17     }
18
19 }
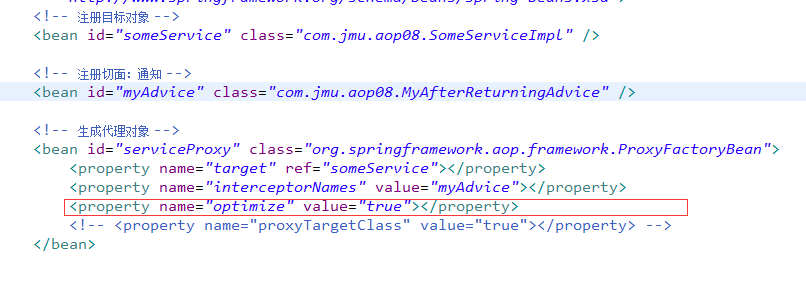
七、有接口(也可以)使用CGLIB
方法一:

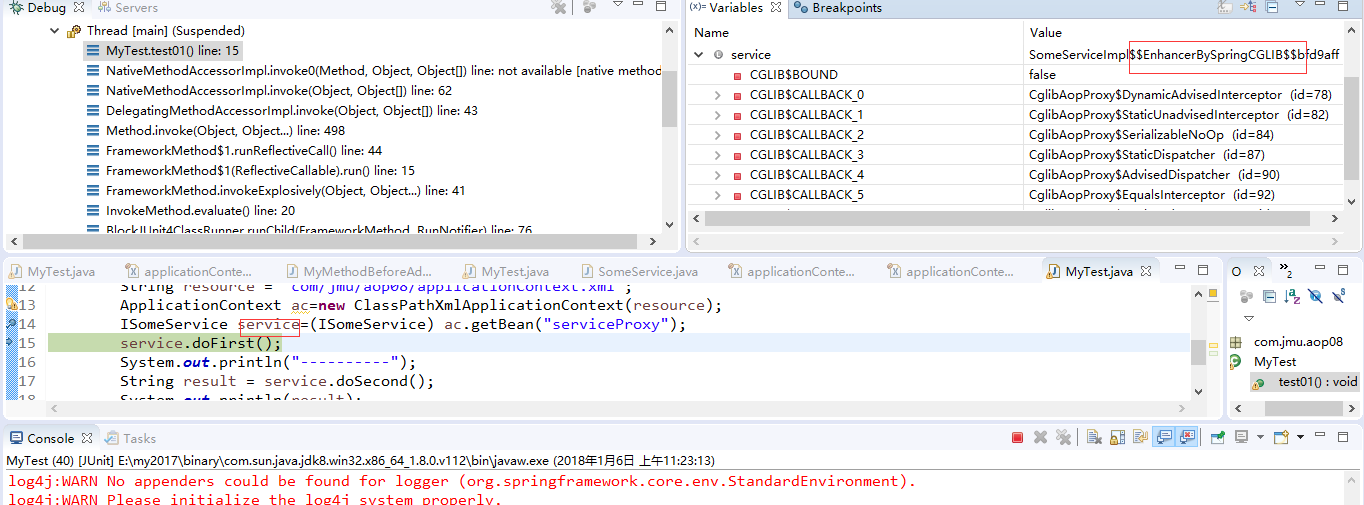
方法二:
八、顾问 Advisor
通知是Spring提供的一种切面,只能将切面织入到目标方法的所有方法中。
顾问是Spring提供的另一种切面,其可以完成更为复杂的切面织入功能。
PointAdisor是顾问的一种,可以指定具体的切入点。顾问将通知进行了包装,会根据不同的通知类型,在不同的时间点,将切面织入到不同的切入点。
名称匹配方法切入点顾问
 1 public class SomeServiceImpl implements ISomeService {
 2
 3     @Override
 4     public void doFirst() {
 5         // TODO Auto-generated method stub
 6         System.out.println("执行doFirst()方法");
 7     }
 8
 9     @Override
10     public String doSecond() {
11         System.out.println("执行doSecond()方法");
12      return "ABCD";
13     }
14
15     @Override
16     public void doThird() {
17         // TODO Auto-generated method stub
18         System.out.println("执行doThird()方法");
19     }
20
21
22 }
 1 <!-- 注册目标对象 -->
 2     <bean id="someService" class="com.jmu.aop09.SomeServiceImpl" />
 3
 4     <!-- 注册切面:通知-->
 5     <bean id="myAdvice" class="com.jmu.aop09.MyAfterReturningAdvice" />
 6     <!-- 注册切面:顾问-->
 7     <bean id="myAdvisor" class="org.springframework.aop.support.NameMatchMethodPointcutAdvisor">
 8       <property name="advice" ref="myAdvice"></property>
 9       <!-- 指定切入点 -->
10       <!--   <property name="mappedName" value="doFirst"></property> -->
11        <!-- <property name="mappedNames" value="doFirst,doSecond"></property> -->
12        <property name="mappedNames" value="*ir*"></property>
13     </bean>
14     <bean id="serviceProxy" class="org.springframework.aop.framework.ProxyFactoryBean">
15         <property name="target" ref="someService"></property>
16         <property name="interceptorNames" value="myAdvisor"></property>
17     </bean>
指定切入点:这里匹配的对象是简单方法名
<property name="mappedNames" value="*ir*"></property>
输出:
执行doFirst()方法
执行后置通知方法 reurnValue= null
----------
执行doSecond()方法
----------
执行doThird()方法
执行后置通知方法 reurnValue= null
正则表达式方法切入点顾问
| 运算符 | 名称 | 意义 |
| . | 点号 | 表示任意单个字符 |
| + | 加号 | 表示前一个字符出现一次或多次 |
| * | 星号 | 表示前一个字符出现0次或多次 |
 1 <!-- 注册目标对象 -->
 2     <bean id="someService" class="com.jmu.aop10.SomeServiceImpl" />
 3
 4     <!-- 注册切面:通知-->
 5     <bean id="myAdvice" class="com.jmu.aop10.MyAfterReturningAdvice" />
 6     <!-- 注册切面:顾问-->
 7     <bean id="myAdvisor" class="org.springframework.aop.support.RegexpMethodPointcutAdvisor">
 8       <property name="advice" ref="myAdvice"></property>
 9       <!-- 这里的正则表达式匹配的对象是全限定方法名 -->
10       <!--  <property name="pattern" value=".*doFirst"></property> -->
11       <!-- <property name="patterns" value=".*doFirst,.*doSecond"></property> -->
12       <property name="pattern" value=".*doFirst|.*doSecond"></property><!-- |为p右边的键,表示或 -->
13     </bean>
14     <bean id="serviceProxy" class="org.springframework.aop.framework.ProxyFactoryBean">
15         <property name="target" ref="someService"></property>
16         <property name="interceptorNames" value="myAdvisor"></property>
17     </bean>
这里正则表达式匹配的对象是全限定名
<property name="pattern" value=".*S.*"></property>
九、自动代理生成器
前面代码中所使用的代理对象,均是由ProxyFactoryBean代理工具类生成的。该代理工具类存在如下缺点:
1、一个代理对象只能代理一个Bean
2、在客户类中获取Bean时。使用的是代理类id,而非我们定义的模目标对象Bea的id。
Spring对此提供了自动代理生成器,常用的为以下2种:
默认advisor自动代理器
    <!-- 注册自动代理生成器 -->
    <bean class="org.springframework.aop.framework.autoproxy.DefaultAdvisorAutoProxyCreator"></bean>
 1 public class MyTest {
 2
 3     @Test
 4     public void test01() {
 5         // 创建容器对象
 6         String resource = "com/jmu/aop11/applicationContext.xml";
 7         ApplicationContext ac = new ClassPathXmlApplicationContext(resource);
 8         ISomeService service = (ISomeService) ac.getBean("someService");
 9         service.doFirst();
10         System.out.println("----------");
11         service.doSecond();
12         System.out.println("----------");
13         service.doThird();
14
15         System.out.println("--------------");
16
17         ISomeService service2 = (ISomeService) ac.getBean("someService2");
18         service2.doFirst();
19         System.out.println("----------");
20         service2.doSecond();
21         System.out.println("----------");
22         service2.doThird();
23     }
24
25 }
输出:
执行doFirst()方法
执行后置通知方法 reurnValue= null
----------
执行doSecond()方法
----------
执行doThird()方法
执行后置通知方法 reurnValue= null
--------------
执行doFirst()方法
执行后置通知方法 reurnValue= null
----------
执行doSecond()方法
----------
执行doThird()方法
执行后置通知方法 reurnValue= null
DefaultAdvisorAutoProxyCreator缺点:
- 不能选择目标对象
- 不能选择切面类型,切面只能是advisor
- 不能选择advisor,所有advisor均被作文切面织入到目标
Bean名称自动代理生成器
 1 <!-- 注册目标对象 -->
 2     <bean id="someService" class="com.jmu.aop12.SomeServiceImpl" />
 3     <bean id="someService2" class="com.jmu.aop12.SomeServiceImpl" />
 4     <!-- 注册切面:通知-->
 5     <bean id="myAdvice" class="com.jmu.aop12.MyAfterReturningAdvice" />
 6     <!-- 注册切面:顾问-->
 7     <bean id="myAdvisor" class="org.springframework.aop.support.NameMatchMethodPointcutAdvisor">
 8       <property name="advice" ref="myAdvice"></property>
 9        <property name="mappedNames" value="doFirst"></property>
10     </bean>
11     <bean id="myAdvisor2" class="org.springframework.aop.support.NameMatchMethodPointcutAdvisor">
12       <property name="advice" ref="myAdvice"></property>
13        <property name="mappedNames" value="doSecond"></property>
14     </bean>
15
16     <!-- 注册自动代理生成器 -->
17     <bean class="org.springframework.aop.framework.autoproxy.BeanNameAutoProxyCreator">
18        <property name="beanNames" value="someService"></property>
19        <!--  <property name="interceptorNames" value="myAdvice"></property> -->
20         <property name="interceptorNames" value="myAdvisor"></property>
21     </bean>
 1 public class MyTest {
 2
 3     @Test
 4     public void test01() {
 5         // 创建容器对象
 6         String resource = "com/jmu/aop12/applicationContext.xml";
 7         ApplicationContext ac = new ClassPathXmlApplicationContext(resource);
 8         ISomeService service = (ISomeService) ac.getBean("someService");
 9         service.doFirst();
10         System.out.println("----------");
11         service.doSecond();
12         System.out.println("----------");
13         service.doThird();
14
15         System.out.println("--------------");
16
17         ISomeService service2 = (ISomeService) ac.getBean("someService2");
18         service2.doFirst();
19         System.out.println("----------");
20         service2.doSecond();
21         System.out.println("----------");
22         service2.doThird();
23     }
24
25 }
输出:
执行doFirst()方法
执行后置通知方法 reurnValue= null
----------
执行doSecond()方法
----------
执行doThird()方法
--------------
执行doFirst()方法
----------
执行doSecond()方法
----------
执行doThird()方法