[cloud][OVS][sdn] Open vSwitch 初步了解
继之前的内容,安装基于dpdk的ovs
https://docs.openvswitch.org/en/latest/intro/install/dpdk/
摘要:
一 内核设置与版本依赖:
On Linux Distros running kernel version >= 3.0, only IOMMU needs to enabled via the grub cmdline, assuming you are using VFIO. For older kernels,
ensure the kernel is built with UIO, HUGETLBFS, PROC_PAGE_MONITOR, HPET, HPET_MMAP support. If these are not present, it will be necessary to
upgrade your kernel or build a custom kernel with these flags enabled.
步骤:
1. 编译dpdk-17.11.1
编辑 config/common_base 修改 如下:
[root@D128 dpdk-stable-17.11.1]# cat config/common_base |grep SHARE
CONFIG_RTE_BUILD_SHARED_LIB=y
[root@D128 dpdk-stable-17.11.1]# make config T=$RTE_TARGET O=$RTE_TARGET
[root@D128 dpdk-stable-17.11.1]# cd x86_64-native-linuxapp-gcc/
[root@D128 x86_64-native-linuxapp-gcc]# make
2. 安装
[root@D128 dpdk-stable-17.11.1]# make install prefix=/root/BUILD_ovs/
make[1]: Nothing to be done for `pre_install'.
================== Installing /root/BUILD_ovs//
Installation in /root/BUILD_ovs// complete
[root@D128 dpdk-stable-17.11.1]#
3. 加载ld目录
[root@D128 dpdk-stable-17.11.1]# tail -n1 ~/.bash_profile
export LD_LIBRARY_PATH=$HOME/BUILD_ovs/lib
[root@D128 dpdk-stable-17.11.1]# source ~/.bash_profile
[root@D128 dpdk-stable-17.11.1]# ldconfig
[root@D128 dpdk-stable-17.11.1]#
4. 编译ovs
[root@D128 ovs]# ./boot.sh
[root@D128 ovs]# yum install libpcap-devel
[root@D128 ovs]# ./configure --prefix=/root/BUILD_ovs/ --with-dpdk=/root/BUILD_ovs/
[root@D128 ovs]# make
报错了。。。有是版本问题。。。。
lib/netdev-dpdk.c:34:28: fatal error: rte_virtio_net.h: No such file or directory
ovs切到2.9.0
[root@D128 ovs]# git checkout v2.9.0
继续安装:
[root@D128 ovs]# make
[root@D128 ovs]# make install
5. 配置
a 大页(原来还可以这样,用sysctl)
[root@D128 ovs]# cat /sys/kernel/mm/hugepages/hugepages-2048kB/nr_hugepages
0
[root@D128 ovs]# sysctl -w vm.nr_hugepages=256
vm.nr_hugepages = 256
[root@D128 ovs]# cat /sys/kernel/mm/hugepages/hugepages-2048kB/nr_hugepages
256
[root@D128 ovs]#
b 挂载大页(已经挂上了)
[root@D128 ovs]# mount -l |grep hugetlbfs
hugetlbfs on /dev/hugepages type hugetlbfs (rw,relatime)
[root@D128 ovs]#
c iommu
check:这地方很重要,新知识,以前一直想搞清楚IOMMU到底怎么配的,终于找到了,在这里。要读一下文档。
$ dmesg | grep -e DMAR -e IOMMU
$ cat /proc/cmdline | grep iommu=pt
$ cat /proc/cmdline | grep intel_iommu=on
修改内核参数,并重启
[root@D128 ~]# cat /etc/default/grub |grep CMD
GRUB_CMDLINE_LINUX="crashkernel=auto rd.lvm.lv=centos/root rd.lvm.lv=centos/swap intel_iommu=on iommu=pt rhgb quiet"
[root@D128 ~]# grub2-mkconfig -o /boot/grub2/grub.cfg
d 绑定vfio
[root@D128 ~]# modprobe vfio-pci
[root@D128 ~]# chmod a+x /dev/vfio
[root@D128 ~]# chmod 0666 /dev/vfio/*
[root@D128 ~]# ~/BUILD_ovs/share/dpdk/usertools/dpdk-devbind.py --bind=vfio-pci 0000:02:05.0
Error: bind failed for 0000:02:05.0 - Cannot bind to driver vfio-pci
绑定失败:
[root@D128 ~]# dmesg |grep vfio
[ 1113.056898] vfio-pci: probe of 0000:02:05.0 failed with error -22
[ 1116.163472] vfio-pci: probe of 0000:02:05.0 failed with error -22
[ 1562.817267] vfio-pci: probe of 0000:02:05.0 failed with error -22
[ 1646.964904] vfio-pci: probe of 0000:02:05.0 failed with error -22
[root@D128 ~]#
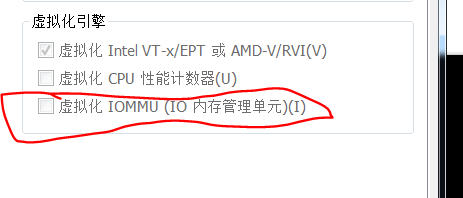
需要给vmware启用iommu
e 再开机
1. 设置大页,页数
2. 加载vfio-pci
3. bind 网卡
[root@D128 ~]# sysctl -w vm.nr_hugepages=256
[root@D128 ~]# ll /dev/vfio/vfio
crw------- 1 root root 10, 196 Apr 11 10:13 /dev/vfio/vfio
[root@D128 ~]# ll /dev/ |grep vfio
drwxr-xr-x 2 root root          60 Apr 11 10:13 vfio
[root@D128 ~]# lsmod |grep vfio
[root@D128 ~]# modprobe vfio-pci
[root@D128 ~]# lsmod |grep vfio
vfio_pci               41267  0
vfio_iommu_type1       22300  0
vfio                   32367  2 vfio_iommu_type1,vfio_pci
irqbypass              13503  2 kvm,vfio_pci
[root@D128 ~]# ll /dev/vfio/vfio
crw-rw-rw- 1 root root 10, 196 Apr 11 10:17 /dev/vfio/vfio
[root@D128 ~]# ll /dev/ |grep vfio
drwxr-xr-x 2 root root          60 Apr 11 10:13 vfio
[root@D128 ~]# /root/BUILD_ovs/share/dpdk/usertools/dpdk-devbind.py -b vfio-pci ens37
[root@D128 ~]# /root/BUILD_ovs/share/dpdk/usertools/dpdk-devbind.py -s

Network devices using DPDK-compatible driver
============================================
0000:02:05.0 '82545EM Gigabit Ethernet Controller (Copper) 100f' drv=vfio-pci unused=e1000

Network devices using kernel driver
===================================
0000:02:01.0 '82545EM Gigabit Ethernet Controller (Copper) 100f' if=ens33 drv=e1000 unused=vfio-pci
6. 设置 OVS
a 正常启动ovs
root@D128 ~/B/s/o/scripts# modprobe openvswitch
root@D128 ~/B/s/o/scripts# ./ovs-ctl --system-id=random start
Starting ovsdb-server                                      [  OK  ]
Configuring Open vSwitch system IDs                        [  OK  ]
Starting ovs-vswitchd                                      [  OK  ]
Enabling remote OVSDB managers                             [  OK  ]
root@D128 ~/B/s/o/scripts#
b 设置dpdk参数
root@D128 ~/B/s/o/scripts# ovs-vsctl --no-wait set Open_vSwitch . other_config:dpdk-init=true
root@D128 ~/B/s/o/scripts# ovs-vsctl --no-wait set Open_vSwitch . other_config:dpdk-socket-mem=256
7. 使用ovs with dpdk
root@D128 ~/B/s/o/scripts# ovs-vsctl add-br ovs-br0
root@D128 ~/B/s/o/scripts# ip link
1: lo: <LOOPBACK,UP,LOWER_UP> mtu 65536 qdisc noqueue state UNKNOWN mode DEFAULT qlen 1
    link/loopback 00:00:00:00:00:00 brd 00:00:00:00:00:00
2: ens33: <BROADCAST,MULTICAST,UP,LOWER_UP> mtu 1500 qdisc pfifo_fast master br-ext state UP mode DEFAULT qlen 1000
    link/ether 00:0c:29:2f:cf:32 brd ff:ff:ff:ff:ff:ff
4: br-ext: <BROADCAST,MULTICAST,UP,LOWER_UP> mtu 1500 qdisc noqueue state UP mode DEFAULT qlen 1000
    link/ether 00:0c:29:2f:cf:32 brd ff:ff:ff:ff:ff:ff
12: ovs-system: <BROADCAST,MULTICAST> mtu 1500 qdisc noop state DOWN mode DEFAULT qlen 1000
    link/ether ee:be:5d:5c:01:ca brd ff:ff:ff:ff:ff:ff
13: ovs-br0: <BROADCAST,MULTICAST> mtu 1500 qdisc noop state DOWN mode DEFAULT qlen 1000
    link/ether ee:3c:79:58:8b:4a brd ff:ff:ff:ff:ff:ff
root@D128 ~/B/s/o/scripts# ovs-vsctl show
528b5679-22e8-484b-947b-4499959dc341
    Bridge "ovs-br0"
        Port "ovs-br0"
            Interface "ovs-br0"
                type: internal
    ovs_version: "2.9.0"
root@D128 ~/B/s/o/scripts# ovs-vsctl set bridge ovs-br0 datapath_type=netdev
root@D128 ~/B/s/o/scripts# ip link
1: lo: <LOOPBACK,UP,LOWER_UP> mtu 65536 qdisc noqueue state UNKNOWN mode DEFAULT qlen 1
    link/loopback 00:00:00:00:00:00 brd 00:00:00:00:00:00
2: ens33: <BROADCAST,MULTICAST,UP,LOWER_UP> mtu 1500 qdisc pfifo_fast master br-ext state UP mode DEFAULT qlen 1000
    link/ether 00:0c:29:2f:cf:32 brd ff:ff:ff:ff:ff:ff
4: br-ext: <BROADCAST,MULTICAST,UP,LOWER_UP> mtu 1500 qdisc noqueue state UP mode DEFAULT qlen 1000
    link/ether 00:0c:29:2f:cf:32 brd ff:ff:ff:ff:ff:ff
14: ovs-netdev: <BROADCAST,PROMISC> mtu 1500 qdisc noop state DOWN mode DEFAULT qlen 1000
    link/ether ba:37:40:3e:b7:64 brd ff:ff:ff:ff:ff:ff
15: ovs-br0: <BROADCAST,PROMISC> mtu 1500 qdisc noop state DOWN mode DEFAULT qlen 1000
    link/ether ee:3c:79:58:8b:4a brd ff:ff:ff:ff:ff:ff
root@D128 ~/B/s/o/scripts#
加port失败,查看vswitchd.log, 在启动时有如下错误信息:
[root@D128]# ovs-vsctl add-port ovs-br0 dpdk-p0 -- set Interface dpdk-p0 type=dpdk options:dpdk-devargs=02:01.0
... ...
2018-04-11T03:44:19.040Z|00021|dpdk|ERR|EAL:   0000:02:05.0 VFIO group is not viable!
2018-04-11T03:44:19.040Z|00022|dpdk|ERR|EAL: Requested device 0000:02:05.0 cannot be used
解决办法:
http://webcache.googleusercontent.com/search?q=cache:Xx_mIPljxWAJ:danny270degree.blogspot.com/2015/12/iommu-error-of-vfio-group-is-not-viable.html+&cd=1&hl=zh-CN&ct=clnk&gl=cn
http://webcache.googleusercontent.com/search?q=cache:http://vfio.blogspot.com/2014/08/iommu-groups-inside-and-out.html&gws_rd=cr
原因即使,一个iommu group里现在有两个设备:
[root@D128 scripts]# find /sys/kernel/iommu_groups/ -type l
/sys/kernel/iommu_groups/0/devices/0000:00:00.0
/sys/kernel/iommu_groups/1/devices/0000:00:01.0
/sys/kernel/iommu_groups/2/devices/0000:00:07.0
/sys/kernel/iommu_groups/2/devices/0000:00:07.1
/sys/kernel/iommu_groups/2/devices/0000:00:07.3
/sys/kernel/iommu_groups/2/devices/0000:00:07.7
/sys/kernel/iommu_groups/3/devices/0000:00:0f.0
/sys/kernel/iommu_groups/4/devices/0000:00:10.0
/sys/kernel/iommu_groups/5/devices/0000:00:11.0
/sys/kernel/iommu_groups/5/devices/0000:02:00.0
/sys/kernel/iommu_groups/5/devices/0000:02:01.0
/sys/kernel/iommu_groups/5/devices/0000:02:02.0
/sys/kernel/iommu_groups/5/devices/0000:02:03.0
/sys/kernel/iommu_groups/5/devices/0000:02:05.0
/sys/kernel/iommu_groups/6/devices/0000:00:15.0
/sys/kernel/iommu_groups/6/devices/0000:00:15.1
/sys/kernel/iommu_groups/6/devices/0000:00:15.2
/sys/kernel/iommu_groups/6/devices/0000:00:15.3
/sys/kernel/iommu_groups/6/devices/0000:00:15.4
/sys/kernel/iommu_groups/6/devices/0000:00:15.5
/sys/kernel/iommu_groups/6/devices/0000:00:15.6
/sys/kernel/iommu_groups/6/devices/0000:00:15.7
/sys/kernel/iommu_groups/7/devices/0000:00:16.0
/sys/kernel/iommu_groups/7/devices/0000:00:16.1
/sys/kernel/iommu_groups/7/devices/0000:00:16.2
/sys/kernel/iommu_groups/7/devices/0000:00:16.3
/sys/kernel/iommu_groups/7/devices/0000:00:16.4
/sys/kernel/iommu_groups/7/devices/0000:00:16.5
/sys/kernel/iommu_groups/7/devices/0000:00:16.6
/sys/kernel/iommu_groups/7/devices/0000:00:16.7
/sys/kernel/iommu_groups/8/devices/0000:00:17.0
/sys/kernel/iommu_groups/8/devices/0000:00:17.1
/sys/kernel/iommu_groups/8/devices/0000:00:17.2
/sys/kernel/iommu_groups/8/devices/0000:00:17.3
/sys/kernel/iommu_groups/8/devices/0000:00:17.4
/sys/kernel/iommu_groups/8/devices/0000:00:17.5
/sys/kernel/iommu_groups/8/devices/0000:00:17.6
/sys/kernel/iommu_groups/8/devices/0000:00:17.7
/sys/kernel/iommu_groups/9/devices/0000:00:18.0
/sys/kernel/iommu_groups/9/devices/0000:00:18.1
/sys/kernel/iommu_groups/9/devices/0000:00:18.2
/sys/kernel/iommu_groups/9/devices/0000:00:18.3
/sys/kernel/iommu_groups/9/devices/0000:00:18.4
/sys/kernel/iommu_groups/9/devices/0000:00:18.5
/sys/kernel/iommu_groups/9/devices/0000:00:18.6
/sys/kernel/iommu_groups/9/devices/0000:00:18.7
[root@D128 scripts]#
解决方法有两个:1 换个网卡插槽,是他们不再一个group,二,内核patch。
So, the solutions are these two:
1. Install the device into a different slot
2. Bypass ACS using the ACS overrides patch
但是,虚拟机怎么换插槽。。。。。
解决不了。。。。。
解决方案:
修改网卡的驱动类型为e1000e, 修改文件 CentOS 7 64 位.vmx 中的如下内容:
ethernet1.virtualDev = "e1000e"
然后重启,重新设置以上流程:
[root@D128 ~]# ovs-vsctl add-port ovs-br0 dpdk-p0 -- set Interface dpdk-p0 type=dpdk options:dpdk-devargs=0000:03:00.0
[root@D128 ~]# ovs-vsctl show
528b5679-22e8-484b-947b-4499959dc341
    Bridge "ovs-br0"
        Port "ovs-br0"
            Interface "ovs-br0"
                type: internal
        Port "dpdk-p0"
            Interface "dpdk-p0"
                type: dpdk
                options: {dpdk-devargs="0000:03:00.0"}
    ovs_version: "2.9.0"
[root@D128 ~]# tail /root/BUILD_ovs/var/log/openvswitch/ovs-vswitchd.log
2018-04-11T08:34:21.221Z|00112|dpdk|INFO|EAL:   using IOMMU type 1 (Type 1)
2018-04-11T08:34:21.251Z|00113|dpdk|INFO|EAL: Ignore mapping IO port bar(2)
2018-04-11T08:34:21.357Z|00114|netdev_dpdk|INFO|Device '0000:03:00.0' attached to DPDK
2018-04-11T08:34:21.385Z|00115|dpif_netdev|INFO|PMD thread on numa_id: 0, core id:  0 created.
2018-04-11T08:34:21.385Z|00116|dpif_netdev|INFO|There are 1 pmd threads on numa node 0
2018-04-11T08:34:21.592Z|00117|netdev_dpdk|INFO|Port 0: 00:0c:29:2f:cf:3c
2018-04-11T08:34:21.593Z|00118|dpif_netdev|INFO|Core 0 on numa node 0 assigned port 'dpdk-p0' rx queue 0 (measured processing cycles 0).
2018-04-11T08:34:21.595Z|00119|bridge|INFO|bridge ovs-br0: added interface dpdk-p0 on port 1
2018-04-11T08:34:21.600Z|00120|bridge|INFO|bridge ovs-br0: using datapath ID 0000000c292fcf3c
2018-04-11T08:34:21.606Z|00121|netdev_dpdk|WARN|Failed to enable flow control on device 0
[root@D128 ~]#
8 使用vhost-user连接vm
http://docs.openvswitch.org/en/latest/topics/dpdk/vhost-user/
vhost-user client mode ports require QEMU version 2.7.
Use of vhost-user ports requires QEMU >= 2.2; vhost-user ports are deprecated.
CentOS7里面qemu,qemu-kvm的版本都太低了,不支持vhost。就用tap/virio做了。
二: 搭建一个标准计算节点的网络环境
参考图:https://yeasy.gitbooks.io/openstack_understand_neutron/content/vxlan_mode/
1. 添加一个安全网桥,用于连接VM的interface(也就是前边提到的tap/virtio)。
[root@D128 j]# nmcli c add type bridge ifname br-safe-0 autoconnect yes save yes
Connection 'bridge-br-safe-0' (fb4058cc-3d9a-4d0e-88a8-8b1ef551f6bc) successfully added.
[root@D128 j]# brctl show
bridge name    bridge id        STP enabled    interfaces
br-ext        8000.000c292fcf32    yes        ens33
br-safe-0        8000.000000000000    yes
[root@D128 j]#
2. 添加一个veth,用于连接 安全网桥和ovs的bt-int
[root@D128 j]# ip link add veth0-safe type veth peer name veth0-ovs