从现在开始相关文章请到: http://lko2o.com/moon
接着上一篇:《ASP.NET SignalR系列》第三课 SignalR的支持平台
一、概述
SignalR常常依托于ASP.NET应用程序运行于IIS中,但它还可以自我托管(比如作为console winform、Windows service).只要我们使用self-host库就可以了.
该库向所有的SignalR 2库一样,构建于OWIN (Open Web Interface for .NET).OWIN定义了一个在.NET web 服务端和web 应用程序的抽象.
OWIN解耦了从服务端来的web 应用程序,这使得OWIN对于子托管web应用程序于自己的进程中得以表现得很完美.
不托管于IIS的原因有:
- IIS的环境不能构建,比如一个已经存在的服务端程序(没有运行于IIS)
- IIS的性能开销需要注意的地方
- signalr功能需要添加到一个现有的应用程序,比如运行在 Windows Service, Azure worker role, 或者 其他进程
如果我们处于性能原因考虑使用self-host,我们推荐将程序同时在IIS中运行测试,来看看性能的具体好处.
本教程包含以下部分:
- 创建服务端
- 用 JavaScript 客户端访问服务端
二、创建服务端
在本教程中,您将创建托管在一个控制台应用程序的服务端,当然服务端能够托管于其他任何形式的进程,如Windows service or Azure worker role.
如果你要看如何托管于Windows Service, 可以去看看这里Self-Hosting SignalR in a Windows Service.
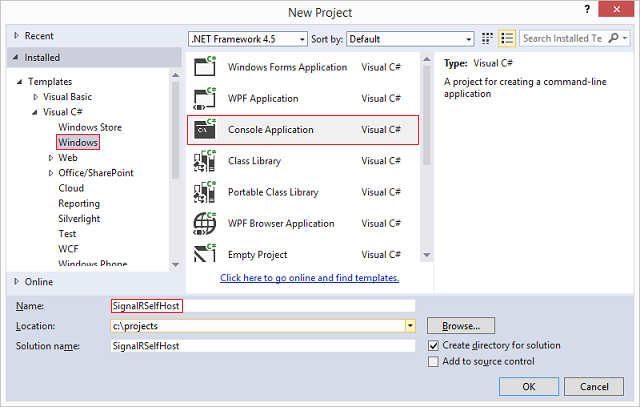
1.用VS创建一个名为 "SignalRSelfHost" 的控制台项目;
2.在程序包管理器控制台,输入如下命令
Install-Package Microsoft.AspNet.SignalR.SelfHost3.输入如下命令:
Install-Package Microsoft.Owin.Cors该库将提供跨域支持,这对于那些SignalR的服务端和客户端不在同一个域下的程序而言是必须的.
4.控制台代码
using System;
using Microsoft.AspNet.SignalR;
using Microsoft.Owin.Hosting;
using Owin;
using Microsoft.Owin.Cors;

namespace SignalRSelfHost
{
    class Program
    {
        static void Main(string[] args)
        {
            // This will *ONLY* bind to localhost, if you want to bind to all addresses
            // use http://*:8080 to bind to all addresses.
            // See http://msdn.microsoft.com/en-us/library/system.net.httplistener.aspx
            // for more information.
            string url = "http://localhost:8080";
            using (WebApp.Start(url))
            {
                Console.WriteLine("Server running on {0}", url);
                Console.ReadLine();
            }
        }
    }
    class Startup
    {
        public void Configuration(IAppBuilder app)
        {
            app.UseCors(CorsOptions.AllowAll);
            app.MapSignalR();
        }
    }
    public class MyHub : Hub
    {
        public void Send(string name, string message)
        {
            Clients.All.addMessage(name, message);
        }
    }
}
上面的代码包括三个类:
-
Program,包含程序的主方法.在这个方法中,类型为Startup的web应用程序启动于指定的URL (http://localhost:8080). 如果需要更加安全一点,可以支持SSL. 请去这里看看How to: Configure a Port with an SSL Certificate
- Startup, 该类含有SignalR服务端的配置(该教程使用的唯一的配置是用来调用
UseCors),MapSignalR为所有形式的Hub对象创建了路由规则.
-
MyHub, SignalR的Hub 类是程序要提供给客户端的. 该类就一个方法, Send, 客户端可以用来发送消息给其他客户端.
5.编译并运行程序.

6.如果程序出现这样的异常: System.Reflection.TargetInvocationException was unhandled, 你需要重启 Visual Studio ,需要administrator 权限.
三、用javascript客户端访问服务端
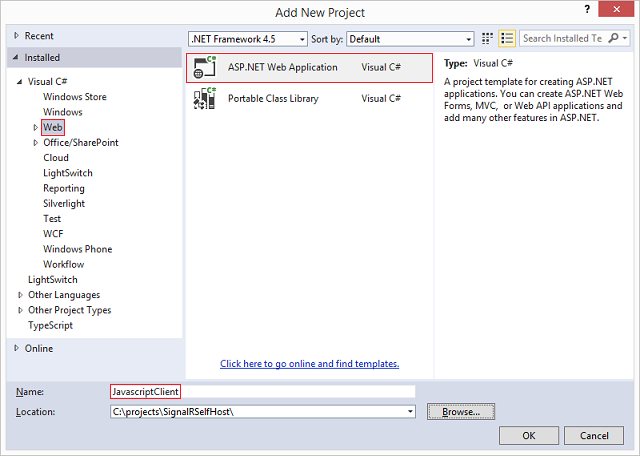
1.创建项目
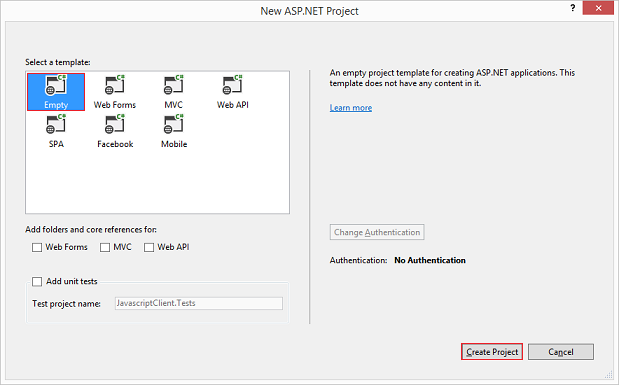
2.使用空模板
3.初始化客户端需要的东西
Install-Package Microsoft.AspNet.SignalR.JS
4.初始化客户端需要的东西
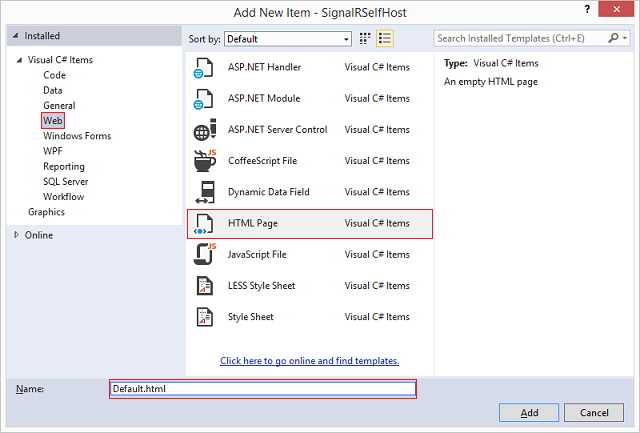
5.客户端代码
<!DOCTYPE html> <html> <head> <title>SignalR Simple Chat</title> <style type="text/css"> .container { background-color: #99CCFF; border: thick solid #808080; padding: 20px; margin: 20px; } </style> </head> <body> <div class="container"> <input type="text" id="message" /> <input type="button" id="sendmessage" value="Send" /> <input type="hidden" id="displayname" /> <ul id="discussion"></ul> </div> <!--Script references. --> <!--Reference the jQuery library. --> <script src="Scripts/jquery-1.6.4.min.js"></script> <!--Reference the SignalR library. --> <script src="Scripts/jquery.signalR-2.1.0.min.js"></script> <!--Reference the autogenerated SignalR hub script. --> <script src="http://localhost:8080/signalr/hubs"></script> <!--Add script to update the page and send messages.--> <script type="text/javascript"> $(function () { //Set the hubs URL for the connection $.connection.hub.url = "http://localhost:8080/signalr"; // Declare a proxy to reference the hub. var chat = $.connection.myHub; // Create a function that the hub can call to broadcast messages. chat.client.addMessage = function (name, message) { // Html encode display name and message. var encodedName = $('<div />').text(name).html(); var encodedMsg = $('<div />').text(message).html(); // Add the message to the page. $('#discussion').append('<li><strong>' + encodedName + '</strong>: ' + encodedMsg + '</li>'); }; // Get the user name and store it to prepend to messages. $('#displayname').val(prompt('Enter your name:', '')); // Set initial focus to message input box. $('#message').focus(); // Start the connection. $.connection.hub.start().done(function () { $('#sendmessage').click(function () { // Call the Send method on the hub. chat.server.send($('#displayname').val(), $('#message').val()); // Clear text box and reset focus for next comment. $('#message').val('').focus(); }); }); }); </script> </body> </html>
6.将客户端和服务端同时运行,我们就可以运行了.

7.下载代码:
点击下载