最近项目要引用identityserver 4来进行多客户端身份验证,按照官网的教程,搭建了基于asp.net core的WebApi+MVC的客户端,但是项目中有非core的asp.net webapi,官网上没有例子,自己调查了一下,将搭建步骤记录一下,以备之后参考。
- 在webapi项目中添加Owin Startup启动类Startup.cs,之后通过NuGet安装Microsoft.Owin.Host.SystemWeb,不安装的话将不会执行Startup的代码
- 在webapi项目中通过NuGetIdentityServer3.AccessTokenValidation,官网教程中core的webapi中安装的是IdentityServer4.AccessTokenValidation ,但是该插件基于core的开发的,non core的webapi不能使用。这里兼容性不用担心,无论IdentityServer3还是IdentityServer4只是符合相同协议的实现, 这同样适用于那些TokenValidation中间件。也就是说,可以在一个AspNetCore API项目中使用IdentityServer4.AccessTokenValidation来验证来自IdentityServer3项目的Token。 相反,也可以在一个AspNet API项目中使用dentityServer3.AccessTokenValidation来验证来自IdentityServer4 AspNetCore项目的Token。
- 在IdentityServer4的config中添加ApiResource代码
return new[]
            {
                new ApiResource("ICPWebApi", "ICPWebApi")
                {
                    ApiSecrets = new List<Secret>()
                    {
                        new Secret("secret".Sha256())//.net core api中不需要此配置
                    }

                }
            }
- 在identityServer4的config中添加一个Client用来生成Token访问API
  public static IEnumerable<Client> GetClients()
        {
            return new[]
            {
                new Client
                {
                    ClientId = "Api",
                    ClientSecrets = new [] { new Secret("secret".Sha256()) },
                    AllowedGrantTypes = GrantTypes.ResourceOwnerPasswordAndClientCredentials,
                    AllowedScopes = new [] { "ICPWebApi" }
                },
            };
        }
在webApi的Startup的Configration中添加以下代码
// 有关如何配置应用程序的详细信息,请访问 https://go.microsoft.com/fwlink/?LinkID=316888
            JwtSecurityTokenHandler.InboundClaimTypeMap.Clear();
            app.UseIdentityServerBearerTokenAuthentication(new IdentityServerBearerTokenAuthenticationOptions
            {
                Authority = "http://localhost:5000",//IdentityServer
                AuthenticationType = "Bearer",
                ClientId = "ICPWebApi",
                ValidationMode = ValidationMode.ValidationEndpoint,
                ClientSecret = "secret"
            });
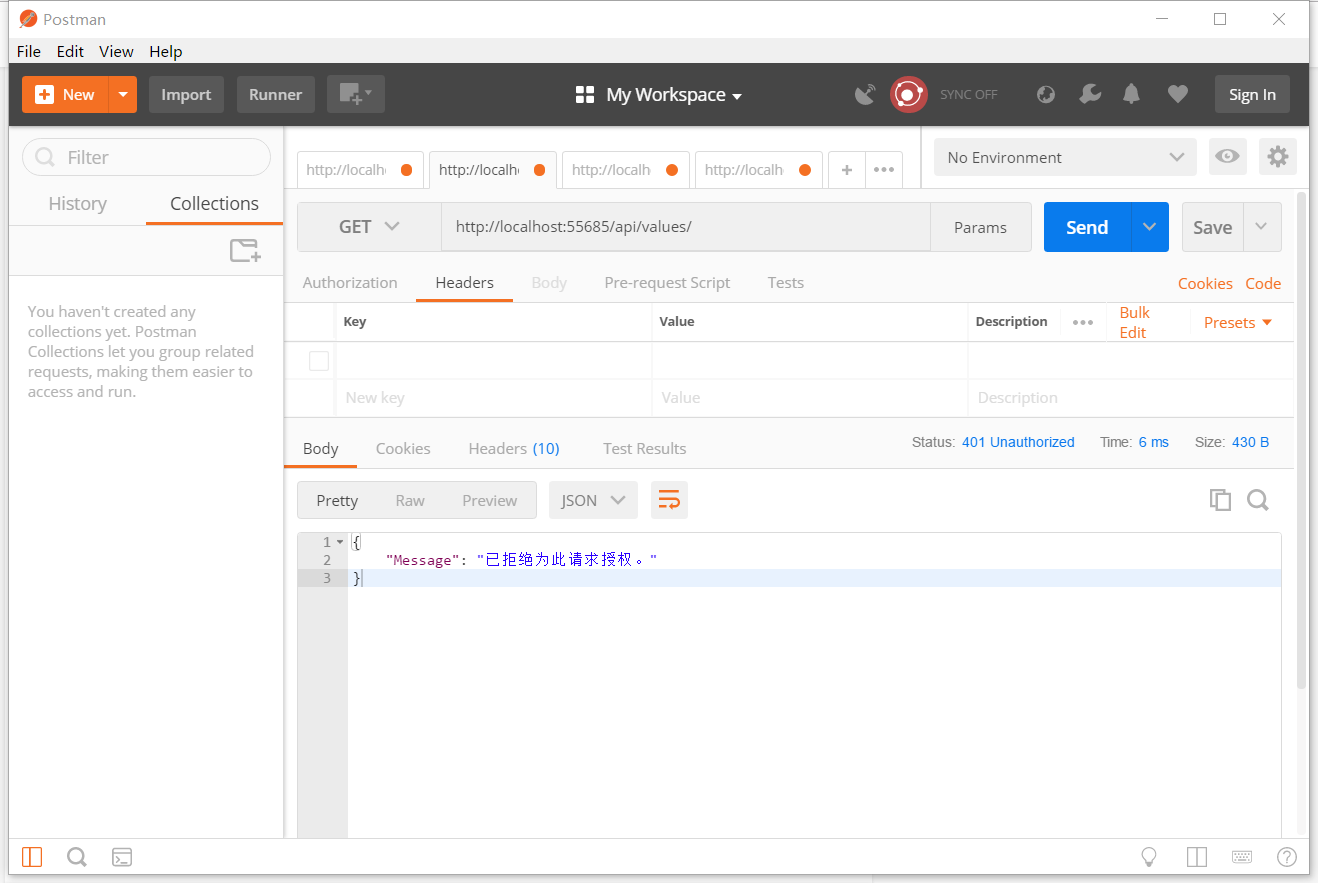
在valuesController的Get方法添加Authorize属性,然后运行项目,访问api/values/ 会提示Message:已拒绝次请求授权,错误代码401
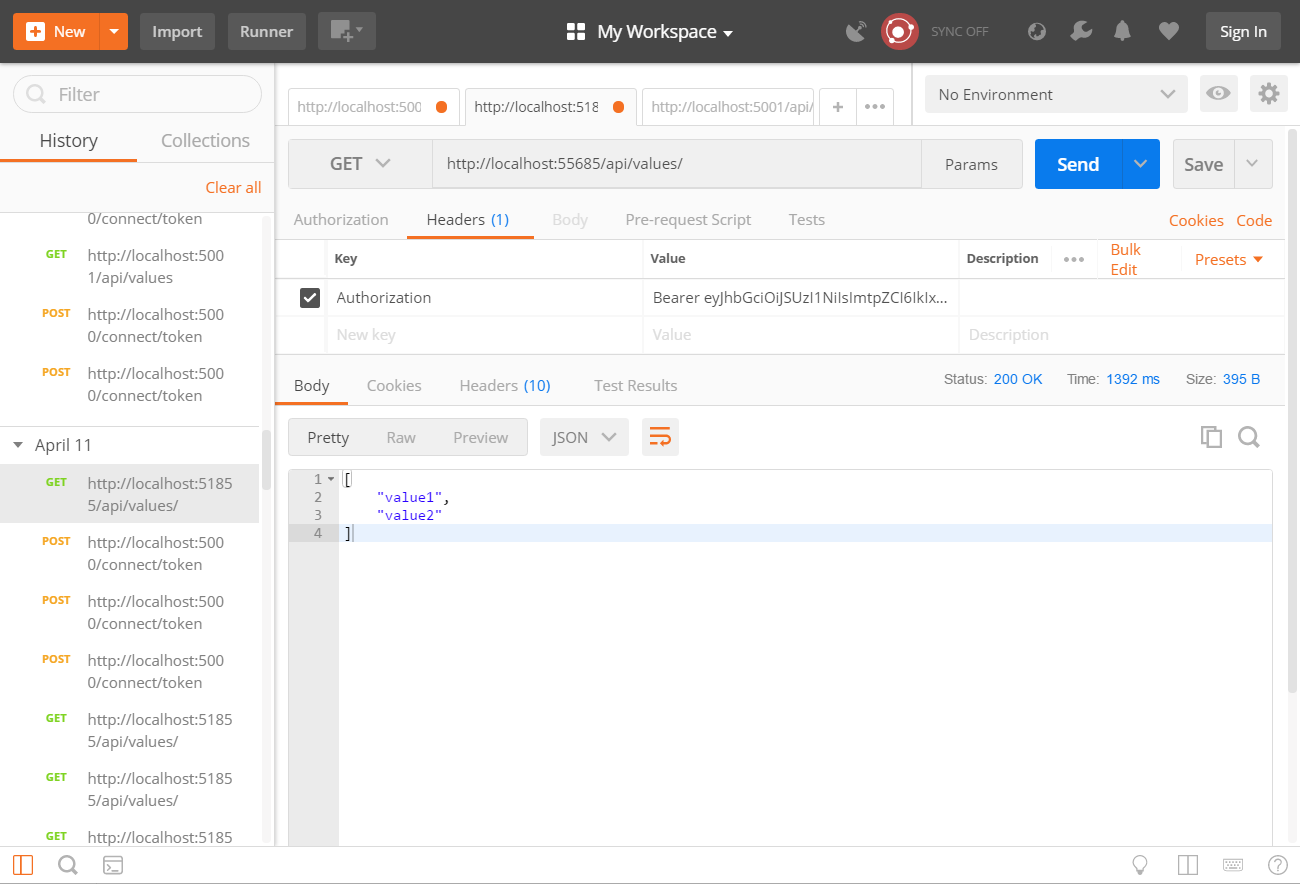
通过Client获取Token

用获取的token访问api/Values,状态200,访问成功。
最后需要注意在CoreWebApi中,可以不声明Secret,但是在non core WebApi中需要在identityServer中设置Secret并且在WebApi中设定ClientSecret。
原文地址:https://blog.csdn.net/heyongsi/article/details/79984476