我们先看看我们在没有spring之前,程序间是怎么解耦的。
创建一个maven工程,整体的目录结构

1.创建dao层
IAccountDao.java
package com.itzn.dao;
public interface IAccountDao {
    void save();
}
AccountDaoImpl.java
package com.itzn.dao;
public class AccountDaoImpl implements IAccountDao {
    public void save() {
        System.out.println("保存账户");
    }
}
2.创建service层
IAccountService.java
package com.itzn.service;
public interface IAccountService {
    void save();
}
AccountServiceImpl .java
package com.itzn.service;
import com.itzn.dao.AccountDaoImpl;
import com.itzn.dao.IAccountDao;
import com.itzn.factory.BeanFactory;
public class AccountServiceImpl implements IAccountService {
    //默认不解耦方式
    //private IAccountDao iAccountDao = new AccountDaoImpl();
    private IAccountDao iAccountDao =(IAccountDao)BeanFactory.getBean("accountDao");
    public void save() {
        iAccountDao.save();
    }
}
3.创建配置文件bean.properties
accountService=com.itzn.service.AccountServiceImpl
accountDao=com.itzn.dao.AccountDaoImpl
4.创建Bean工厂层
BeanFactory.java
package com.itzn.factory;

import java.io.InputStream;
import java.util.Enumeration;
import java.util.HashMap;
import java.util.Map;
import java.util.Properties;

public class BeanFactory {
    /**
     * 容器
     */
    private static Map<String, Object> beans;
    private static Properties props;

    static {
        try {
            //实例化对象
            props = new Properties();
            //获取properties文件流对象
            InputStream in = BeanFactory.class.getClassLoader().getResourceAsStream("bean.properties");
            props.load(in);

            beans = new HashMap<String, Object>();
            Enumeration keys = props.keys();
            while (keys.hasMoreElements()) {
                String key = keys.nextElement().toString();
                String beanPath = props.getProperty(key);
                Object value = Class.forName(beanPath).newInstance();
                beans.put(key, value);
            }
        } catch (Exception e) {
            throw new ExceptionInInitializerError("dfdf");
        }
    }

    /**
     * 单例获取对象
     *
     * @param beanName
     * @return
     */
    public static Object getBean(String beanName) {
        return beans.get(beanName);
    }

    /**
     * 多实例
     * @param beanName
     * @return
     */
//    public static Object getBean(String beanName) {
//        Object bean = null;
//        try {
//            String beanPath = props.getProperty(beanName);
//            bean = Class.forName(beanPath).newInstance();
//        } catch (Exception e) {
//            e.printStackTrace();
//        }
//        return bean;
//    }

}
5.测试
AccountTest .java
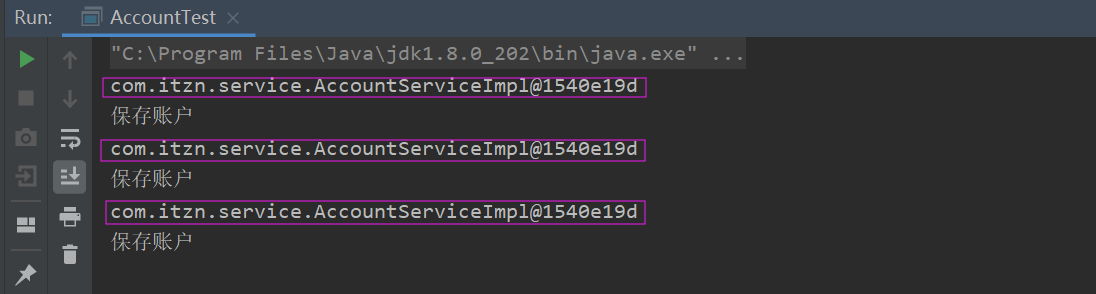
package com.itzn.ui;

import com.itzn.factory.BeanFactory;
import com.itzn.service.IAccountService;

public class AccountTest {
    public static void main(String[] args) {
        for (int i=0;i<3;i++)
        {
            IAccountService iAccountService= (IAccountService) BeanFactory.getBean("accountService");
            System.out.println(iAccountService);
            iAccountService.save();
        }
    }
}
测试结果
spring基于XML的IOC环境搭建入门
下面来看看使用Spring
1.新建maven工程,到spring引用,这里我们用5.0.2.RELEASE版本
<?xml version="1.0" encoding="UTF-8"?>
<project xmlns="http://maven.apache.org/POM/4.0.0"
         xmlns:xsi="http://www.w3.org/2001/XMLSchema-instance"
         xsi:schemaLocation="http://maven.apache.org/POM/4.0.0 http://maven.apache.org/xsd/maven-4.0.0.xsd">
    <modelVersion>4.0.0</modelVersion>

    <groupId>com.itzn</groupId>
    <artifactId>day01_easy_02spring</artifactId>
    <version>1.0-SNAPSHOT</version>
    <packaging>jar</packaging>

<dependencies>
    <dependency>
        <groupId>org.springframework</groupId>
        <artifactId>spring-context</artifactId>
        <version>5.0.2.RELEASE</version>
    </dependency>
</dependencies>
</project>
2.dao层
IAccountDao.java
package com.itzn.dao;

public interface IAccountDao {
    void save();
}
AccountDaoImpl.java
package com.itzn.dao;
public class AccountDaoImpl implements IAccountDao {

    public void save() {
        System.out.println("保存账户");
    }
}
3.service层
IAccountService.java
package com.itzn.service;

public interface IAccountService {
    void save();
}
AccountServiceImpl.java
package com.itzn.service;

import com.itzn.dao.AccountDaoImpl;
import com.itzn.dao.IAccountDao;

public class AccountServiceImpl implements IAccountService {
    private IAccountDao iAccountDao = new AccountDaoImpl();

    public void save() {
        iAccountDao.save();
    }
}
4.测试
AccountTest.java
package com.itzn.ui;

import com.itzn.dao.AccountDaoImpl;
import com.itzn.dao.IAccountDao;
import com.itzn.service.AccountServiceImpl;
import com.itzn.service.IAccountService;
import org.springframework.context.ApplicationContext;
import org.springframework.context.support.ClassPathXmlApplicationContext;

public class AccountTest {
    public static void main(String[] args) {
        //IAccountService iAccountService = new AccountServiceImpl();
        ApplicationContext ac = new ClassPathXmlApplicationContext("bean.xml");
        IAccountService iAccountService = (IAccountService) ac.getBean("accountService");
        IAccountDao iAccountDao=ac.getBean("accountDao", AccountDaoImpl.class);
        System.out.println(iAccountService);
        System.out.println(iAccountDao);

    }
}
测试结果

这里说说BeanFactory 和 ApplicationContext 的区别
BeanFactory 才是 Spring 容器中的顶层接口。
ApplicationContext 是它的子接口。
BeanFactory 和 ApplicationContext 的区别:
创建对象的时间点不一样。
ApplicationContext:只要一读取配置文件,默认情况下就会创建对象。
BeanFactory:什么使用什么时候创建对象。
ApplicationContext 接口的实现类
ClassPathXmlApplicationContext:它是从类的根路径下加载配置文件 推荐使用这种
FileSystemXmlApplicationContext:它是从磁盘路径上加载配置文件,配置文件可以在磁盘的任意位置。
AnnotationConfigApplicationContext:当我们使用注解配置容器对象时,需要使用此类来创建 spring 容器。它用来读取注解。