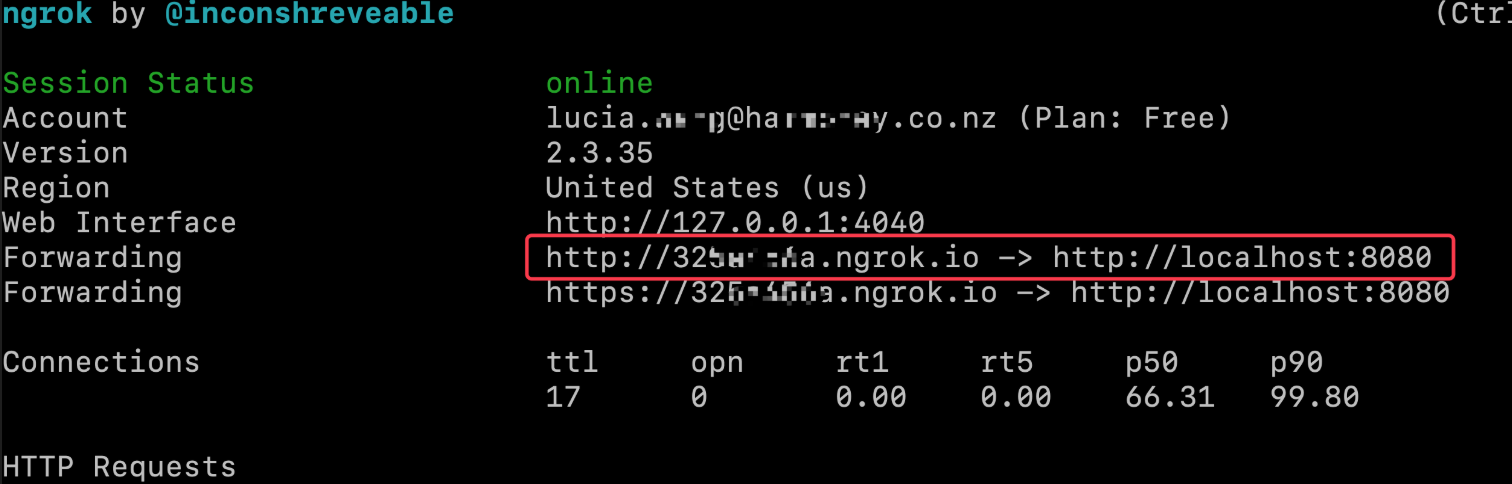
0. Expose your local web server to the internet
https://dashboard.ngrok.com/get-started
My Keycloak is running in my local laptop localhost:8080. After publishing it to the internet. we could use http://325xxxx.ngrok.io to connect by anyone else.
1. Create a google application
(1) Create a google application at https://console.developers.google.com/ ,
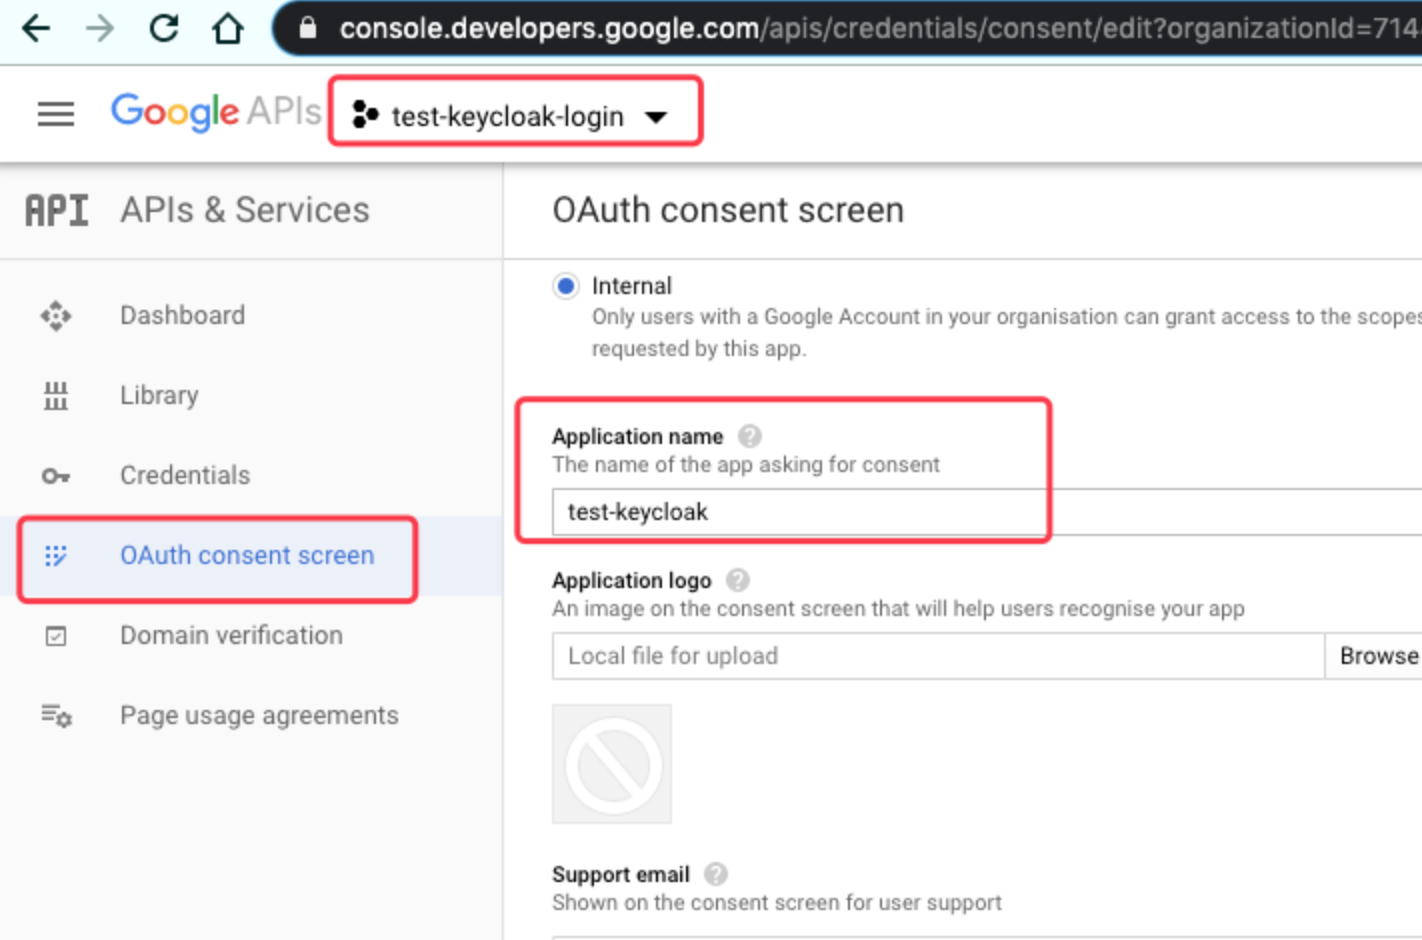
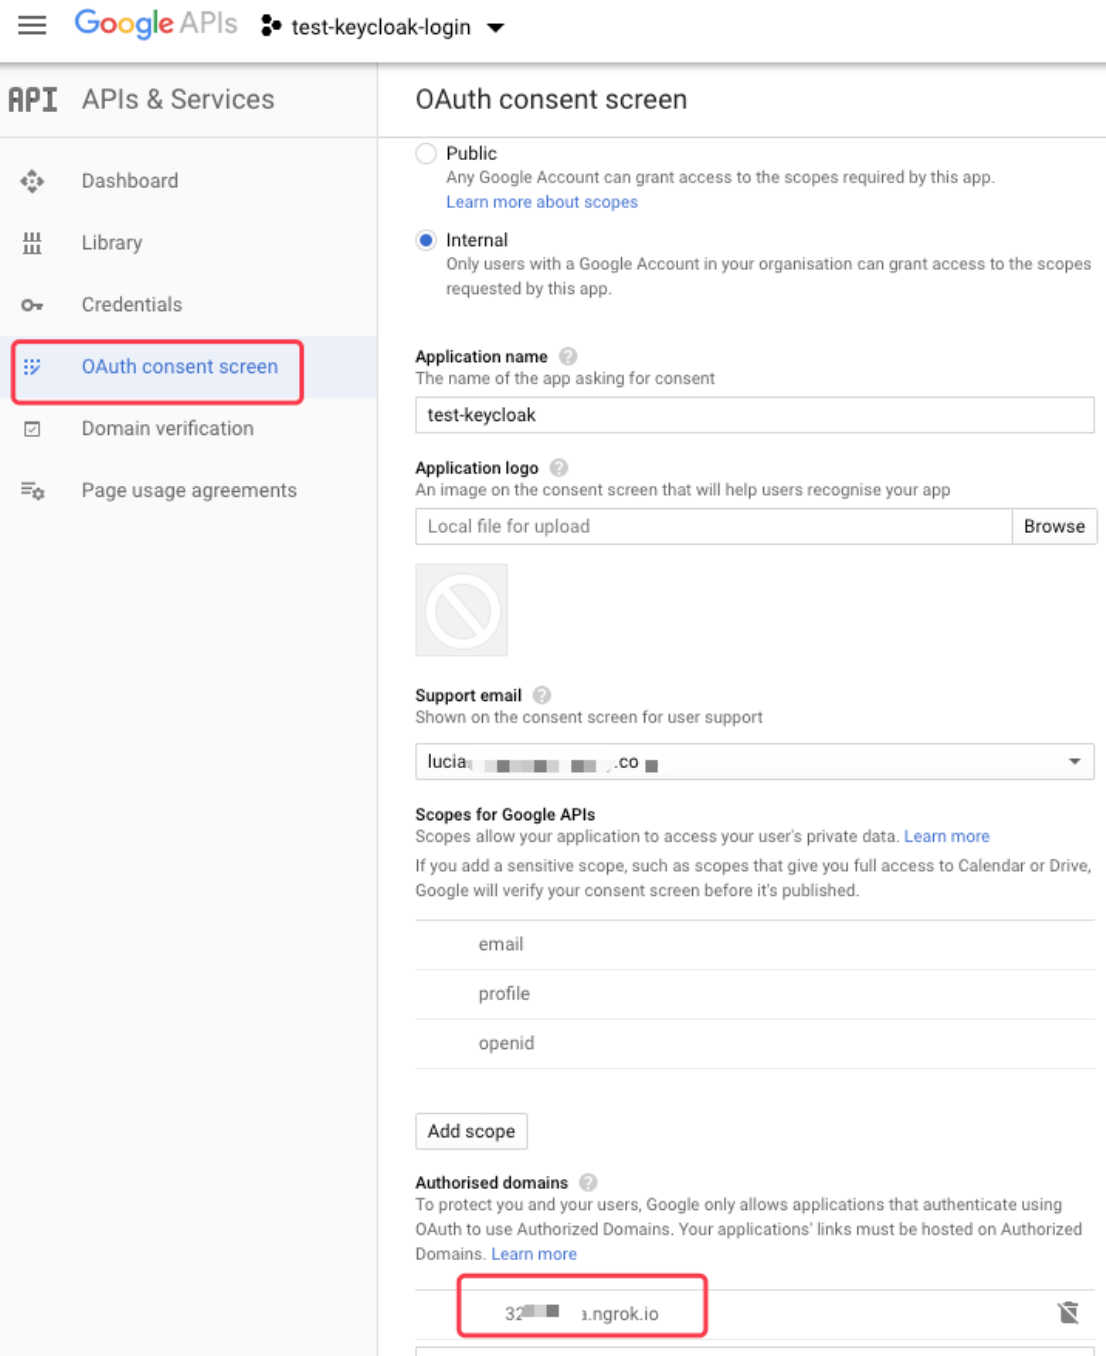
(2) Create a new OAuth consent screen
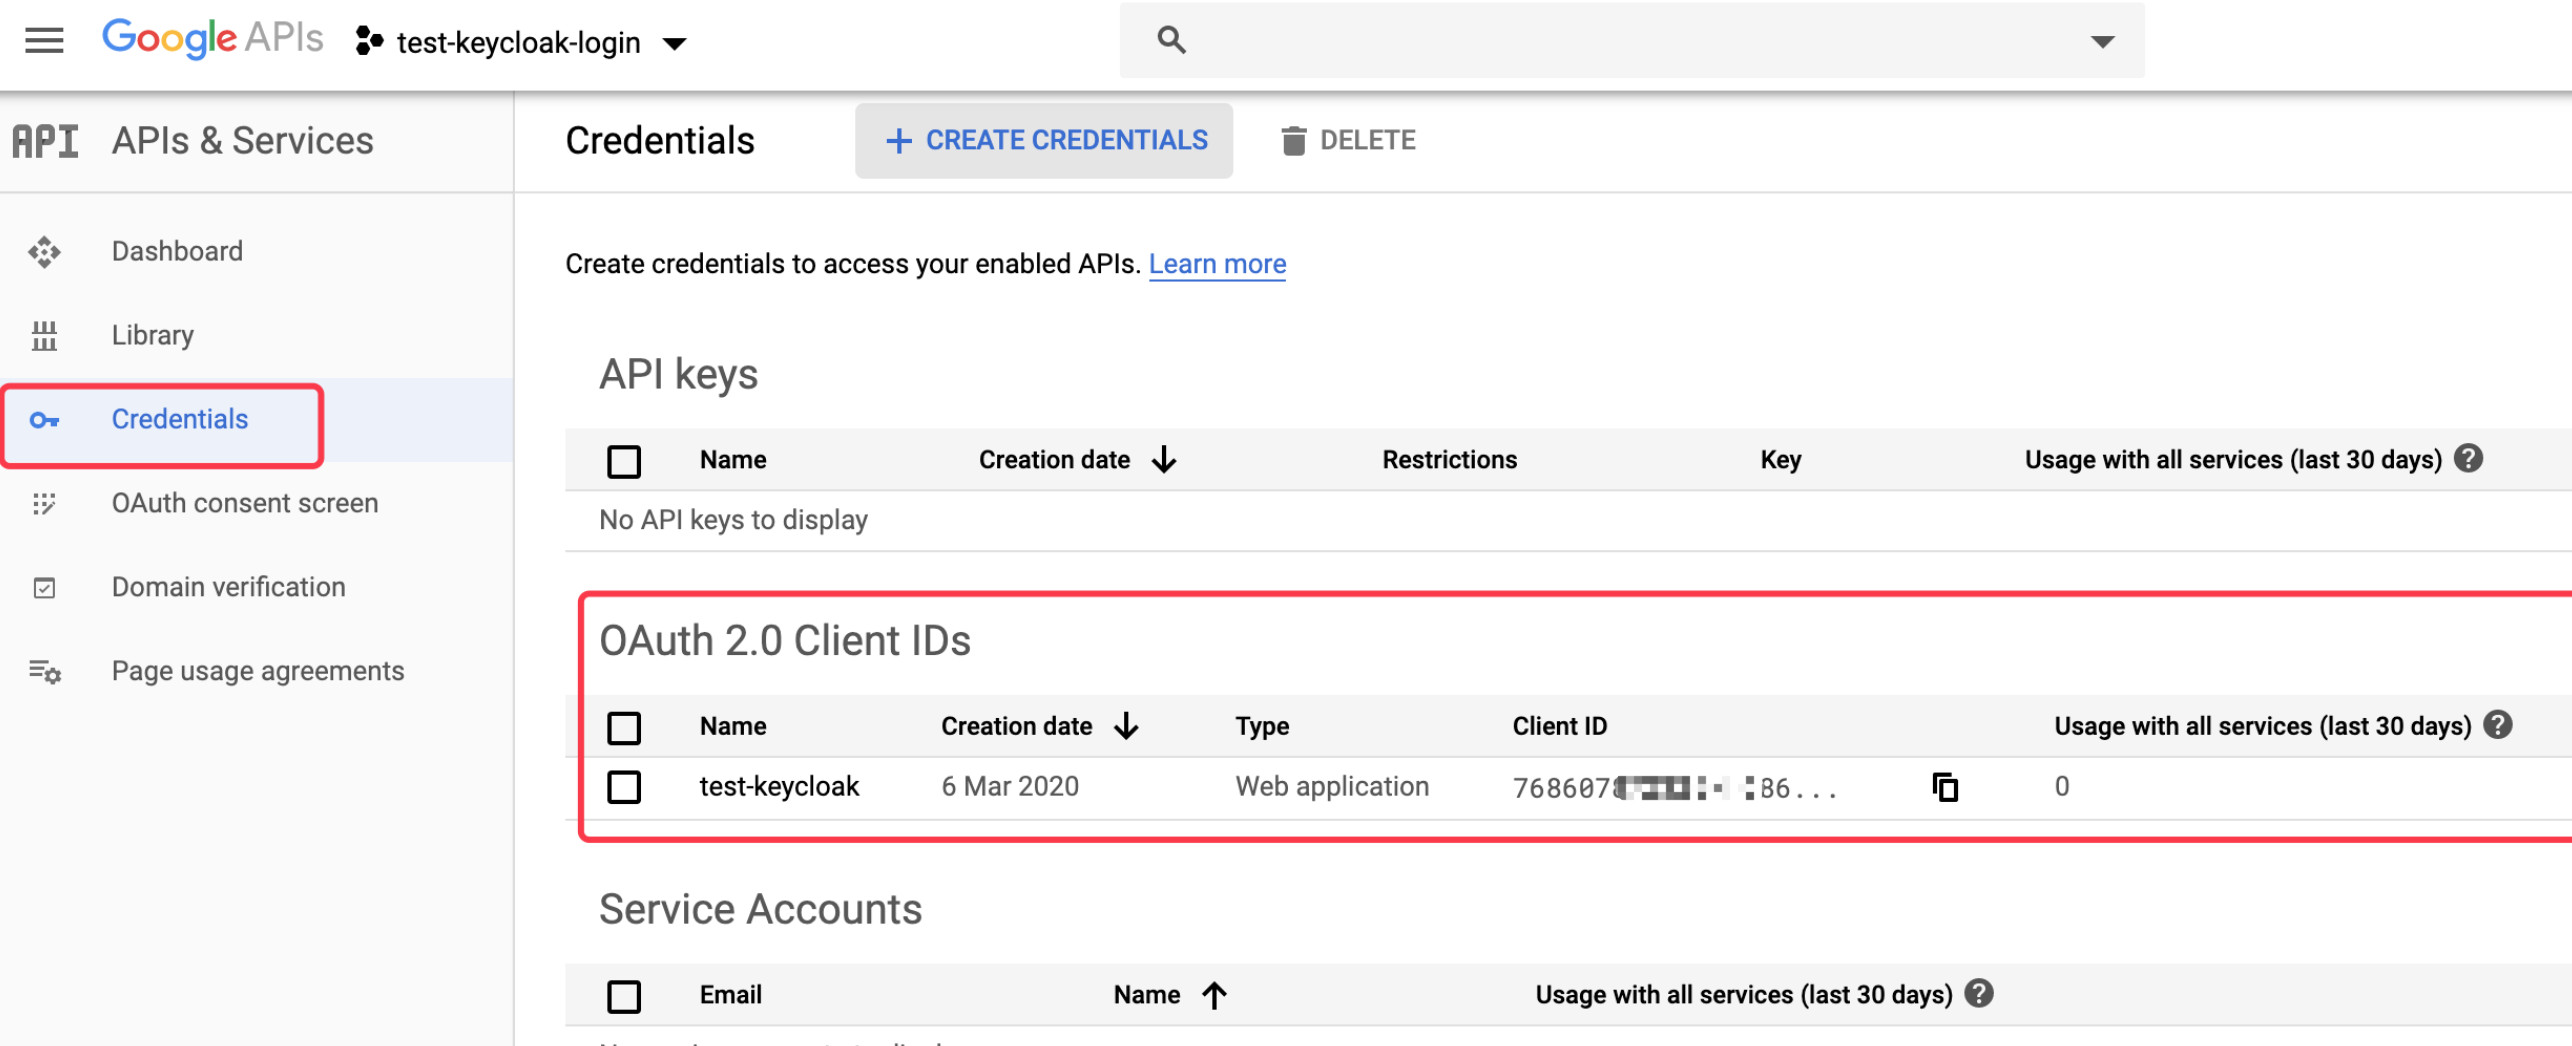
(3) Create a client ID
save the id and secret, we will use it in Keycloak settings.
2.Setup Keycloak
(1) Create a new realm and client
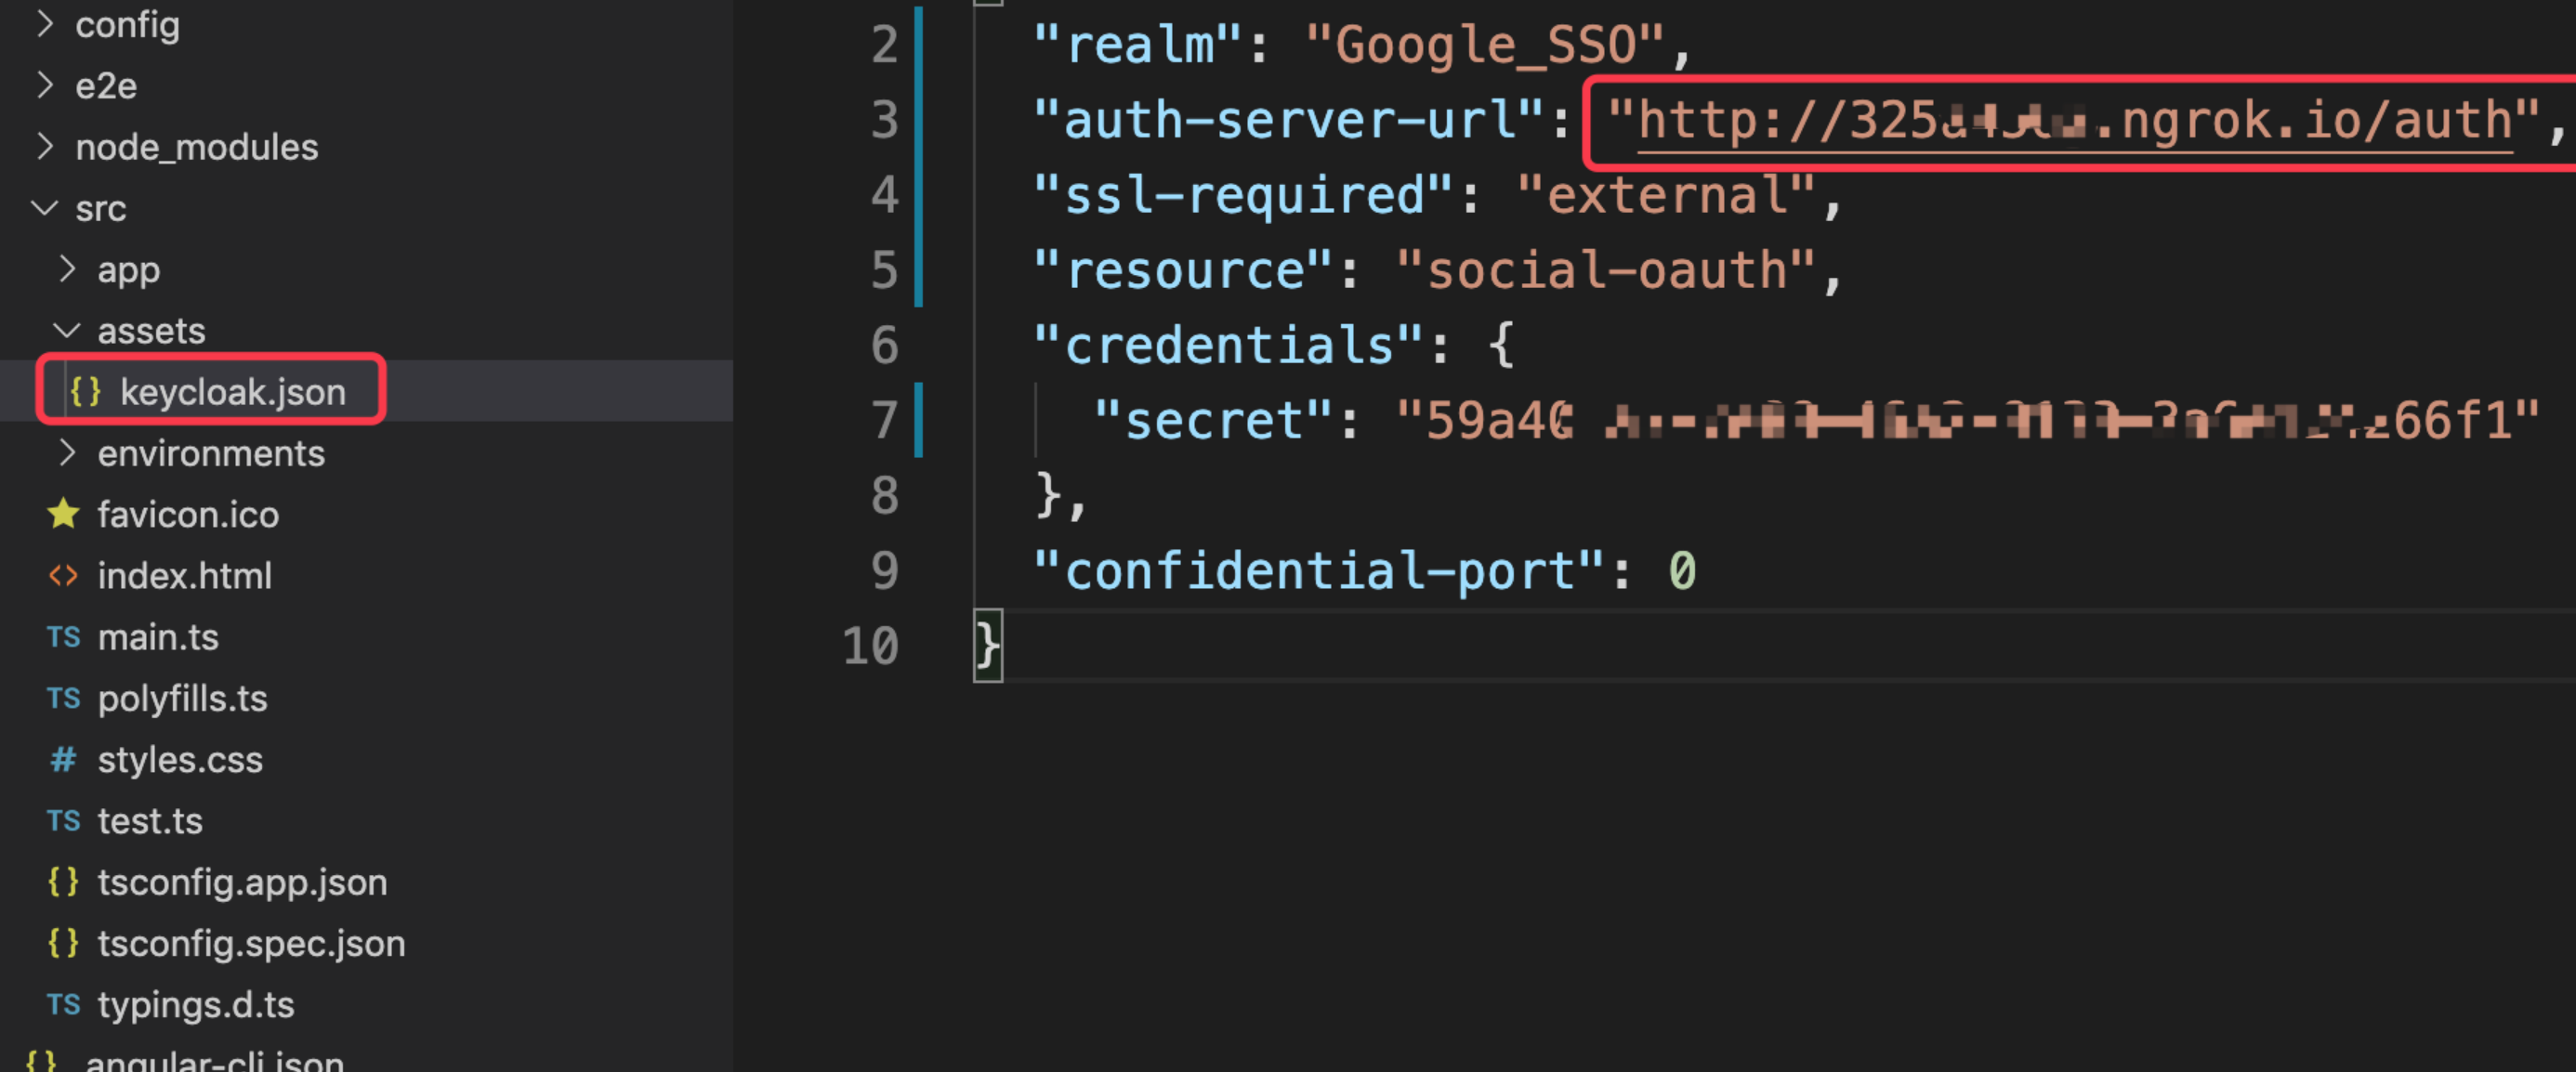
While in the client, click the Installation tab. Under format option select “Keycloak OIDC JSON“.
Copy and paste this value in a file keycloak.json, we will use it later.
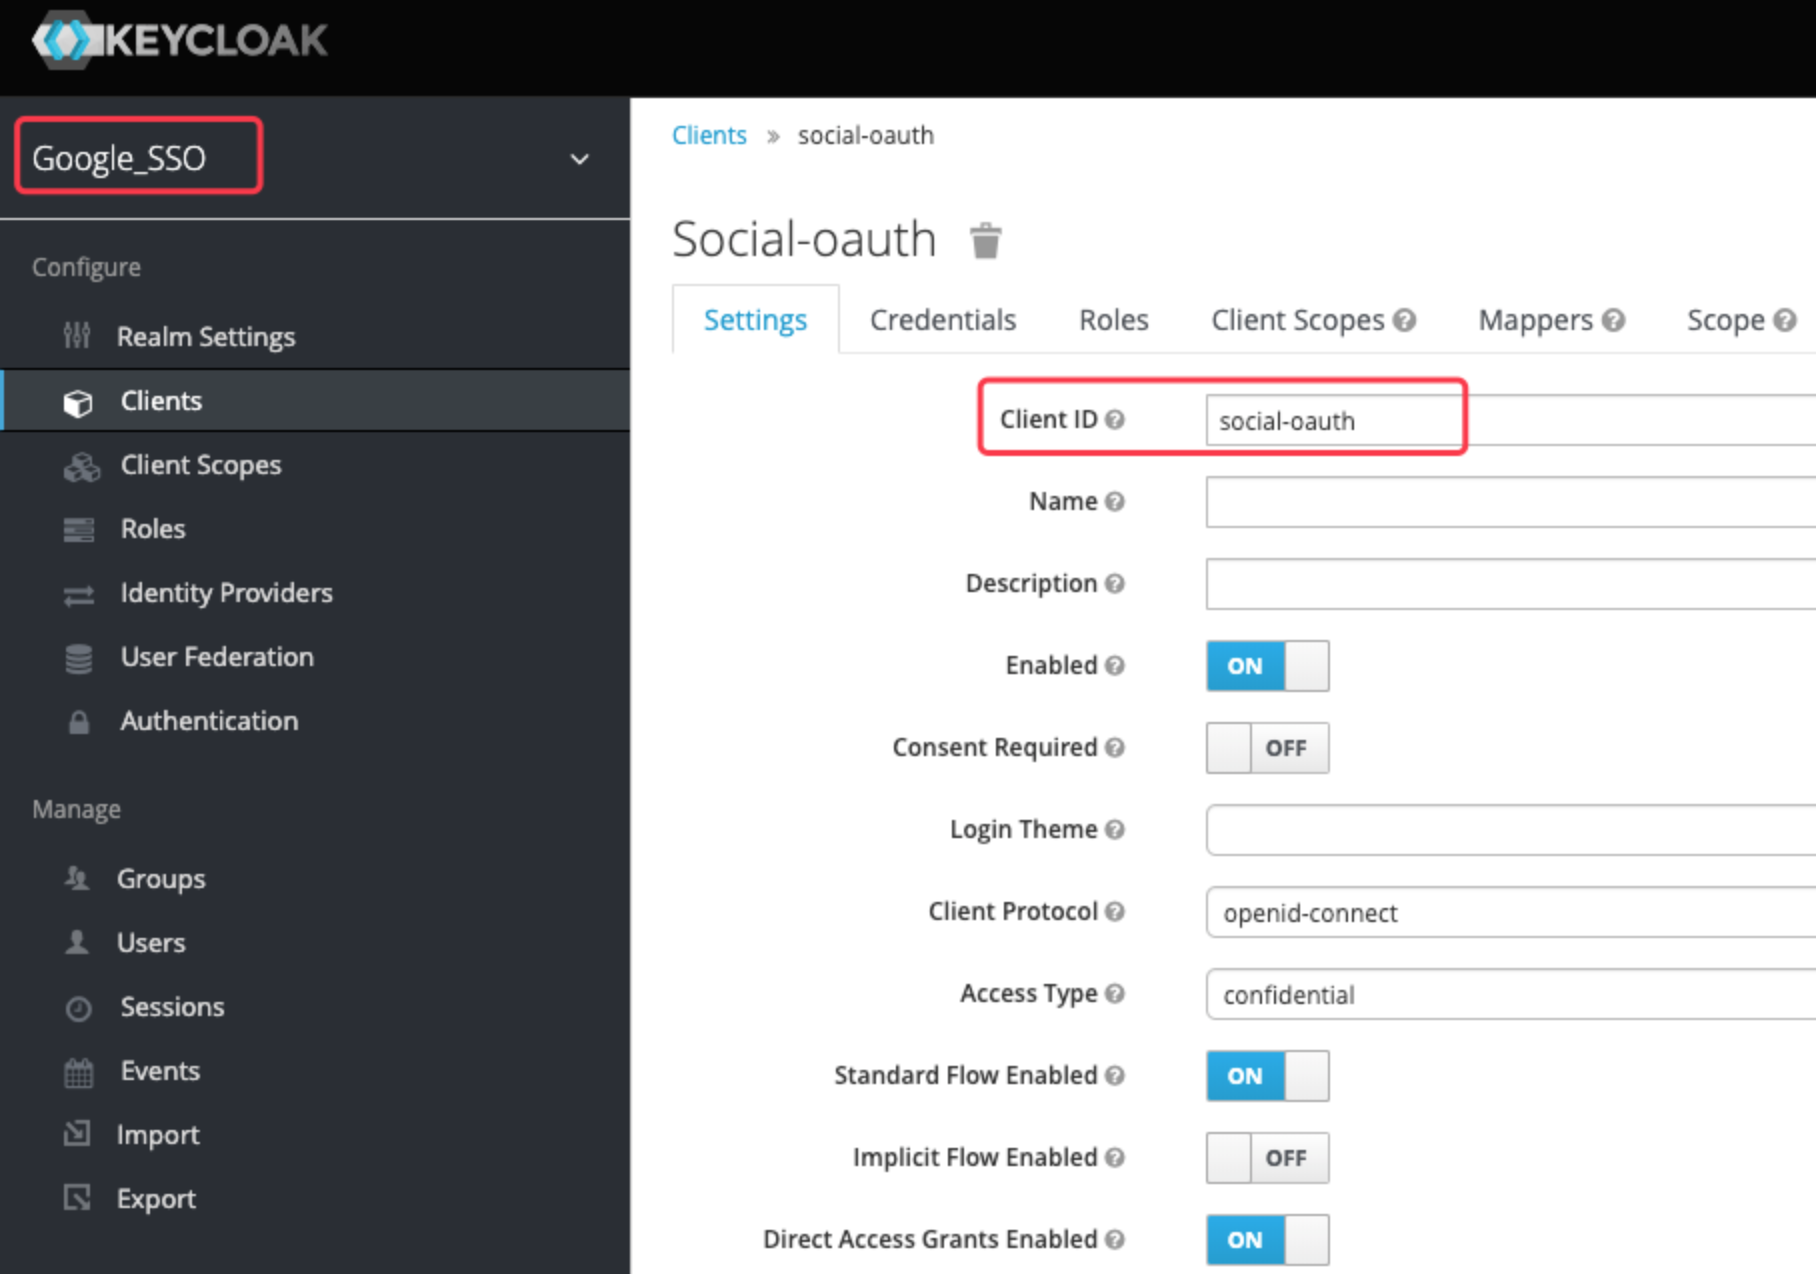
(2) Create an Identity Provider
Fill in the client Id and secret which we generated in the previous step

3. Create a web project
Create a web project which could use Keycloak for login. Use keycloak.json file for settings.
Use the public URL which generated in step 0 intead of localhost:8080
https://github.com/shiralwz/Keycloak-Angular-Auth
run yarn to install the lib, then run yarn start to start the server
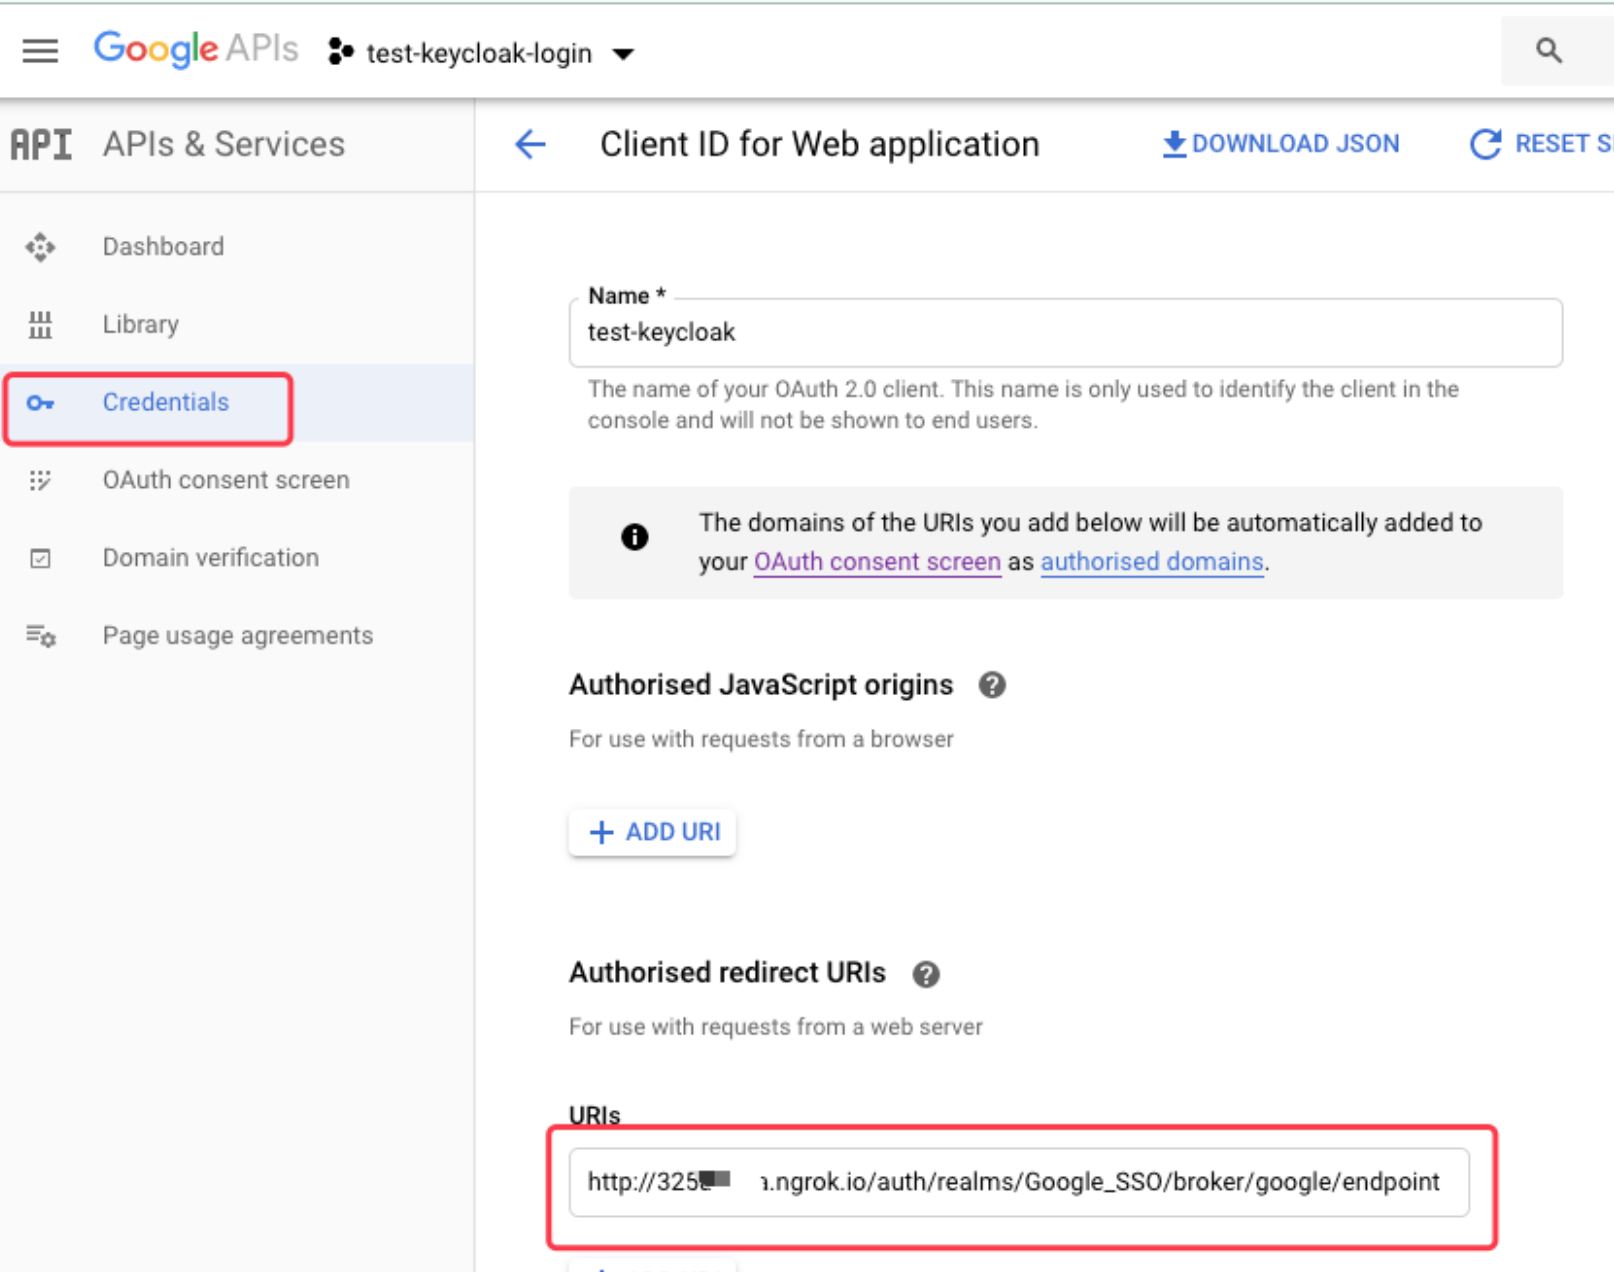
4. Setup google redirect URIs
(1) Setup the redirect URI and authorized domains
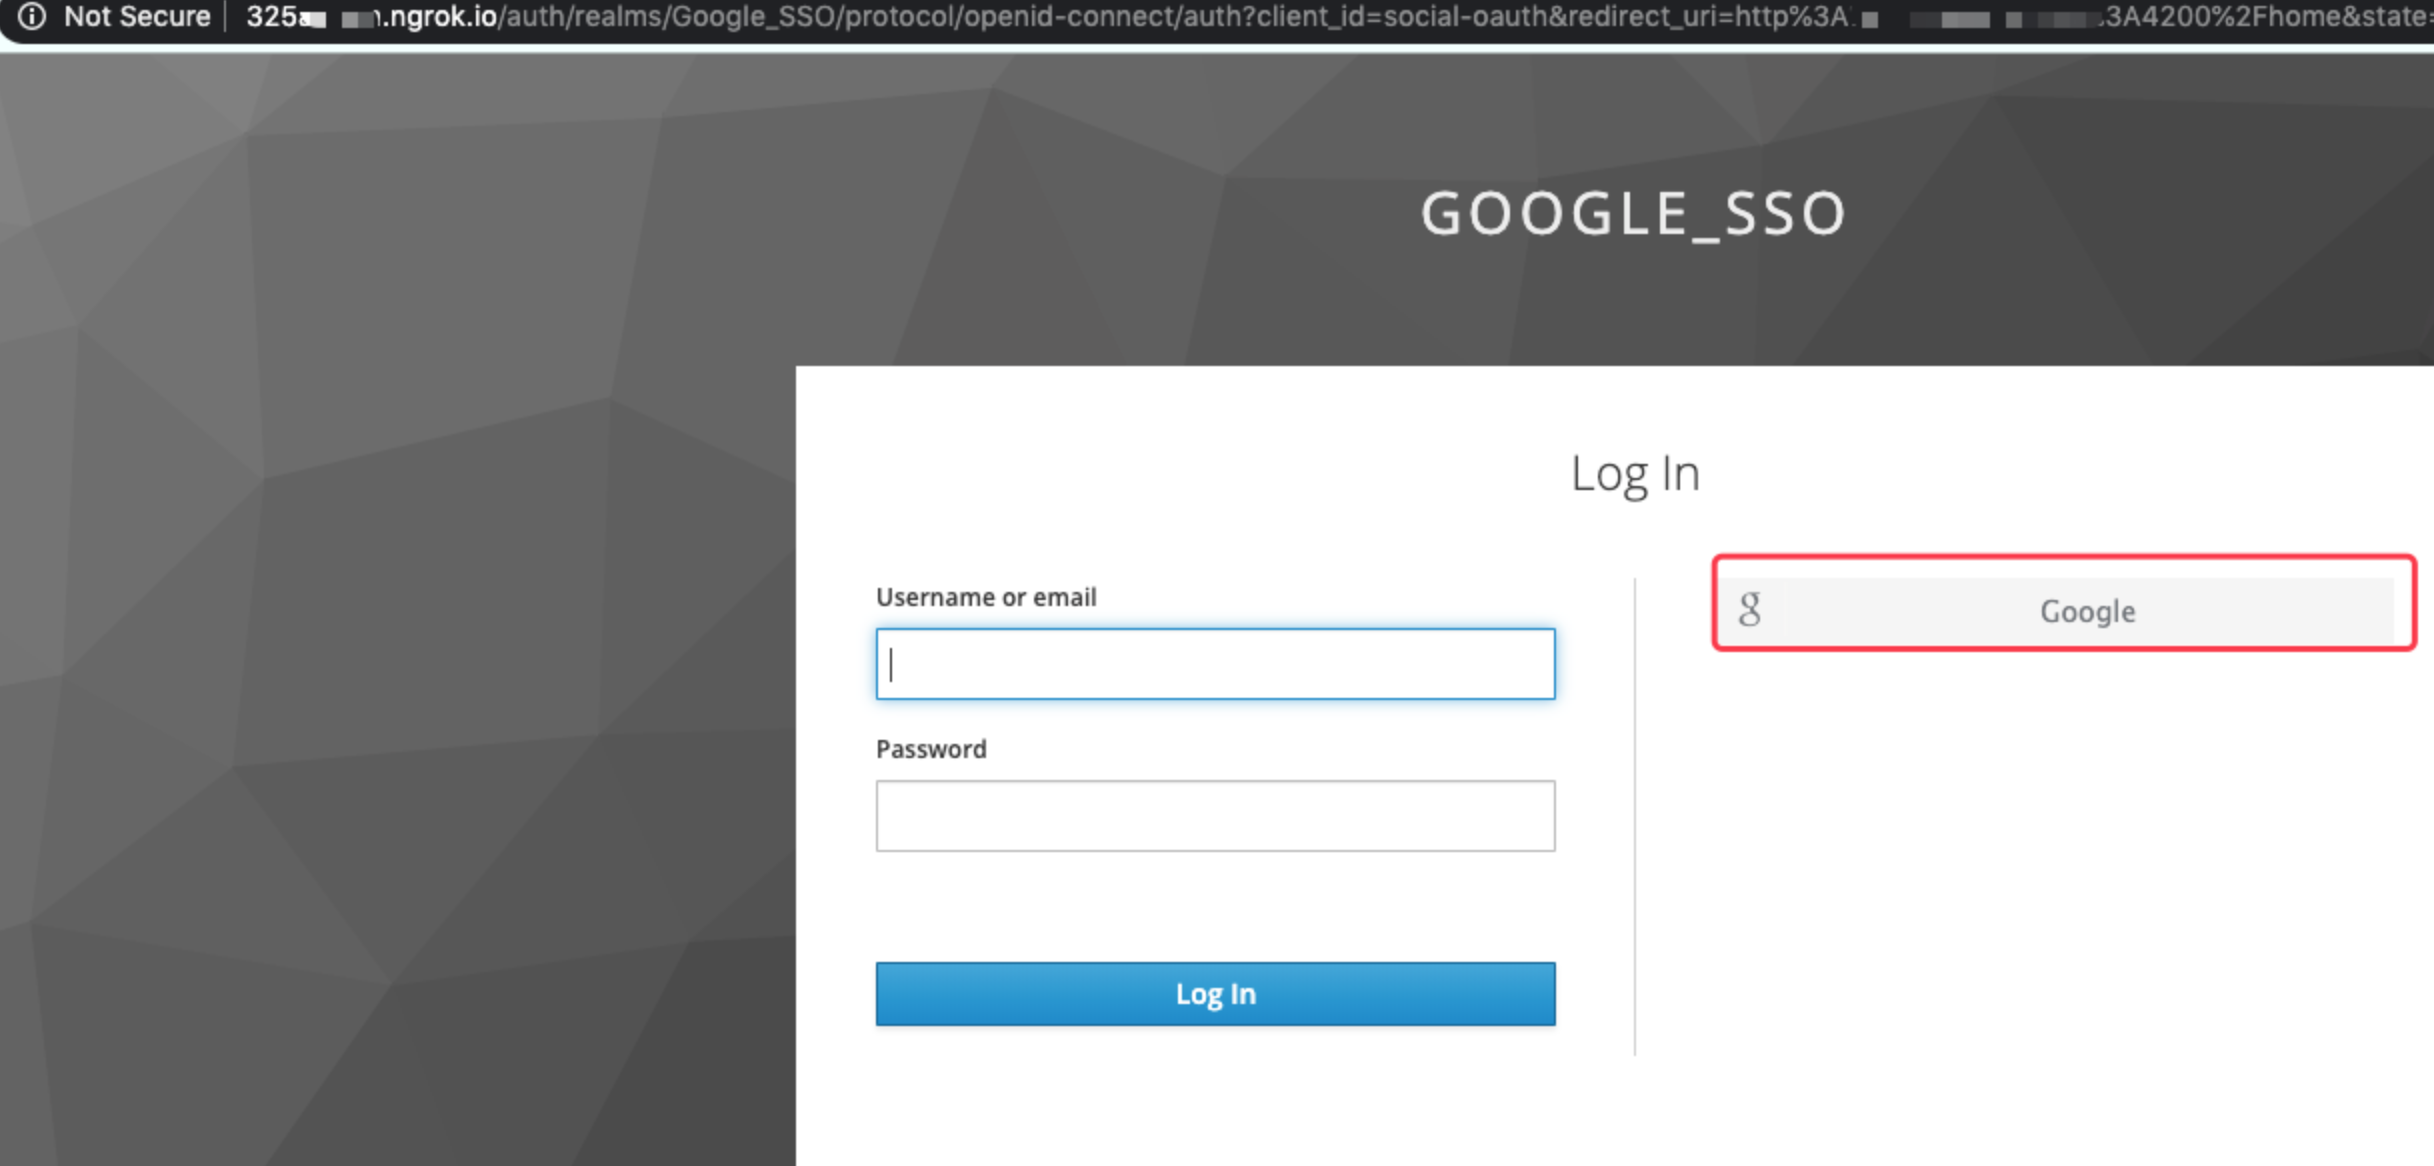
5. Run web server and test
Click login link and redirected to Keycloak login page