本篇LIST:
项目介绍
项目实现
--静态布局
--交互逻辑实现
项目预览地址:http://jackson01.gitee.io/canvashua/
项目介绍:
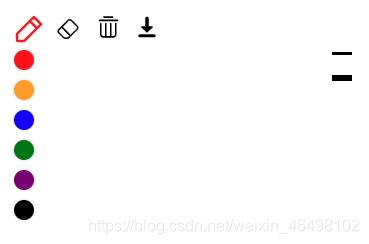
在学习HTML5 canvas时制作的一个画板,支持移动端和桌面端,可以图片形式保存绘画内容。
功能
- 可选择笔的粗细
- 可选择笔的颜色
- 添加橡皮擦功能
- 添加清空功能
- 添加可下载内容
项目实现:
1.静态布局
2.逻辑实现
2.1 根据设备自动设置画布的大小
我们定义一个自动设置画布大小函数利用document.documentElement.clientWidth/clientHeight;获取设备的的大小,利用canvas.width = width; canvas.height = height;设置画布的大小。此时我们需要给window绑定一个resize事件,此事件在窗口大小发生变化时调用,来重新设置画布的大小。
function autoSetCanvasSize(canvas) {
  setCanvasSize();
  function setCanvasSize() {
    let width = document.documentElement.clientWidth;
    let height = document.documentElement.clientHeight;
    canvas.width = width;
    canvas.height = height;
  }
  window.onresize = function () {
    setCanvasSize();
  };
}
2.2 跟用户进行交换逻辑
我们在全局设置了一个变量eraserUsing来标识当时是删除状态,还是画笔的绘画状态。用此在我们处理用户的滑动时进行判断。这里我们要区分来访的设备是移动端还是pc端。来进行不同时间的绑定。在函数中我设置一个变量using来记录用户是否在摁住拖动鼠标事件中,这个函数里边用到了闭包。点下鼠标或手指点击,我们改变using为真。利用e.touches[0].clientX``e.touches[0].clientY来获取点击的位置,在画笔状态下,我们记录这个点。在橡皮擦状态时,我们调用清除的函数。
移动事件中我们,获取lastpoint,当前坐标,调用一个划线函数。之后把lastpoint替换为当前的坐标。橡皮擦状态下,我们同样调用删除函数进行删除。
function listenToUser(canvas) {
  let using = false;
  let lastPoint = {};
  if (document.documentElement.ontouchmove !== undefined) {
    canvas.ontouchstart = function (e) {
      using = true;

      if (!eraserEnabled) {
        lastPoint["x"] = e.touches[0].clientX;
        lastPoint["y"] = e.touches[0].clientY;
      } else {
        clearDraw(e.touches[0].clientX, e.touches[0].clientY);
      }
    };
    canvas.ontouchmove = function (e) {
      if (!using) {
        return false;
      }
      if (!eraserEnabled) {
        drawLine(
          lastPoint.x,
          lastPoint.y,
          e.touches[0].clientX,
          e.touches[0].clientY
        );
        lastPoint["x"] = e.touches[0].clientX;
        lastPoint["y"] = e.touches[0].clientY;
      } else {
        clearDraw(e.touches[0].clientX, e.touches[0].clientY);
      }
    };
    canvas.ontouchend = function (e) {
      using = false;
    };
  } else {
    canvas.onmousedown = function (e) {
      using = true;

      if (!eraserEnabled) {
        lastPoint["x"] = e.clientX;
        lastPoint["y"] = e.clientY;
      } else {
        clearDraw(e.clientX, e.clientY);
      }
    };
    canvas.onmousemove = function (e) {
      if (!using) {
        return false;
      }
      if (!eraserEnabled) {
        drawLine(lastPoint.x, lastPoint.y, e.clientX, e.clientY);
        lastPoint["x"] = e.clientX;
        lastPoint["y"] = e.clientY;
      } else {
        clearDraw(e.clientX, e.clientY);
      }
    };
    canvas.onmouseup = function (e) {
      using = false;
    };
  }
}
function drawLine(x1, y1, x2, y2) {
  cxt.beginPath();
  cxt.lineWidth = lineWidth;
  cxt.moveTo(x1, y1);
  cxt.lineTo(x2, y2);
  cxt.closePath();
  cxt.stroke();
}

function clearDraw(x, y, width = 20, height = 20) {
  cxt.clearRect(x - width / 2, y - height / 2, width, height);
}
2.2.1 移动端与pc端来访设备进行判断
document.documentElement.ontouchmove !== undefined //移动端
document.documentElement.ontouchmove === undefined //pc端
2.2.2 移动端与pc端事件的不同
- 移动端 是
ontouchstart ; ontouchmove; ontouchend - pc端 是
onmousedown; onmousemove;onmouseup
2.2.3 移动端与pc端获取点击位置的不同
移动端: e.touches[0].clientX; e.touches[0].clientY
pc端 : e.clientX ; e.clientX
2.2.4 画笔颜色的切换
利用排他思想,进行不同颜色的选择切换激活。 修改画笔颜色的代码如下:
cxt.fillStyle = ‘颜色’;
cxt.strokeStyle = ‘颜色’;
2.2.5 橡皮擦函数的实现
我们通过后边两个参数传递清除的区域,可以默认不传递。前两个参数是需要清除区域的中心位置。
function clearDraw(x, y, width = 20, height = 20) {
  cxt.clearRect(x - width / 2, y - height / 2, width, height);
}
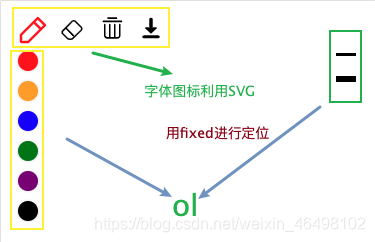
2.2.6 走马灯效果的实现
我们利用关键帧动画,来进行小tip的实现。并且在其中可以设置循环无限等,多个关键帧动画的特有属性。 代码如下:
@keyframes kk {
  0% {
    left: 100%;
  }
  50% {
    left: 50%;
  }
  70% {
    left: 25%;
  }
  100% {
    left: 0%;
    transform: translate(-100%);
  }
}
.tip {
   29em;
  color: aquamarine;
  position: fixed;
  bottom: 10px;
  animation: kk 10s infinite linear;
}
这里有几点我们需要注意,关键帧其中的不同时刻,我们尽量操作相同的属性来完成动画效果。防止样式发生错乱。