一、集成Thymeleaf
1、引入jar包(thymeleaf对应的starter)
<dependency>
    <groupId>org.springframework.boot</groupId>
    <artifactId>spring-boot-starter-thymeleaf</artifactId>
</dependency>
2、配置thymeleaf
spring:
  thymeleaf:
    prefix: classpath:/templates/
    check-template-location: true
    cache: false
    suffix: .html
    encoding: UTF-8
    content-type: text/html
    mode: HTML5
(1)prefix:指定模板躲在的目录
(2)check-template-location:检查模板路径是否存在
(3)cache:是否缓存,开发模式下设置为false,避免改了模板还要重启重启服务器,线上设置为true,可以提高性能
(4)encoding&content-type:这个大家应该比较熟悉了,与Servlet中设置输出对应属性效果一致
(5)mode:这个还是参考官网的说明吧,并且这个是2.X与3.0不同,本文自动引入的包是2.15。
3、编写thymeleaf模板文件
<!DOCTYPE HTML>
<html xmlns="http://www.w3.org/1999/xhtml" xmlns:th="http://www.thymeleaf.org">
<head>
<meta content="text/html;charset=UTF-8"/>
</head>
<body>
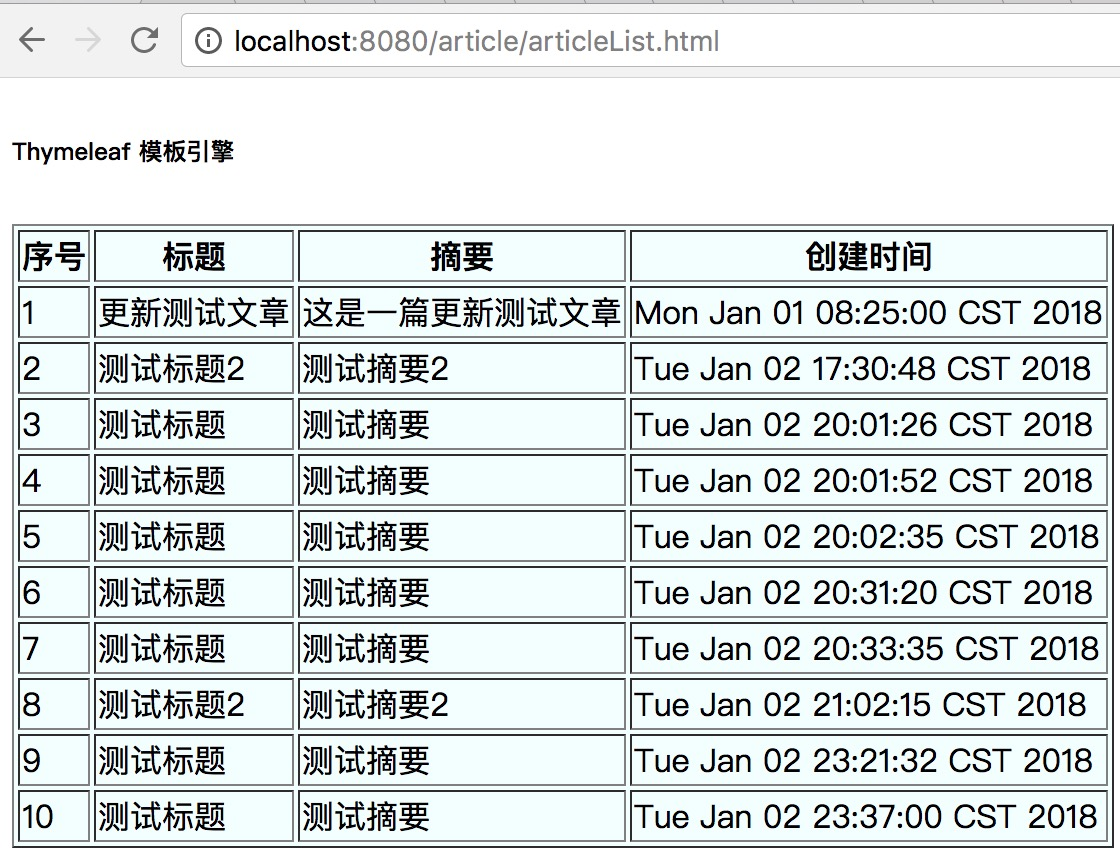
<h6>Thymeleaf 模板引擎</h6>
<table border="1" bgcolor="#f0ffff">
<thead>
<tr>
<th>序号</th>
<th>标题</th>
<th>摘要</th>
<th>创建时间</th>
</tr>
</thead>
<tbody th:each="article : ${list}">
<tr>
<td th:text="${article.id}"></td>
<td th:text="${article.title}"></td>
<td th:text="${article.summary}"></td>
<td th:text="${article.createTime}"></td>
</tr>
</tbody>
</table>
</body>
</html>
大家可以看到,thymeleaf还是比较简单的,并且最大的特点就是的标签是作为HTML元素的属性存在的,也就是说,该页面是可以直接通过浏览器来预览的,只是没有数据而已,这个很方便大家进行调试。
4、配置Controller
@Controller
@RequestMapping("/article")
public class ArticleController {

    @Autowired
    private ArticleService articleService;

    @RequestMapping("/articleList.html")
    public String getArticleList(Model model, String title, @RequestParam(defaultValue = "10") Integer pageSize,
                                 @RequestParam(defaultValue = "1") Integer pageNum) {
        int offset = (pageNum - 1) * pageSize;
        List<Article> list = articleService.getArticles(title, 1L, offset, pageSize);
        model.addAttribute("list", list);
        return "article/articleList";
    }
}
注意,这里用的注解是@Controller,而不是@RestController,因为@RestController会自动将返回结果转为字符串。
5、查看结果
6、常用语法
| 关键字 | 功能介绍 |
|---|---|
| th:id | 替换id |
| th:text | 文本替换 |
| th:utext | 支持html的文本替换 |
| th:object | 替换对象 |
| th:value | 属性赋值 |
| th:with | 变量赋值运算 |
| th:style | 设置样式 |
| th:onclick | 点击事件 |
| th:each | 属性赋值 |
| th:if | 判断条件 |
| th:unless | 和th:if判断相反 |
| th:href | 链接地址 |
| th:switch | 多路选择 配合th:case 使用 |
| th:case | th:switch的一个分支 |
| th:fragment | 布局标签,定义一个代码片段,方便其它地方引用 |
| th:include | 布局标签,替换内容到引入的文件 |
| th:replace | 布局标签,替换整个标签到引入的文件 |
| th:selected | selected选择框 选中 |
| th:src | 图片类地址引入 |
| th:inline | 定义js脚本可以使用变量 |
| th:action | 表单提交的地址 |
| th:remove | 删除某个属性 |
| th:attr | 设置标签属性,多个属性可以用逗号分隔 |
二、集成Freemarker
1、引入jar包(Freemarker对应的starter)
<dependency>
    <groupId>org.springframework.boot</groupId>
    <artifactId>spring-boot-starter-freemarker</artifactId>
</dependency>
2、配置Freemarker
spring:
  freemarker:
    template-loader-path: classpath:/templates/
    suffix: .ftl
    content-type: text/html
    charset: UTF-8
    settings:
      number_format: '0.##'
除了settings外,其他的配置选项和thymeleaf类似。settings会对freemarker的某些行为产生影响,如日期格式化,数字格式化等,感兴趣的同学可以参考官网提供的说明:https://freemarker.apache.org/docs/api/freemarker/template/Configuration.html#setSetting-java.lang.String-java.lang.String-
3、编写freemarker模板文件
<html>
<title>文章列表</title>
<body>
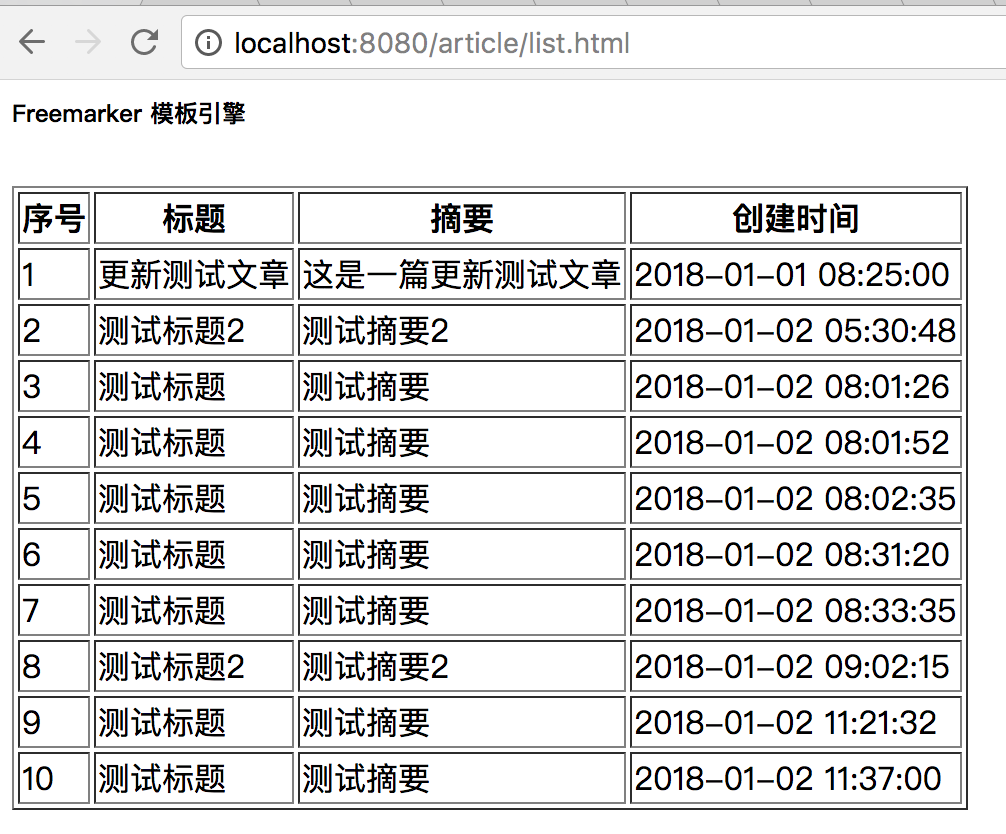
<h6>Freemarker 模板引擎</h6>
<table border="1">
<thead>
<tr>
<th>序号</th>
<th>标题</th>
<th>摘要</th>
<th>创建时间</th>
</tr>
</thead>
<#list list as article>
<tr>
<td>${article.id}</td>
<td>${article.title}</td>
<td>${article.summary}</td>
<td>${article.createTime?string('yyyy-MM-dd hh:mm:ss')}</td>
</tr>
</#list>
</table>
</body>
</html>
4、编写Controller
@Controller
@RequestMapping("/article")
public class ArticleController {

    @Autowired
    private ArticleService articleService;

    @RequestMapping("/list.html")
    public String getArticles(Model model, String title, @RequestParam(defaultValue = "10") Integer pageSize, Integer pageNum) {
        if (pageSize == null) {
            pageSize = 10;
        }
        if (pageNum == null) {
            pageNum = 1;
        }
        int offset = (pageNum - 1) * pageSize;
        List<Article> list = articleService.getArticles(title, 1L, offset, pageSize);
        model.addAttribute("list", list);
        return "article/list";
    }
}
5、访问网页
三、集成JSP
在正式的项目开发中,现在已经极少用jsp模板了,所以Spring boot对jsp的支持也不是很好,因此配置起来比thymeleaf和Freemaker相对来说就更复杂一点。
1、引入jar包
<dependency>
    <groupId>javax.servlet</groupId>
    <artifactId>jstl</artifactId>
</dependency>
<dependency>
    <groupId>org.apache.tomcat.embed</groupId>
    <artifactId>tomcat-embed-jasper</artifactId>
</dependency>
第一个jstl的依赖用于支持el表达式,第二个依赖用于支持jsp。注意,如果是在外部的tomcat中运行,需要将scope设置为provide,防止jar包冲突。
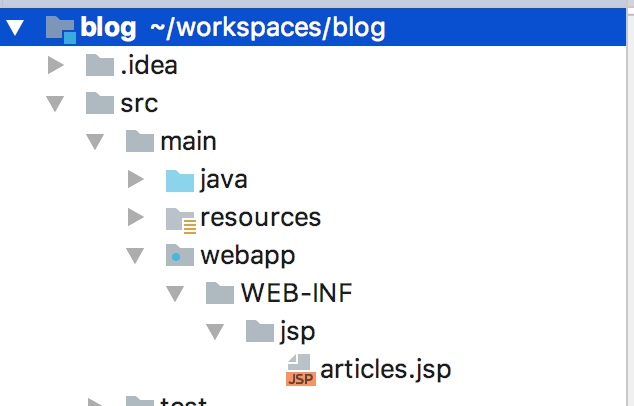
2、手动创建webapp目录
需要手动在main目录下创建一个webapp的目录,结构如下:
3、jsp路径配置
在application.yml中添加如下配置:
spring:
  mvc:
    view:
      prefix: /WEB-INF/jsp/
      suffix: .jsp
了解Spring mvc的应该很熟悉上面的配置。
4、编写jsp页面
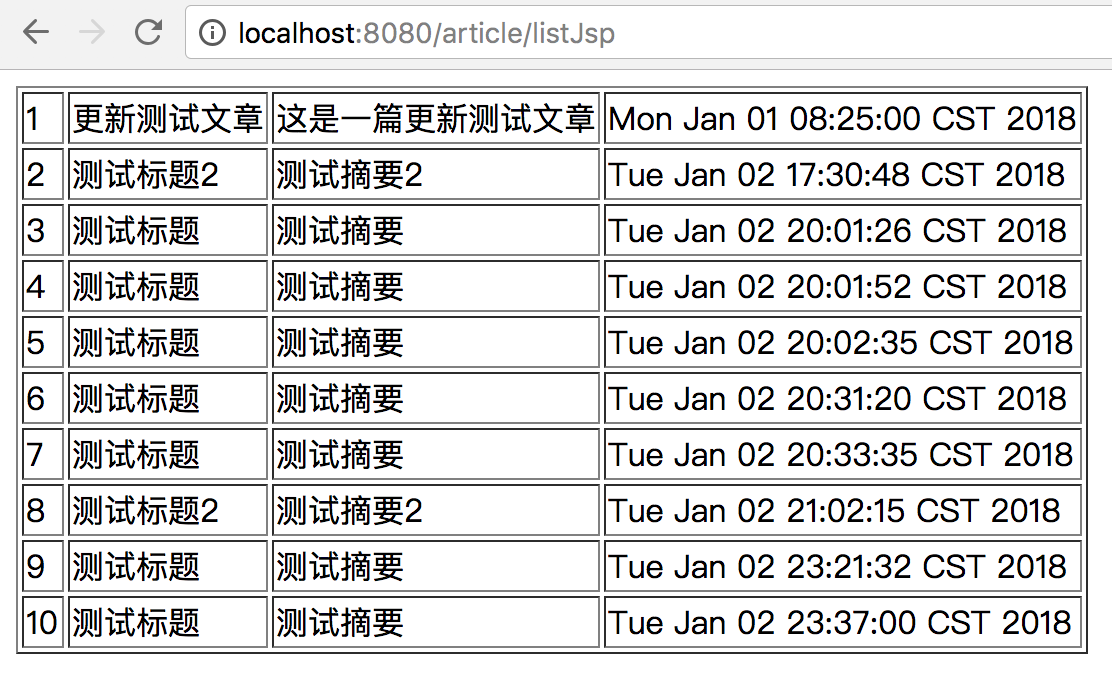
<%@ page contentType="text/html;charset=UTF-8" language="java" %>
<%@ taglib uri="http://java.sun.com/jsp/jstl/core" prefix="c"%>
<html>
<head>
    <title>Title</title>
</head>
<body>
    <table border="1">
        <c:forEach var="article" items="${list}">
            <tr>
                <td>${article.id}</td>
                <td>${article.title}</td>
                <td>${article.summary}</td>
                <td>${article.createTime}</td>
            </tr>
        </c:forEach>
    </table>
</body>
</html>
5、编写Controller
@RequestMapping("/listJsp")
   public String getArticleListJsp(Model model, String title, @RequestParam(defaultValue = "10") Integer pageSize, Integer pageNum) {
       if (pageSize == null) {
           pageSize = 10;
       }
       if (pageNum == null) {
           pageNum = 1;
       }
       int offset = (pageNum - 1) * pageSize;
       List<Article> list = articleService.getArticles(title, 1L, offset, pageSize);
       model.addAttribute("list", list);
       return "articles";
   }
6、访问结果页面
7、jsp应该尽量避免使用,原因如下:
- jsp只能打包为:war格式,不支持jar格式,只能在标准的容器里面跑(tomcat,jetty都可以)
- 内嵌的Jetty目前不支持JSPs
- Undertow不支持jsps
- jsp自定义错误页面不能覆盖spring boot 默认的错误页面
四、总结
总体来讲,Spring boot对thymeleaf和Freemaker支持比较友好,配置相对也简单一点,在实际的开发中,大多也以这两种模板引擎为主,很少有用jsp的,jsp现在可能更多是在实验或者学习阶段使用。jsp配置比较麻烦一点的事情是不像前两者,网上的说法基本一致,但是对Jsp的配置有很多种说法,比如说是不是需要将jar包改成war包?jsp的依赖是否需要设置为provide等等,这个主要依赖于你是否最后要将程序部署到外部的tomcat还是直接运行jar?因为本文都是直接在idea下直接运行Application类,所以这些操作就不需要了。