数据库连接是一种关键的有限的昂贵的资源,这在多用户网页应用程序中体现的尤为突出.对数据库连接的管理能显著影响到整个应用程序的伸缩性和健壮性,影响到程序的性能指标,数据库连接池正是针对这个问题提出的.
数据库连接池负责分配,管理和释放数据库连接,它允许应用程序重复使用一个现有的数据库连接,而不是再重新建立一个;释放空闲时间超过最大空闲时间的数据库连接来避免因为没有释放数据库连接而引起的数据库连接遗漏,这样可以明显提高对数据库操作的性能.
数据库连接池在初始化的时将创建一定数量的数据库连接放到连接池中,这些数据库连接的数量是又最小数据库连接数来设定的,无论这些数据库连接是否被使用,连接池都将一直保证至少拥有这么多的连接数,当应用程序向连接池请求的连接数超过最大连接数量时,这些请求将被加入到等待队列中.
数据库连接池的最小连接数和最大连接数的设置要考虑到下列几个因素:
1.最小连接数是连接池一直保持的数据库连接,所以如果应用程序对数据库连接的使用量不大,将会有大量的数据库连接资源被浪费.
2.最大连接数是连接池申请的最大连接数,如果数据库连接请求超过次数,后面的数据库连接请求将被加入到等待对了中,这回影响之后的数据库操作
如果最小连接数与最大连接数相差太大,那么最先的连接请求将会获利,之后超过最小连接数量的连接请求等价于建立一个新的数据库连接,不过,这些小于最小连接数的数据库连接在使用完不会马上被释放,它将被放到连接池中等待重复使用或是空闲超时被释放.
实例使用的Tomcat版本为6.0
方法一: 在Tomcat的conf/context.xml中配置
在Tomcatapache-tomcat-6.0.33conf目录下的context.xml文件中配置默认值如下:
<?xml version='1.0' encoding='utf-8'?>
<Context>
    <WatchedResource>WEB-INF/web.xml</WatchedResource>
</Context>
配置连接池:
<?xml version='1.0' encoding='utf-8'?>
<Context>
    <WatchedResource>WEB-INF/web.xml</WatchedResource>

    <!--配置oracle数据库的连接池-->
    <Resource name="jdbc/oracleds"
        author="Container"
        type="javax.sql.DataSource"
        maxActive="100"
        maxIdle="30"
        maxWait="10000"
        username="scott"
        password="tiger"
        driverClassName="oracle.jdbc.dirver.OracleDriver"
        url="jdbc:oracle:thin:@127.0.0.1:1521:ora9" />

    <!--配置mysql数据库的连接池,
        需要做的额外步骤是将mysql的Java驱动类放到tomcat的lib目录下
        maxIdle 连接池中最多可空闲maxIdle个连接
        minIdle 连接池中最少空闲maxIdle个连接
        initialSize 初始化连接数目
        maxWait 连接池中连接用完时,新的请求等待时间,毫秒
        username 数据库用户名
        password 数据库密码
        -->
    <Resource name="jdbc/mysqlds"
        auth="Container"
        type="javax.sql.DataSource"
        username="root"
        password="root"
        maxIdle="30"
        maxWait="10000"
        maxActive="100"
        driverClassName="com.mysql.jdbc.Driver"
        url="jdbc:mysql://127.0.0.1:3306/db_blog" />

</Context>
配置好后需要注意的两个步骤
1.将对应数据库的驱动类放到tomcat的lib目录西安
2.重新启动tomcat服务器,让配置生效
在web应用程序的web.xml中设置数据源参考,如下:
在<web-app></web-app>节点中加入下面内容
<resource-ref>
      <description>mysql数据库连接池</description>
      <!-- 参考数据源名字,同Tomcat中配置的Resource节点中name属性值"jdbc/mysqlds"一致 -->
      <res-ref-name>jdbc/mysqlds</res-ref-name>
      <!-- 资源类型 -->
      <res-type>javax.sql.DataSource</res-type>
      <res-auth>Container</res-auth>
      <res-sharing-scope>Shareable</res-sharing-scope>
</resource-ref>
错误解决:
javax.naming.NoInitialContextException: Need to specify class name in environment or system property, or as an applet parameter, or in an application resource file: java.naming.factory.initial
    at javax.naming.spi.NamingManager.getInitialContext(NamingManager.java:645)
    at javax.naming.InitialContext.getDefaultInitCtx(InitialContext.java:288)
    at javax.naming.InitialContext.getURLOrDefaultInitCtx(InitialContext.java:325)
    at javax.naming.InitialContext.lookup(InitialContext.java:392)
    at com.iblog.util.DBPoolUtil.<clinit>(DBPoolUtil.java:34)
解决方案:
上面的异常信息是配置文件中JNDI没有初始化造成的
如果下面的问题都不存在
1.要去检查下配置文件中连接数据库的URL参数是否正确2.以及是否导入了正常的包3.检查在Tomcat中conf/server.xml文件,检查是否设置useNaming="false",如果是,去掉
2.那就是通过main方法测试的,这个数据源不支持这样的测试方法,程序要运行在Tomcat中才能找到相应的数据源.[我在测试时犯这样的错导致上面错误出现]
<%@ page language="java" pageEncoding="UTF-8" contentType="text/html; charset=UTF-8"%>
<%@ page import="java.sql.*" %>
<%@ page import="javax.naming.*" %>
<%@ page import="javax.sql.DataSource" %>
import="java.sql.*, javax.sql.*, javax.naming.*
<html>
<head>
<title>Tomcat6.0 JNDI!</title>
</head>
<body>
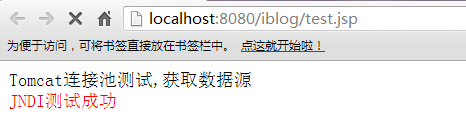
Tomcat连接池测试,获取数据源 <br>
<%
try {
//初始化查找命名空间
Context ctx = new InitialContext();
//参数java:/comp/env为固定路径
Context envContext = (Context)ctx.lookup("java:/comp/env");
//参数jdbc/mysqlds为数据源和JNDI绑定的名字
DataSource ds = (DataSource)envContext.lookup("jdbc/mysqlds");
Connection conn = ds.getConnection();
conn.close();
out.println("<span style='color:red;'>JNDI测试成功<span>");
} catch (NamingException e) {
e.printStackTrace();
} catch (SQLException e) {
e.printStackTrace();
}
%>
</body>
</html>
运行效果:
方法二:在Tomcat的conf/server.xml中配置
打开tomcat的conf/server.xml文件,找到<GlobalNamingResources></GlobalNamingResources>节点,默认的内容如下
<GlobalNamingResources>
    <Resource name="UserDatabase" auth="Container"
              type="org.apache.catalina.UserDatabase"
              description="User database that can be updated and saved"
              factory="org.apache.catalina.users.MemoryUserDatabaseFactory"
              pathname="conf/tomcat-users.xml" />
</GlobalNamingResources>
在该节点中加入相关的池配置信息,如下
<GlobalNamingResources>
             <Resource name="UserDatabase" auth="Container"
              type="org.apache.catalina.UserDatabase"
              description="User database that can be updated and saved"
              factory="org.apache.catalina.users.MemoryUserDatabaseFactory"
              pathname="conf/tomcat-users.xml" />

             <!--配置mysql数据库的连接池,
                需要做的额外步骤是将mysql的Java驱动类放到tomcat的lib目录下
               -->
             <Resource name="jdbc/mysqlds"
              auth="Container"
              type="javax.sql.DataSource"
              username="root"
              password="root"
              maxIdle="30"
              maxWait="10000"
              maxActive="100"
              driverClassName="com.mysql.jdbc.Driver"
              url="jdbc:mysql://127.0.0.1:3306/db_blog" />
  </GlobalNamingResources>
在tomcat的conf/context.xml文件中的<Context></Context>节点中加入如下内容
<ResourceLink name="jdbc/mysqlds" global="jdbc/mysqlds" type="javax.sql.DataSource"/>
然后在web项目中的WEB-INF目录下的web.xml中配置
<resource-ref>
      <description>mysql数据库连接池</description>
      <!-- 参考数据源名字,同Tomcat中配置的Resource节点中name属性值"jdbc/mysqlds"一致 -->
      <res-ref-name>jdbc/mysqlds</res-ref-name>
      <!-- 资源类型 -->
      <res-type>javax.sql.DataSource</res-type>
      <res-auth>Container</res-auth>
      <res-sharing-scope>Shareable</res-sharing-scope>
</resource-ref>
同样配置好后,需要重新启动服务器,让配置生效.
方法三:在Tomcat的conf/server.xml中配置虚拟目录时配置
在配置虚拟目录时,也就是在配置conf下面的server.xml时,在context标签内添加池配置.
在说该方法之前,先说一下,如何用tomcat配置虚拟目录
在tomcatconf下server.xml中找到
<Host name="localhost"  appBase="webapPS"
            unpackWARs="true" autoDeploy="true"
            xmlValidation="false" xmlNamespaceAware="false">
</Host>
在其中添加:
<Context path="/website" docBase="F:/myweb" reloadable="true"></Context>
注意:
docBase要改成你的项目目录。
path为虚拟路径,访问时的路径,注意:一定要加“/” debug建议设置为0
reloadable设置为true。
这样重新启动tomcat
实例中如下配置
<Context path="/website" docBase="D:/program files/Tomcat/apache-tomcat-6.0.33/webapps/iblog.war" reloadable="true">
</Context>
接下来添加池配置,如下
<!--配置虚拟目录-->
<Context path="/website" docBase="D:/program files/Tomcat/apache-tomcat-6.0.33/webapps/iblog.war" reloadable="true">
            <Resource name="jdbc/mysqlds"
            auth="Container"
            type="javax.sql.DataSource"
            username="root"
            password="root"
            maxIdle="30"
            maxWait="10000"
            maxActive="100"
            driverClassName="com.mysql.jdbc.Driver"
            url="jdbc:mysql://127.0.0.1:3306/db_blog"
            />
</Context>
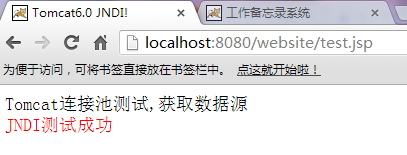
启动服务器,测试,注意因为我们配置了path值为”/website”,所以访问的路径应该为website.如下图:
方法四:在Web项目中的META-INF目录下新建一个文件context.xml,写入配置
注意:是META-INF目录下,不是WEB-INF目录下新建
<?xml version='1.0' encoding='utf-8'?>
<Context>
    <Resource name="jdbc/mysqlds"
        auth="Container"
        type="javax.sql.DataSource"
        username="root"
        password="root"
        maxIdle="30"
        maxWait="10000"
        maxActive="100"
        driverClassName="com.mysql.jdbc.Driver"
        url="jdbc:mysql://127.0.0.1:3306/db_blog"
        logAbandoned="true" />
</Context>
然后在WEB-INF中新建web.xml文件,然后将下面内容复制,保存
<?xml version="1.0" encoding="UTF-8"?>
<web-app xmlns="http://java.sun.com/xml/ns/javaee"
xmlns:xsi="http://www.w3.org/2001/XMLSchema-instance"
xsi:schemaLocation="http://java.sun.com/xml/ns/javaee
http://java.sun.com/xml/ns/javaee/web-app_3_0.xsd"
version="3.0"
metadata-complete="true">
<display-name>test</display-name>
<welcome-file-list>
<welcome-file>test.jsp</welcome-file>
</welcome-file-list>
<resource-ref>
<description>DB Connection</description>
<res-ref-name>jdbc/mysqlds</res-ref-name>
<res-type>javax.sql.DataSource</res-type>
<res-auth>Container</res-auth>
</resource-ref>
</web-app>
import javax.naming.Context; import javax.naming.InitialContext; import javax.sql.DataSource;
4.完成后,重启tomcat服务器。
方法五
Tomcat7 新的数据库连接池Tomcat jdbc pool介绍和配置
1.Tomcat 中直接使用的方法:全局的连接池
在conf/server.xml下的<GlobalNamingResources>节点里配置resource,例如:
- <Resource name="jdbc/ens"
- auth="Container"
- type="javax.sql.DataSource"
- factory="org.apache.tomcat.jdbc.pool.DataSourceFactory"
- testWhileIdle="true"
- testOnBorrow="true"
- testOnReturn="false"
- validationInterval="30000"
- timeBetweenEvictionRunsMillis="30000"
- maxActive="100"
- minIdle="10"
- maxWait="10000"
- initialSize="10"
- removeAbandonedTimeout="60"
- removeAbandoned="true"
- logAbandoned="true"
- minEvictableIdleTimeMillis="30000"
- jmxEnabled="true"
- jdbcInterceptors=
- "org.apache.tomcat.jdbc.pool.interceptor.ConnectionState;org.apache.tomcat.jdbc.pool.interceptor.StatementFinalizer"
- username="root"
- password="123"
- driverClassName="com.mysql.jdbc.Driver"
- url="jdbc:mysql://localhost:3306/ens"/>
然后,在context.xml文件的<Context></Context>节点中添加如下配置:
- <ResourceLink global="jdbc/ens" name="jdbc/ens" type="javax.sql.DataSource"/>
global="jdbc/ens" 中的参数值("jdbc/ens")必须和上一段<Resource >配置中的name属性的值保持一样。name="jdbc/ens" 这个可以随便取,但是在程序中调用的时候,就应该与name的值保持一致。到这里,连接池已经配置好啦。
用JSP测试一下:
- <%@ page language="java" pageEncoding="gbk"%>
- <%@page import="java.sql.Connection"%>
- <%@page import="javax.naming.Context"%>
- <%@page import="javax.naming.InitialContext"%>
- <%@page import="javax.sql.DataSource"%>
- <%@page import="java.sql.Statement"%>
- <%@page import="java.sql.ResultSet"%>
- <%
- //连接池的获取
- Connection conn = null;
- DataSource ds = null;
- ResultSet rs =null;
- Statement stmt = null;
- Context initCtx = new InitialContext();
- ds =(DataSource)initCtx.lookup("java:comp/env/jdbc/ens");
- if(ds!=null){
- out.println("已经获得DataSource!");
- out.println("<br>");
- conn = ds.getConnection();
- try{
- stmt = conn.createStatement();
- String sql ="select * from ens_area";
- rs = stmt.executeQuery(sql);
- out.println("以下是从数据库中读取出来的数据:<br>");
- while(rs.next()){
- out.println("<br>");
- out.println(rs.getString("area_name"));
- }
- }catch(Exception ex){
- ex.printStackTrace();
- }finally{
- conn.close();
- rs.close();
- stmt.close();
- }
- }
- %>
方法六
Tomcat7 新的数据库连接池Tomcat jdbc pool
(1)dbcp 是单线程的,为了保证线程安全会锁整个连接池
(2)dbcp 性能不佳
(3)dbcp 太复杂,超过 60 个类,发展滞后。
因此,通常J2EE中还会使用其它的高性能连接池,如 C3P0,还有阿里系的 druid 等。为此,Tomcat 从 7.0 开始引入一个新的模块: Tomcat jdbc pool
tomcat jdbc pool 近乎兼容 dbcp ,性能更高
异步方式获取连接
tomcat jdbc pool 是 tomcat 的一个模块,基于 tomcat JULI,使用 Tomcat 的日志框架
使用 javax.sql.PooledConnection 接口获取连接
支持高并发应用环境
超简单,核心文件只有8个,比 c3p0 还少
更好的空闲连接处理机制
支持 JMX
支持 XA Connection。
tomcat jdbc pool 可在 Tomcat 中直接使用,也可以在独立的应用中使用。
在META-INF/context.xml下的<Context></Context>节点里配置resource,例如:
- <Resource name="j<span style="font-size:12px; line-height:1.45; white-space:pre-wrap">dbc/TestDB</span>"
- auth="Container"
- type="javax.sql.DataSource"
- factory="org.apache.tomcat.jdbc.pool.DataSourceFactory"
- testWhileIdle="true"
- testOnBorrow="true"
- testOnReturn="false"
- validationInterval="30000"
- timeBetweenEvictionRunsMillis="30000"
- maxActive="100"
- minIdle="10"
- maxWait="10000"
- initialSize="10"
- removeAbandonedTimeout="60"
- removeAbandoned="true"
- logAbandoned="true"
- minEvictableIdleTimeMillis="30000"
- jmxEnabled="true"
- jdbcInterceptors=
- "org.apache.tomcat.jdbc.pool.interceptor.ConnectionState;org.apache.tomcat.jdbc.pool.interceptor.StatementFinalizer"
- username="root"
- password="123"
- driverClassName="com.mysql.jdbc.Driver"
- url="jdbc:mysql://localhost:3306/ens"/>
然后,在WEB-INF/web.xml文件的节点中添加如下配置:
- </resource-ref>
- <resource-ref>
- <description>DB_Connection</description>
- <res-ref-name>jdbc/TestDB</res-ref-name>
- <res-type>javax.sql.DataSource</res-type>
- <res-auth>Container</res-auth>
- </resource-ref>
这个可以随便取,但是在程序中调用的时候,就应该与name的值保持一致。到这里,连接池已经配置好啦。
方法七为单个web项目配置数据池
1 配置连接池
将以下内容保存为context.xml,放在web项目下的META-INF文件夹下:
- <?xml version="1.0" encoding="UTF-8"?>
- <!DOCTYPE xml>
- <Context>
- <Resource name="jdbc/test"
- auth="Container"
- type="javax.sql.DataSource"
- factory="org.apache.tomcat.jdbc.pool.DataSourceFactory"
- maxActive="100" //最大激活连接
- maxIdle="30" //最大空闲连接
- maxWait="1000" //最大等待数
- username="test" //数据库用户名
- password="testtest" //数据库密码
- driverClassName="com.mysql.jdbc.Driver" //此处使用mysql数据库,请自行修改驱动
- url="jdbc:mysql://localhost:3306/test?characterEncoding=UTF-8" /> //test为数据库名,编码为UTF-8
- </Context>
2.项目中web.xml中引用连接池
<description>DB_Connection</description>
<res-ref-name>jdbc/TestDB</res-ref-name>
<res-type>javax.sql.DataSource</res-type>
<res-auth>Container</res-auth>
</resource-ref>
3 代码中引用连接池
- package com.hrb2c.servlet;
- import java.io.IOException;
- import java.io.PrintWriter;
- import java.sql.Connection;
- import java.sql.ResultSet;
- import java.sql.SQLException;
- import java.sql.Statement;
- import java.util.concurrent.Future;
- import javax.naming.Context;
- import javax.naming.InitialContext;
- import javax.naming.NamingException;
- import javax.servlet.ServletException;
- import javax.servlet.annotation.WebServlet;
- import javax.servlet.http.HttpServlet;
- import javax.servlet.http.HttpServletRequest;
- import javax.servlet.http.HttpServletResponse;
- import org.apache.tomcat.jdbc.pool.DataSource;
- /**
- * 数据库连接池
- *
- * @author Yuedong Li
- *
- */
- @WebServlet("/ConnPoolTest")
- public class ConnPoolTest extends HttpServlet {
- private static final long serialVersionUID = 1L;
- private Connection con = null;
- private static DataSource datasource;
- /**
- * @see HttpServlet#HttpServlet()
- */
- public ConnPoolTest() {
- super();
- try {
- //获取数据源
- datasource = getInstance();
- //连接池同步
- Future<Connection> future = datasource.getConnectionAsync();
- while (!future.isDone()) {
- // 等待连接池同步
- Thread.sleep(100);
- }
- // 获取连接池
- con = future.get();
- } catch (Exception e) {
- e.printStackTrace();
- }
- }
- /**
- * 单例模式获取数据源
- * @return
- * @throws NamingException
- */
- private DataSource getInstance() throws NamingException {
- if (datasource == null) {
- Context initContext = new InitialContext();
- Context envContext = (Context) initContext.lookup("java:/comp/env");
- datasource = (DataSource) envContext.lookup("jdbc/test");
- }
- return datasource;
- }
- /**
- * 处理get方法
- */
- protected void doGet(HttpServletRequest request,
- HttpServletResponse response) throws ServletException, IOException {
- doPost(request, response);
- }
- /**
- * 处理post方法
- */
- protected void doPost(HttpServletRequest request,
- HttpServletResponse response) throws ServletException, IOException {
- Statement st;
- StringBuffer buff = new StringBuffer("<html><body>");
- try {
- if (con != null) {
- //简单查询,test表中有2列,id与name
- buff.append("id");
- buff.append(" ");
- buff.append("name");
- buff.append("<br>");
- st = con.createStatement();
- ResultSet rs = st.executeQuery("select * from test");
- while (rs.next()) {
- buff.append(rs.getString("id"));
- buff.append(" ");
- buff.append(rs.getString("name"));
- buff.append("<br>");
- }
- }
- buff.append("</body></html>");
- } catch (SQLException e) {
- e.printStackTrace();
- }
- PrintWriter out = response.getWriter();
- out.write(buff.toString());
- }
- }