前言:
Spring Boot是为了简化Spring应用的创建、运行、调试、部署等而出现的,使用它可以做到专注于Spring应用的开发,而无需过多关注XML的配置。
简单来说,它提供了一堆依赖打包,并已经按照使用习惯解决了依赖问题---习惯大于约定。
Spring Boot默认使用tomcat作为服务器,使用logback提供日志记录。
Spring Boot的主要优点:
- 为所有Spring开发者更快的入门
- 开箱即用,提供各种默认配置来简化项目配置
- 内嵌式容器简化Web项目
- 没有冗余代码生成和XML配置的要求
技术栈:
- Java 8
- Maven
- Spring-boot
- Mybatis
- Redis
- Lombok
- Swagger2
- Jenkins
- SonarQuber
1、使用Maven构建项目
1.1 通过 SPRING INITIALIZR 工具生产基础项目
通过访问:http://start.spring.io/ 快速创建Spring-boot 的服务框架。

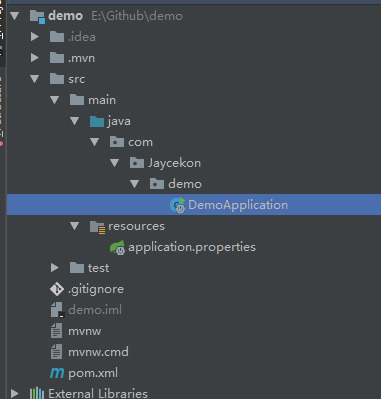
初始化相应信息后,下载压缩包。解压完成后,用IDEA打开项目,项目的目录结构:
总体流程:
- 访问:
http://start.spring.io/ - 选择构建工具
Maven Project、Spring Boot版本1.3.2以及一些工程基本信息 - 点击
Generate Project下载项目压缩包
解压项目包,并用IDE以Maven项目导入,以IntelliJ IDEA 14为例:
- 菜单中选择
File–>New–>Project from Existing Sources... - 选择解压后的项目文件夹,点击
OK - 点击
Import project from external model并选择Maven,点击Next到底为止。 - 若你的环境有多个版本的JDK,注意到选择
Java SDK的时候请选择Java 7以上的版本
1.2 导入Spring-boot 相关依赖
项目初始化时,相关依赖如下:
- spring-boot-starters:核心模块,包括自动配置支持、日志和YAML
- spring-boot-starter-test:测试模块,包括JUnit、Hamcrest、Mockito
- spring-boot-devtools:用于设置热部署
        <dependency>
            <groupId>org.springframework.boot</groupId>
            <artifactId>spring-boot-starter</artifactId>
        </dependency>

        <dependency>
            <groupId>org.springframework.boot</groupId>
            <artifactId>spring-boot-starter-test</artifactId>
            <scope>test</scope>
        </dependency>
        <!--热部署-->
        <dependency>
            <groupId>org.springframework.boot</groupId>
            <artifactId>spring-boot-devtools</artifactId>
            <optional>true</optional>
        </dependency>
这里我们需要引入Web模块,需要添加:
        <dependency>
            <groupId>org.springframework.boot</groupId>
            <artifactId>spring-boot-starter-web</artifactId>
        </dependency>
1.3 启动项目
添加首页控制层:
@RestController
public class IndexController {

    @RequestMapping("index")
    public String index() {
        return "hello world!";
    }
}
运行DemoApplication中的main方法,启动服务:
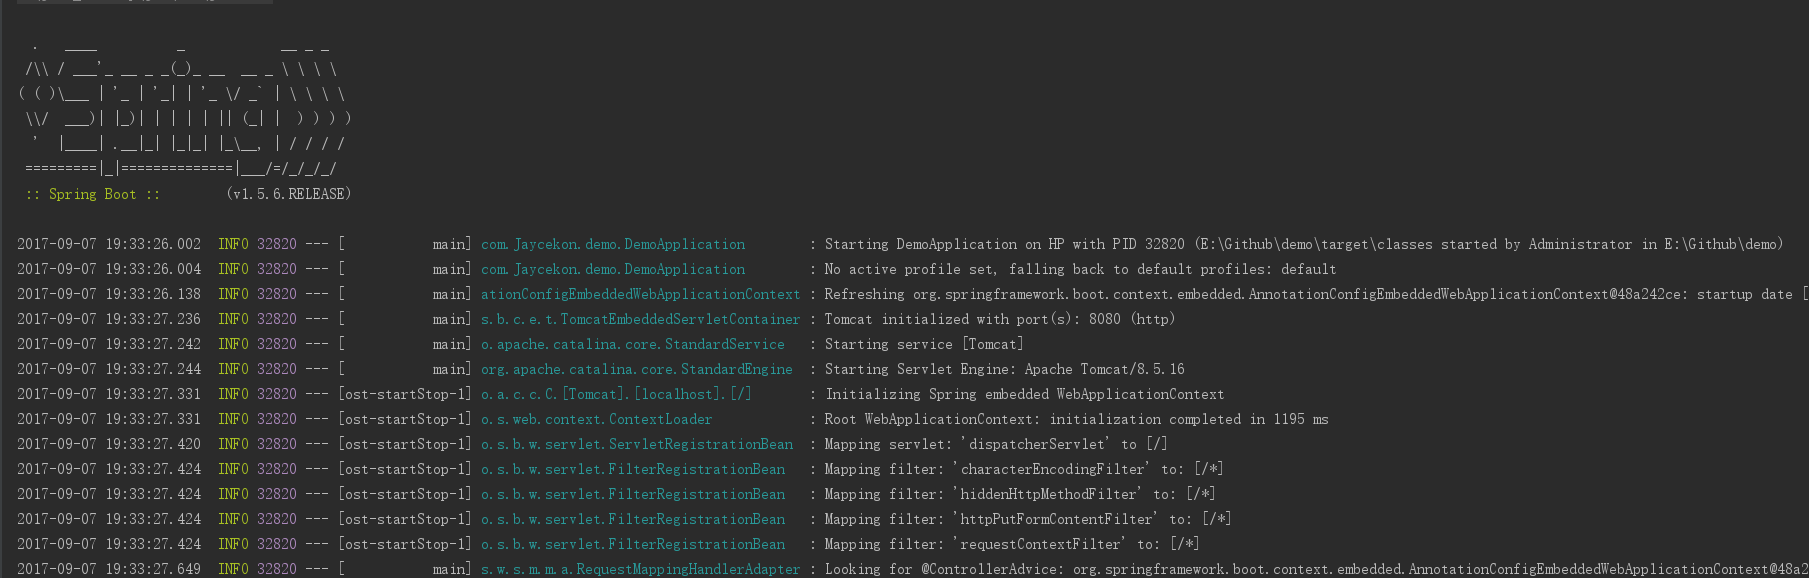
服务启动后, 访问 http://localhost:8080/index ,可以看到页面输出Hello world!。
2、整合Mybatis
2.1 项目依赖
- 引入连接mysql的必要依赖mysql-connector-java
- 引入整合MyBatis的核心依赖mybatis-spring-boot-starter
- 引入tk.mybatis 依赖,实现对实体类的增删改查的代码
- 引入pagerhelper 依赖,实现分页功能
      <dependency>
            <groupId>org.mybatis.spring.boot</groupId>
            <artifactId>mybatis-spring-boot-starter</artifactId>
            <version>1.3.0</version>
        </dependency>
        <dependency>
            <groupId>mysql</groupId>
            <artifactId>mysql-connector-java</artifactId>
             <version>5.1.43</version>
        </dependency>
         <dependency>
            <groupId>tk.mybatis</groupId>
            <artifactId>mapper-spring-boot-starter</artifactId>
            <version>1.1.3</version>
        </dependency>
        <!--pagehelper-->
        <dependency>
            <groupId>com.github.pagehelper</groupId>
            <artifactId>pagehelper-spring-boot-starter</artifactId>
            <version>1.1.2</version>
        </dependency>
2.2 项目配置
修改resources 下的application.properties文件:
spring.datasource.url=jdbc:mysql://localhost:3306/test
spring.datasource.username=root
spring.datasource.password=root
spring.datasource.driver-class-name=com.mysql.jdbc.Driver

#实体类扫描包
mybatis.type-aliases-package=com.jaycekon.demo.model
#Mapper.xml文件扫描目录
mybatis.mapper-locations=classpath:mapper/*.xml
#驼峰命名
mybatis.configuration.mapUnderscoreToCamelCase=true

#tkmapper 工具类
mapper.mappers=com.Jaycekon.demo.util.MyMapper
mapper.not-empty=false
mapper.identity=MYSQL
pagehelper.helperDialect=mysql
pagehelper.reasonable=true
pagehelper.supportMethodsArguments=true
pagehelper.params=count=countSql
2.3 单元测试
创建实体类,我们引入Lombok相关依赖,用于避免数据Get Set方法的重复创建:
        <dependency>
            <groupId>org.projectlombok</groupId>
            <artifactId>lombok</artifactId>
            <version>1.16.18</version>
            <scope>provided</scope>
        </dependency>
实体类最终的代码如下:
@Data
@NoArgsConstructor
@AllArgsConstructor
@Accessors(chain = true)
public class User {
    private int id;
    private String username;
    private String idCard;
    private String phone;
    private String password;
}
可以看出,在添加了Lombok 之后,我们的Java 实体类代码简洁了很多。
接下来,我们需要创建UserMapper 数据库处理类。由于MyMapper 已经帮我们实现了基本的CRUD操作,因此我们这里并不需要再重写操作,我可以先一个根据用户名查找的方法:
@Mapper
public interface UserMapper extends MyMapper<User> {

    @Select("select * from user where username=#{username}")
    User selectByName(String username);
}
MyMapper 类位于util 目录下:
public interface MyMapper<T> extends Mapper<T>, MySqlMapper<T> {
}
这里需要注意,MyMapper 与我们的实体类Mapper 不能放在同一个目录。
测试类:
@RunWith(SpringRunner.class)
@SpringBootTest
@MapperScan("com.Jaycekon.demo.mapper")
public class UserMapperTest {
    @Autowired
    private UserMapper mapper;

    @Test
    public void testInset() {
        User user = new User(1, "Jaycekon","1234","1234","123");
        int i = mapper.insert(user);
        Assert.assertNotEquals(0, i);
    }


    @Test
    public void testSelect(){
        User user = mapper.selectByName("Jaycekon");
        Assert.assertNotEquals(null,user);
    }
}
3、整合Redis
3.1 相关依赖
Spring Boot提供的数据访问框架Spring Data Redis基于Jedis。可以通过引入 spring-boot-starter-redis 来配置依赖关系。
<dependency>
    <groupId>org.springframework.boot</groupId>
    <artifactId>spring-boot-starter-redis</artifactId>
</dependency>
3.2 Redis 配置
1、Spring-boot 连接单机版Redis 的配置如下:
# REDIS (RedisProperties)
# Redis数据库索引(默认为0)
spring.redis.database=0
# Redis服务器地址
spring.redis.host=localhost
# Redis服务器连接端口
spring.redis.port=6379
# Redis服务器连接密码(默认为空)
spring.redis.password=
# 连接池最大连接数(使用负值表示没有限制)
spring.redis.pool.max-active=8
# 连接池最大阻塞等待时间(使用负值表示没有限制)
spring.redis.pool.max-wait=-1
# 连接池中的最大空闲连接
spring.redis.pool.max-idle=8
# 连接池中的最小空闲连接
spring.redis.pool.min-idle=0
# 连接超时时间(毫秒)
spring.redis.timeout=0
2、Spring-boot 连接Sentinel 哨兵集群配置:
# REDIS (RedisProperties)
# Redis数据库索引(默认为0)
spring.redis.database=0
# Redis服务器地址
#spring.redis.host=localhost
# Redis服务器连接端口
#spring.redis.port=6379
# Redis服务器连接密码(默认为空)
spring.redis.password=
# 连接池最大连接数(使用负值表示没有限制)
spring.redis.pool.max-active=8
# 连接池最大阻塞等待时间(使用负值表示没有限制)
spring.redis.pool.max-wait=-1
# 连接池中的最大空闲连接
spring.redis.pool.max-idle=8
# 连接池中的最小空闲连接
spring.redis.pool.min-idle=0
# 连接超时时间(毫秒)
spring.redis.timeout=0

#哨兵监听redis server名称
spring.redis.sentinel.master=cn-test-master
#哨兵的配置列表
spring.redis.sentinel.nodes=localhost:26379,localhost:36379,localhost:46379
3.3 Redis 操作工具类
1、StringRedisTemplate 工具类
StringRedisTemplate 工具类可以解决字符串级别的Redis操作。在写好配置后,可以直接通过Autowried 就可以注入对象。
@RunWith(SpringJUnit4ClassRunner.class)
@SpringApplicationConfiguration(Application.class)
public class ApplicationTests {
    @Autowired
    private StringRedisTemplate stringRedisTemplate;
    @Test
    public void test() throws Exception {
        // 保存字符串
        stringRedisTemplate.opsForValue().set("aaa", "111");
        Assert.assertEquals("111", stringRedisTemplate.opsForValue().get("aaa"));
    }
}
2、RedisTemplate<Object,Object> 工具类
可以处理大部分的序列化操作,在这里我封装了一个简化Redis工具类,后续可以继续优化。
@Component
public class RedisComponent {
    @Autowired
    //操作字符串的template,StringRedisTemplate是RedisTemplate的一个子集
    private StringRedisTemplate stringRedisTemplate;

    private Logger logger = LoggerFactory.getLogger(RedisComponent.class);

    @Autowired
    // RedisTemplate,可以进行所有的操作
    private RedisTemplate<Object, Object> redisTemplate;

    public void set(String key, String value) {
        ValueOperations<String, String> ops = this.stringRedisTemplate.opsForValue();
        boolean bExistent = this.stringRedisTemplate.hasKey(key);
        if (bExistent) {
            logger.info("this key is bExistent!");
        } else {
            ops.set(key, value);
        }
    }

    public String get(String key) {
        return this.stringRedisTemplate.opsForValue().get(key);
    }

    public void del(String key) {
        this.stringRedisTemplate.delete(key);
    }

    public void sentinelSet(String key, Object object) {
        redisTemplate.opsForValue().set(key, JSON.toJSONString(object));
    }

    public String sentinelGet(String key) {
        return String.valueOf(redisTemplate.opsForValue().get(key));
    }
}
4、整合Swagger2
4.1 添加Swagger2 依赖:
        <dependency>
            <groupId>io.springfox</groupId>
            <artifactId>springfox-swagger2</artifactId>
            <version>2.7.0</version>
        </dependency>
        <dependency>
            <groupId>io.springfox</groupId>
            <artifactId>springfox-swagger-ui</artifactId>
            <version>2.7.0</version>
        </dependency>
4.2 创建Swagger2 配置类:
在Application.java 同级创建一个Swagger2 的配置类:
@Configuration
@EnableSwagger2
public class Swagger2 {

    @Bean
    public Docket webApi() {
        return new Docket(DocumentationType.SWAGGER_2)
                .groupName("DemoAPI接口文档")
                .apiInfo(apiInfo())
                .select()
                .apis(RequestHandlerSelectors.basePackage("com.Jaycekon.demo.controller"))
                .paths(PathSelectors.any()).build();
    }

    /**
     swagger2使用说明:
     @Api:用在类上,说明该类的作用
     @ApiOperation:用在方法上,说明方法的作用
     @ApiIgnore:使用该注解忽略这个API
     @ApiImplicitParams:用在方法上包含一组参数说明
     @ApiImplicitParam:用在@ApiImplicitParams注解中,指定一个请求参数的各个方面
     paramType:参数放在哪个地方
     header-->请求参数的获取:@RequestHeader
     query-->请求参数的获取:@RequestParam
     path(用于restful接口)-->请求参数的获取:@PathVariable
     body(不常用)
     form(不常用)
     name:参数名
     dataType:参数类型
     required:参数是否必须传
     value:参数的意思
     defaultValue:参数的默认值
     @ApiResponses:用于表示一组响应
     @ApiResponse:用在@ApiResponses中,一般用于表达一个错误的响应信息
     code:数字,例如400
     message:信息,例如"请求参数没填好"
     response:抛出异常的类
     @ApiModel:描述一个Model的信息(这种一般用在post创建的时候,使用@RequestBody这样的场景,请求参数无法使用@ApiImplicitParam注解进行描述的时候)
     @ApiModelProperty:描述一个model的属性
     */
    private ApiInfo apiInfo() {
        return new ApiInfoBuilder()
                .title("Demo使用Swagger2构建RESTful APIs")
                .description("微信打卡服务")
                .contact(new Contact("Jaycekon", "http://petstore.swagger.io/v2/swagger.json", "jaycekon@163.com"))
                .version("1.0")
                .build();
    }
}
4.3 在需要生成Api 的接口添加注解:
@Api(tags = "测试用例")
@RestController
@RequestMapping(value="/users")     // 通过这里配置使下面的映射都在/users下,可去除
public class UserController {


    @ApiOperation(value="获取用户列表", notes="")
    @RequestMapping(value={""}, method= RequestMethod.GET)
    public List<User> getUserList() {
        return new ArrayList<>();
    }

    @ApiOperation(value="创建用户", notes="根据User对象创建用户")
    @ApiImplicitParam(name = "user", value = "用户详细实体user", required = true, dataType = "User")
    @RequestMapping(value="", method=RequestMethod.POST)
    public String postUser(@RequestBody User user) {
        return "success";
    }

    @ApiOperation(value="获取用户详细信息", notes="根据url的id来获取用户详细信息")
    @ApiImplicitParam(name = "id", value = "用户ID", required = true, dataType = "Long")
    @RequestMapping(value="/{id}", method=RequestMethod.GET)
    public User getUser(@PathVariable Long id) {
        return new User();
    }

    @ApiOperation(value="更新用户详细信息", notes="根据url的id来指定更新对象,并根据传过来的user信息来更新用户详细信息")
    @ApiImplicitParams({
            @ApiImplicitParam(name = "id", value = "用户ID", required = true, dataType = "Long"),
            @ApiImplicitParam(name = "user", value = "用户详细实体user", required = true, dataType = "User")
    })
    @RequestMapping(value="/{id}", method=RequestMethod.PUT)
    public String putUser(@PathVariable Long id, @RequestBody User user) {
        return "success";
    }

    @ApiOperation(value="删除用户", notes="根据url的id来指定删除对象")
    @ApiImplicitParam(name = "id", value = "用户ID", required = true, dataType = "Long")
    @RequestMapping(value="/{id}", method=RequestMethod.DELETE)
    public String deleteUser(@PathVariable Long id) {
        return "success";
    }

}
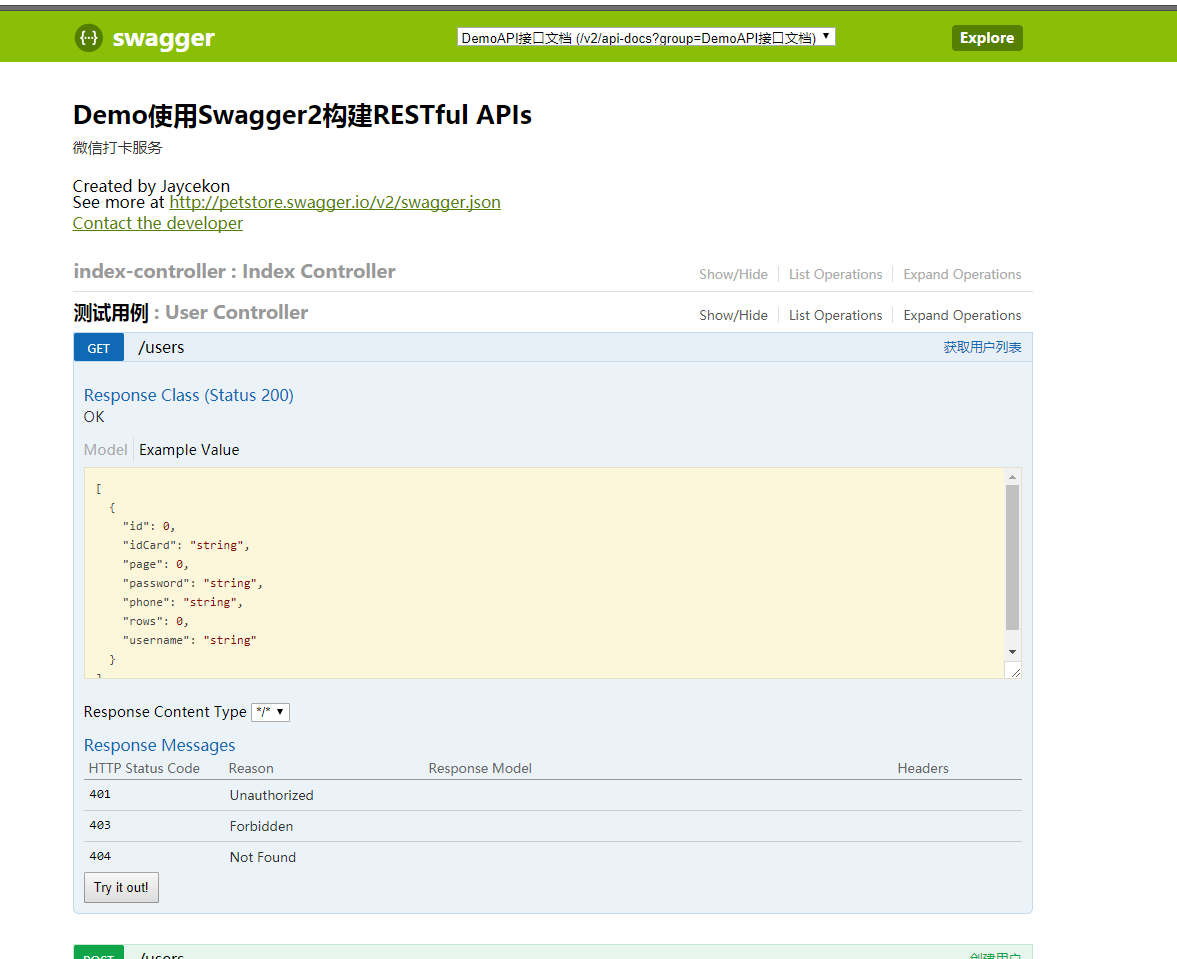
完成上述代码添加上,启动Spring Boot程序,访问:http://localhost:8080/swagger-ui.html
。就能看到前文所展示的RESTful API的页面。我们可以再点开具体的API请求,以POST类型的/users请求为例,可找到上述代码中我们配置的Notes信息以及参数user的描述信息,如下图所示。
4、接入Jenkins&SonarQube
项目框架搭建好后,我们可以通Jenkins 进行项目的自动发版,以及SonarQube 进行代码质量检测。在接入钱,我们需要将项目打包成war包,需要进行以下修改:
1、修改项目打包类型:
    <groupId>com.Jaycekon</groupId>
    <artifactId>demo</artifactId>
    <version>0.0.1-SNAPSHOT</version>
    <packaging>war</packaging>
2、修改Application.java 文件:
@SpringBootApplication
public class DemoApplication extends SpringBootServletInitializer {

    @Override
    protected SpringApplicationBuilder configure(SpringApplicationBuilder application) {
        return application.sources(DemoApplication.class);
    }

    public static void main(String[] args) {
        SpringApplication.run(DemoApplication.class, args);
    }
}
在我的上一篇博客,哆啦A梦的传送门,已经讲解了一些基本配置方法,这里为大家讲解一下,接入SonarQube 进行代码质量检测的配置(需要本地安装SonarQube服务)。
首先需要在MetaData 中,加入SonarQube 的项目名(新建的命名):
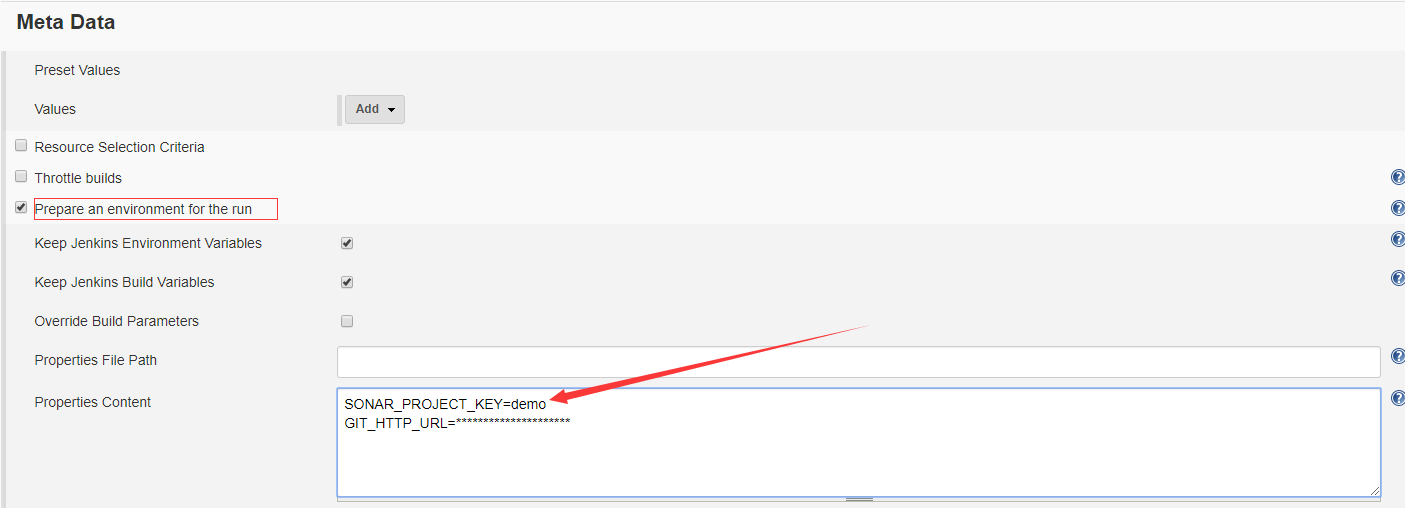
然后在Post Steps 中选择添加 Execute SonarQube Scanner:

在配置好这两项后,Jenkins 在编译文件时,就会执行SonarQube 代码质量检测。
最后,我们可以设置项目在编译完后,执行shell 脚本,进行项目的自动发版:
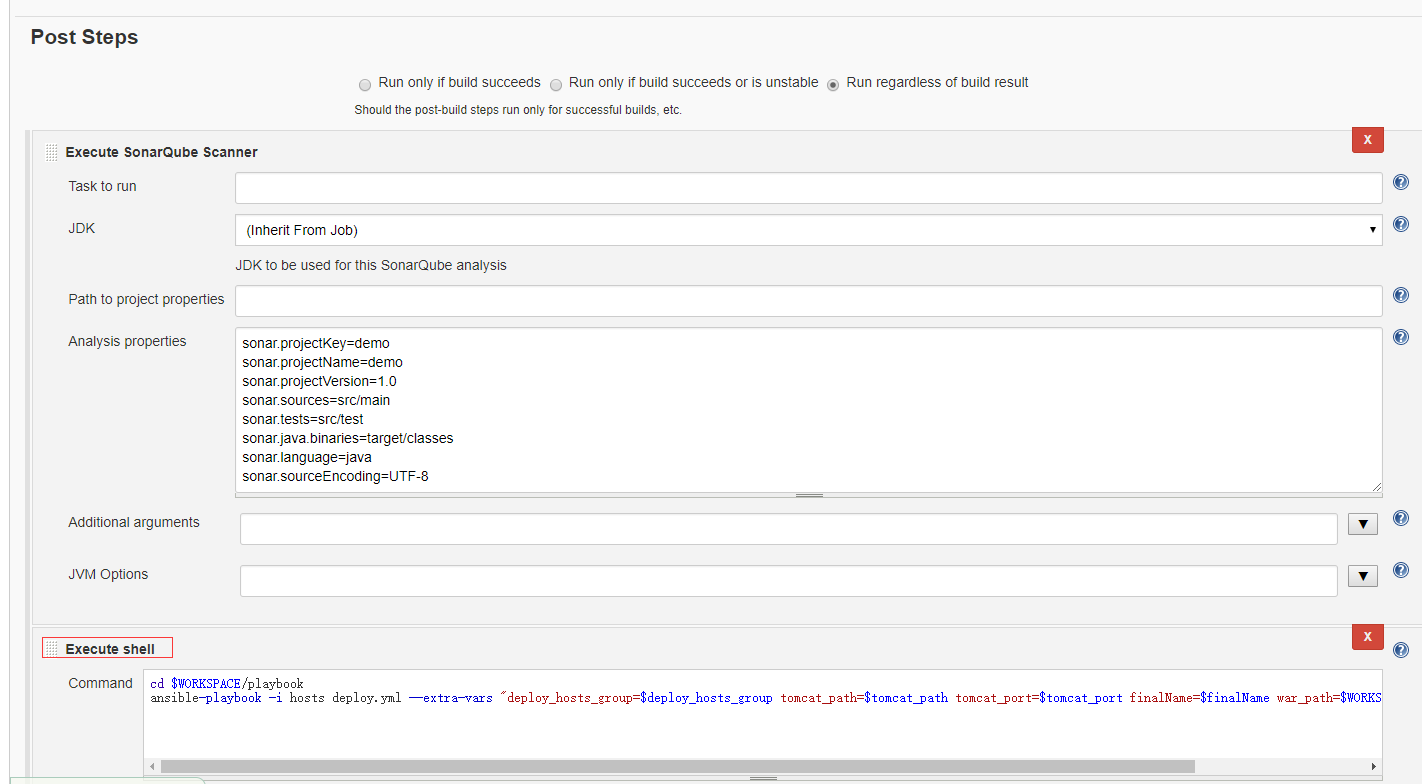
项目编译完后,会找到项目下的playbook,执行里面的脚本,将我们的项目部署到设定的服务器中。
总结 :
本篇文章为大家带来了Spring-boot 的架构搭建,主要使用到了目前较为流行的技术。
源码地址:https://github.com/jaycekon/SpringBootDemo