引言
本篇文章总结了日常开发中,时长会处理的两类问题, 一个是,条件渲染, 这里的所说的条件渲染不仅仅包含了v-if , 而是泛指,一个组件的渲染,需要具备一定的触发时机, 那么处理这种场景时, 通常有 v-if 、 手动挂载 、 以及 动态组件。
此外,第二种场景,是 某个组件中的某些方法的执行, 需要依赖另一个组件中函数处理返回的数据。也就是需要值监听,然后执行某些方法。
这里常用的是:通过ref访问实例直接调用、 vm.$watcher 和 定时判断。 因需求的变化,其应用场景也有不同。
1. 条件渲染
开发工作时, 要求 A 组件挂载完成之后,再去挂载 B 组件, 是极为常见的开发需求。通常是由于B 组件的渲染,依赖 A 组件处理返回的数据。
这里讨论几种最常用的处理方案, 在不同的情况下度量应用。
为了演示方便, 这里通过一个简单的示例来进行说明:

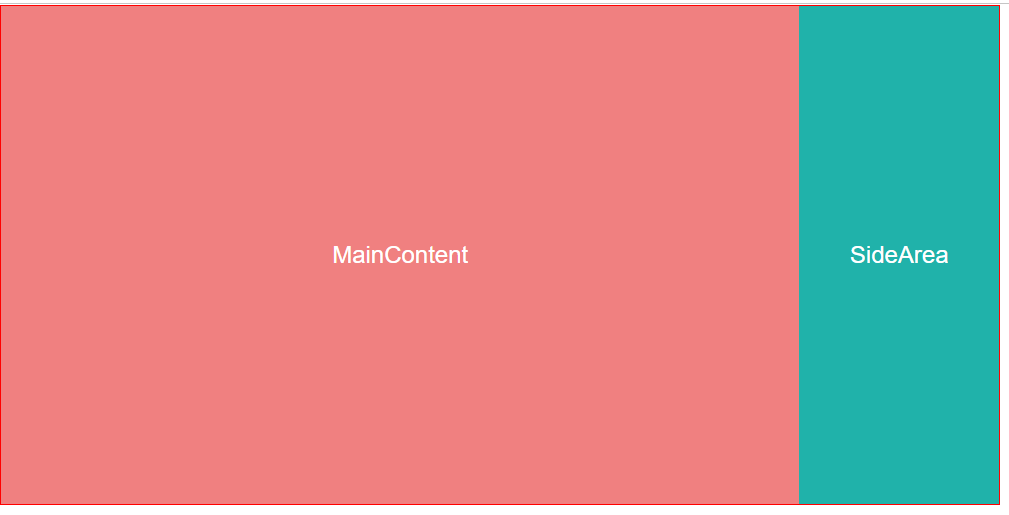
有这样一个页面, 期望,MainContent 要先于 SideArea 挂载。
组件定义内容如下:
// MainContent
<template>
  <div class="flex justify-center items-center">
    MainContent
  </div>
</template>
<script>
export default {
  created() {
    setTimeout(() => this.$emit("isMounted", { msg: "依赖的假数据" }), 2000);
  },
};
</script>
<style scoped>
div {
  height: 100%;
   800px;
  background-color: lightcoral;
  color: white;
  font-size: 24px;
}
</style>
为了模拟MainContent组件需要较长时间的渲染, 这里通过延时定时器触发 自定义事件 来标识组件挂载完毕
// SideArea
<template>
  <div class="flex justify-center items-center">
    SideArea
    <br />
    {{ mockMsg }}
  </div>
</template>
<script>
export default {
  props: ["mockMsg"],
};
</script>
<style scoped>
div {
  height: 100%;
   200px;
  background-color: lightseagreen;
  color: white;
  font-size: 24px;
}
</style>
方案一 : 通过 v-if 指令,条件渲染
index.vue 组件
<template>
  <div class="wrapper">
    <main-content @isMounted="isMountedHandler"></main-content>
    <side-area v-if="ifRender" :mock="mock"></side-area>
  </div>
</template>
<script>
import MainContent from "./comps/MainContent.vue";
import SideArea from "./comps/SideArea.vue";
export default {
  components: {
    MainContent,
    SideArea,
  },
  data() {
    return {
      ifRender: false,
      mock: "",
    };
  },
  methods: {
    isMountedHandler({ mock }) {
      this.ifRender = true;
      this.mock = mock;
    },
  },
};
</script>
<style scoped>
.wrapper {
  height: 500px;
   1000px;
  border: 1px solid red;
  display: flex;
  justify-content: flex-start;
}
</style>
当 MainContent 组件渲染完成, 通过$emit 触发自定义事件 isMounted ,并传入返回的mock 数据, 上层组件监听函数isMountedHandler 执行, 将 SideArea v-if 值设定为 true 并props传入 mock 数据。
这种方式是最方便,也是最常见的方式。
方案二 :vm.$mount() 手动挂载
不再通过v-if 去控制是否渲染SideArea, 利用Vue 的手动挂载机制:
index.vue 组件
<template>
  <div class="wrapper">
    <main-content @isMounted="isMountedHandler"></main-content>
    <div id="side-area-box"></div>
  </div>
</template>
<script>
import MainContent from "./comps/MainContent.vue";
import SideArea from "./comps/SideArea.vue";
import Vue from "vue";
export default {
  components: {
    MainContent,
  },
  methods: {
    isMountedHandler({ msg }) {
      let sideAreaInstance = Vue.extend(SideArea);
      new sideAreaInstance({
        propsData: {
          mockMsg: msg,
        },
      }).$mount("#side-area-box");
    },
  },
};
</script>
<style scoped>
.wrapper {
  height: 500px;
   1000px;
  border: 1px solid red;
  display: flex;
  justify-content: flex-start;
}
</style>
这种方式要注意的是, 你需要有一个占位的容器, 需要考虑样式布局,被挂载的组件样式应该独立。 因为手动挂载后, 并不是将组件插入到占位容器中去, 而是直接替换,这意味着,如果你的样式作用在占位容器上,将全部失效, 所以应该将样式写在组件内部。
此外如果不需要传入
props可以直接这样写:isMountedHandler() { new Vue(SideArea).$mount("#side-area-box"); },
方案三 :动态组件
index.vue 组件
<template>
  <div class="wrapper">
    <main-content @isMounted="isMountedHandler"></main-content>
    <component :is="componentName" :mockMsg="mock" />
  </div>
</template>
<script>
import MainContent from "./comps/MainContent.vue";
import SideArea from "./comps/SideArea.vue";
export default {
  components: {
    MainContent,
    SideArea,
  },
  data() {
    return {
      mock: null,
      componentName: undefined,
    };
  },
  methods: {
    isMountedHandler({ msg }) {
      this.componentName = "SideArea";
      this.mock = msg;
    },
  },
};
</script>
<style scoped>
.wrapper {
  height: 500px;
   1000px;
  border: 1px solid red;
  display: flex;
  justify-content: flex-start;
}
</style>
实现效果和v-if 是比较类似的。
2. 组件方法的值驱动执行⭐
还有一种常见的场景,B 组件中的某个方法的执行, 依赖于 A 组件某个方法执行的返回值。 听起来,常用eventbus 解决这个问题, 但是这里,不是利用事件机制, 而是通过观察值的变化去执行B组件内的方法。 即我们监测A 组件的方法执行返回值, 有值之后再去执行B 组件方法。
方案一:通过 ref 直接调用
这种方法是最常见的方式, 但是其重心就不在 SideArea 组件中了,而是在其上层组件, 示例中,即 index.vue 文件。
//mainContent.vue
<template>
  <div class="flex justify-center items-center">
    MainContent
  </div>
</template>
<script>
export default {
  created() {
    let count = 0;
    setInterval(
      () => this.$emit("isMounted", { msg: "依赖的假数据" + count++ }),
      2000,
    );
  },
};
</script>
<style scoped>
div {
  height: 100%;
   800px;
  background-color: lightcoral;
  color: white;
  font-size: 24px;
}
</style>
让props 值每两秒变化一次
// SideArea.vue
<template>
  <div class="flex justify-center items-center">
    SideArea
  </div>
</template>
<script>
export default {
  methods: {
    doSomething(msg) {
      console.log("触发一次执行一次", msg, "--line10");
    },
  },
};
</script>
<style scoped>
div {
  height: 100%;
   200px;
  background-color: lightseagreen;
  color: white;
  font-size: 24px;
}
</style>
index.vue 文件:
<template>
  <div class="wrapper">
    <main-content @isMounted="isMountedHandler" />
    <SideArea ref="sideArea" />
  </div>
</template>
<script>
import MainContent from "./comps/MainContent.vue";
import SideArea from "./comps/SideArea.vue";
export default {
  components: {
    MainContent,
    SideArea,
  },
  data() {
    return {
      mock: null,
    };
  },
  methods: {
    isMountedHandler({ msg }) {
      this.$refs.sideArea.doSomething(msg);
    },
  },
};
</script>
<style scoped>
.wrapper {
  height: 500px;
   1000px;
  border: 1px solid red;
  display: flex;
  justify-content: flex-start;
}
</style>

mainContent 中值发生变化,然后通过$emit 触发其上层组件index.vue 中的 handler —— isMountedHandler , 然后直接在handler 中通过 ref 引用访问到 SideArea 组件实例,直接调用预定义的目标方法,并通过函数参数传参达到传值的目的。
这种方式的特点就是 简单, 还有就是触发一次, 执行一次, 这意味着,值一旦变化, 这个方法就会重新被触发;大部分时候是符合我们的用意的,但是有些场景下是不适用的, 例如要求仅触发一次。
下面的两种方案,则是常用于解决要求仅触发一次的场景。
接下来的两种方案, 重心都在 SideArea.vue 组件, 另外两个文件也稍有变化, 先写在前面:
index.vue 文件:
// index.vue
<template>
  <div class="wrapper">
    <main-content @isMounted="isMountedHandler" />
    <SideArea :mockMsg="mock" />
  </div>
</template>
<script>
import MainContent from "./comps/MainContent.vue";
import SideArea from "./comps/SideArea.vue";
export default {
  components: {
    MainContent,
    SideArea,
  },
  data() {
    return {
      mock: null,
    };
  },
  methods: {
    isMountedHandler({ msg }) {
      this.mock = msg;
    },
  },
};
</script>
<style scoped>
.wrapper {
  height: 500px;
   1000px;
  border: 1px solid red;
  display: flex;
  justify-content: flex-start;
}
</style>
直接简单的把 mainContent.vue 中变化的值通过 props 传给 SideArea
mainContent.vue 文件:
<template>
  <div class="flex justify-center items-center">
    MainContent
  </div>
</template>
<script>
export default {
  created() {
    let count = 0;
    setInterval(
      () => this.$emit("isMounted", { msg: "依赖的假数据" + count++ }),
      2000,
    );
  },
};
</script>
<style scoped>
div {
  height: 100%;
   800px;
  background-color: lightcoral;
  color: white;
  font-size: 24px;
}
</style>
让props 值每两秒变化一次
接下来的说明,主要是在SideArea.vue 中演示的, 和上面这两个文件的关联不大。
方案二: vw.$watch
利用vue实例方法 $watch() , 之所以不用普通的监听器,写在 watch 对象中, 是因为 vue 实例方法 $watch ,在定义一个监听器后返回的是其取消侦听函数
SideArea.vue 文件 :
<template>
  <div class="flex justify-center items-center">
    SideArea
    <br />
    {{ mockMsg }}
  </div>
</template>
<script>
export default {
  props: ["mockMsg"],
  created() {
    var unwatch = this.$watch("mockMsg", function() {
      //do something here
      console.log("只触发一次", "--line14");
      if (unwatch) {
        unwatch();
      }
    });
  },
};
</script>
<style scoped>
div {
  height: 100%;
   200px;
  background-color: lightseagreen;
  color: white;
  font-size: 24px;
}
</style>
简单的描述,就是通过vue 的实例方法
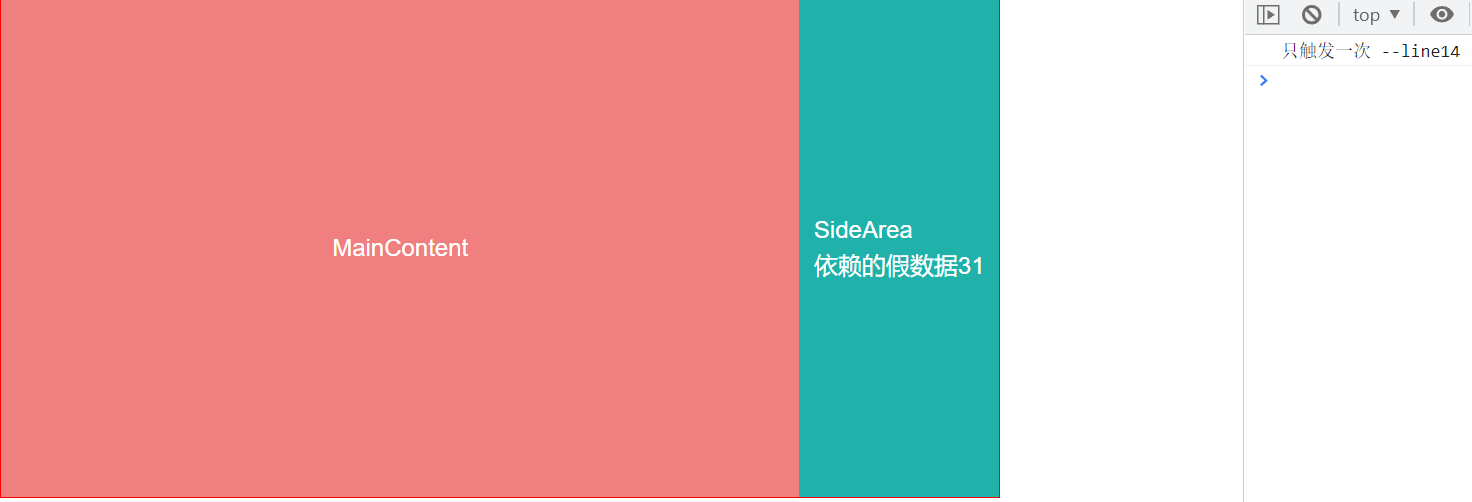
$watch去监听mainContent 组件传入的props 值, 且为了 SideArea 组件中的目标事件仅触发一次, 我们通过调用vm.$watch()返回的取消侦听函数,在目标事件执行完后去调用以取消侦听。

可以看到,实现的效果,就是即便props在不断变化, 但是目标函数仅会执行一次。
方案三:定时判断
这种方法,也是类似监听,不过方法更加的原始。
SideArea.vue
<template>
  <div class="flex justify-center items-center">
    SideArea
    <br />
    {{ mockMsg }}
  </div>
</template>
<script>
export default {
  props: ["mockMsg"],
  created() {
    this.doSomething();
  },

  methods: {
    doSomething() {
      if (!this.mockMsg) {// init prop is null
        this.timer = setTimeout(() => this.doSomething(), 10);
        return;
      }
      if (this.timer) clearTimeout(this.timer);
      // do something here
      console.log("仅执行一次", "--line17");
    },
  },
};
</script>
<style scoped>
div {
  height: 100%;
   200px;
  background-color: lightseagreen;
  color: white;
  font-size: 24px;
}
</style>
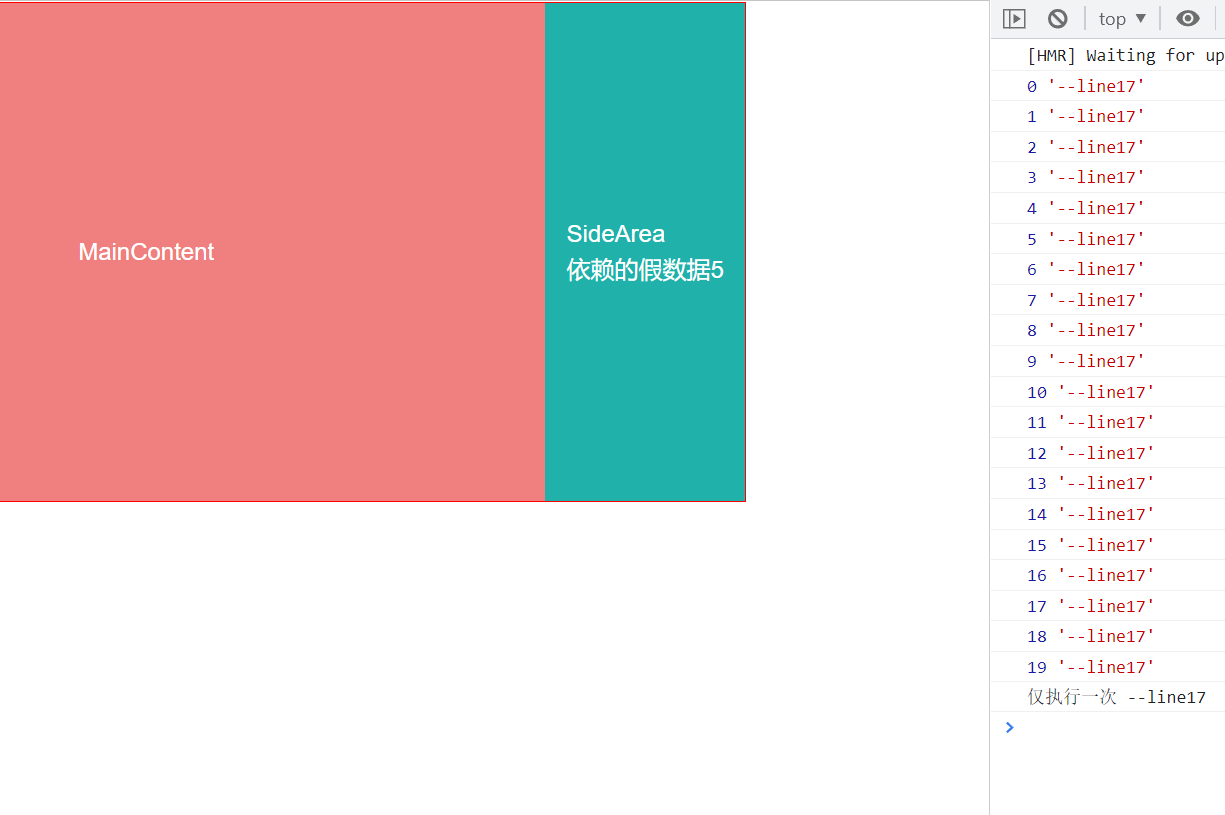
定义了一个定时器,用以不断的去问有没有props值过来, 一旦有值,就立即销毁定时器, 然后执行之后的代码逻辑。
为了观察更加方便可以加一个定时器:
<template>
  <div class="flex justify-center items-center">
    SideArea
    <br />
    {{ mockMsg }}
  </div>
</template>
<script>
export default {
  props: ["mockMsg"],
  data() {
    return {
      count: 0,
    };
  },
  created() {
    this.doSomething();
  },

  methods: {
    doSomething() {
      console.log(this.count, "--line17");
      if (!this.mockMsg) {
        this.count++;
        // init prop is null
        this.timer = setTimeout(() => this.doSomething(), 100);
        return;
      }
      if (this.timer) clearTimeout(this.timer);
      // do something here
      console.log("仅执行一次", "--line17");
    },
  },
};
</script>
<style scoped>
div {
  height: 100%;
   200px;
  background-color: lightseagreen;
  color: white;
  font-size: 24px;
}
</style>

可以看到也可以达到监听 props 值的效果。
总结
本文总结了日常开发中,经常遇到的两种场景处理, 分别是 组件的条件渲染问题, 以及组件方法执行由值驱动时的问题。
根据不同开发需求,又列举了多种不同场景时解决方案。 它们有的可能并不是专用于解决该类问题, 而是能够解决。
此外,组件方法由值驱动执行这种场景下, 本文按照可能需要重复执行和单次执行 进行了总结, 如 以常用的 ref 实例引用的方式直接调用子组件内的方法,用于调用一次执行一次。 所以当其在被一个变化值所驱动时,子组件内对应的方法也就会重复被执行。
而有的时候,我们需要的其实是一次性执行,例如我们需要在子组件目标方法中去初始化一个事件监听器,等类似的场景。
这时候我们可以利用 vm.$watch() vue 的实例方法, 返回的是其取消监听的函数这一特点,实现一次性监听。
也可以用循环延时判断,props 值, 然后在该值满足所需要求的时候,销毁定时器, 执行下面的流程。
实际上,这只是一部分方法, 例如, 第二种场景的 如果要求能重复执行,除了 ref ,我们还可以通过 props 传值,然后通过 定义watch 对象,去达成目的。 再比如,无论第二种场景下的哪种情况,都是可以通过自定义事件(eventBus)去达成目的的, 要求重复执行?, $on, 要救仅执行一次? , $once。