【前言】
自定义端口启动
json-server --watch db.json --port 3004
简介:
    在大多数开发流程中 后台开发人员一般会优先输出API文档给前端开发人员
前端开发人员按照API文档先行编写业务逻辑 当然此时API并不能真正调用 意味着我们拿不到测试数据。
    而有些业务逻辑需要后台API数据的支持 我们必须等到后台API开发完成后 才能测试这些业务逻辑
    显然这种工作效率是低下的 我们不得不依赖API的开发进度。当然我们是聪明的攻城狮 这不应该成为我们拿不到绩效奖金的绊脚石~~~ 即使你们公司从不发绩效奖金 哈哈哈
    那么我们怎么规避这种问题? 试想下如果我们自己本地搭建一台JSON服务器 自己生产测试数据 ???而今天的主角json-server就能帮你达到目的
本质:
JSON-Server 是一个 Node 模块,运行 Express 服务器,你可以指定一个 json 文件作为 api 的数据源
【主体】
(1)下载安装
npm install -g json-server
安装完成后输入 json-server 可以看到支持的命令有哪些?如下图

(2)简单使用
既然制造 json 测试数据 那么我们需要创建json数据
首先在你喜欢的位置创建一个文件目录
在这里面我创建了api_server目录 用于存放json数据
然后进入该目录
然后我们在该目录下生成一个db.json文件 内容如下:
json-server可以直接把一个json文件托管成一个具备全RESTful风格的API,并支持跨域、jsonp、路由订制、数据快照保存等功能的 web 服务器。
代码:
{
    "users":[
        {
            "id":1,
            "username":"张三",
            "age":22,
            "job":2
        }
    ],
    "jobs":[
        {
            "id":1,
            "name":"学生"
        },
        {
            "id":2,
            "name":"老师"
        },
        {
            "id":3,
            "name":"保安"
        },
        {
            "id":4,
            "name":"电工"
        }
    ]
}
在这里我们创建了简单的测试数据
接下来我们需要启动json-server 并告诉json-server监视db.json
json-server --watch db.json
如果没有出现错误 终端将会出现如下提示:

(3)监听多端口
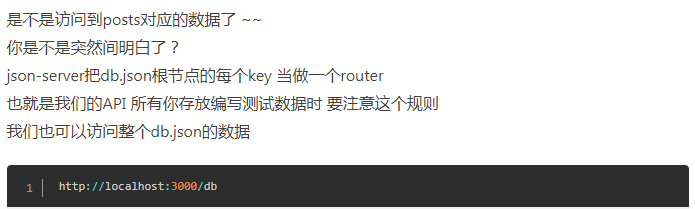
我们看到json-server的Hom地址为http://localhost:3000
当然我们也可以指定端口 这样我们就可以监听多个json文件
(4)数据模拟测试
我们在浏览器中访问该地址 将看到如下内容
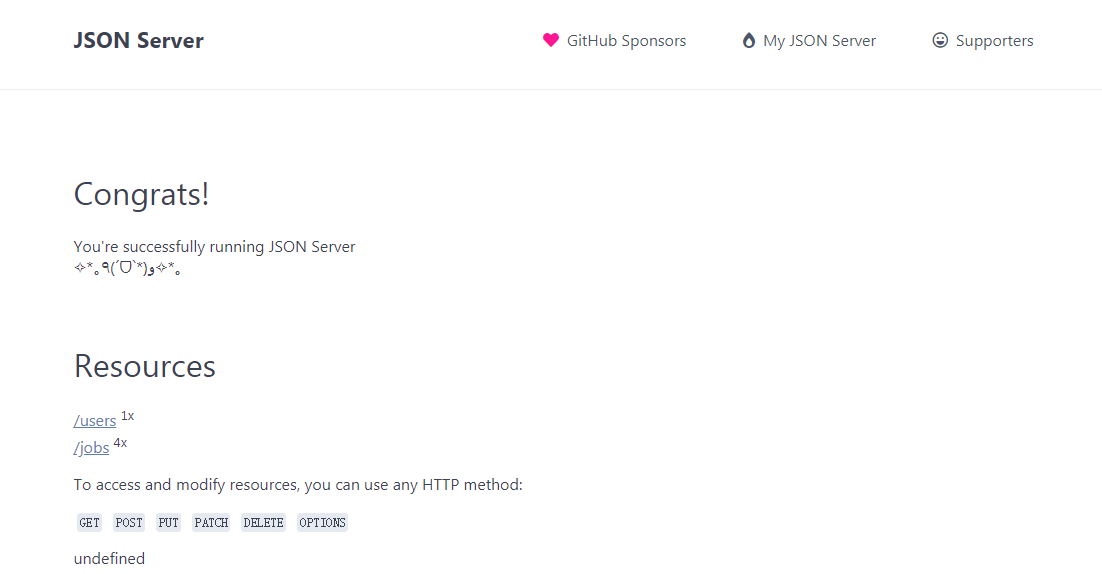
可以看到在Routes选项出 列举了db.json字典的所有keys
点击jobs,会跳到jobs信息页面

(5)分析

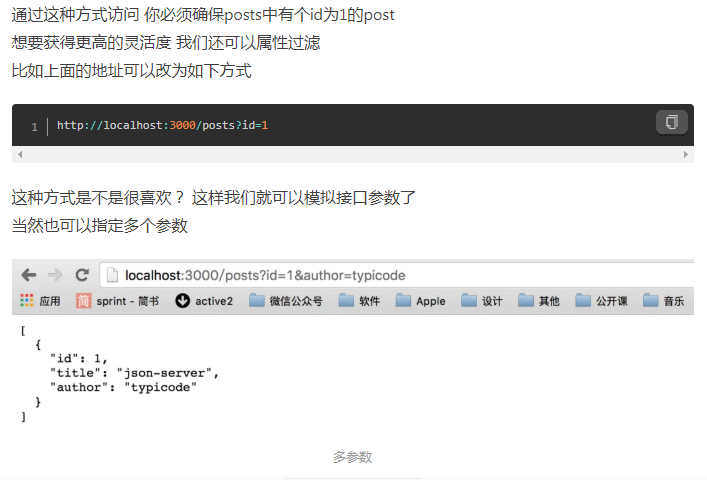
(6)过滤
(7)分页

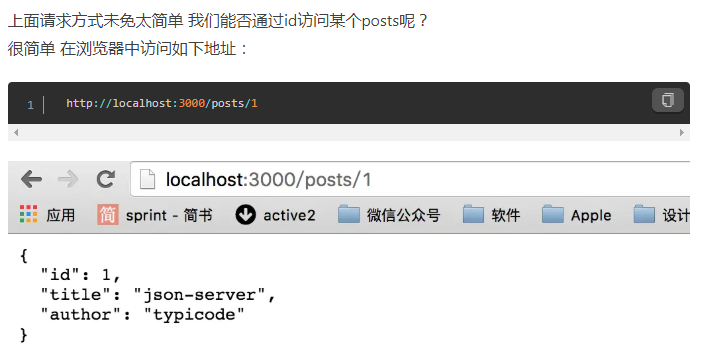
{
  "posts": [
      { "id": 1, "title": "json-server", "author": "typicode" },
     { "id": 2, "title": "我是posts2", "author": "typicode" },
     { "id": 3, "title": "我是posts3", "author": "typicode" },
      { "id": 4, "title": "我是posts4", "author": "typicode" },
      { "id": 2, "title": "我是posts2", "author": "typicode" },
      { "id": 5, "title": "我是posts5", "author": "typicode" },
      { "id": 6, "title": "我是posts6", "author": "typicode" },
      { "id": 7, "title": "我是posts7", "author": "typicode" },
      { "id": 8, "title": "我是posts8", "author": "typicode" },
      { "id":9, "title": "我是posts9", "author": "typicode" },
    { "id":10, "title": "我是posts10", "author": "typicode" }
  ],
"comments": [
    { "id": 1, "body": "some comment", "postId": 1 }
  ],
    "profile": { "name": "typicode" }
}


(8)排序

(9)json-server 的相关启动参数
-
语法:
json-server [options] <source> -
选项列表:
| 参数 | 简写 | 默认值 | 说明 |
|---|---|---|---|
| --config | -c | 指定配置文件 | [默认值: "json-server.json"] |
| --port | -p | 设置端口 [默认值: 3000] | Number |
| --host | -H | 设置域 [默认值: "0.0.0.0"] | String |
| --watch | -w | Watch file(s) | 是否监听 |
| --routes | -r | 指定自定义路由 | |
| --middlewares | -m | 指定中间件 files | [数组] |
| --static | -s | Set static files directory | 静态目录,类比:express的静态目录 |
| --readonly | --ro | Allow only GET requests [布尔] | |
| --nocors | --nc | Disable Cross-Origin Resource Sharing [布尔] | |
| --no | gzip | , --ng Disable GZIP Content-Encoding [布尔] | |
| --snapshots | -S | Set snapshots directory [默认值: "."] | |
| --delay | -d | Add delay to responses (ms) | |
| --id | -i | Set database id property (e.g. _id) [默认值: "id"] | |
| --foreignKeySuffix | -- | fks Set foreign key suffix (e.g. _id as in post_id) | [默认值: "Id"] |
| --help | -h | 显示帮助信息 | [布尔] |
| --version | -v | 显示版本号 | [布尔] |
- source可以是json文件或者js文件。实例:
$ json-server --watch -c ./jsonserver.json
$ json-server --watch app.js
$ json-server db.json
json-server --watch -port 8888 db.json
(10)其他
动态生成模拟数据
例如启动json-server的命令:json-server --watch app.js 是把一个js文件返回的数据托管成web服务。
app.js配合mockjs库可以很方便的进行生成模拟数据。
// 用mockjs模拟生成数据
var Mock = require('mockjs');

module.exports = () => {
  // 使用 Mock
  var data = Mock.mock({
    'course|227': [
      {
        // 属性 id 是一个自增数,起始值为 1,每次增 1
        'id|+1': 1000,
        course_name: '@ctitle(5,10)',
        autor: '@cname',
        college: '@ctitle(6)',
        'category_Id|1-6': 1
      }
    ],
    'course_category|6': [
      {
        "id|+1": 1,
        "pid": -1,
        cName: '@ctitle(4)'
      }
    ]
  });
  // 返回的data会作为json-server的数据
  return data;
};
路由
默认的路由
json-server为提供了GET,POST, PUT, PATCH ,DELETE等请求的API,分别对应数据中的所有类型的实体。
# 获取所有的课程信息
GET    /course

# 获取id=1001的课程信息
GET    /course/1001

# 添加课程信息,请求body中必须包含course的属性数据,json-server自动保存。
POST   /course

# 修改课程,请求body中必须包含course的属性数据
PUT    /course/1
PATCH  /course/1

# 删除课程信息
DELETE /course/1

# 获取具体课程信息id=1001
GET    /course/1001
自定义路由
当然你可以自定义路由:
$ json-server --watch --routes route.json db.jsonroute.json文件
{
  "/api/*": "/$1",    //   /api/course   <==>  /course
  "/:resource/:id/show": "/:resource/:id",
  "/posts/:category": "/posts?category=:category",
  "/articles\?id=:id": "/posts/:id"
}
自定义配置文件
通过命令行配置路由、数据文件、监控等会让命令变的很长,而且容易敲错,可以把命令写到npm的scripts中,但是依然配置不方便。
json-server允许我们把所有的配置放到一个配置文件中,这个配置文件默认json-server.json;
例如:
{
  "port": 53000,
  "watch": true,
  "static": "./public",
  "read-only": false,
  "no-cors": false,
  "no-gzip": false,
  "routes": "route.json"
}
使用配置文件启动json-server:
# 默认使用:json-server.json配置文件
$ json-server --watch app.js

# 指定配置文件
$ json-server --watch -c jserver.json db.json
过滤查询
查询数据,可以额外提供
GET /posts?title=json-server&author=typicode
GET /posts?id=1&id=2

# 可以用 . 访问更深层的属性。
GET /comments?author.name=typicode
还可以使用一些判断条件作为过滤查询的辅助。
GET /posts?views_gte=10&views_lte=20可以用的拼接条件为:
_gte: 大于等于_lte: 小于等于_ne: 不等于_like: 包含
GET /posts?id_ne=1
GET /posts?id_lte=100
GET /posts?title_like=server
分页查询
默认后台处理分页参数为: _page 第几页, _limit一页多少条。
GET /posts?_page=7
GET /posts?_page=7&_limit=20
默认一页10条。
后台会返回总条数,总条数的数据在响应头:X-Total-Count中。
排序
- 参数:
_sort设定排序的字段 - 参数:
_order设定排序的方式(默认升序)
GET /posts?_sort=views&_order=asc
GET /posts/1/comments?_sort=votes&_order=asc
支持多个字段排序:
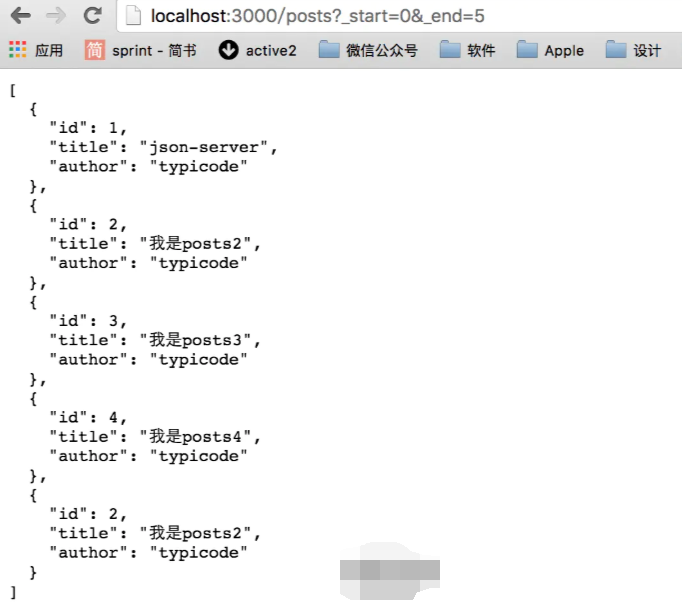
GET /posts?_sort=user,views&_order=desc,asc任意切片数据
GET /posts?_start=20&_end=30
GET /posts/1/comments?_start=20&_end=30
GET /posts/1/comments?_start=20&_limit=10
全文检索
可以通过q参数进行全文检索,例如:GET /posts?q=internet
实体关联
关联子实体
包含children的对象, 添加_embed
GET /posts?_embed=comments
GET /posts/1?_embed=comments
关联父实体
包含 parent 的对象, 添加_expand
GET /comments?_expand=post
GET /comments/1?_expand=post
其他高级用法
json-server本身就是依赖express开发而来,可以进行深度定制。细节就不展开,具体详情请参考官网。
- 自定义路由
const jsonServer = require('json-server')
const server = jsonServer.create()
const router = jsonServer.router('db.json')
const middlewares = jsonServer.defaults()

server.use(middlewares)

server.get('/echo', (req, res) => {
  res.jsonp(req.query)
})

server.use(jsonServer.bodyParser)
server.use((req, res, next) => {
  if (req.method === 'POST') {
    req.body.createdAt = Date.now()
  }
  next()
})

server.use(router)
server.listen(3000, () => {
  console.log('JSON Server is running')
})- 自定义输出内容
router.render = (req, res) => {
  res.jsonp({
    body: res.locals.data
  })
}- 自定义用户校验
const jsonServer = require('json-server')
const server = jsonServer.create()
const router = jsonServer.router('db.json')
const middlewares = jsonServer.defaults()

server.use(middlewares)
server.use((req, res, next) => {
 if (isAuthorized(req)) { // add your authorization logic here
   next() // continue to JSON Server router
 } else {
   res.sendStatus(401)
 }
})
server.use(router)
server.listen(3000, () => {
  console.log('JSON Server is running')
})
.