关闭防火墙和selinux
开始搭建Wiki前,需要下载一些软件包。
wget https://www.atlassian.com/software/confluence/downloads/binary/atlassian-confluence-5.6.6-x64.bin
    * confluence5.6.6
    * Confluence-5.6.6-language-pack-zh_CN
    * mysql-connector
    * confluence_keygen
安装配置java
yum install -y java
java -version
安装配置mysql
1、安装、创建相应数据库并授权
由于CentOS 7比较特殊,MySQL已经没了,只能安装mariadb:
[root@zabbix-server ~]# yum install -y mariadb-server
启动并设置开机自启动数据库
[root@zabbix-server bin]# systemctl enable mariadb.service
Created symlink from /etc/systemd/system/multi-user.target.wants/mariadb.service to /usr/lib/systemd/system/mariadb.service.
[root@zabbix-server bin]# systemctl start mariadb.service
[root@zabbix-server bin]#
初始化数据库
[root@zabbix-server ~]# find / -type f -name "mysql_secure_installation"
/usr/bin/mysql_secure_installation    #mariadb数据库自带的初始化脚本
[root@zabbix-server ~]#
[root@zabbix-server bin]# mysql_secure_installation
NOTE: RUNNING ALL PARTS OF THIS SCRIPT IS RECOMMENDED FOR ALL MariaDB
      SERVERS IN PRODUCTION USE!  PLEASE READ EACH STEP CAREFULLY!
In order to log into MariaDB to secure it, we'll need the current
password for the root user.  If you've just installed MariaDB, and
you haven't set the root password yet, the password will be blank,
so you should just press enter here.
Enter current password for root (enter for none):
OK, successfully used password, moving on...
Setting the root password ensures that nobody can log into the MariaDB
root user without the proper authorisation.
Set root password? [Y/n] y
New password:    #123456
Re-enter new password:    #123456
Password updated successfully!
Reloading privilege tables..
... Success!
By default, a MariaDB installation has an anonymous user, allowing anyone
to log into MariaDB without having to have a user account created for
them.  This is intended only for testing, and to make the installation
go a bit smoother.  You should remove them before moving into a
production environment.
Remove anonymous users? [Y/n] y
... Success!
Normally, root should only be allowed to connect from 'localhost'.  This
ensures that someone cannot guess at the root password from the network.
Disallow root login remotely? [Y/n] y
... Success!
By default, MariaDB comes with a database named 'test' that anyone can
access.  This is also intended only for testing, and should be removed
before moving into a production environment.
Remove test database and access to it? [Y/n] y
- Dropping test database...
... Success!
- Removing privileges on test database...
... Success!
Reloading the privilege tables will ensure that all changes made so far
will take effect immediately.
Reload privilege tables now? [Y/n] y
... Success!
Cleaning up...
All done!  If you've completed all of the above steps, your MariaDB
installation should now be secure.
Thanks for using MariaDB!
[root@zabbix-server bin]

create database confluence default character set utf8;
grant all on confluence.* to 'confluenceuser'@'%' identified by 'confluencepasswd' with grant option;
grant all on confluence.* to 'confluenceuser'@localhost identified by 'confluencepasswd' with grant option;
flush privileges;
2、修改mysql配置文件,在my.cnf中添加
binlog_format=mixed
3、重启mysql
service mysqld stop
service mysqld start
开始安装confluence
1、上传下载好的文件
2、开始安装
chmod 755 atlassian-confluence-5.6.6-x64.bin
./atlassian-confluence-5.6.6-x64.bin
confluence默认安装到/opt/atlassian/confluence和/var/atlassian/application-data/confluence目录下,并且confluence监听的端口是8090。
3、confluence的主要配置文件,存放在/opt/atlassian/confluence/conf/server.xml文件中。
4、测试访问,假设CentOS7的ip地址为192.168.56.101,那么在浏览器输入http://192.168.56.101:8090,即可看到Confluence的欢迎界面。
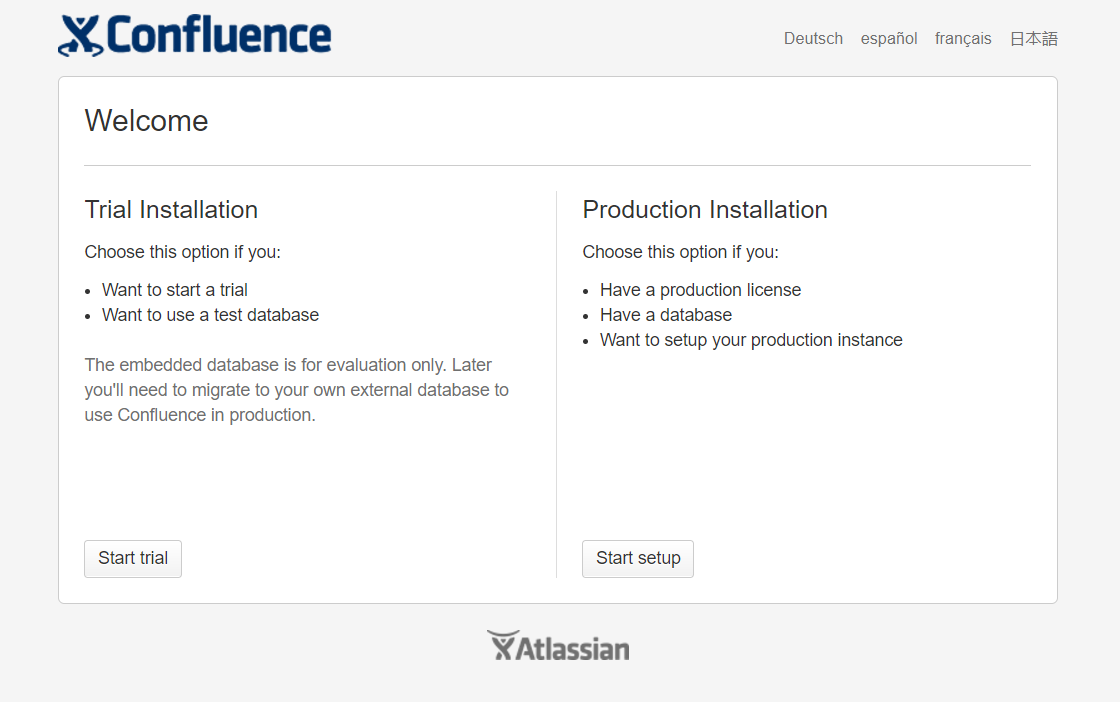
破解confluence
1、点击“Start setup”,看到如下界面。

2、复制Server ID并保存,然后关闭confluence。
[root@linux-node1 tools]# /etc/init.d/confluence stop
executing using dedicated user
If you encounter issues starting up Confluence, please see the Installation guide at http://confluence.atlassian.com/display/DOC/Confluence+Installation+Guide
Server startup logs are located in /opt/atlassian/confluence/logs/catalina.out
Using CATALINA_BASE:   /opt/atlassian/confluence
Using CATALINA_HOME:   /opt/atlassian/confluence
Using CATALINA_TMPDIR: /opt/atlassian/confluence/temp
Using JRE_HOME:        /opt/atlassian/confluence/jre/
Using CLASSPATH:       /opt/atlassian/confluence/bin/bootstrap.jar:/opt/atlassian/confluence/bin/tomcat-juli.jar
Using CATALINA_PID:    /opt/atlassian/confluence/work/catalina.pid
Tomcat stopped.
[root@linux-node1 tools]#
3、从/opt/atlassian/confluence/confluence/WEB-INF/lib中,拷贝atlassian-extras-decoder-v2-3.2.jar到windows,并重命名为atlassian-extras-2.4.jar。
java -jar confluence_keygen.jar
会弹出如下界面
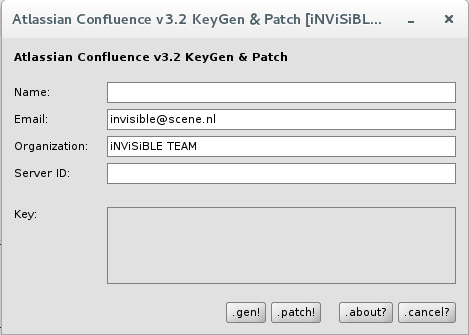
把第二步中复制的Server ID粘贴进去,然后点击“.gen!”,保存生成的key。

5、打补丁。点击“.patch!”,选择第3步中重命名的atlassian-extras-2.4.jar,会生成新的atlassian-extras-2.4.jar。
6、上传新的atlassian-extras-2.4.jar、Confluence-5.6.6-language-pack-zh_CN.jar、mysql-connector-java-5.1.39-bin.jar到/opt/atlassian/confluence/confluence/WEB-INF/lib,并且删除atlassian-extras-decoder-v2-3.2.jar。
7、启动confluence
[root@linux-node1 lib]# /etc/init.d/confluence start
To run Confluence in the foreground, start the server with start-confluence.sh -fg
executing using dedicated user: confluence
If you encounter issues starting up Confluence, please see the Installation guide at http://confluence.atlassian.com/display/DOC/Confluence+Installation+Guide
Server startup logs are located in /opt/atlassian/confluence/logs/catalina.out
Using CATALINA_BASE:   /opt/atlassian/confluence
Using CATALINA_HOME:   /opt/atlassian/confluence
Using CATALINA_TMPDIR: /opt/atlassian/confluence/temp
Using JRE_HOME:        /opt/atlassian/confluence/jre/
Using CLASSPATH:       /opt/atlassian/confluence/bin/bootstrap.jar:/opt/atlassian/confluence/bin/tomcat-juli.jar
Using CATALINA_PID:    /opt/atlassian/confluence/work/catalina.pid
Tomcat started.
[root@linux-node1 lib]#
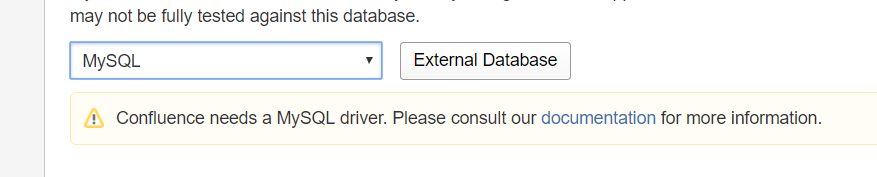
配置数据库
1、数据库选择MySQL,然后点击“External Database”,进入数据库配置页面。
2、点击“Direct JDBC”,User Name和Password填写安装配置mysql中设置的用户名和密码。
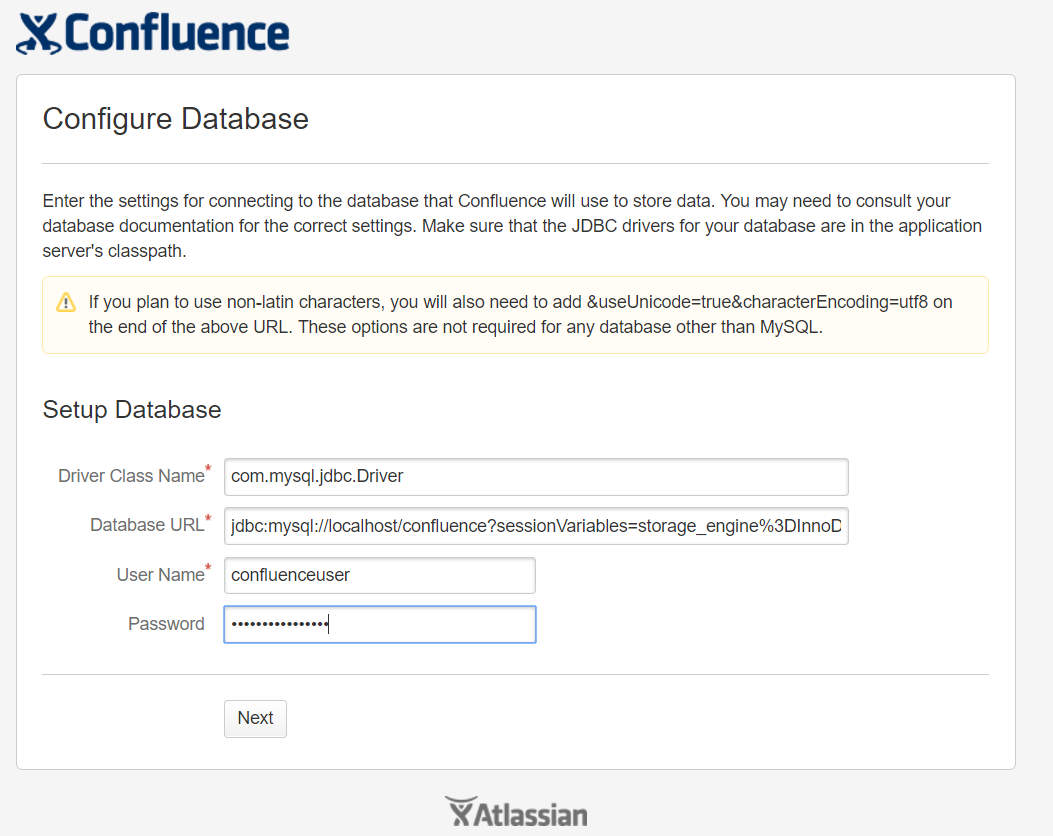
3、点击“Next”,这一步花费时间较长,请耐心等待。数据写入成功,进入如下页面。
4、第3步如果报错,请检查mysql数据库配置,然后卸载后重新安装,卸载命令如下。
/etc/init.d/confluence stop
cd /opt/atlassian/confluence/
./uninstall
或者:
/etc/init.d/confluence stop
rm -rf /opt/atlassian/
rm -rf /var/atlassian/
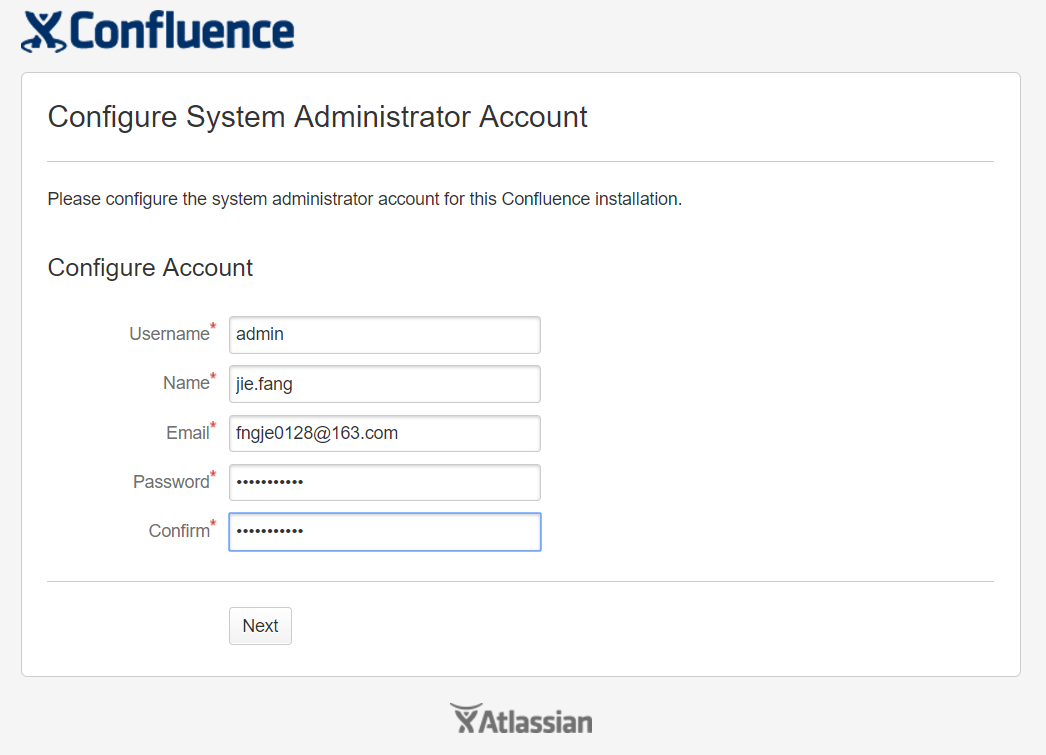
配置管理员
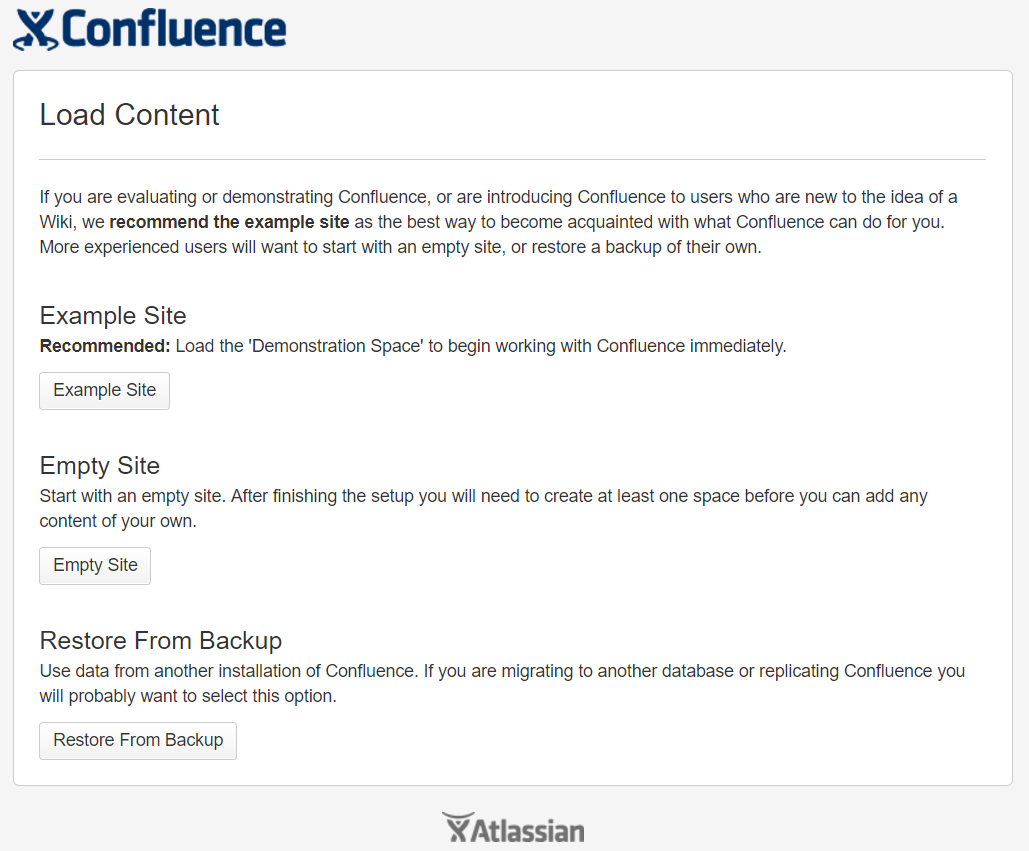
初始化一个样例站点,根据提示进行配置。

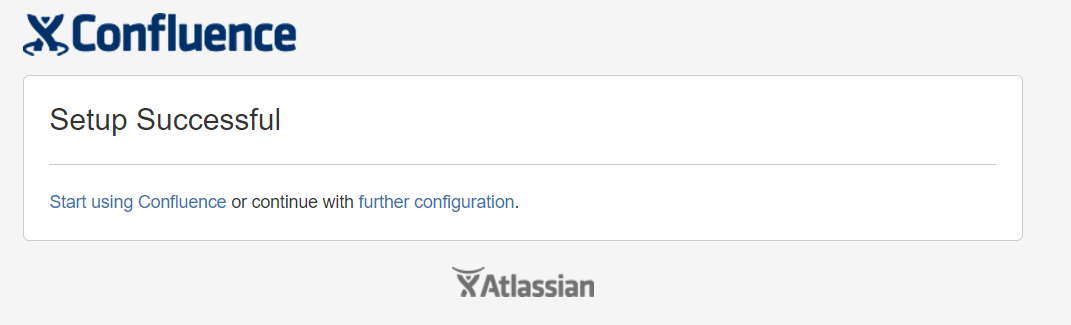
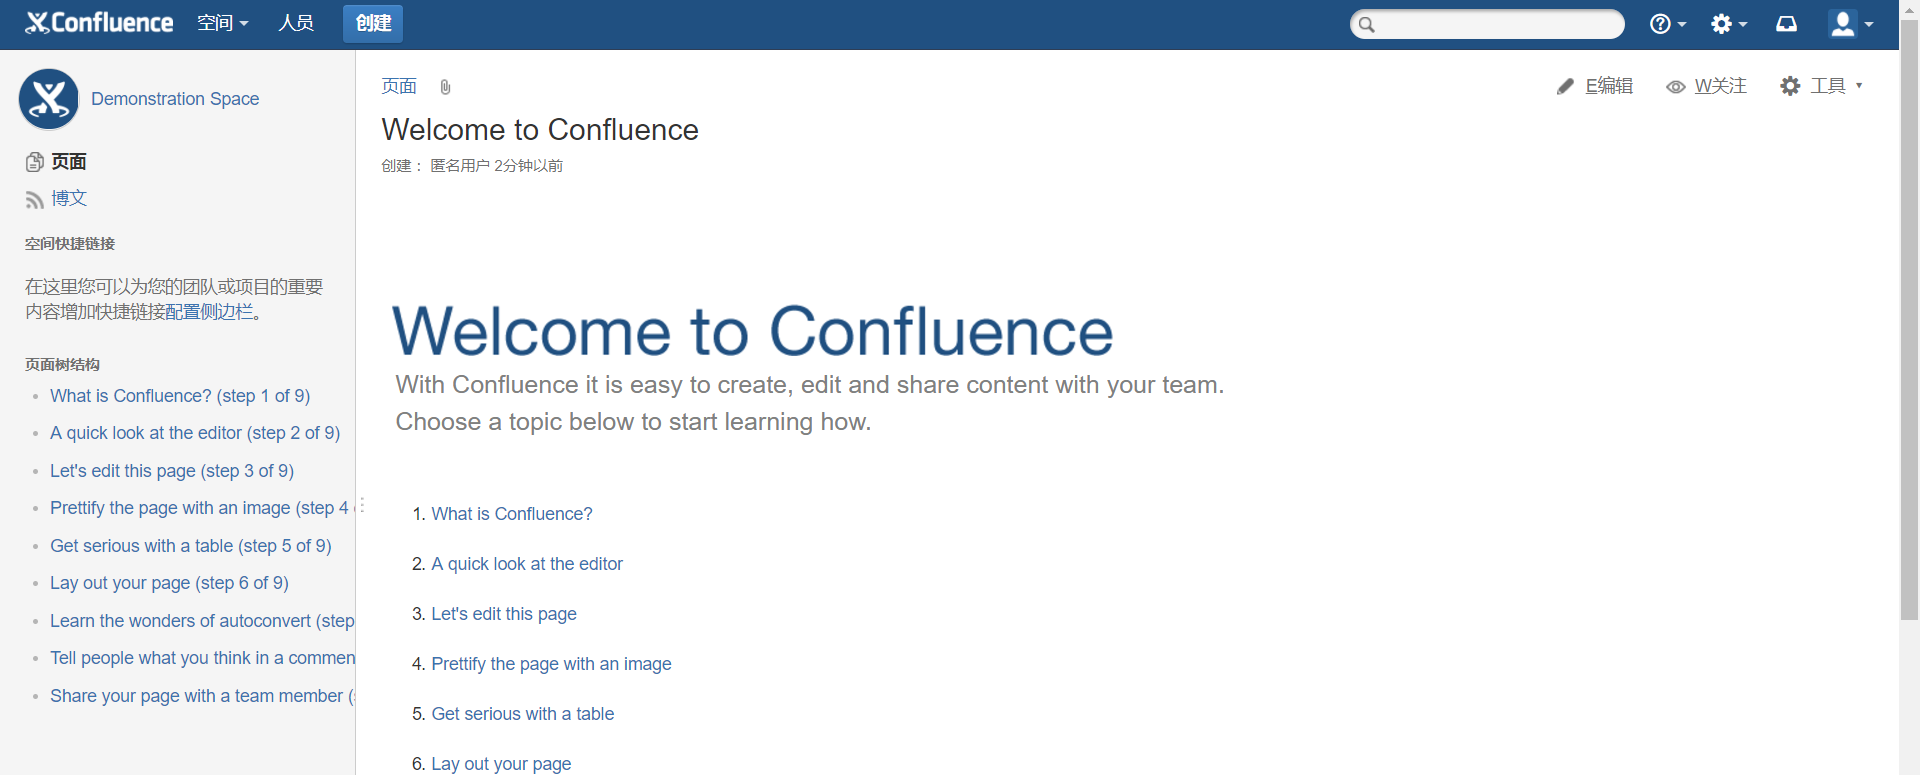
进入wiki
WIKI的迁移及其他请参考: