所需软件 & 环境
操作系统:CentOS 7.3.1711 最小安装 (已关闭 SELinux 和防火墙)
应用软件: Nginx 、MariaDB 、PHP 、ownCloud 10.0.3
一.安装软件包
yum -y install nginx mariadb-server redis lbzip2 php71w-common php71w-fpm php71w-gd php71w-mysql php71w-mbstring php71w-intl php71w-mcrypt php71w-pecl-imagick php71w-xml php71w-pecl-redis
二. 下载 & 安装 ownCloud
wget  https://download.owncloud.org/community/owncloud-10.0.2.tar.bz2
tar -xf ./owncloud-10.0.3.tar.bz2 mv owncloud /usr/share/nginx/
chown -R nginx:nginx /usr/share/nginx/owncloud
find /usr/share/nginx/owncloud -type d -exec chmod 755 {} ;
find /usr/share/nginx/owncloud -type f -exec chmod 644 {} ;
三.创建 ownCloud 数据目录
ownCloud 上的数据将存储到 /data/owncloud 中。
mkdir /data/owncloud
chown nginx:nginx /var/lib/owncloud
四.配置数据库
4.1启动数据库
systemctl start mariadb

systemctl enable mariadb
4.2 进行安全设置
mysql_secure_installation
4.3 数据库配置
CREATE USER 'owncloud'@'localhost' IDENTIFIED BY 'owncloud';
CREATE DATABASE owncloud;
GRANT ALL PRIVILEGES ON owncloud.* TO 'owncloud'@'localhost' IDENTIFIED BY 'owncloud';
FLUSH PRIVILEGES;
五.配置nginx
vim /etc/nginx/conf.d/owncloud.conf
upstream php-handler {
        server unix:/run/php-fpm/owncloud.sock;
}
server {
    listen    8080;
    server_name    _;
    # Path to the root of your installation
    root    /usr/share/nginx/owncloud;
    # set max upload size
    client_max_body_size    10G;
    fastcgi_buffers    64    4K;
    # Disable gzip to avoid the removal of the ETag header
    gzip    off;
    # Uncomment if your server is build with the ngx_pagespeed module
    # This module is currently not supported.
    #pagespeed    off;
    rewrite    ^/caldav(.*)$    /remote.php/caldav$1 redirect;
    rewrite    ^/carddav(.*)$    /remote.php/carddav$1 redirect;
    rewrite    ^/webdav(.*)$    /remote.php/webdav$1 redirect;
    index    index.php;
    error_page    403    /core/templates/403.php;
    error_page    404    /core/templates/404.php;
    location = /robots.txt {
        allow all;
        log_not_found off;
        access_log off;
    }
    location ~ ^/(?:.htaccess|data|config|db_structure.xml|README){
        deny all;
    }
    location / {
        # The following 2 rules are only needed with webfinger
        rewrite ^/.well-known/host-meta /public.php?service=host-meta last;
        rewrite ^/.well-known/host-meta.json /public.php?service=host-meta-json last;
        rewrite ^/.well-known/carddav /remote.php/carddav/ redirect;
        rewrite ^/.well-known/caldav /remote.php/caldav/ redirect;
        rewrite ^(/core/doc/[^/]+/)$ $1/index.html;
        try_files $uri $uri/ /index.php;
    }
    location ~ .php(?:$|/) {
        fastcgi_split_path_info ^(.+.php)(/.+)$;
        include fastcgi_params;
        fastcgi_param SCRIPT_FILENAME $document_root$fastcgi_script_name;
        fastcgi_param PATH_INFO $fastcgi_path_info;
        fastcgi_pass php-handler;
    }
    # Optional: set long EXPIRES header on static assets
    location ~* .(?:jpg|jpeg|gif|bmp|ico|png|css|js|swf)$ {
          expires 30d;
            access_log off;
    }
}
六. 配置 PHP-FPM
6.1 编辑配置文件
vi /etc/php-fpm.d/owncloud.conf
[owncloud]
user = nginx
group = nginx
listen = /run/php-fpm/owncloud.sock
listen.owner = nginx
listen.group = nginx
listen.mode = 0600
pm = dynamic
pm.max_children = 50
pm.start_servers = 5
pm.min_spare_servers = 5
pm.max_spare_servers = 35
slowlog = /var/log/php-fpm/owncloud-slow.log
php_admin_value[error_log] = /var/log/php-fpm/owncloud-error.log
php_admin_flag[log_errors] = on
php_value[memory_limit] = 512M
php_value[session.save_handler] = files
php_value[session.save_path]    = /var/lib/php/session
php_value[soap.wsdl_cache_dir]  = /var/lib/php/wsdlcache
php_value[upload_max_filesize] = 16G
php_value[post_max_size] = 16G
php_value[max_input_time] = 3600
php_value[max_execution_time] = 3600
php_value[date.timezone] = Asia/Shanghai
env[HOSTNAME] = $HOSTNAME
env[PATH] = /usr/local/bin:/usr/bin:/bin
env[TMP] = /tmp
env[TMPDIR] = /tmp
env[TEMP] = /tmp
6.2 创建 PHP 会话目录
mkdir -p /var/lib/php/session && chown -R nginx:nginx /var/lib/php/session
七.启动服务
7.1 启动服务
systemctl start nginx php-fpm
7.2 设置开机启动
systemctl enable nginx php-fpm mariadb
八.配置 ownCloud
打开浏览器,输入 https://192.168.129.100 ,回车打开。然后按图片提示进行 ownCloud 的初始化。

九.配置缓存 & 启用本地文件读取
配置缓存文件
vi /usr/share/nginx/owncloud/config/config.php   #倒数第二行开头(installed 那里)
'memcache.local' => 'OCMemcacheRedis',
'redis' => [
   'host' => 'localhost',
   'port' => 6379,
],
'memcache.locking' => 'OCMemcacheRedis',
'files_external_allow_create_new_local' => true,
配置计划任务
crontab -e
*/15 * * * * sudo -u nginx php -f /usr/share/nginx/owncloud/cron.php > /dev/null 2>&1
十.用Docker部署ONLYOFFICE Document Server
10.1 安装docker
yum install docker -y
10.2 启动服务,设置开机启动
# systemctl start decker

# systemctl enable decker
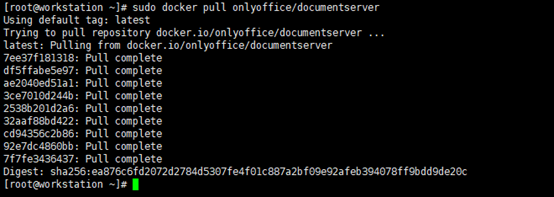
10.3 拉取ONLYOFFICE Document Server 的Docker镜像
docker pull onlyoffice/documentserver
10.4 启动Docker容器
并映射80端口至本地:
docker run -i -t -d -p 80:80 onlyoffice/documentserver
将Document Server映射至其它端口
80端口上往往会运行像Apache、Nginx之类的HTTP服务,为了避免端口冲突,我们可以将Document Server映射至其它端口。
映射至9000端口:
docker run -i -t -d -p 9000:80 onlyoffice/documentserver

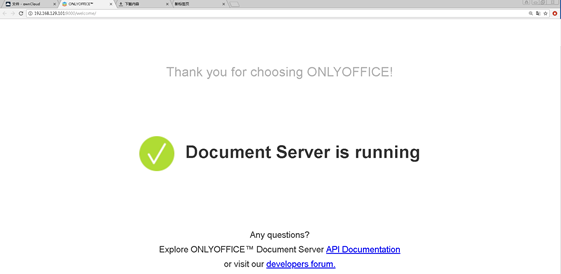
通过IP:9000地址访问
Document Server的数据在容器中的储存位置如下:
- /var/log/onlyoffice 存放ONLYOFFICE Document Server日志
- /var/www/onlyoffice/Data 存放证书文件
11. 启用OwnCloud ONLYOFFICE集成应用程序
11.1 下载安装ONLYOFFICE
将OwnCloud ONLYOFFICE集成应用程序放在OwnCloud服务器上的/ apps目录中:
cd  /usr/share/nginx/owncloud/apps

git clone https://github.com/ONLYOFFICE/onlyoffice-owncloud.git onlyoffice
11.2 安装ONLYOFFICE
转到OwnCloud,打开带有未启用应用程序的页面,然后单击启用 ONLYOFFICE应用程序。

11.3
11.3 配置ONLYOFFICE
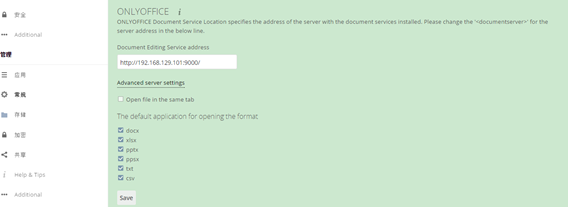
完成配置。