pymysql模块
1.pymysql安装
这是一个第三方的模块,需要提前安装
使用清华源安装:(可以解决下载慢,超时导致下载失败等问题)
pip3 install -i http://pypi.douban.com/simple/ pymysql
2.基本使用流程
先创建一个表用来当作实验表
create database db666 charset='utf8';
use db666;
create table user(
	id int primary key auto_increment,
    username varchar(24),
    password varchar(16)
);
insert into user(username,password) values('jkey',123),('tufei',222),('song',123),('dd',222),('jj',123),('kk',222),('uu',123),('yy',222),('nn',123),('cc',222);
在pycharm中 使用pymysql
# 1. 链接数据库 和 dos终端一样
conn = pymysql.connect(
	host='localhost',
    port=3306,
    user='root',
    password='jzd123',
    database='db666',
    'charset'='utf8'  # 注意是utf8不是utf-8

    # passwd='' 也可以指定密码
    # db='' 也可以指定数据库名 都是为了兼容mysqldb
)

# 2. 通过链接对象conn产生一个游标对象, 游标对象就相当于dos界面的执行行,等待输入指令的.  mysql>
cursor = conn.cursor()

# 3. 定义sql语句交给游标对象去执行
"""
affected_rows = cursor.execute(sql)
execute是给我们提交sql语句到数据库的,返回的是当前sql语句影响的行数,可以当作判断是否查找成功的依据
"""
# 例如: 判断用户输入的账号和密码是否和数据库中存的一致
username = input('请输入账号>>:').strip()
password = input("请输入密码>>:").strip()

sql = 'select * from user where username="%s" and password="%s"' % (username,password)  # 注意:%s要加上引号,是一个varchar类型
affected_rows = cursor.execute(sql)
print("影响了%s行"%affected_rows)

if affected_rows:
    print("登录成功")
else:
    print("用户名或者密码错误")
3. 利用execute解决sql注入问题
根本原理:利用一些SQL语法的特性, 书写一些特定的语句实现固定的语法. 这里就是利用的是MySQL的注释语法。 当然还有很多种,这里只是简单的一种列举。
举例说明:
Copy"""
web端登陆时, 在应用程序级别, 先筛选一下特殊符号或者根本不让你输入特殊符号, 从服务器下载页面代码到客户端. 客户端的web端js代码把你有一些能改变sql语句逻辑的符号, and ,or, –- 注释等全部给你过滤掉, 再往服务端发, 再拼成sql语句, 往数据库上一提交, 但是这种安全是在前端界面实现的我们可以破解.

破解: 过模拟浏览器的行为, 相当于跳过了你前端的js过滤监测, mysql服务端就嗝屁了
"""
2种sql注入介绍:
Copy# 1、sql注入之:用户存在,绕过密码
jkey" #任意字符 或者 jkey" -- 任意字符 (注意: 使用--这种注释语法后面必须跟一个空格, 后面才是任意字符. #号注释没有要求)
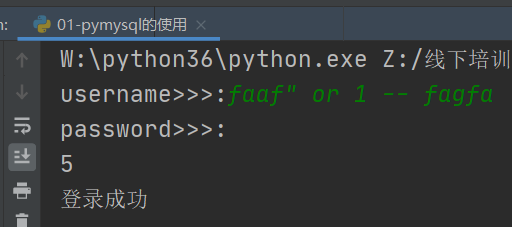
# 2、sql注入之:用户不存在,绕过用户与密码
xxx" or 1=1 #任意字符 或者 xxx" or 1=1 -- 任意字符

sql注入俩种解决方案
import pymysql

conn = pymysql.connect(host="localhost",user='root',password='jzd123',database='db666',charset='utf8')

# curr = conn.cursor(cursor=pymysql.cursors.DictCursor)  # 将返回的查询结果变为列表套 key:values的形式
curr = conn.cursor()  # 默认的sql语句的执行结果为大元组套小元组的形式

inp_user = input('username>>>:').strip()
inp_pwd = input('password>>>:').strip()

# 解决sql注入问题方法1
sql = rf'select * from user where username="{inp_user}" and password="{inp_pwd}"'  # 这样用自己的拼接方式会出现sql注入的问题,
# # 例如:输入时输入 xxx" or 1=1 -- xx 就会破坏掉sql语句的本身意思,这时候你要想让sql语句的语句不被破坏,就得自己编写正则去匹配输入中是否有特殊符合,
# # 有就处理这些特殊符合
rows = curr.execute(sql)
# 解决sql注入问题方法2
# 将sql语句放到execute方法中,这个方法会帮我们处理这个问题
# rows = curr.execute("select * from user where username=%s and password=%s", args=(inp_user, inp_pwd))

print(rows)

# res = curr.fetchall()
#
# print(res)
if rows:
    print('登录成功')
else:
    print('登录失败')

curr.close()
conn.close()
4.fetch系列的方法
该系列的方法是在pymysql中拿到sql语句执行的返回结果的
例如.还是拿上面的user表演示
import pymysql

conn = pymysql.connect(
    host='127.0.0.1',
    port=3306,
    user='root',
    passwd='jzd123',
    db='db666',
    charset='utf8'
)

# 注意: 游标对象默认拿到的返回数据是元组的类型,可以设置成字典的类型
cursor = conn.cursor(cursor=pymysql.cursors.DictCursor)

while True:
    sql = input("mysql> ").strip()  # 输入 select * from user;
    print("sql:", sql)
    affected_rows = cursor.execute(sql)
    print('affected_rows:', affected_rows)

    # cursor.fetchone() 方法: 表示一次只拿一条数据,有值返回数据本身是字典类型,没有查询结果或者被取空都返回None
    """
    需要主要的是fetch系列的方法返回是迭代器,提交了一次只有一次的返回结果,取干净了就得重新提交sql语句了
    """
    print(cursor.fetchone())
    print(cursor.fetchone())
    """返回结果:
    {'id': 1, 'username': 'jkey', 'password': '123'}
	{'id': 2, 'username': 'tufei', 'password': '222'}
	"""

    # cursor.fetchmany(n) 可以一次取多条数据,有值就返回数据,列表套字典的类型,没有查询结果或者被取空都返回[]
    print(cursor.fetchmany(2))
    print(cursor.fetchmany(3))
    """返回结果
    [{'id': 3, 'username': 'song', 'password': '123'}, {'id': 4, 'username': 'dd', 'password': '222'}]
	[{'id': 5, 'username': 'jj', 'password': '123'}, {'id': 6, 'username': 'kk', 'password': '222'}, {'id': 7, 'username': 'uu', 'password': '123'}]
    """

    # 3. cursor.fetchall(): 将所有的数据全部取空,有值就返回数据,列表套字典的类型,没有查询结果或者被取空都返回[]
    print(cursor.fetchall())
    print(cursor.fetchall())
    """返回结果
    [{'id': 8, 'username': 'yy', 'password': '222'}, {'id': 9, 'username': 'nn', 'password': '123'}, {'id': 10, 'username': 'cc', 'password': '222'}]
    []
    """
5.指针的移动介绍(scroll)
是搭配fetch系列的方法使用
例如:
import pymysql

conn = pymysql.connect(
    host='127.0.0.1',
    port=3306,
    user='root',
    passwd='jzd123',
    db='db666',
    charset='utf8'
)

cursor = conn.cursor(cursor=pymysql.cursors.DictCursor)

cursor.execute('select * from user;')

""" 方法介绍
cursor.scroll(x,relative/absolute)
第一个参数为指针往后移动的位数
第二个参数为选择相对移动还是绝对移动,默认为relative相对移动
"""
# 1. relative 相对移动: 意思是相对于光标当前所在的位置继续往后移动x位
cursor.scroll(1)  # 等价于 cursor.scroll(1,relative)
print(cursor.fetchone())  # 注意: 读取数据类似于文件指针的移动
cursor.scroll(3)
print(cursor.fetchmany(2))
"""执行返回结果
{'id': 2, 'username': 'tufei', 'password': '222'}
[{'id': 6, 'username': 'kk', 'password': '222'}, {'id': 7, 'username': 'uu', 'password': '123'}]
"""

# 2. 绝对移动: 相对于数据的开头位置往后继续移动1位
cursor.scroll(1, 'absolute')
print(cursor.fetchone())
cursor.scroll(3, 'absolute')
print(cursor.fetchmany(2))
"""执行后返回结果
{'id': 2, 'username': 'tufei', 'password': '222'}
[{'id': 4, 'username': 'dd', 'password': '222'}, {'id': 5, 'username': 'jj', 'password': '123'}]
"""
6.增删改介绍(execute系列)
在python中针对数据库的提交,都是execute帮我们提交的sql语句,如果是查的话,是可以直接拿取到数据的,而如果是增删改的话,考虑到数据的安全性,我们需要二次确认之后才能真正的操作硬盘上的数据
commit方法
import pymysql

conn = pymysql.connect(
    host='127.0.0.1',
    port=3306,
    user='root',
    passwd='jzd123',
    db='db666',
    charset='utf8',
    # autocommit=True  # 默认是Flase,设为True之后,对于增删改的操作就不需要二次提交了 即 下面的conn.commit() 就可以不用写了
)

cursor = conn.cursor(cursor=pymysql.cursors.DictCursor)

# 修改之前查看一下数据
cursor.execute('select * from user;')
print(cursor.fetchall())

# 往数据库 user 表 里面增数据
# 1. cursor.execute()  表示指定单个sql语句
sql = 'insert into user(username,password) values("刘大傻","dsb")'
cursor.execute(sql)
"""
在dos界面查看 是否插入成功
mysql> select * from user;
+----+----------+----------+
| id | username | password |
+----+----------+----------+
|  1 | jkey     | 123      |
|  2 | tufei    | 222      |
|  3 | song     | 123      |
|  4 | dd       | 222      |
|  5 | jj       | 123      |
|  6 | kk       | 222      |
|  7 | uu       | 123      |
|  8 | yy       | 222      |
|  9 | nn       | 123      |
| 10 | cc       | 222      |
+----+----------+----------+
10 rows in set (0.00 sec)
发现并没有插入到数据库中,这也证实了需要二次确认的观念
"""
cursor.execute('select * from user;')
print(cursor.fetchall())  # 但是自己这个客户端是可以查看到的昂 {'id': 13, 'username': '刘大傻', 'password': 'dsb'}

# 2.cursor.execute(): 指定单个sql语句+过滤特殊符号和敏感关键字
sql = 'insert into user(username,password) values(%s,%s)'
cursor.execute(sql, ("拍打星", "123"))
cursor.execute(sql, ["拍打星2", "123"])
cursor.execute(sql, args=["拍打星3", "123"])  # 元组,列表的形式都可以

# 3.cursor.executemany()  可以一次提交多个sql语句+ 过滤特殊符号和敏感关键字
sql = "insert into  user(username,password) values(%s,%s)"
cursor.executemany(sql, [("蛋蛋", "123"), ("可可", '234'), ("大大", "234")])

# 删
sql = 'delete from user where id<10'
cursor.execute(sql)

# 改
sql = 'update user set username="杨二傻" where id=10'
cursor.execute(sql)

# 补充:  execute之for循环实现executemany的功能
user_info = [
    ('jj', '123'),
    ('dd', '323'),
    ('aa', '444')
]
for user in user_info:
    sql = "insert into user(username, password) values (%s, %s);"
    cursor.execute(sql, user)

# 提交
conn.commit()  # 注意: 增删改操作必须指定commit才会生效

"""修改后查"""
cursor.execute('select * from user;')
print(cursor.fetchall())

cursor.close()
conn.close()
"""最后提交后的结果
mysql> select * from user;
+----+------------+----------+
| id | username   | password |
+----+------------+----------+
| 10 | cc         | 222      |
| 38 | 刘大傻     | dsb      |
| 39 | 拍打星     | 123      |
| 40 | 拍打星2    | 123      |
| 41 | 拍打星3    | 123      |
| 42 | 蛋蛋       | 123      |
| 43 | 可可       | 234      |
| 44 | 大大       | 234      |
| 45 | jj         | 123      |
| 46 | dd         | 323      |
| 47 | aa         | 444      |
+----+------------+----------+
"""
7. 获取插入的最后一条数据的自增ID
Copyimport pymysql

conn = pymysql.connect(
    host='localhost',
    user='root',
    password='jzd123',
    database='db666'
)
cursor = conn.cursor()

sql = 'insert into user(username,password) values("xxxx","123");'
rows = cursor.execute(sql)
print(cursor.lastrowid)  # 在插入语句后查看. 获取插入的最后一条数据的自增ID, 如果插入数据之前id是10, 执行execute以后返回的值是11. 返回结果是int类型.

conn.commit()

cursor.close()
conn.close()