在使用ajax提交表单时,一定要区分提交按钮的形式和数据表头的设置,实例如下:
GET请求:
HTML代码:
 1 <!doctype html>
 2 <html lang="en">
 3     <head>
 4         <meta charset="UTF-8">
 5         <title>原生ajax-状态值得含义</title>
 6         <script type="text/javascript">
 7             window.onload = function() {
 8                 var btn = document.getElementById('btn');
 9                 btn.onclick = function() {
10                     var username = document.getElementById("username").value;
11                     var password = document.getElementById('password').value;
12                     //第一步:创建xhr对象
13                     var xhr = null;
14                     if(window.XMLHttpRequest) { //标准浏览器
15                         xhr = new XMLHttpRequest();
16                     } else { //早期的IE浏览器
17                         xhr = new ActiveXObject('Microsoft.XMLHTTP');
18                     }
19
20                     //第二步:准备发送请求-配置发送请求的一些行为
21                     //var url = '05open.php?username=' + encodeURIComponet(username) + '&password=' + password;
22
23                     var url = '05open.php?username='+username+'&password='+password;
24                     xhr.open('get', url,true);
25                     //第三步:执行发送的动作
26
27                     var param = 'username=' + username + '&password=' + password;
28                     xhr.send(null);
29                     //第四步:指定一些回调函数
30                     xhr.onreadystatechange = function() {
31                         if(xhr.readyState == 4) {
32                             if(xhr.status == 200) {
33                                 var data = xhr.responseText; //json
34                                 console.log(data);
35                                 // var data1 = xhr.responseXML;
36                             }
37                         }
38                     }
39                 }
40             }
41         </script>
42     </head>
43
44     <body>
45         <div>
46             <div id="showInfo"></div>
47             <form>
48                 用户名:<input type="text" name="username" id="username"><br> 密码:
49                 <input type="password" name="password" id="password"><br>
50                 <!--<input type="button" value="提交" id="btn">-->
51                 <input type="submit" value="提交" id="btn">
52             </form>
53         </div>
54     </body>
55 </html>
php代码:
 1 <?php
 2
 3 $username = $_GET['username'];
 4 $password = $_GET['password'];
 5
 6 // $username = $_POST['username'];
 7 // $password = $_POST['password'];
 8 // echo 1;
 9
10 echo '用户名:'.$username.'密码:'.$password;
11
12 ?>
提交按钮采用
<input type="submit" value="提交" id="btn">
提交后的结果是:
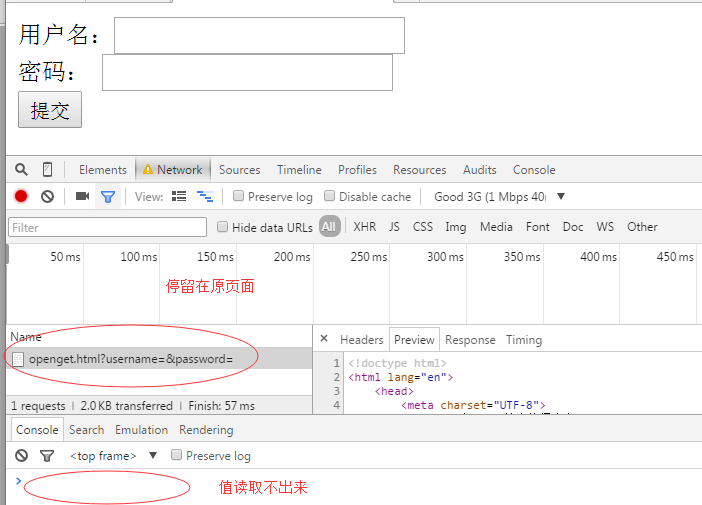
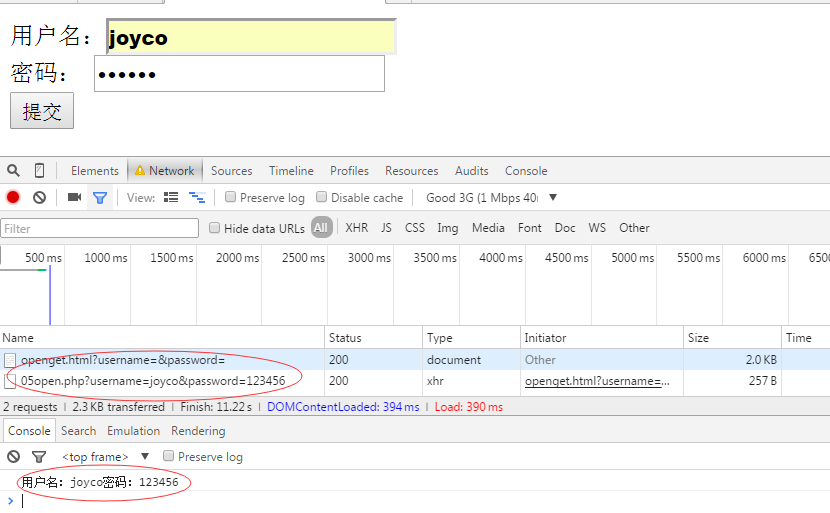
提交按钮采用
<input type="button" value="提交" id="btn">
提交后的结果是:
POST请求:
HTML代码:
 1 <!doctype html>
 2 <html lang="en">
 3     <head>
 4         <meta charset="UTF-8">
 5         <title>原生ajax-状态值得含义</title>
 6         <script type="text/javascript">
 7             window.onload = function() {
 8                 var btn = document.getElementById('btn');
 9                 btn.onclick = function() {
10                     var username = document.getElementById("username").value;
11                     var password = document.getElementById('password').value;
12                     //第一步:创建xhr对象
13                     var xhr = null;
14                     if(window.XMLHttpRequest) { //标准浏览器
15                         xhr = new XMLHttpRequest();
16                     } else { //早期的IE浏览器
17                         xhr = new ActiveXObject('Microsoft.XMLHTTP');
18                     }
19
20                     //第二步:准备发送请求-配置发送请求的一些行为
21                     //var url = '05open.php?username=' + encodeURIComponet(username) + '&password=' + password;
22
23                     //var url = '05open.php?username='+username+'&password='+password;
24                     var url='05open.php';
25                     xhr.open('post', url,true);
26                     //第三步:执行发送的动作
27
28                     var param = 'username=' + username + '&password=' + password;
29                     xhr.send(param);
30                     //第四步:指定一些回调函数
31                     xhr.onreadystatechange = function() {
32                         if(xhr.readyState == 4) {
33                             if(xhr.status == 200) {
34                                 var data = xhr.responseText; //json
35                                 console.log(data);
36                                 // var data1 = xhr.responseXML;
37                             }
38                         }
39                     }
40                 }
41             }
42         </script>
43     </head>
44
45     <body>
46         <div>
47             <div id="showInfo"></div>
48             <form>
49                 用户名:<input type="text" name="username" id="username"><br> 密码:
50                 <input type="password" name="password" id="password"><br>
51                 <input type="button" value="提交" id="btn">
52             </form>
53         </div>
54     </body>
55 </html>
php代码:
 1 <?php
 2
 3
 4 //$username = $_GET['username'];
 5 //$password = $_GET['password'];
 6
 7 $username = $_POST['username'];
 8 $password = $_POST['password'];
 9
10 echo '用户名:'.$username.'密码:'.$password;
11
12 ?>
执行结果:

这是没有设置头文件的原因:
头文件设置如下:
1 xhr.setRequestHeader('Content-Type','application/x-www-form-urlencoded');
设置后执行如下:
