一:介绍
1.模式

2.应用场景
如果exchangge与队列中的key相同,消息就发送过去。
这个就是需要将交换机与队列增加key。
3.路由类型
上节课的订阅模式中的路由类型是Fanout。
这篇文章的路由类型是Direct。
二:程序
1.生产者
 1 package com.mq.routing;
 2
 3 import com.mq.utils.ConnectionUtil;
 4 import com.rabbitmq.client.Channel;
 5 import com.rabbitmq.client.Connection;
 6 import com.rabbitmq.client.ConnectionFactory;
 7
 8 public class RoutingSend {
 9     private static final String EXCHANGE_NAME="test_exchange_direct";
10     private static final String QUEUE_NAME="test_queue_direct_1";
11     public static void main(String[] args)throws Exception{
12         Connection connection= ConnectionUtil.getConnection();
13         Channel channel=connection.createChannel();
14         channel.exchangeDeclare(EXCHANGE_NAME,"direct");
15         String msg="hello routing";
16         //重点是第二个参数routingKey
17         String routingKey="info";
18         channel.basicPublish(EXCHANGE_NAME,routingKey,null,msg.getBytes());
19         System.out.println("msg send:"+msg);
20         channel.close();
21         connection.close();
22     }
23 }
2.消费者一
 1 package com.mq.routing;
 2
 3 import com.mq.utils.ConnectionUtil;
 4 import com.rabbitmq.client.*;
 5
 6 import java.io.IOException;
 7
 8 public class RoutingReceive1 {
 9     private static final String EXCHANGE_NAME="test_exchange_direct";
10     private static final String QUEUE_NAME="test_queue_direct_1";
11     public static void main(String[] args)throws Exception{
12         Connection connection= ConnectionUtil.getConnection();
13         final Channel channel=connection.createChannel();
14         channel.queueDeclare(QUEUE_NAME,false,false,false,null);
15         channel.queueBind(QUEUE_NAME,EXCHANGE_NAME,"error");
16         channel.basicQos(1);
17         Consumer consumer=new DefaultConsumer(channel){
18             @Override
19             public void handleDelivery(String consumerTag, Envelope envelope, AMQP.BasicProperties properties, byte[] body) throws IOException {
20                 String msg = new String(body, "utf-8");
21                 System.out.println("[1] receive:" + msg);
22                 try {
23                     Thread.sleep(200);
24                 }catch (Exception e){
25                     e.printStackTrace();
26                 }finally {
27                     System.out.println("[done]");
28                     channel.basicAck(envelope.getDeliveryTag(),false);
29                 }
30             }
31         };
32         boolean autoAck=false;
33         channel.basicConsume(QUEUE_NAME,autoAck,consumer);
34     }
35 }
3.消费者二
 1 package com.mq.routing;
 2
 3 import com.mq.utils.ConnectionUtil;
 4 import com.rabbitmq.client.*;
 5
 6 import java.io.IOException;
 7
 8 public class RoutingReceive2 {
 9     private static final String EXCHANGE_NAME="test_exchange_direct";
10     private static final String QUEUE_NAME="test_queue_direct_2";
11     public static void main(String[] args)throws Exception{
12         Connection connection= ConnectionUtil.getConnection();
13         final Channel channel=connection.createChannel();
14         channel.queueDeclare(QUEUE_NAME,false,false,false,null);
15         channel.queueBind(QUEUE_NAME,EXCHANGE_NAME,"error");
16         channel.queueBind(QUEUE_NAME,EXCHANGE_NAME,"info");
17         channel.queueBind(QUEUE_NAME,EXCHANGE_NAME,"waring");
18         channel.basicQos(1);
19         Consumer consumer=new DefaultConsumer(channel){
20             @Override
21             public void handleDelivery(String consumerTag, Envelope envelope, AMQP.BasicProperties properties, byte[] body) throws IOException {
22                 String msg = new String(body, "utf-8");
23                 System.out.println("[1] receive:" + msg);
24                 try {
25                     Thread.sleep(200);
26                 }catch (Exception e){
27                     e.printStackTrace();
28                 }finally {
29                     System.out.println("[done]");
30                     channel.basicAck(envelope.getDeliveryTag(),false);
31                 }
32             }
33         };
34         boolean autoAck=false;
35         channel.basicConsume(QUEUE_NAME,autoAck,consumer);
36     }
37 }
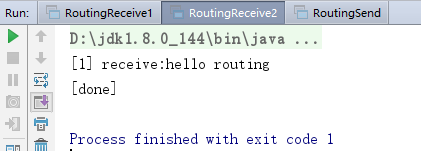
4.现象
send:

receive1:

receive2: