声明:本文源码出自实现雪花飞舞效果(有改动)主要通过这篇文来分析自定义view的实现过程。
没事时,比较喜欢上网看看一些新的东西,泡在网上的日子就是一个很不错的网站。
下面开始了,哈哈。^_^
大家都知道,自定义view分成三个类型,1、是完全自定义,自己绘制,例如本文讲的例子。2、是Groupview,就是把一些安卓原生提供的控件组合起来,做成一个有多种功能的组合控件,如前面写过的android-oldman之TitleBar.就是这种。3、就是继承自安卓原来的控件,然后增加修改成自己需要的功能。如extends TextVeiw后,再里面做一些更改,text的位置,长度什么的。相比2,与3,第1种自定义view就是要继承自view,然后根据需要,测量,绘制。
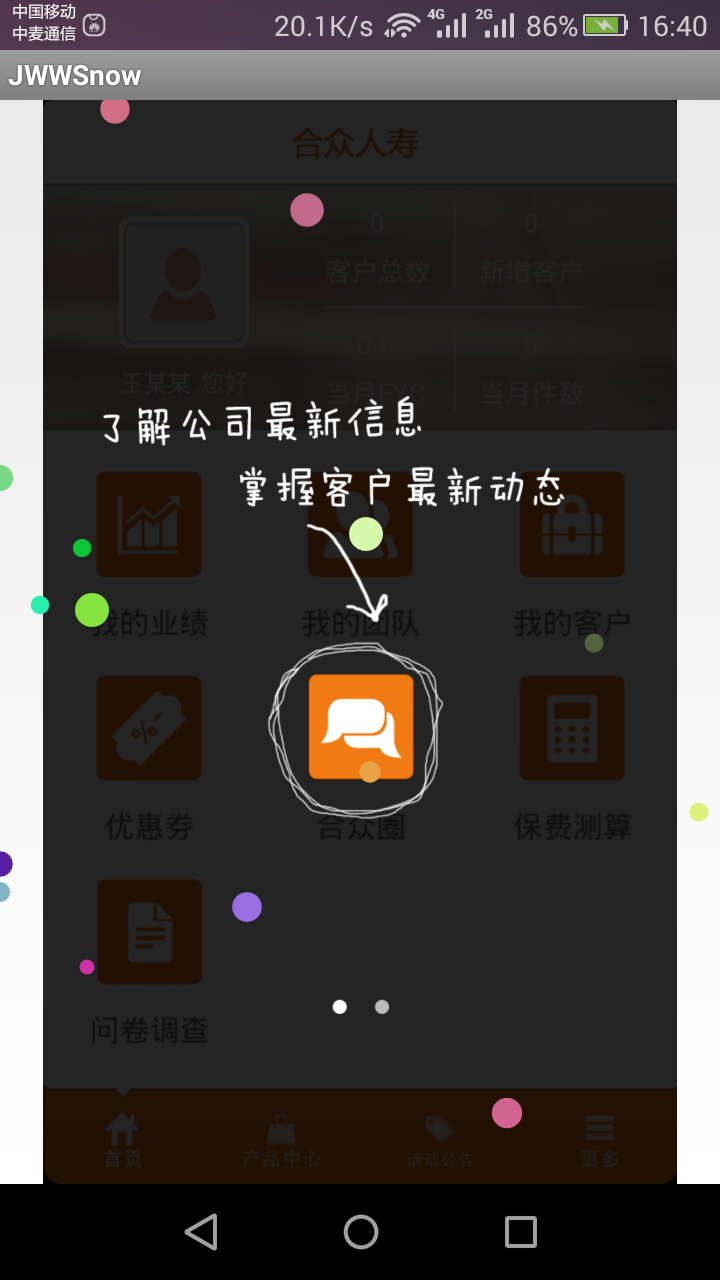
最终要的效果是:看到没有,上面一些彩色的点,就是原来的雪花,当然,你可以通过修改参数,改变雪花数量。
下面就开始贴代码了,哈哈哈。
首先,先是定义view
 1 package com.example.jwwsnow;
 2
 3 import java.util.ArrayList;
 4 import java.util.HashMap;
 5 import java.util.List;
 6
 7 import android.content.Context;
 8 import android.graphics.Canvas;
 9 import android.graphics.Color;
10 import android.graphics.Paint;
11 import android.util.AttributeSet;
12 import android.util.Log;
13 import android.view.View;
14
15 public class SnowView extends View {
16
17     Random random;
18     private static final int NUM_SNOWFLAKES = 15;//雪花数量
19     private static final int DELAY = 1;//画面延时刷新时间
20
21     private SnowFlake[] snowflakes;//雪花对像数组。
22
23     public SnowView(Context context) {
24         super(context);
25     }
26
27     public SnowView(Context context, AttributeSet attrs) {
28         super(context, attrs);
29     }
30
31     public SnowView(Context context, AttributeSet attrs, int defStyleAttr) {
32         super(context, attrs, defStyleAttr);
33     }
34
35
36     protected void resize(int width, int height) {
37         random = new Random();
38         snowflakes = new SnowFlake[NUM_SNOWFLAKES];
39         for (int i = 0; i < NUM_SNOWFLAKES; i++) {
40             //for循环生产雪花。
41             Paint paint = new Paint(Paint.ANTI_ALIAS_FLAG);
42             paint.setStyle(Paint.Style.FILL);
43             paint.setColor(Color.rgb(random.getColor(), random.getColor(), random.getColor()));
44             //返回的对象存入对象数组中去。
45             snowflakes[i] = SnowFlake.create(width, height, paint);
46             Log.i("SnowDemo", "时间::::::::::"+System.currentTimeMillis());
47         }
48     }
49
50     /**
51      * View中方法的启动顺序onSizeChanged()>onDraw();
52      */
53     @Override
54     protected void onSizeChanged(int w, int h, int oldw, int oldh) {
55         super.onSizeChanged(w, h, oldw, oldh);
56         if (w != oldw || h != oldh) {
57             resize(w, h);
58         }
59
60     }
61
62     @Override
63     protected void onDraw(Canvas canvas) {
64         super.onDraw(canvas);
65         for (SnowFlake snowFlake : snowflakes) {
66             //得到雪花对象,绘制。
67             snowFlake.draw(canvas);
68         }
69
70         getHandler().postDelayed(runnable, DELAY);//得到子线程,设置5ms延时,每5ms在主线程绘制一次界面。。
71     }
72
73     private Runnable runnable = new Runnable() {
74         @Override
75         public void run() {
76             invalidate();//此方法会把原来的视图清除掉,并重新调用veiw.onDraw方法。
77         }
78     };
79 }
可以看到,重写了view中的几个方法:
onSizeChanged();
这个方法,是先于onDrow方法执行的。判断view的size是不是改变,如果改变,则由系统调用。然后才是执行onDrow()方法。
在本例此方法中,系统通过对view的尺寸的判断,来调用reSize()方法,并把width与heigh传递过去。
在reSize()方法中。定义了雪花对象数组SnowFlakes[],通过for循环,创建指定数量的雪花对象,并在for循环中创建Paint对象,设置画笔。(ps:Paint与Canvas,paint就像我们平时做画用的画笔,我们可以选择画笔的颜色,粗细,抗锯齿,空心,实心,是不是带阴影等。Canvas,画布,我们可以用画布来承载我们要画的具体事物,如矩形,圆形,线等。要把ptint与canvas区分开,因为功用不同。canvas决定要画的具体是什么,print决定用什么样的性质去画嘿嘿,被我说晕没。)。然后调用下面要贴的雪花Calss的create方法。这个方法主要是设置一些尺寸,位置等的。然后把这些尺寸位置等参数状态以对象的形式保存在SnowFalkes[]数组中,供下面的onDraw方法中去用这些参数做画。

onDraw()方法中,for循环,依次对SnowFalkes[]对象数组中的每个雪花进行绘画。然后用Handler在主线程中定时重绘一次。
snowFlake.draw(canvas);方法则是具体的进行绘制了。下面先贴代码,再接着讲。
 1 package com.example.jwwsnow;
 2
 3 import android.graphics.Canvas;
 4 import android.graphics.Paint;
 5 import android.graphics.Point;
 6
 7 public class SnowFlake {
 8
 9     private static final float ANGE_RANGE = 0.1f;    //
10     private static final float HALF_ANGLE_RANGE = ANGE_RANGE / 2f;
11     private static final float HALF_PI = (float) Math.PI / 2f;
12     private static final float ANGLE_SEED = 25f;
13     private static final float ANGLE_DIVISOR = 10000f;
14     private static final float INCREMENT_LOWER = 2f;
15     private static final float INCREMENT_UPPER = 4f;
16     private static final float FLAKE_SIZE_LOWER = 7f;//最小雪花大小
17     private static final float FLAKE_SIZE_UPPER = 20f;//最大雪花大小
18
19     private final Random random;
20     private final Point position;
21     private float angle;
22     private final float increment;
23     private final float flakeSize;
24     private final Paint paint;
25
26     public static SnowFlake create(int width, int height, Paint paint) {
27         Random random = new Random();
28         int x = random.getRandom(width);//得到[0~width)的整数width与height都是外层view的尺寸。
29         int y = random.getRandom(height);
30         Point position = new Point(x, y);//设置雪花刚一出来的随机位置。
31         //设置Random.getRandom(ANGLE_SEED)/ANGLE_SEED得到[0~1)再*ANGE_RANGE得到[0~0.1f)的数据,再减去0.05得到[-0.05~0.05)的数据。
32         float angle = random.getRandom(ANGLE_SEED) / ANGLE_SEED * ANGE_RANGE + HALF_PI - HALF_ANGLE_RANGE;
33         //得到[2f~4f)的随机数据
34         float increment = random.getRandom(INCREMENT_LOWER, INCREMENT_UPPER);
35         //得到[7f~20f)的随机数据
36         float flakeSize = random.getRandom(FLAKE_SIZE_LOWER, FLAKE_SIZE_UPPER);
37         //返回雪花对象。
38         return new SnowFlake(random, position, angle, increment, flakeSize, paint);
39     }
40
41     SnowFlake(Random random, Point position, float angle, float increment, float flakeSize, Paint paint) {
42         this.random = random;
43         this.position = position;
44         this.angle = angle;//[-0.05~0.05)
45         this.increment = increment;//[2f~4f)
46         this.flakeSize = flakeSize;//[7f~20f)
47         this.paint = paint;
48     }
49
50     private void move(int width, int height) {
51         //x方向的偏移量小,y方向的大,是为了让雪花快点落下。
52         double x = position.x + (increment * Math.cos(angle));//Math.cos(angle)约为1
53         double y = position.y + (increment * Math.sin(angle));//Math.sin(0.05~-0.05) = +-[0~8.7)
54       /*
55        *设置雪花的位置为正,不跑出屏幕。[0~1)*2*ANGLE_SEED-ANGLE_SEED等于+-(0~ANGLE_SEED],为+-(0~25f]。然后再/10000f====+-(0~0.0025],
56        *然后再加[-0.05~0.05)泥妈,快算晕了。大神们果然不好理解。(-0.0525~0.0525)
57        */
58
59         angle += random.getRandom(-ANGLE_SEED, ANGLE_SEED) / ANGLE_DIVISOR;
60
61         position.set((int) x, (int) y);//设置新的位置
62
63         if (!isInside(width, height)) {
64             //如果雪花不在view视图内,则重设置他们的位置。
65             reset(width);
66         }
67     }
68
69     private boolean isInside(int width, int height) {
70         //TODO 设置雪花位置
71         int x = position.x;
72         int y = position.y;
73         //判断x坐标x>雪花尺寸加1距原点的距离(负方向)。x<background宽,同样的方式理解y。由于上面的设置,其实x方向,雪花是不可能跑出屏幕的,只有y方向上会。
74         return x >= -flakeSize - 1 && x + flakeSize <= width && y >= -flakeSize - 1 && y - flakeSize < height;
75
76     }
77
78     private void reset(int width) {
79         //当雪花落到屏幕最下方以下时,重新设置雪花从
80         position.x = random.getRandom(width);//x轴设设置一个view内的随机位置就行
81         position.y = (int) (-flakeSize - 1);//view的(0,0)点在view的左上角,所以,当y为负时,则在view的上方。看起来像是一个新的雪花从上落下。
82         angle = random.getRandom(ANGLE_SEED) / ANGLE_SEED * ANGE_RANGE + HALF_PI - HALF_ANGLE_RANGE;
83     }
84
85     public void draw(Canvas canvas) {
86         //绘制方法
87         int width = canvas.getWidth();
88         int height = canvas.getHeight();//雪花所整个view高度与宽度
89         move(width, height);//雪花移动,传的参数为view的的北景大小。
90       //画一个个雪花。其实就是画一个个球。其坐标,尺寸,画笔都是原来在create方法时就定义 了的,之后保存在flakesnow数组里了。
91         canvas.drawCircle(position.x, position.y, flakeSize, paint);
92     }
93
94
95 }
先跳到前面的onSizeChange()方法来说。可以看到,当调用SnowFlake.create()方法后,最后返回的是:(里面的Random对象也是重新进行封装的,马上贴上)
1 return new SnowFlake(random, position, angle, increment, flakeSize, paint);
这个是用来绘制SnowFlake时需要的参数。然后在onSizeChange()方法调用的reSize()方法中保存进入了雪花数组SnowFlakes[i]。
再跳到上面大段代码前面的接着说,在onDraw()方法中,for循环会依次绘制每个雪花。snowFalke.draw().就是snowflakes[i] = SnowFlake snowFlake();
snowFlake再调用自己的draw()方法。由于前面每个SnowFlake对象都保存了每个雪花的参数,所以在draw()中,用的就直接使用了。
雪花是要下落的,则在draw()方法中,调用move()方法,来设置每个雪花的位置。当雪花位置跑出屏幕后再调用reset()方法,重新设置雪花从屏幕最上方重新落下。
下面是代码中用来设置随机数据的Random对象封装。
 1 package com.example.jwwsnow;
 2
 3 import java.util.ArrayList;
 4 import java.util.List;
 5
 6 public class Random {
 7
 8      private static final java.util.Random RANDOM = new java.util.Random();
 9
10         public float getRandom(float lower, float upper) {
11             float min = Math.min(lower, upper);//返回两者较小的一个。
12             float max = Math.max(lower, upper);
13             return getRandom(max - min) + min;//返回的是比最大的小,比最小的大的数。
14         }
15
16         public float getRandom(float upper) {
17             return RANDOM.nextFloat() * upper;//Random.nextFloat()生成[0~1)的数.
18         }
19
20         public int getRandom(int upper) {
21             return RANDOM.nextInt(upper);//随机生成比[0~upper)的数值。
22         }
23         public int getColor(){
24             return RANDOM.nextInt(255);//随机生成[0~255)整数。
25
26         }
27 }
然后就是使用了:xml引用,要把路径写完整。
 1 <?xml version="1.0" encoding="utf-8"?>
 2 <RelativeLayout xmlns:android="http://schemas.android.com/apk/res/android"
 3   xmlns:tools="http://schemas.android.com/tools"
 4   android:layout_width="match_parent"
 5   android:layout_height="match_parent"
 6   tools:context="com.stylingandroid.snowfall.MainActivity">
 7
 8   <ImageView
 9     android:id="@+id/image"
10     android:layout_width="match_parent"
11     android:layout_height="match_parent"
12     android:layout_centerInParent="true"
13     android:contentDescription="@null"
14     android:scaleType="fitCenter"
15     android:src="@drawable/tree" />
16
17   <com.example.jwwsnow.SnowView
18     android:layout_width="match_parent"
19     android:layout_height="match_parent"
20     android:layout_alignBottom="@id/image"
21     android:layout_alignEnd="@id/image"
22     android:layout_alignLeft="@id/image"
23     android:layout_alignRight="@id/image"
24     android:layout_alignStart="@id/image"
25     android:layout_alignTop="@id/image" />
26 </RelativeLayout
本文主要用来复习自定义view的流程。建议先看原文。^_^
下面把我注释改变后的一些代码发上来,仅做研究用(eclipse版的。。。)。
ca,博客园不能上传代码。360云盘 访问密码 ce1b。