author: headsen chen
date: 2018-10-18 12:35:40
注意:依据Git上的tars搭建步骤整理而来
参考:
https://max.book118.com/html/2017/0527/109698528.shtm
https://github.com/TarsCloud/Tars/blob/master/Install.zh.md
环境: centos7.3-x86_64 kernel :3.10
1,依赖
yum install mpfr -y
yum install gmp -y
yum install *mpc* -y
yum install glibc-static libstdc++-static -y
yum -y install gcc gcc-c++
yum -y install autoconf automake libtool curl make g++ unzip zlib zlib-devel
yum install glibc-devel -y
yum install cmake -y
yum install perl -y
yum install -y git
yum install ncurses-devel -y
2,安装gcc
# 安装,下载好包并放在/mnt下面
cd /mnt
tar  fx gcc-6.3.0.tar.gz
cd gcc-6.3.0/
./contrib/download_prerequisites
./configure -enable-checking=release -enable-languages=c,c++ -disable-multilib
make -j2
make install
# 配置gcc环境变量
mv /usr/bin/gcc /usr/bin/gcc4.4.7
ln -s /usr/local/bin/gcc /usr/bin/gcc
mv /usr/bin/g++ /usr/bin/g++4.4.7
ln -s /usr/local/bin/g++ /usr/bin/g++
mv /usr/bin/cc /usr/bin/cc4.4.7
ln -s /usr/local/bin/cc /usr/bin/cc
mv /usr/bin/c++ /usr/bin/c++4.4.7
ln -s /usr/local/bin/c++ /usr/bin/c++
gcc --version
echo "/usr/local/lib64" >>/etc/ld.so.conf
ldconfig
3,安装protoc-3.6.1
cd /mnt
unzip protobuf-master.zip
cd protobuf-master/
./autogen.sh
./configure
make
make check
make install
protoc --version
4,安装jdk
cd /mnt
tar xf jdk-8u181-linux-x64.tar.gz -C /usr/java
cat >> /etc/profile << EOF
export JAVA_HOME=/usr/java/jdk1.8.0_181
export JRE_HOME=${JAVA_HOME}/jre
export CLASSPATH=.:${JAVA_HOME}/lib:${JRE_HOME}/lib
export PATH=${JAVA_HOME}/bin:$PATH
EOF

source /etc/profile
echo $JAVA_HOME
5,安装mysql-5.6
# 安装mysql
useradd mysql
tar fx mysql-5.6.35.tar.gz
cd  mysql-5.6.35/
cmake . -DCMAKE_INSTALL_PREFIX=/usr/local/mysql -DWITH_INNOBASE_STORAGE_ENGINE=1 -DMYSQL_USER=mysql -DDEFAULT_CHARSET=utf8 -DDEFAULT_COLLATION=utf8_general_ci
make && make install
#配置mysql
yum -y install perl
cd /usr/local/mysql/
rm  -rf /usr/local/mysql/data/
mkdir -p /data/mysql-data
ln -s /data/mysql-data/ /usr/local/mysql/data
chown -R mysql. /data/mysql-data/
chown -R mysql. /usr/local/mysql/data/
cp support-files/mysql.server /etc/init.d/mysql
rm -rf /etc/my.cnf
yum install -y perl-Module-Install.noarch
perl scripts/mysql_install_db --user=mysql
[root@bogon mysql]# vim /usr/local/mysql/my.cnf
# For advice on how to change settings please see
# http://dev.mysql.com/doc/refman/5.6/en/server-configuration-defaults.html

[mysqld]

# Remove leading # and set to the amount of RAM for the most important data
# cache in MySQL. Start at 70% of total RAM for dedicated server, else 10%.
innodb_buffer_pool_size = 128M

# Remove leading # to turn on a very important data integrity option: logging
# changes to the binary log between backups.
log_bin

# These are commonly set, remove the # and set as required.
basedir = /usr/local/mysql
datadir = /usr/local/mysql/data
# port = .....
# server_id = .....
socket = /tmp/mysql.sock
bind-address=172.25.196.66

# Remove leading # to set options mainly useful for reporting servers.
# The server defaults are faster for transactions and fast SELECTs.
# Adjust sizes as needed, experiment to find the optimal values.
join_buffer_size = 128M
sort_buffer_size = 2M
read_rnd_buffer_size = 2M

sql_mode=NO_ENGINE_SUBSTITUTION,STRICT_TRANS_TABLES
~
ln -s /usr/local/mysql /usr/local/mysql-5.6.35
service mysql start
netstat -plnt |grep 3306
chkconfig mysql on
mkdir -p /var/lib/mysql/
ln -s /tmp/mysql.sock /var/lib/mysql/mysql.sock
# 添加环境变量
echo "PATH=$PATH:/usr/local/mysql/bin" >>/etc/profile
echo "export PATH" >>/etc/profile
source /etc/profile
service mysql restart
./bin/mysqladmin -u root password 'root@appinside'
./bin/mysqladmin -u root -h 172.25.196.66 password 'root@appinside'
echo "/usr/local/mysql/lib/" >>/etc/ld.so.conf
ldconfig
6,安装resin
cd /usr/local/
wget http://www.caucho.com/download/resin-4.0.49.tar.gz
tar xf resin-4.0.49.tar.gz
ln -s resin-4.0.49 resin
7,安装maven
cd /mnt
tar fx apache-maven-3.5.4-bin.tar.gz
mv apache-maven-3.5.4 /usr/local/maven
cp /etc/profile /etc/profile.bak
echo "export MVEN_HOME=/usr/local/maven" >>/etc/profile
echo "export PATH=$MVEN_HOME/bin:$PATH" >>/etc/profile
source /etc/profile
mvn -version
8,安装web管理系统开发环境nvm
wget -qO- https://raw.githubusercontent.com/creationix/nvm/v0.33.11/install.sh | bash
source ~/.bashrc
nvm install v8.11.3
npm install -g pm2 --registry=https://registry.npm.taobao.org
9,安装bison组件和flex组件
yum -y install bison flex
10,安装Java语言工具包
cd /mnt
tar fx thirdparty.tgz
cd  thirdparty/tars-1.5.0/;ls
----->
build  docs           Install_faq.en.md  Install.md          Introduction.md  LICENSE.TXT  php      README.en.md  tup
cpp    Install.en.md  Install_faq.md     Introduction.en.md  java             nodejs       plugins  README.md     web

cd java
mvn clean install
mvn clean install -f core/client.pom.xml
mvn clean install -f core/server.pom.xml
12、安装c++环境
yum -y install dos2unix flex bison

cd /mnt/thirdparty/tars-1.5.0/cpp/thirdparty
git clone https://github.com/Tencent/rapidjson.git

cd /mnt/thirdparty/tars-1.5.0/cpp/build/
./build.sh all
mkdir /usr/local/tars
make install
13、tars数据库环境初始化
mysql -uroot -proot@appinside -e "grant all on *.* to 'tars'@'%' identified by 'tars2015' with grant option;"
mysql -uroot -proot@appinside -e "grant all on *.* to 'tars'@'localhost' identified by 'tars2015' with grant option;"
mysql -uroot -proot@appinside -e "grant all on *.* to 'tars'@'${MachineName}' identified by 'tars2015' with grant option;"
mysql -uroot -proot@appinside -e "flush privileges;"
cd /mnt/thirtparty/tars-1.5.0/cpp/framework/sql
sed -i "s/192.168.2.131/172.25.196.66/g" `grep 192.168.2.131 -rl ./*`
sed -i "s/db.tars.com/172.25.196.66/g" `grep db.tars.com -rl ./*`
chmod u+x exec-sql.sh
./exec-sql.sh
14、打包框架基础服务
cd /mnt/thirdparty/tars-1.5.0/cpp/build/
make framework-tar

make tarsstat-tar
make tarsnotify-tar
make tarsproperty-tar
make tarslog-tar
make tarsquerystat-tar
make tarsqueryproperty-tar
15、安装核心基础服务
mkdir -p /usr/local/app/tars/
cd /mnt/thirtyparty/tars-1.5.0/cpp/build

cp framework.tgz /usr/local/app/tars/
cd /usr/local/app/tars
tar xf framework.tgz

sed -i "s/192.168.2.131/172.25.196.66/g" `grep 192.168.2.131 -rl ./*`
sed -i "s/db.tars.com/172.25.196.66/g" `grep db.tars.com -rl ./*`
sed -i "s/registry.tars.com/172.25.196.66/g" `grep registry.tars.com -rl ./*`
sed -i "s/web.tars.com/172.25.196.66/g" `grep web.tars.com -rl ./*`

chmod u+x tars_install.sh
./tars_install.sh
./tarspatch/util/init.sh
16、安装web管理系统
cd /mnt/thirtparty/tars-1.5.0/web/
sed -i "s/db.tars.com/172.25.196.66/g" `grep db.tars.com -rl ./src/main/resources/*`
sed -i "s/registry1.tars.com/172.25.196.66/g" `grep registry1.tars.com -rl ./src/main/resources/*`
sed -i "s/registry2.tars.com/172.25.196.66/g" `grep registry2.tars.com -rl ./src/main/resources/*`

mvn clean package
cp ./target/tars.war /usr/local/resin/webapps/
#./web/target/tars/WEB-INF/classes/log4j.properties  这里可以修改日志目录
mkdir -p /data/log/tars/
mv /usr/local/resin/conf/resin.xml /usr/local/resin/conf/resin.xml.backup
cat > /usr/local/resin/conf/resin.xml << EOF
<!--
   - Resin 4.0 configuration file.
  -->
<resin xmlns="http://caucho.com/ns/resin"
       xmlns:resin="urn:java:com.caucho.resin">

  <!-- property-based Resin configuration -->
  <resin:properties path="${__DIR__}/resin.properties" optional="true"/>

  <resin:if test="${properties_import_url}">
     <resin:properties path="${properties_import_url}"
                    optional="true" recover="true"/>
  </resin:if>


  <!-- Logging configuration for the JDK logging API -->
  <log-handler name="" level="all" path="stdout:"
               timestamp="[%y-%m-%d %H:%M:%S.%s]"
               format=" {${thread}} ${log.message}"/>

  <!--
     - Alternative pseudo-TTCC log format
     -
     - <log-handler name="" level="all" path="stdout:"
     -           timestamp="%y-%m-%d %H:%M:%S.%s"
     -           format=" [${thread}] ${log.level} ${log.shortName} - ${log.message}"/>
    -->

  <!--
     - level='info' for production
     - 'fine' or 'finer' for development and troubleshooting
    -->
  <logger name="" level="${log_level?:'info'}"/>

  <logger name="com.caucho.java" level="config"/>
  <logger name="com.caucho.loader" level="config"/>

  <!--
     - Default configuration applied to all clusters, including
     - HTTP, HTTPS, and /resin-admin configuration.
    -->
  <resin:import path="${__DIR__}/cluster-default.xml"/>

  <!--
     - health configuration
    -->
  <resin:import path="${__DIR__}/health.xml"/>


  <!--
     - Remote management requires at least one enabled admin user.
    -->
  <resin:AdminAuthenticator>
    <user name="${admin_user}" password="${admin_password}"/>

    <resin:import path="${__DIR__}/admin-users.xml" optional="true"/>
  </resin:AdminAuthenticator>

  <!--
     - For clustered systems, create a password in as cluster_system_key
    -->
  <cluster-system-key>${cluster_system_key}</cluster-system-key>

  <!--
     - For production sites, change dependency-check-interval to something
     - like 600s, so it only checks for updates every 10 minutes.
    -->
  <dependency-check-interval>${dependency_check_interval?:'2s'}</dependency-check-interval>

  <!-- For resin.properties dynamic cluster joining -->
  <home-cluster>${home_cluster}</home-cluster>
  <home-server>${home_server}</home-server>
  <elastic-server>${elastic_server}</elastic-server>
  <elastic-dns>${elastic_dns}</elastic-dns>

  <!--
     - Configures the main application cluster.  Load-balancing configurations
     - will also have a web cluster.
    -->
  <cluster id="app">
    <!-- define the servers in the cluster -->
    <server-multi id-prefix="app-" address-list="${app_servers}" port="6800"/>

    <host-default>
      <!-- creates the webapps directory for .war expansion -->
      <web-app-deploy path="webapps"
                      expand-preserve-fileset="WEB-INF/work/**"
                      multiversion-routing="${webapp_multiversion_routing}"
                      path-suffix="${elastic_webapp?resin.id:''}"/>
    </host-default>

    <!-- auto virtual host deployment in hosts/foo.example.com/webapps -->
    <host-deploy path="hosts">
      <host-default>
        <resin:import path="host.xml" optional="true"/>
      </host-default>
    </host-deploy>

    <!-- the default host, matching any host name -->
    <host id="" root-directory=".">
      <!--
         - webapps can be overridden/extended in the resin.xml
        -->
      <web-app id="/" document-directory="webapps/tars"/>

    </host>

    <resin:if test="${resin_doc}">
      <host id="${resin_doc_host}" root-directory="${resin_doc_host}">
        <web-app id="/resin-doc" root-directory="${resin.root}/doc/resin-doc"/>
      </host>
    </resin:if>
  </cluster>

  <cluster id="web">
    <!-- define the servers in the cluster -->
    <server-multi id-prefix="web-" address-list="${web_servers}" port="6810"/>

    <host id="" root-directory="web">
      <web-app id="">
        <resin:LoadBalance regexp="" cluster="app"/>
      </web-app>
    </host>
  </cluster>

  <cluster id="memcached" xmlns:memcache="urn:java:com.caucho.memcached">
    <!-- define the servers in the cluster -->
    <server-multi id-prefix="memcached-" address-list="${memcached_servers}" port="6820">
      <!-- listen for the memcache protocol -->
      <listen port="${memcached_port?:11211}"
              keepalive-timeout="600s" socket-timeout="600s">
        <memcache:MemcachedProtocol/>
      </listen>
    </server-multi>
  </cluster>

  <cluster id="proxycache">
    <!-- define the servers in the cluster -->
    <server-multi id-prefix="proxycache-" address-list="${proxycache_servers}" port="6830"/>

    <host id="" root-directory="proxycache">
      <web-app id="">
        <resin:HttpProxy regexp=".*">
          <!-- backend HTTP servers to proxy to -->
          <addresses>${backend_servers}</addresses>
        </resin:HttpProxy>
      </web-app>
    </host>
  </cluster>

</resin>
EOF
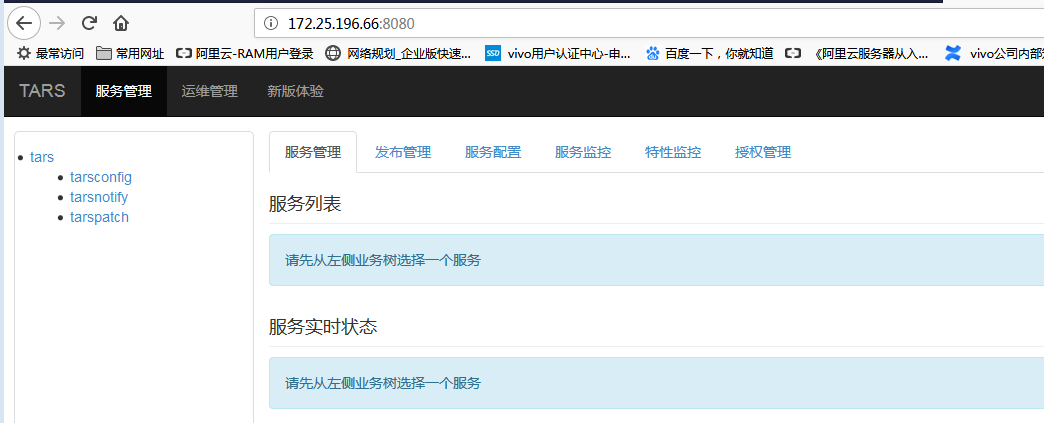
17、现在可以访问8080端口的web管理系统了
/usr/local/resin/bin/resin.sh start
http://172.25.196.66:8080