一、实验报告封面
- 课程:Java程序设计 班级:1752班 姓名:张家华 学号:20175208
- 指导教师:娄嘉鹏 实验日期:2019年5月16日
- 实验时间:--- 实验序号:实验四
-
实验名称:Android开发基础
- 实验要求:
- 没有Linux基础的同学建议先学习《Linux基础入门(新版)》《Vim编辑器》 课程
- 完成实验、撰写实验报告,实验报告以博客方式发表在博客园,注意实验报告重点是运行结果,遇到的问题(工具查找,安装,使用,程序的编辑,调试,运行等)、解决办法(空洞的方法如“查网络”、“问同学”、“看书”等一律得0分)以及分析(从中可以得到什么启示,有什么收获,教训等)。报告可以参考范飞龙老师的指导
- 严禁抄袭,有该行为者实验成绩归零,并附加其他惩罚措施。
二、实验内容及步骤
1.Android Stuidio的安装测试
- 要求:
- 参考http://www.cnblogs.com/rocedu/p/6371315.html#SECANDROID,安装 Android Stuidio
- 完成Hello World, 要求修改res目录中的内容,Hello World后要显示自己的学号,自己学号前后一名同学的学号,提交代码运行截图和码云Git链接,截图没有学号要扣分
- 学习Android Stuidio调试应用程序
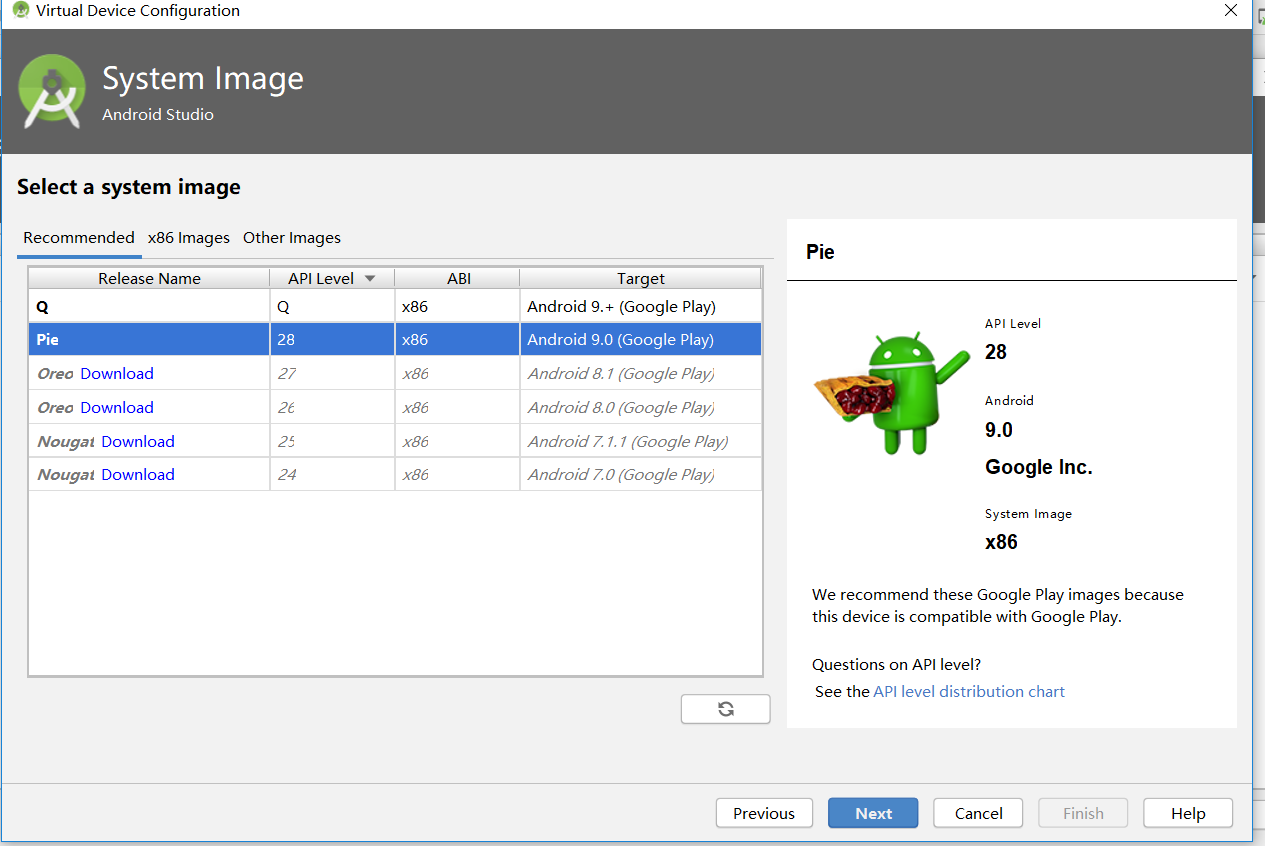
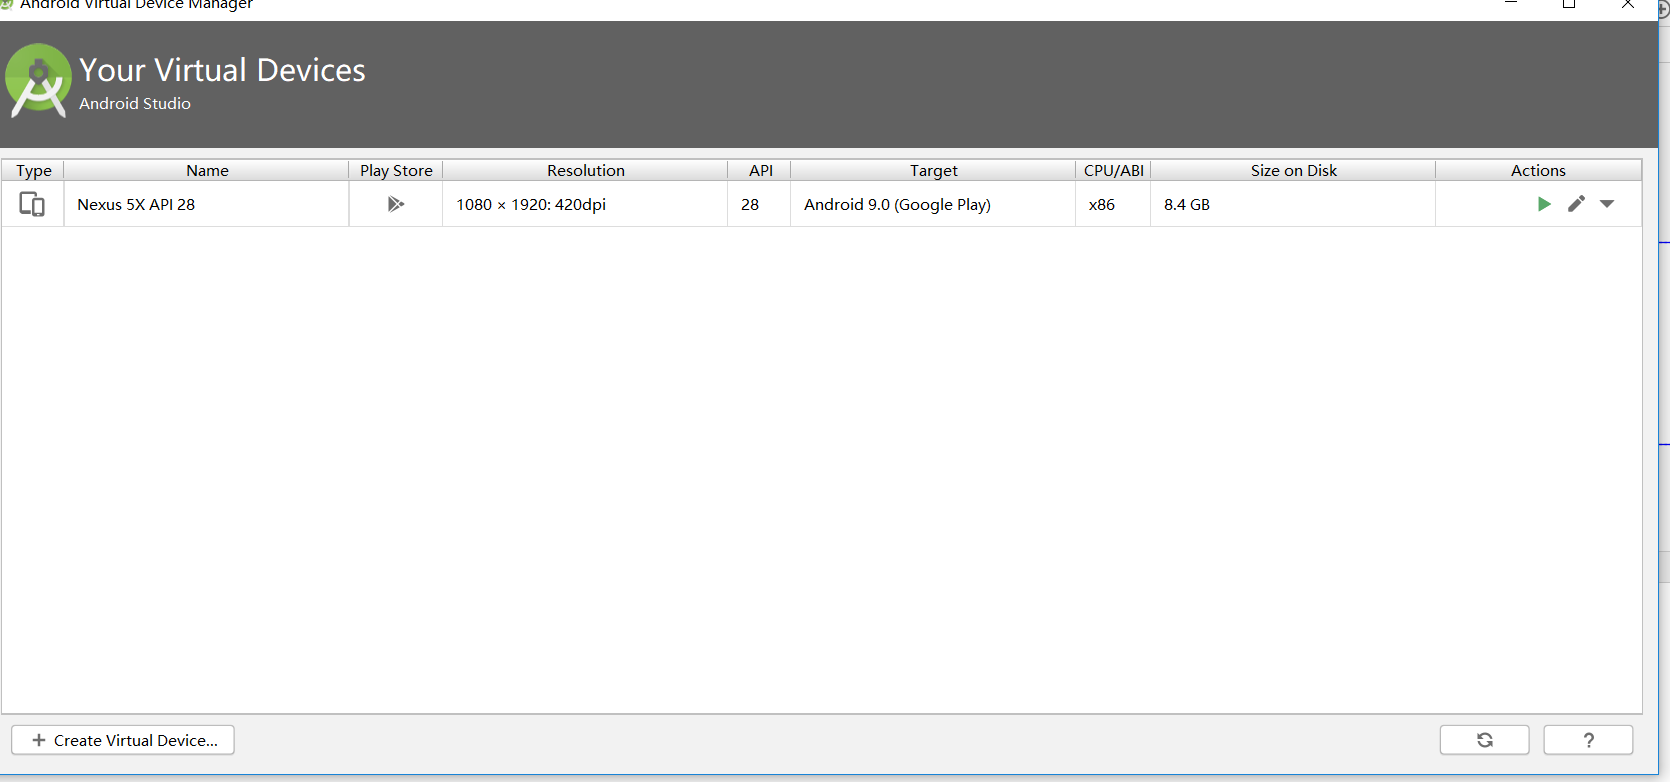
安装配置过程
-
先在官网上下载对应版本的Android studio,然后基本就是一步接着一步正常安装就可以了。
打开后如图所示:

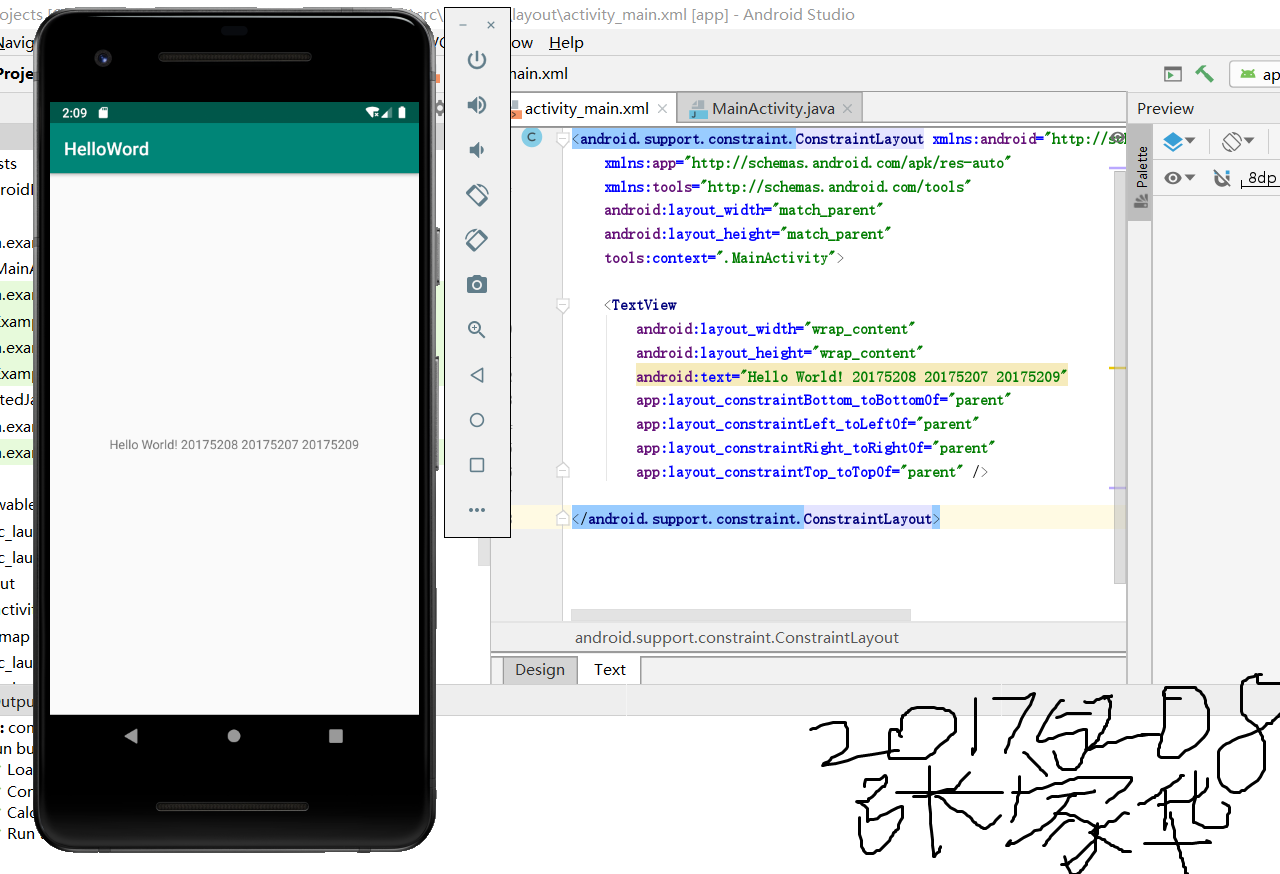
实验代码:
<?xml version="1.0" encoding="utf-8"?>
 <android.support.constraint.ConstraintLayout
 xmlns:android="http://schemas.android.com/apk/res/android"
 xmlns:app="http://schemas.android.com/apk/res-auto"
 xmlns:tools="http://schemas.android.com/tools"
 android:layout_width="match_parent"
 android:layout_height="match_parent"
 tools:context=".MainActivity">
 <TextView
     android:layout_width="wrap_content"
     android:layout_height="wrap_content"
     android:layout_marginEnd="80dp"
     android:layout_marginRight="80dp"
     android:text="Hello World!20175214 20175213 20175215"
     app:layout_constraintBottom_toBottomOf="parent"
     app:layout_constraintEnd_toEndOf="parent"
     app:layout_constraintLeft_toLeftOf="parent"
     app:layout_constraintRight_toRightOf="parent"
     app:layout_constraintTop_toTopOf="parent"
     tools:text="Hello World!20175208 20175207 20175209" />

</android.support.constraint.ConstraintLayout>
实验运行结果:
2.Activity测试
- 要求:
- 构建项目,运行教材相关代码
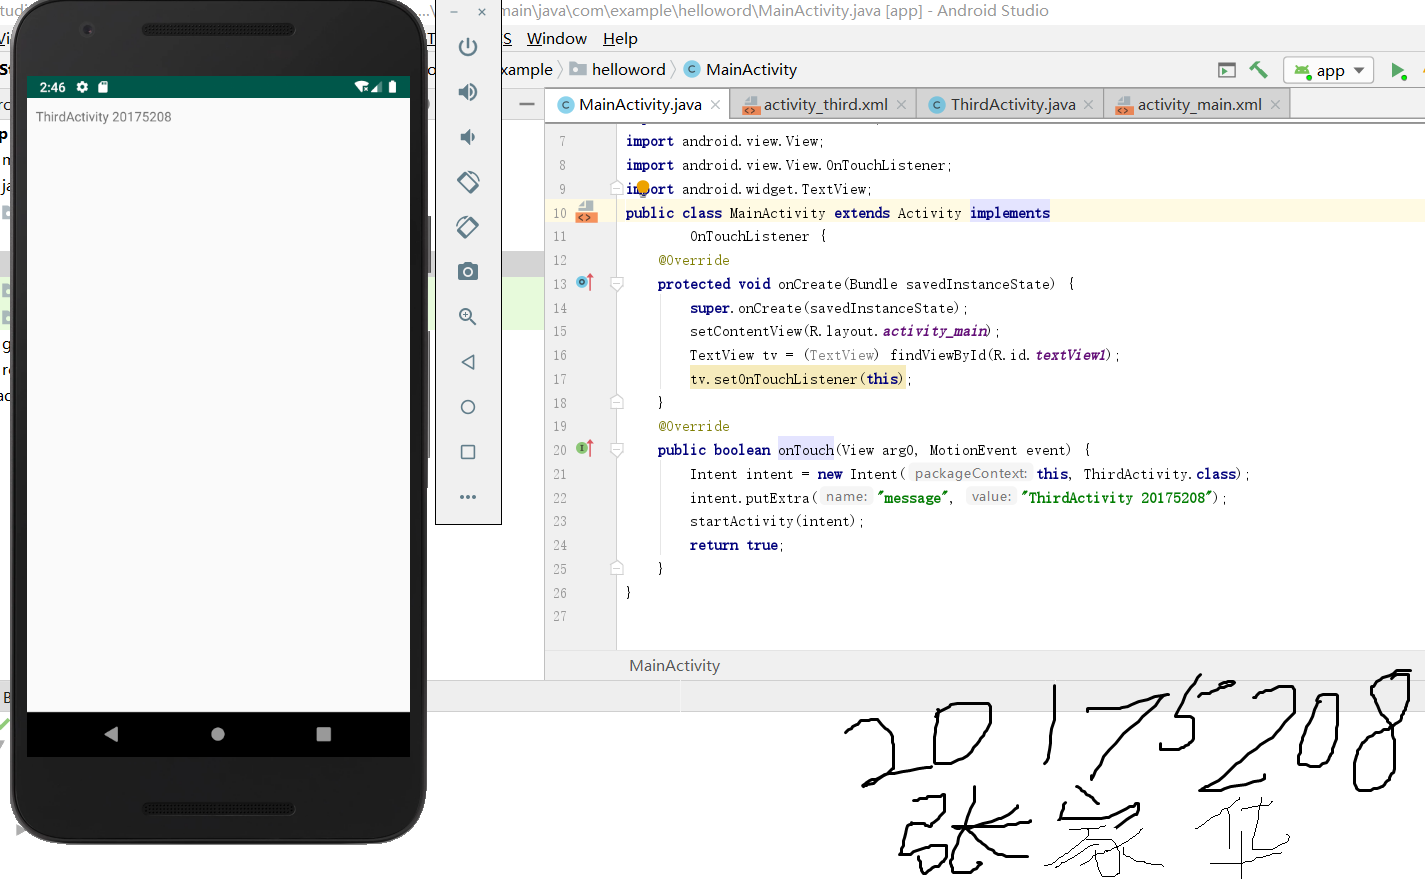
- 创建 ThirdActivity, 在ThirdActivity中显示自己的学号,修改代码让MainActivity启动ThirdActivity
- 提交代码运行截图和码云Git链接,截图要有学号水印,否则会扣分
onCreat函数
- 调用onCreat函数,创建活动开始
onTouch事件
- 负责设置触碰事件,在本程序中负责第二个活动
ThirdActivity的调用,可利用Intent类创建对象,再用startActivity实现跳转
TextView类
- 在两个活动中,都包括TextView类,触发主活动中的TextView,会启动第二个活动,并将消息传给后者
package com.example.helloword;
import android.app.Activity;
import android.content.Intent;
import android.os.Bundle;
import android.view.Menu;
import android.view.MotionEvent;
import android.view.View;
import android.view.View.OnTouchListener;
import android.widget.TextView;
public class MainActivity extends Activity implements
        OnTouchListener {
    @Override
    protected void onCreate(Bundle savedInstanceState) {
        super.onCreate(savedInstanceState);
        setContentView(R.layout.activity_main);
        TextView tv = (TextView) findViewById(R.id.textView1);
        tv.setOnTouchListener(this);
    }
    @Override
    public boolean onTouch(View arg0, MotionEvent event) {
        Intent intent = new Intent(this, ThirdActivity.class);
        intent.putExtra("message", "ThirdActivity 20175208");
        startActivity(intent);
        return true;
    }
}


<RelativeLayout
    xmlns:android="http://schemas.android.com/apk/res/android"
    xmlns:tools="http://schemas.android.com/tools"
    android:layout_width="match_parent"
    android:layout_height="match_parent"
    android:paddingBottom="10dp"
    android:paddingLeft="10dp"
    android:paddingRight="10dp"
    android:paddingTop="10dp"
    tools:context=".ThirdActivity" >
    <TextView
        android:id="@+id/textView1"
        android:layout_width="wrap_content"
        android:layout_height="wrap_content" />

</RelativeLayout>
package com.example.helloword;
import android.app.Activity;
import android.content.Intent;
import android.os.Bundle;
import android.view.Menu;
import android.widget.TextView;
public class ThirdActivity extends Activity {
    @Override
    protected void onCreate(Bundle savedInstanceState) {
        super.onCreate(savedInstanceState);
        setContentView(R.layout.activity_third);
        Intent intent = getIntent();
        String message = intent.getStringExtra("message");
        ((TextView) findViewById(R.id.textView1)).setText(message);
    }
}

<RelativeLayout xmlns:android="http://schemas.android.com/apk/res/android"
    xmlns:tools="http://schemas.android.com/tools"
    android:layout_width="match_parent"
    android:layout_height="match_parent"
    tools:context=".MainActivity">
    <TextView
        android:id="@+id/textView1"
        android:layout_width="wrap_content"
        android:layout_height="wrap_content"
        android:text="FirstActivity  20175208" />
</RelativeLayout>
实验运行结果:
3.UI测试
- 要求:
- 修改代码让Toast消息中显示自己的学号信息
- 提交代码运行截图和码云Git链接,截图要有学号水印,否则会扣分
MainActivity代码
package com.example.toast;
import android.content.DialogInterface;
import android.support.v7.app.AlertDialog;
import android.support.v7.app.AppCompatActivity;
import android.os.Bundle;
import android.widget.Toast;
public class MainActivity extends AppCompatActivity {
@Override
protected void onCreate(Bundle savedInstanceState) {
 super.onCreate(savedInstanceState);
 setContentView(R.layout.activity_main);
 Toast.makeText(this,"20175208 张家华",Toast.LENGTH_LONG).show();
}
}
activity_main.xml
<?xml version="1.0" encoding="UTF-8"?>
<android.support.constraint.ConstraintLayout xmlns:android="http://schemas.android.com/apk/res/android"
    xmlns:app="http://schemas.android.com/apk/res-auto"
    xmlns:tools="http://schemas.android.com/tools"
    android:layout_width="match_parent"
    android:layout_height="match_parent"
    tools:context=".MainActivity">
    <TextView
        android:layout_width="wrap_content"
        android:layout_height="wrap_content"
        app:layout_constraintBottom_toBottomOf="parent"
        app:layout_constraintLeft_toLeftOf="parent"
        app:layout_constraintRight_toRightOf="parent"
        app:layout_constraintTop_toTopOf="parent" />
    <Button
        android:id="@+id/btn1"
        android:layout_width="wrap_content"
        android:layout_height="fill_parent"
        android:text="Hello!" />
</android.support.constraint.ConstraintLayout>
实验运行结果:


4.布局测试
- 要求
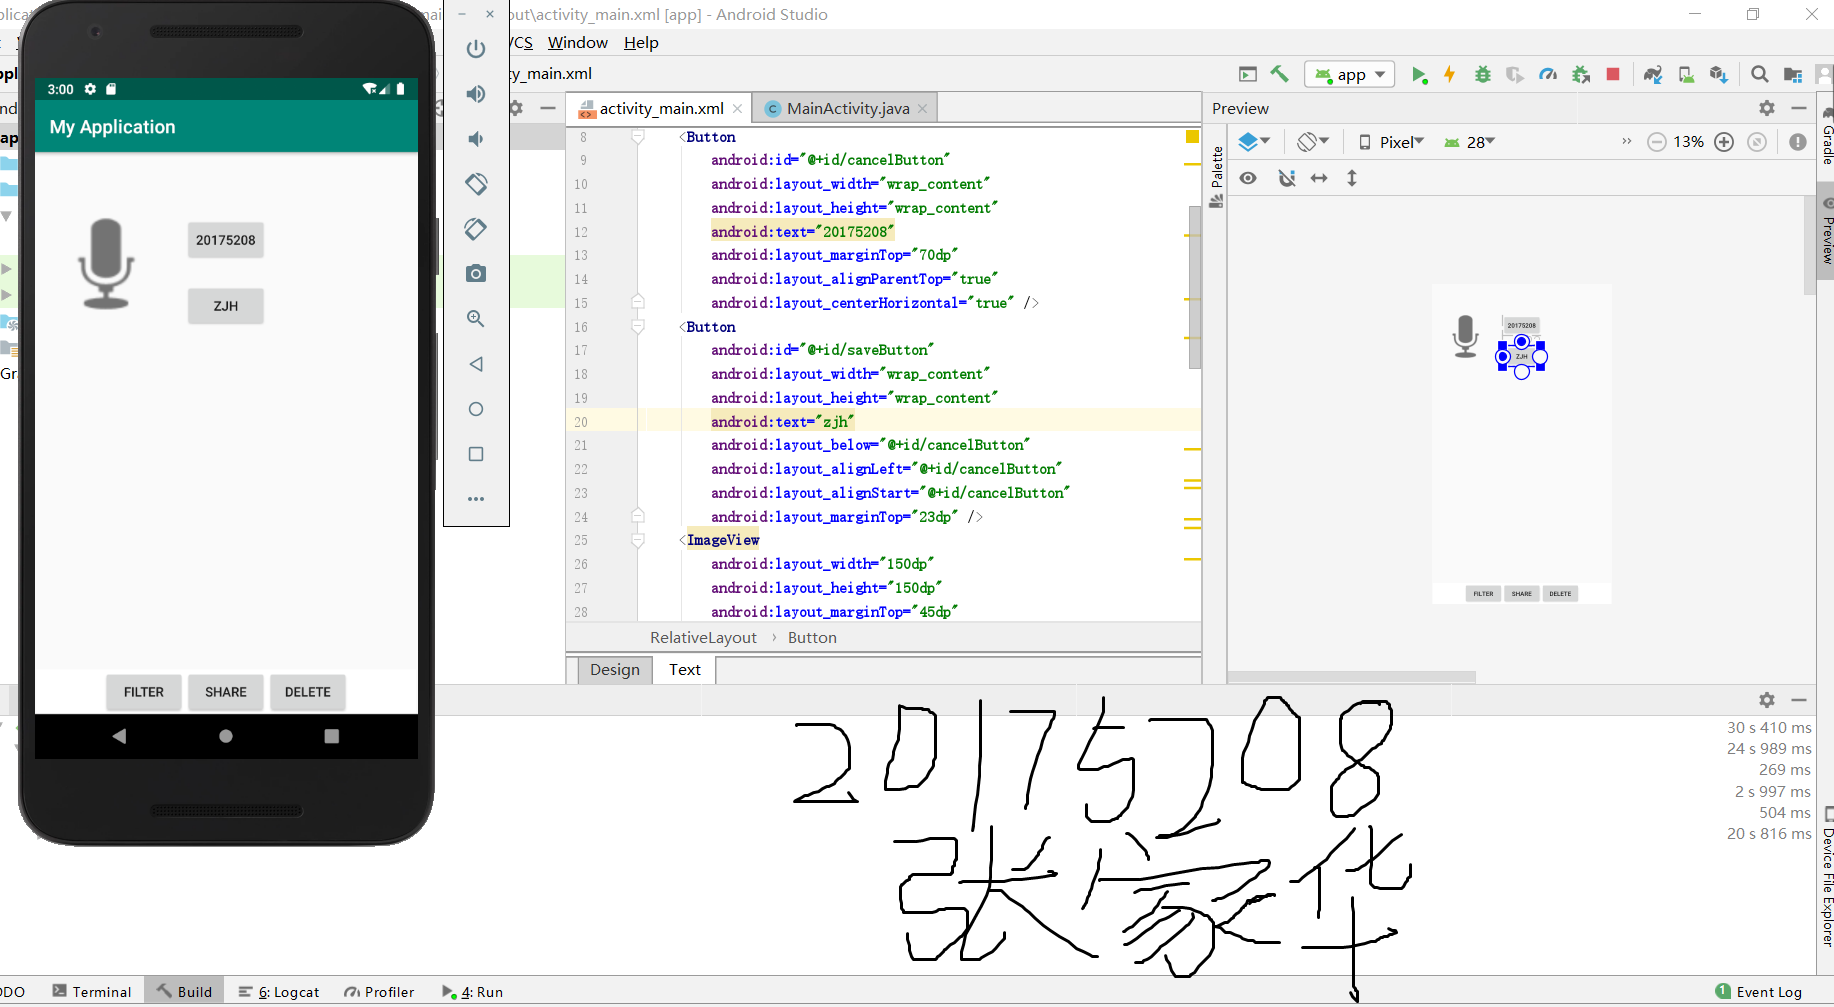
- 修改布局让P290页的界面与教材不同
- 提交代码运行截图和码云Git链接,截图要有学号水印,否则会扣分
MainActivity:
package com.example.myapplication;
import android.support.v7.app.AppCompatActivity;
import android.os.Bundle;

public class MainActivity extends AppCompatActivity {

    @Override
    protected void onCreate(Bundle savedInstanceState) {
        super.onCreate(savedInstanceState);
        setContentView(R.layout.activity_main);
    }
}
activity_main.xml:
<RelativeLayout
    xmlns:android="http://schemas.android.com/apk/res/android"
    xmlns:tools="http://schemas.android.com/tools"
    android:layout_width="match_parent"
    android:layout_height="match_parent"
    android:paddingLeft="2dp"
    android:paddingRight="2dp">
    <Button
        android:id="@+id/cancelButton"
        android:layout_width="wrap_content"
        android:layout_height="wrap_content"
        android:text="20175208"
        android:layout_marginTop="70dp"
        android:layout_alignParentTop="true"
        android:layout_centerHorizontal="true" />
    <Button
        android:id="@+id/saveButton"
        android:layout_width="wrap_content"
        android:layout_height="wrap_content"
        android:text="zjh"
        android:layout_below="@+id/cancelButton"
        android:layout_alignLeft="@+id/cancelButton"
        android:layout_alignStart="@+id/cancelButton"
        android:layout_marginTop="23dp" />
    <ImageView
        android:layout_width="150dp"
        android:layout_height="150dp"
        android:layout_marginTop="45dp"
        android:padding="4dp"
        android:src="@android:drawable/ic_btn_speak_now" />
    <LinearLayout
        android:id="@+id/filter_button_container"
        android:layout_width="match_parent"
        android:layout_height="wrap_content"
        android:layout_alignParentBottom="true"
        android:gravity="center|bottom"
        android:background="@android:color/white"
        android:orientation="horizontal" >
        <Button
            android:id="@+id/filterButton"
            android:layout_width="wrap_content"
            android:layout_height="fill_parent"
            android:text="Filter" />
        <Button
            android:id="@+id/shareButton"
            android:layout_width="wrap_content"
            android:layout_height="fill_parent"
            android:text="Share" />
        <Button
            android:id="@+id/deleteButton"
            android:layout_width="wrap_content"
            android:layout_height="fill_parent"
            android:text="Delete" />
    </LinearLayout>
</RelativeLayout>
实验运行结果:
5.事件处理测试
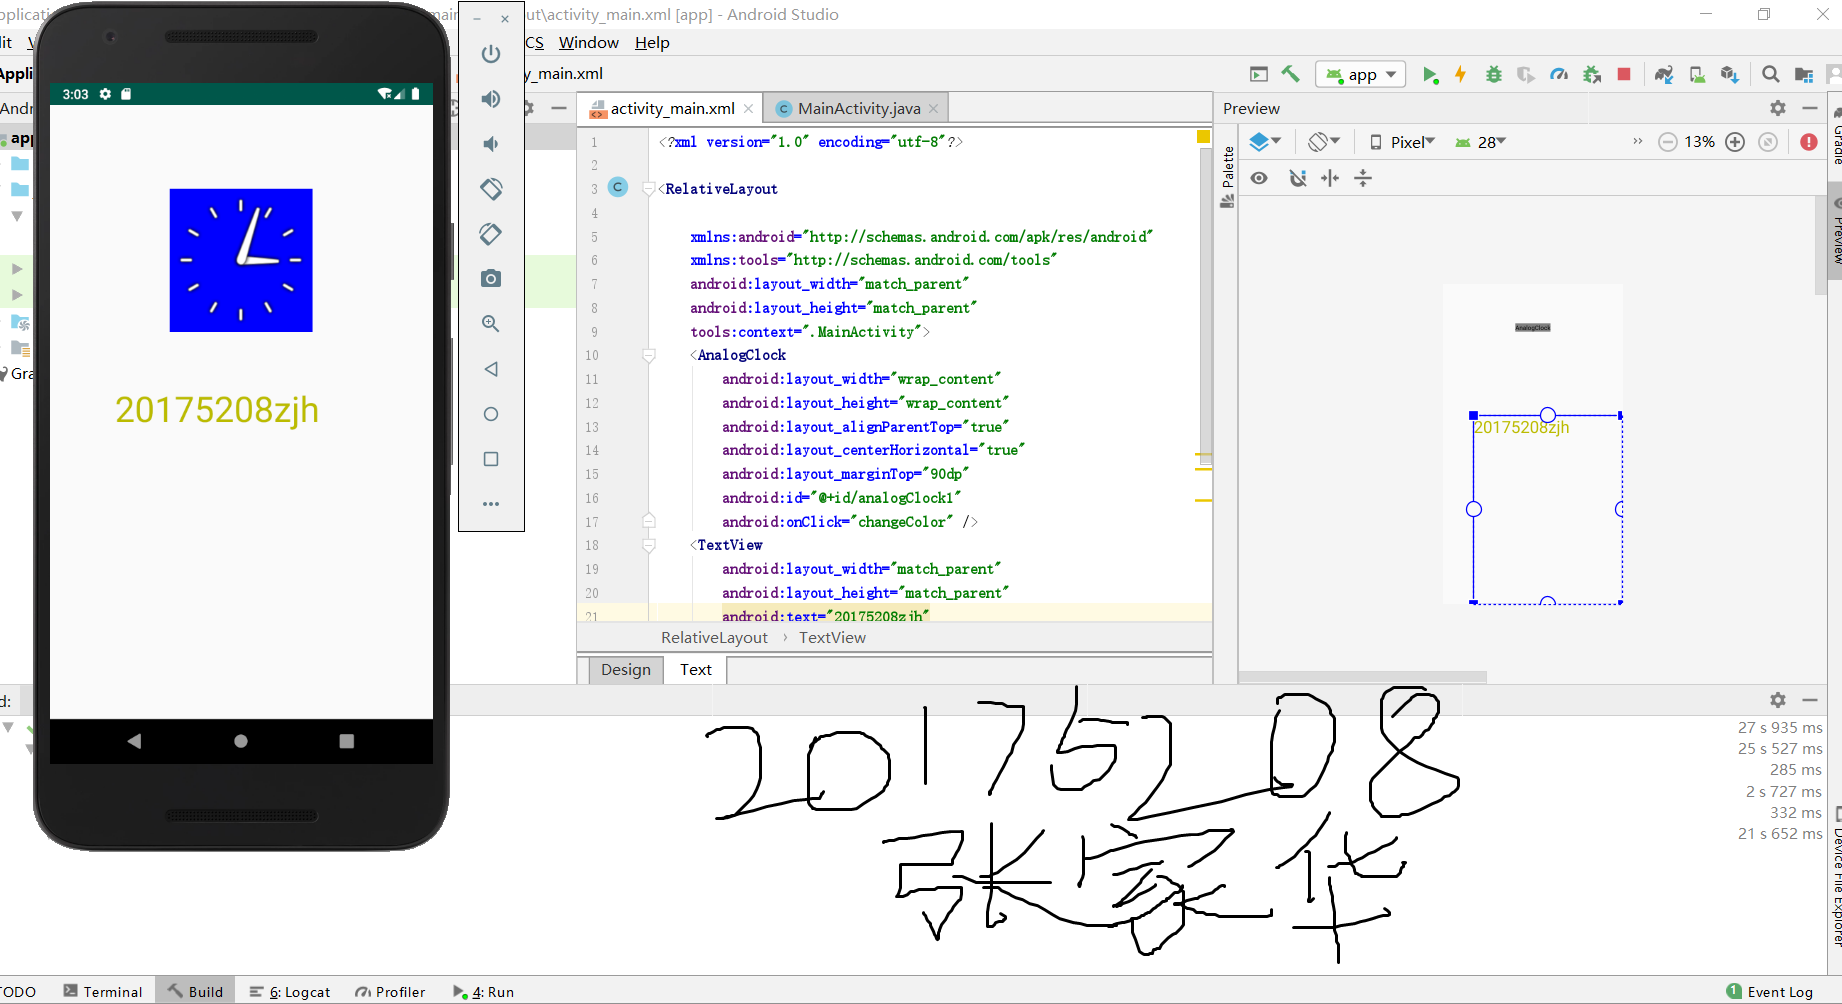
- 要求:运行教材本章相关代码并截图
监听器
- Android是基于事件的。使用活动中的一个视图进行的用户交互,可能会触发一个事件,包括点击、长按、触碰和按键等等
- 要让程序响应某一个事件,需要为该事件编写一个监听器。也就是要实现嵌入在android.view.View类中的一个接口。比如OnClickListener接口的onClick()方法
MainActivity
package com.example.myapplication;
import android.support.v7.app.AppCompatActivity;
import android.os.Bundle;
import android.app.Activity;
import android.graphics.Color;
import android.os.Bundle;
import android.view.Menu;
import android.view.View;
import android.widget.AnalogClock;
import android.app.Activity;
import android.graphics.Color;
import android.os.Bundle;
import android.view.Menu;
import android.view.View;
import android.widget.AnalogClock;
public class MainActivity extends Activity {
    int counter = 0;
    int[] colors = { Color.BLACK, Color.BLUE, Color.CYAN,
            Color.DKGRAY, Color.GRAY, Color.GREEN, Color.LTGRAY,
            Color.MAGENTA, Color.RED, Color.WHITE, Color.YELLOW };
    @Override
    protected void onCreate(Bundle savedInstanceState) {
        super.onCreate(savedInstanceState);
        setContentView(R.layout.activity_main);
    }

    public void changeColor(View view) {
        if (counter == colors.length) {
            counter = 0;
        }
        view.setBackgroundColor(colors[counter++]);
    }
}
activity_main.xml:
<?xml version="1.0" encoding="utf-8"?>

<RelativeLayout

    xmlns:android="http://schemas.android.com/apk/res/android"
    xmlns:tools="http://schemas.android.com/tools"
    android:layout_width="match_parent"
    android:layout_height="match_parent"
    tools:context=".MainActivity">
    <AnalogClock
        android:layout_width="wrap_content"
        android:layout_height="wrap_content"
        android:layout_alignParentTop="true"
        android:layout_centerHorizontal="true"
        android:layout_marginTop="90dp"
        android:id="@+id/analogClock1"
        android:onClick="changeColor" />
    <TextView
        android:layout_width="match_parent"
        android:layout_height="match_parent"
        android:text="20175208zjh"
        android:layout_marginLeft="70dp"
        android:layout_marginTop="300dp"
        android:textSize="38dp"
        android:textColor="#bbbb00"/>
</RelativeLayout>
实验运行结果:
三、码云连接:
https://gitee.com/zhangjiahua20175208/codes/c0v8ahkg7zl4nt2m1j39f28
https://gitee.com/zhangjiahua20175208/codes
四、实验心得体会:
这次实验的内容Android开发是我一直都没有接触过的领域,在实验的过程中遇到了很多问题,在这个过程中,我参考了一些博客,也跟同学们交流讨论了,解决了很多问题。通过这次实验,我在Android开发上学习了很多,也初步接触了开发方面的知识的运用,并能够运行虚拟手机,对Android开发基本功能的运用了解的更深入。