Harbor离线安装包下载地址:https://github.com/goharbor/harbor
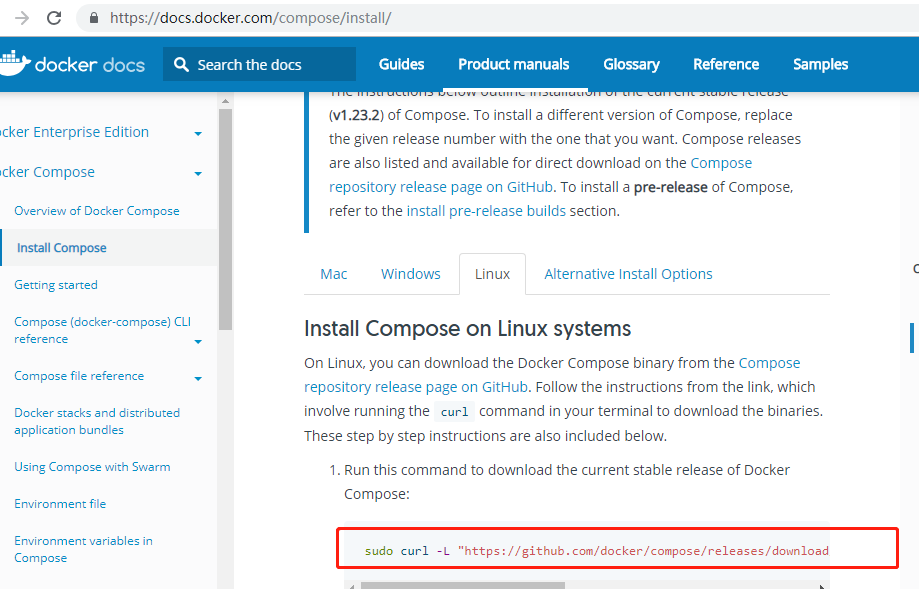
Docker compose(安装harbor需要用到docker compose)下载地址:https://docs.docker.com/compose/install/
Docker compose是单机容器编排工具
以下是操作过程
[root@192 ~]# ls
anaconda-ks.cfg  dockerfile_.zip  nginx  nginx.tar  php  tomcat  wordpress  wordpress-4.9.4-zh_CN.tar.gz
#使用xshell 将docker-compose-Linux-x86_64、harbor-offline-installer-v1.6.1.tgz放进宿主机
[root@192 ~]# rz -E
rz waiting to receive.
[root@192 ~]# rz -E
rz waiting to receive.
[root@192 ~]# ls
anaconda-ks.cfg              harbor-offline-installer-v1.6.1.tgz  php        wordpress-4.9.4-zh_CN.tar.gz
docker-compose-Linux-x86_64  nginx                                tomcat
dockerfile_.zip              nginx.tar                            wordpress
[root@192 ~]# tar xvf harbor-offline-installer-v1.6.1.tgz
harbor/common/templates/
harbor/common/templates/nginx/
harbor/common/templates/nginx/nginx.https.conf
harbor/common/templates/nginx/notary.server.conf
harbor/common/templates/nginx/nginx.http.conf
harbor/common/templates/nginx/notary.upstream.conf
harbor/common/templates/ui/
harbor/common/templates/ui/env
harbor/common/templates/ui/private_key.pem
harbor/common/templates/ui/app.conf
harbor/common/templates/notary/
harbor/common/templates/notary/notary-signer.crt
harbor/common/templates/notary/signer-config.json
harbor/common/templates/notary/notary-signer-ca.crt
harbor/common/templates/notary/signer_env
harbor/common/templates/notary/server_env
harbor/common/templates/notary/signer-config.postgres.json
harbor/common/templates/notary/server-config.json
harbor/common/templates/notary/notary-signer.key
harbor/common/templates/notary/server-config.postgres.json
harbor/common/templates/adminserver/
harbor/common/templates/adminserver/env
harbor/common/templates/chartserver/
harbor/common/templates/chartserver/env
harbor/common/templates/db/
harbor/common/templates/db/env
harbor/common/templates/registry/
harbor/common/templates/registry/root.crt
harbor/common/templates/registry/config.yml
harbor/common/templates/registry/config_ha.yml
harbor/common/templates/registryctl/
harbor/common/templates/registryctl/env
harbor/common/templates/registryctl/config.yml
harbor/common/templates/log/
harbor/common/templates/log/logrotate.conf
harbor/common/templates/jobservice/
harbor/common/templates/jobservice/env
harbor/common/templates/jobservice/config.yml
harbor/common/templates/clair/
harbor/common/templates/clair/postgres_env
harbor/common/templates/clair/config.yaml
harbor/common/templates/clair/postgresql-init.d/
harbor/common/templates/clair/postgresql-init.d/README.md
harbor/common/templates/clair/clair_env
harbor/harbor.v1.6.1.tar.gz
harbor/prepare
harbor/NOTICE
harbor/LICENSE
harbor/install.sh
harbor/harbor.cfg
harbor/docker-compose.yml
harbor/open_source_license
harbor/ha/
harbor/ha/sample/
harbor/ha/sample/active_active/
harbor/ha/sample/active_active/keepalived_active_active.conf
harbor/ha/sample/active_active/check.sh
harbor/ha/sample/active_standby/
harbor/ha/sample/active_standby/keepalived_active_standby.conf
harbor/ha/sample/active_standby/check_harbor.sh
harbor/ha/initial-registry.sql
harbor/ha/docker-compose.tpl
harbor/ha/docker-compose.clair.yml
harbor/ha/docker-compose.clair.tpl
harbor/ha/docker-compose.yml
harbor/docker-compose.notary.yml
harbor/docker-compose.clair.yml
harbor/docker-compose.chartmuseum.yml
[root@192 ~]# ls
anaconda-ks.cfg              harbor                               nginx.tar  wordpress
docker-compose-Linux-x86_64  harbor-offline-installer-v1.6.1.tgz  php        wordpress-4.9.4-zh_CN.tar.gz
dockerfile_.zip              nginx                                tomcat
#将docker-compose-Linux-x86_64移动到 /usr/bin/docker-compose
[root@192 ~]# mv docker-compose-Linux-x86_64 /usr/bin/docker-compose
#加上可执行权限
[root@192 ~]# chmod +x /usr/bin/docker-compose
[root@192 ~]# cd harbor
[root@192 harbor]# ls
common                          docker-compose.notary.yml  harbor.cfg            LICENSE              prepare
docker-compose.chartmuseum.yml  docker-compose.yml         harbor.v1.6.1.tar.gz  NOTICE
docker-compose.clair.yml        ha                         install.sh            open_source_license
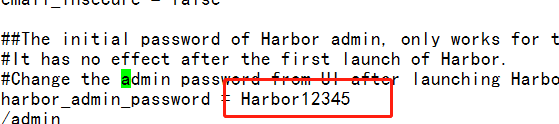
修改harbor.cfg文件,配置访问harbor的地址,这里配置成harbor主机的ip.如果这台机器有域名,也可以配置域名。
vi harbor.cfg

默认访问harbor前台界面的用户名是admin,默认密码在harbor.cfg文件中
#安装harbor准备
[root@192 harbor]# ./prepare loaded secret from file: /data/secretkey Generated configuration file: ./common/config/nginx/nginx.conf Generated configuration file: ./common/config/adminserver/env Generated configuration file: ./common/config/ui/env Generated configuration file: ./common/config/registry/config.yml Generated configuration file: ./common/config/db/env Generated configuration file: ./common/config/jobservice/env Generated configuration file: ./common/config/jobservice/config.yml Generated configuration file: ./common/config/log/logrotate.conf Generated configuration file: ./common/config/registryctl/env Generated configuration file: ./common/config/ui/app.conf Generated certificate, key file: ./common/config/ui/private_key.pem, cert file: ./common/config/registry/root.crt The configuration files are ready, please use docker-compose to start the service.
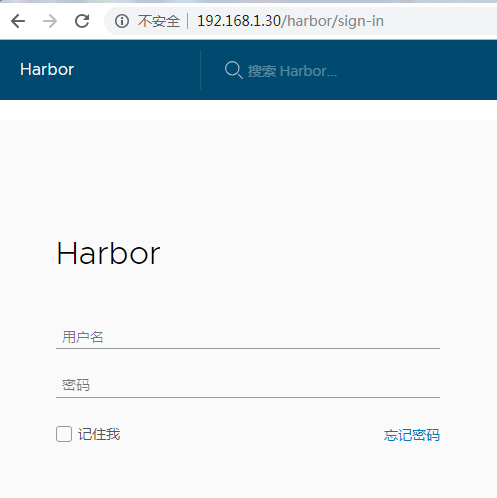
#安装harbor [root@192 harbor]# ./install.sh [Step 0]: checking installation environment ... Note: docker version: 18.09.3 Note: docker-compose version: 1.23.1 [Step 1]: loading Harbor images ... Loaded image: goharbor/harbor-log:v1.6.1 Loaded image: goharbor/harbor-jobservice:v1.6.1 Loaded image: goharbor/redis-photon:v1.6.1 Loaded image: goharbor/nginx-photon:v1.6.1 Loaded image: goharbor/harbor-migrator:v1.6.1 Loaded image: goharbor/chartmuseum-photon:v0.7.1-v1.6.1 Loaded image: goharbor/harbor-ui:v1.6.1 Loaded image: goharbor/harbor-db:v1.6.1 Loaded image: goharbor/registry-photon:v2.6.2-v1.6.1 Loaded image: goharbor/notary-server-photon:v0.5.1-v1.6.1 Loaded image: goharbor/notary-signer-photon:v0.5.1-v1.6.1 Loaded image: goharbor/clair-photon:v2.0.6-v1.6.1 Loaded image: goharbor/harbor-adminserver:v1.6.1 [Step 2]: preparing environment ... Clearing the configuration file: ./common/config/adminserver/env Clearing the configuration file: ./common/config/ui/env Clearing the configuration file: ./common/config/ui/app.conf Clearing the configuration file: ./common/config/ui/private_key.pem Clearing the configuration file: ./common/config/db/env Clearing the configuration file: ./common/config/jobservice/env Clearing the configuration file: ./common/config/jobservice/config.yml Clearing the configuration file: ./common/config/registry/config.yml Clearing the configuration file: ./common/config/registry/root.crt Clearing the configuration file: ./common/config/registryctl/env Clearing the configuration file: ./common/config/registryctl/config.yml Clearing the configuration file: ./common/config/nginx/nginx.conf Clearing the configuration file: ./common/config/log/logrotate.conf loaded secret from file: /data/secretkey Generated configuration file: ./common/config/nginx/nginx.conf Generated configuration file: ./common/config/adminserver/env Generated configuration file: ./common/config/ui/env Generated configuration file: ./common/config/registry/config.yml Generated configuration file: ./common/config/db/env Generated configuration file: ./common/config/jobservice/env Generated configuration file: ./common/config/jobservice/config.yml Generated configuration file: ./common/config/log/logrotate.conf Generated configuration file: ./common/config/registryctl/env Generated configuration file: ./common/config/ui/app.conf Generated certificate, key file: ./common/config/ui/private_key.pem, cert file: ./common/config/registry/root.crt The configuration files are ready, please use docker-compose to start the service. [Step 3]: checking existing instance of Harbor ... [Step 4]: starting Harbor ... Creating network "harbor_harbor" with the default driver Creating harbor-log ... Creating registry ... Creating harbor-adminserver ... Creating harbor-db ... Creating redis ... Creating harbor-ui ... Creating harbor-jobservice ... Creating nginx ... ✔ ----Harbor has been installed and started successfully.---- Now you should be able to visit the admin portal at http://192.168.1.30. For more details, please visit https://github.com/goharbor/harbor . #查看启动容器的状态(install.sh文件里,执行了docker-compose配置文件,作用是启动容器) [root@192 harbor]# docker-compose ps Name Command State Ports ----------------------------------------------------------------------------------------------------------------- harbor-adminserver /harbor/start.sh Up (health: starting) harbor-db /entrypoint.sh postgres Up (health: starting) 5432/tcp harbor-jobservice /harbor/start.sh Up harbor-log /bin/sh -c /usr/local/bin/ ... Up (health: starting) 127.0.0.1:1514->10514/tcp harbor-ui /harbor/start.sh Up (health: starting) nginx nginx -g daemon off; Up (health: starting) 0.0.0.0:443->443/tcp, 0.0.0.0:4443->4443/tcp, 0.0.0.0:80->80/tcp redis docker-entrypoint.sh redis ... Up 6379/tcp registry /entrypoint.sh /etc/regist ... Up (health: starting) 5000/tcp
现在可以通过 http://192.168.1.30 来访问harbor了
作者: 梅梅~
出处: https://www.cnblogs.com/keeptesting
关于作者:专注软件测试,测试运维相关工作,请多多赐教!
本文版权归作者和博客园共有,欢迎转载,但未经作者同意必须保留此段声明,且在文章页面明显位置给出, 原文链接 欢迎沟通交流加微信联系。 微信:yangguangkg20140901 暗号:博客园.