https://learn.adafruit.com/adafruit-motor-shield-v2-for-arduino/install-software
1安装库
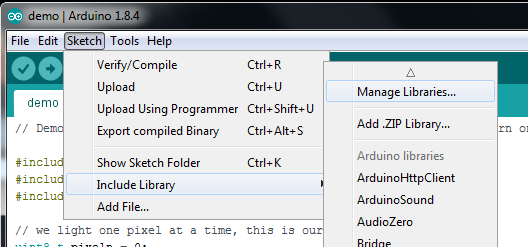
Adafruit_Motor_Shield_V2

2控制直流电机

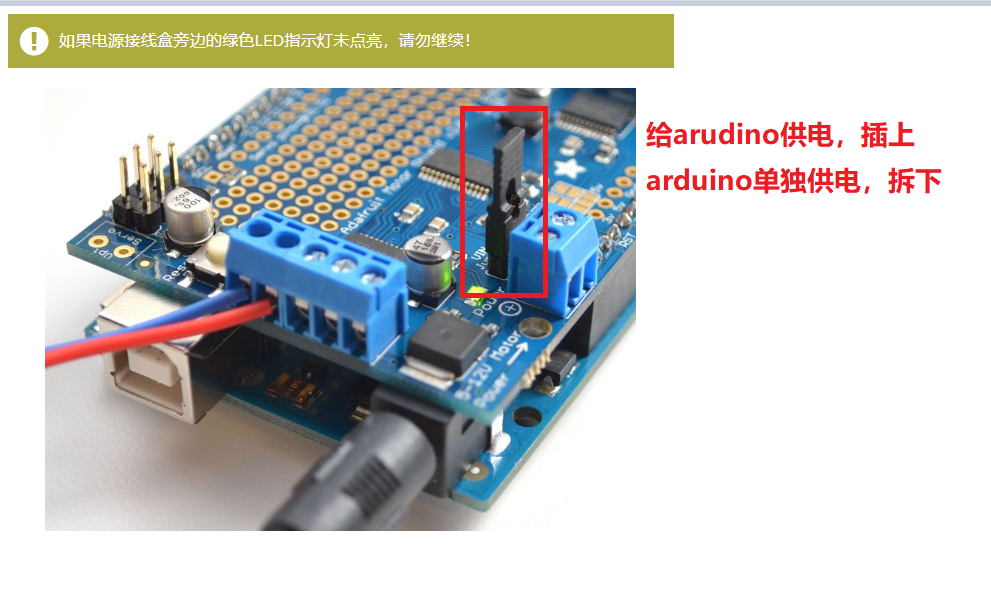
您还必须提供5-12VDC为电动机供电。有两种方法可以做到这一点
您可以通过直流桶式插孔为Arduino供电,并在下面的绿色电源LED旁边插入显示为高黑色手柄的VIN跳线。
您可以通过DC Barrel插孔或 USB端口为Arduino供电。然后通过5-12VDC电机电源端子端口,绿色电源LED旁边的双端子块为屏蔽供电,并卸下VIN跳线
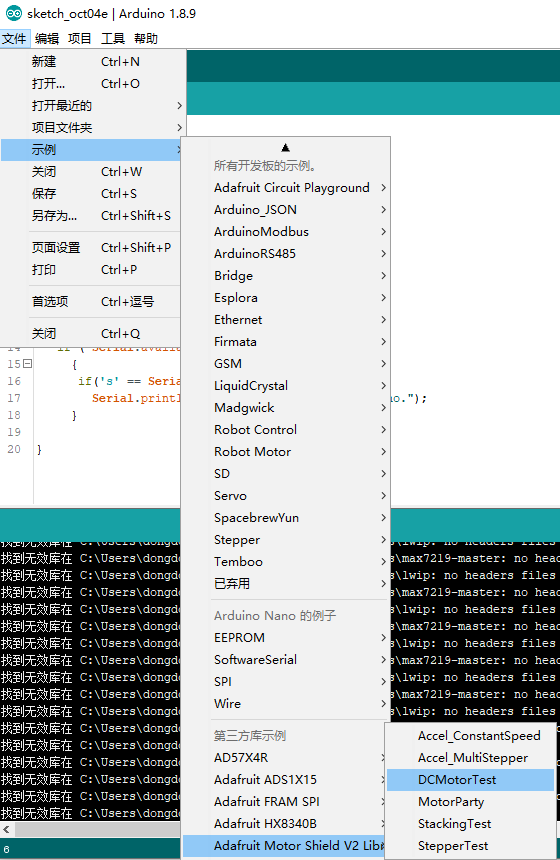
确认电机已正确连接并且电源LED点亮后,我们可以上载代码。
在IDE中,加载File-> Examples-> Adafruit_MotorShield-> DCMotorTest
您应该看到并听到DC电动机打开并前后移动的情况,并附上纸条或胶带作为“标志”,可以帮助您直观地查看运动情况。你看不到运动
步进电机测试
您也可以测试带屏蔽罩的步进电机连接。屏蔽层可以运行单极(5线和6线)和双极(4线)步进器。它不能与其他任何数量的电线一起运行步进器!单极或双极电机的代码相同,接线略有不同。
将屏蔽层插入Arduino,并将步进电机连接到电机端口2- 与DC电机不同,接线顺序很简单。连接到顶部的两个终端端口(线圈1)和底部的两个终端端口(线圈2)。
- 如果您使用的是双极电机,请不要连接到中间引脚(GND)。
- 如果使用5线制单极电机,则将公共线连接到GND。
- 如果您使用具有6线制的单极电机,则可以将两根“中心线圈线”连接到GND


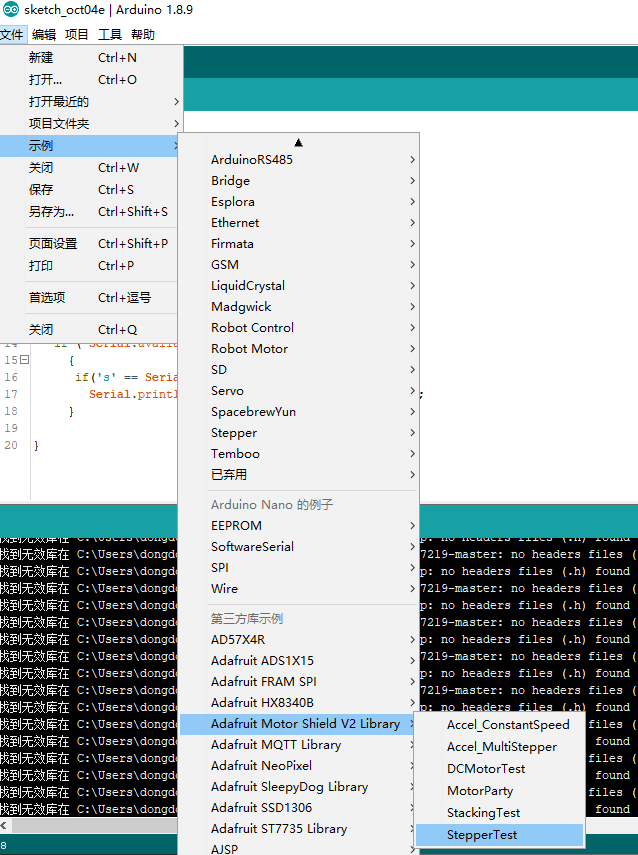
确认电机已正确连接并且电源LED点亮后,我们可以上载代码。
在IDE中,加载File-> Examples-> Adafruit_MotorShield-> StepperTest,
您应该看到并听到步进电机打开并前后移动的情况,并附上纸或胶带作为“标志”,可以帮助您直观地查看运动情况。您看不到运动。有四种移动步进器的方法,它们具有变化的速度,转矩和平滑度折衷。此示例代码将演示所有四个。
/*
This is a test sketch for the Adafruit assembled Motor Shield for Arduino v2
It won't work with v1.x motor shields! Only for the v2's with built in PWM
control

For use with the Adafruit Motor Shield v2
---->	http://www.adafruit.com/products/1438
*/


#include <Wire.h>
#include <Adafruit_MotorShield.h>

// Create the motor shield object with the default I2C address
Adafruit_MotorShield AFMS = Adafruit_MotorShield();
// Or, create it with a different I2C address (say for stacking)
// Adafruit_MotorShield AFMS = Adafruit_MotorShield(0x61);

// Connect a stepper motor with 200 steps per revolution (1.8 degree)
// to motor port #2 (M3 and M4)
Adafruit_StepperMotor *myMotor = AFMS.getStepper(200, 2);


void setup() {
  Serial.begin(9600);           // set up Serial library at 9600 bps
  Serial.println("Stepper test!");

  AFMS.begin();  // create with the default frequency 1.6KHz
  //AFMS.begin(1000);  // OR with a different frequency, say 1KHz

  myMotor->setSpeed(10);  // 10 rpm
}

void loop() {
  Serial.println("Single coil steps");
  myMotor->step(100, FORWARD, SINGLE);
  myMotor->step(100, BACKWARD, SINGLE);

  Serial.println("Double coil steps");
  myMotor->step(100, FORWARD, DOUBLE);
  myMotor->step(100, BACKWARD, DOUBLE);

  Serial.println("Interleave coil steps");
  myMotor->step(100, FORWARD, INTERLEAVE);
  myMotor->step(100, BACKWARD, INTERLEAVE);

  Serial.println("Microstep steps");
  myMotor->step(50, FORWARD, MICROSTEP);
  myMotor->step(50, BACKWARD, MICROSTEP);
}