1、背景
大多数系统都是读多写少,为了降低数据库的压力,可以对主库创建多个从库,从库自动从主库同步数据,程序中将写的操作发送到主库,将读的操作发送到从库去执行。
今天的主要目标:通过 spring 实现读写分离。
读写分离需实现下面 2 个功能:
1、读的方法,由调用者来控制具体是读从库还是主库
2、有事务的方法,内部的所有读写操作都走主库
2、思考 3 个问题
1、读的方法,由调用者来控制具体是读从库还是主库,如何实现?
可以给所有读的方法添加一个参数,来控制读从库还是主库。
2、数据源如何路由?
spring-jdbc 包中提供了一个抽象类:AbstractRoutingDataSource,实现了 javax.sql.DataSource 接口,我们用这个类来作为数据源类,重点是这个类可以用来做数据源的路由,可以在其内部配置多个真实的数据源,最终用哪个数据源,由开发者来决定。
AbstractRoutingDataSource 中有个 map,用来存储多个目标数据源
private Map<Object, DataSource> resolvedDataSources;
比如主从库可以这么存储
resolvedDataSources.put("master",主库数据源);
resolvedDataSources.put("salave",从库数据源);
AbstractRoutingDataSource 中还有抽象方法determineCurrentLookupKey,将这个方法的返回值作为 key 到上面的 resolvedDataSources 中查找对应的数据源,作为当前操作 db 的数据源
protected abstract Object determineCurrentLookupKey();
3、读写分离在哪控制?
读写分离属于一个通用的功能,可以通过 spring 的 aop 来实现,添加一个拦截器,拦截目标方法的之前,在目标方法执行之前,获取一下当前需要走哪个库,将这个标志存储在 ThreadLocal 中,将这个标志作为 AbstractRoutingDataSource.determineCurrentLookupKey()方法的返回值,拦截器中在目标方法执行完毕之后,将这个标志从 ThreadLocal 中清除。
3、代码实现
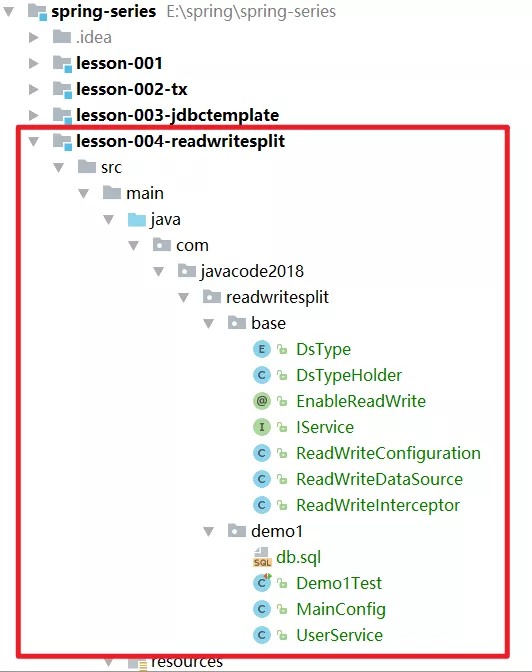
3.1、工程结构图
3.2、DsType
表示数据源类型,有 2 个值,用来区分是主库还是从库。
package com.javacode2018.readwritesplit.base;

public enum DsType {
    MASTER, SLAVE;
}
3.3、DsTypeHolder
内部有个 ThreadLocal,用来记录当前走主库还是从库,将这个标志放在 dsTypeThreadLocal 中
package com.javacode2018.readwritesplit.base;

public class DsTypeHolder {
    private static ThreadLocal<DsType> dsTypeThreadLocal = new ThreadLocal<>();

    public static void master() {
        dsTypeThreadLocal.set(DsType.MASTER);
    }

    public static void slave() {
        dsTypeThreadLocal.set(DsType.SLAVE);
    }

    public static DsType getDsType() {
        return dsTypeThreadLocal.get();
    }

    public static void clearDsType() {
        dsTypeThreadLocal.remove();
    }
}
3.4、IService 接口
这个接口起到标志的作用,当某个类需要启用读写分离的时候,需要实现这个接口,实现这个接口的类都会被读写分离拦截器拦截。
package com.javacode2018.readwritesplit.base;

//需要实现读写分离的service需要实现该接口
public interface IService {
}
3.5、ReadWriteDataSource
读写分离数据源,继承 ReadWriteDataSource,注意其内部的 determineCurrentLookupKey 方法,从上面的 ThreadLocal 中获取当前需要走主库还是从库的标志。
package com.javacode2018.readwritesplit.base;

import org.springframework.jdbc.datasource.lookup.AbstractRoutingDataSource;
import org.springframework.lang.Nullable;

public class ReadWriteDataSource extends AbstractRoutingDataSource {
    @Nullable
    @Override
    protected Object determineCurrentLookupKey() {
        return DsTypeHolder.getDsType();
    }
}
3.6、ReadWriteInterceptor
读写分离拦截器,需放在事务拦截器前面执行,通过@1 代码我们将此拦截器的顺序设置为 Integer.MAX_VALUE - 2,稍后我们将事务拦截器的顺序设置为 Integer.MAX_VALUE - 1,事务拦截器的执行顺序是从小到达的,所以,ReadWriteInterceptor 会在事务拦截器 org.springframework.transaction.interceptor.TransactionInterceptor 之前执行。
由于业务方法中存在相互调用的情况,比如 service1.m1 中调用 service2.m2,而 service2.m2 中调用了 service2.m3,我们只需要在 m1 方法执行之前,获取具体要用哪个数据源就可以了,所以下面代码中会在第一次进入这个拦截器的时候,记录一下走主库还是从库。
下面方法中会获取当前目标方法的最后一个参数,最后一个参数可以是 DsType 类型的,开发者可以通过这个参数来控制具体走主库还是从库。
package com.javacode2018.readwritesplit.base;

import org.aspectj.lang.ProceedingJoinPoint;
import org.aspectj.lang.annotation.Around;
import org.aspectj.lang.annotation.Aspect;
import org.aspectj.lang.annotation.Pointcut;
import org.springframework.core.annotation.Order;
import org.springframework.stereotype.Component;

import java.util.Objects;

@Aspect
@Order(Integer.MAX_VALUE - 2) //@1
@Component
public class ReadWriteInterceptor {

    @Pointcut("target(IService)")
    public void pointcut() {
    }

    //获取当前目标方法的最后一个参数
    private Object getLastArgs(final ProceedingJoinPoint pjp) {
        Object[] args = pjp.getArgs();
        if (Objects.nonNull(args) && args.length > 0) {
            return args[args.length - 1];
        } else {
            return null;
        }
    }

    @Around("pointcut()")
    public Object around(final ProceedingJoinPoint pjp) throws Throwable {
        //判断是否是第一次进来,用于处理事务嵌套
        boolean isFirst = false;
        try {
            if (DsTypeHolder.getDsType() == null) {
                isFirst = true;
            }
            if (isFirst) {
                Object lastArgs = getLastArgs(pjp);
                if (DsType.SLAVE.equals(lastArgs)) {
                    DsTypeHolder.slave();
                } else {
                    DsTypeHolder.master();
                }
            }
            return pjp.proceed();
        } finally {
            //退出的时候,清理
            if (isFirst) {
                DsTypeHolder.clearDsType();
            }
        }
    }
}
3.7、ReadWriteConfiguration
spring 配置类,作用
1、@3:用来将 com.javacode2018.readwritesplit.base 包中的一些类注册到 spring 容器中,比如上面的拦截器 ReadWriteInterceptor
2、@1:开启 spring aop 的功能
3、@2:开启 spring 自动管理事务的功能,@EnableTransactionManagement 的 order 用来指定事务拦截器 org.springframework.transaction.interceptor.TransactionInterceptor 顺序,在这里我们将 order 设置为 Integer.MAX_VALUE - 1,而上面 ReadWriteInterceptor 的 order 是 Integer.MAX_VALUE - 2,所以 ReadWriteInterceptor 会在事务拦截器之前执行。
package com.javacode2018.readwritesplit.base;

import org.springframework.context.annotation.ComponentScan;
import org.springframework.context.annotation.Configuration;
import org.springframework.context.annotation.EnableAspectJAutoProxy;
import org.springframework.transaction.annotation.EnableTransactionManagement;

@Configuration
@EnableAspectJAutoProxy //@1
@EnableTransactionManagement(proxyTargetClass = true, order = Integer.MAX_VALUE - 1) //@2
@ComponentScan(basePackageClasses = IService.class) //@3
public class ReadWriteConfiguration {
}
3.8、@EnableReadWrite
这个注解用俩开启读写分离的功能,@1 通过@Import 将 ReadWriteConfiguration 导入到 spring 容器了,这样就会自动启用读写分离的功能。业务中需要使用读写分离,只需要在 spring 配置类中加上@EnableReadWrite 注解就可以了。
package com.javacode2018.readwritesplit.base;

import org.springframework.context.annotation.Import;

import java.lang.annotation.*;

@Target(ElementType.TYPE)
@Retention(RetentionPolicy.RUNTIME)
@Documented
@Import(ReadWriteConfiguration.class) //@1
public @interface EnableReadWrite {
}
4、案例
读写分离的关键代码写完了,下面我们来上案例验证一下效果。
4.1、执行 sql 脚本
下面准备 2 个数据库:javacode2018_master(主库)、javacode2018_slave(从库)
2 个库中都创建一个 t_user 表,分别插入了一条数据,稍后用这个数据来验证走的是主库还是从库。
DROP DATABASE IF EXISTS javacode2018_master;
CREATE DATABASE IF NOT EXISTS javacode2018_master;

USE javacode2018_master;
DROP TABLE IF EXISTS t_user;
CREATE TABLE t_user (
  id   INT PRIMARY KEY       AUTO_INCREMENT,
  name VARCHAR(256) NOT NULL DEFAULT ''
  COMMENT '姓名'
);

INSERT INTO t_user (name) VALUE ('master库');

DROP DATABASE IF EXISTS javacode2018_slave;
CREATE DATABASE IF NOT EXISTS javacode2018_slave;

USE javacode2018_slave;
DROP TABLE IF EXISTS t_user;
CREATE TABLE t_user (
  id   INT PRIMARY KEY       AUTO_INCREMENT,
  name VARCHAR(256) NOT NULL DEFAULT ''
  COMMENT '姓名'
);
INSERT INTO t_user (name) VALUE ('slave库');
4.2、spring 配置类
@1:启用读写分离
masterDs()方法:定义主库数据源
slaveDs()方法:定义从库数据源
dataSource():定义读写分离路由数据源
后面还有 2 个方法用来定义 JdbcTemplate 和事务管理器,方法中都通过@Qualifier("dataSource")限定了注入的 bean 名称为 dataSource:即注入了上面 dataSource()返回的读写分离路由数据源。
package com.javacode2018.readwritesplit.demo1;

import com.javacode2018.readwritesplit.base.DsType;
import com.javacode2018.readwritesplit.base.EnableReadWrite;
import com.javacode2018.readwritesplit.base.ReadWriteDataSource;
import org.springframework.beans.factory.annotation.Qualifier;
import org.springframework.context.annotation.Bean;
import org.springframework.context.annotation.ComponentScan;
import org.springframework.context.annotation.Configuration;
import org.springframework.jdbc.core.JdbcTemplate;
import org.springframework.jdbc.datasource.DataSourceTransactionManager;
import org.springframework.transaction.PlatformTransactionManager;

import javax.sql.DataSource;
import java.util.HashMap;
import java.util.Map;

@EnableReadWrite //@1
@Configuration
@ComponentScan
public class MainConfig {
    //主库数据源
    @Bean
    public DataSource masterDs() {
        org.apache.tomcat.jdbc.pool.DataSource dataSource = new org.apache.tomcat.jdbc.pool.DataSource();
        dataSource.setDriverClassName("com.mysql.jdbc.Driver");
        dataSource.setUrl("jdbc:mysql://localhost:3306/javacode2018_master?characterEncoding=UTF-8");
        dataSource.setUsername("root");
        dataSource.setPassword("root123");
        dataSource.setInitialSize(5);
        return dataSource;
    }

    //从库数据源
    @Bean
    public DataSource slaveDs() {
        org.apache.tomcat.jdbc.pool.DataSource dataSource = new org.apache.tomcat.jdbc.pool.DataSource();
        dataSource.setDriverClassName("com.mysql.jdbc.Driver");
        dataSource.setUrl("jdbc:mysql://localhost:3306/javacode2018_slave?characterEncoding=UTF-8");
        dataSource.setUsername("root");
        dataSource.setPassword("root123");
        dataSource.setInitialSize(5);
        return dataSource;
    }

    //读写分离路由数据源
    @Bean
    public ReadWriteDataSource dataSource() {
        ReadWriteDataSource dataSource = new ReadWriteDataSource();
        //设置主库为默认的库,当路由的时候没有在datasource那个map中找到对应的数据源的时候,会使用这个默认的数据源
        dataSource.setDefaultTargetDataSource(this.masterDs());
        //设置多个目标库
        Map<Object, Object> targetDataSources = new HashMap<>();
        targetDataSources.put(DsType.MASTER, this.masterDs());
        targetDataSources.put(DsType.SLAVE, this.slaveDs());
        dataSource.setTargetDataSources(targetDataSources);
        return dataSource;
    }

    //JdbcTemplate,dataSource为上面定义的注入读写分离的数据源
    @Bean
    public JdbcTemplate jdbcTemplate(@Qualifier("dataSource") DataSource dataSource) {
        return new JdbcTemplate(dataSource);
    }

    //定义事务管理器,dataSource为上面定义的注入读写分离的数据源
    @Bean
    public PlatformTransactionManager transactionManager(@Qualifier("dataSource") DataSource dataSource) {
        return new DataSourceTransactionManager(dataSource);
    }
}
4.3、UserService
这个类就相当于我们平时写的 service,我是为了方法,直接在里面使用了 JdbcTemplate 来操作数据库,真实的项目操作 db 会放在 dao 里面。
getUserNameById 方法:通过 id 查询 name。
insert 方法:插入数据,这个内部的所有操作都会走主库,为了验证是不是查询也会走主库,插入数据之后,我们会调用 this.userService.getUserNameById(id, DsType.SLAVE)方法去执行查询操作,第二个参数故意使用 SLAVE,如果查询有结果,说明走的是主库,否则走的是从库,这里为什么需要通过 this.userService 来调用 getUserNameById?
this.userService 最终是个代理对象,通过代理对象访问其内部的方法,才会被读写分离的拦截器拦截。
package com.javacode2018.readwritesplit.demo1;

import com.javacode2018.readwritesplit.base.DsType;
import com.javacode2018.readwritesplit.base.IService;
import org.springframework.beans.factory.annotation.Autowired;
import org.springframework.jdbc.core.JdbcTemplate;
import org.springframework.stereotype.Component;
import org.springframework.transaction.annotation.Propagation;
import org.springframework.transaction.annotation.Transactional;

import java.util.List;

@Component
public class UserService implements IService {

    @Autowired
    private JdbcTemplate jdbcTemplate;

    @Autowired
    private UserService userService;

    @Transactional(propagation = Propagation.SUPPORTS, readOnly = true)
    public String getUserNameById(long id, DsType dsType) {
        String sql = "select name from t_user where id=?";
        List<String> list = this.jdbcTemplate.queryForList(sql, String.class, id);
        return (list != null && list.size() > 0) ? list.get(0) : null;
    }

    //这个insert方法会走主库,内部的所有操作都会走主库
    @Transactional
    public void insert(long id, String name) {
        System.out.println(String.format("插入数据{id:%s, name:%s}", id, name));
        this.jdbcTemplate.update("insert into t_user (id,name) values (?,?)", id, name);
        String userName = this.userService.getUserNameById(id, DsType.SLAVE);
        System.out.println("查询结果:" + userName);
    }

}
4.4、测试用例
package com.javacode2018.readwritesplit.demo1;

import com.javacode2018.readwritesplit.base.DsType;
import org.junit.Before;
import org.junit.Test;
import org.springframework.context.annotation.AnnotationConfigApplicationContext;

public class Demo1Test {

    UserService userService;

    @Before
    public void before() {
        AnnotationConfigApplicationContext context = new AnnotationConfigApplicationContext();
        context.register(MainConfig.class);
        context.refresh();
        this.userService = context.getBean(UserService.class);
    }

    @Test
    public void test1() {
        System.out.println(this.userService.getUserNameById(1, DsType.MASTER));
        System.out.println(this.userService.getUserNameById(1, DsType.SLAVE));
    }

    @Test
    public void test2() {
        long id = System.currentTimeMillis();
        System.out.println(id);
        this.userService.insert(id, "张三");
    }
}
test1 方法执行 2 次查询,分别查询主库和从库,输出:
master库
slave库
是不是很爽,由开发者自己控制具体走主库还是从库。
test2 执行结果如下,可以看出查询到了刚刚插入的数据,说明 insert 中所有操作都走的是主库。
1604905117467
插入数据{id:1604905117467, name:张三}
查询结果:张三
5、案例源码
git地址:
https://gitee.com/javacode2018/spring-series

本文案例对应源码:
    spring-series\lesson-004-readwritesplit
大家 star 一下,所有系列代码都会在这个里面。
来源:https://mp.weixin.qq.com/s?__biz=MzA5MTkxMDQ4MQ==&mid=2648938118&idx=2&sn=baef96540a8936e49db0bfe62f909f24&scene=21#wechat_redirect