一、远程调用概述
1.远程调用的定义
在一个程序中就像调用本地中的方法一样调用另外一个远程程序中的方法,但是整个过程对本地完全透明,这就是远程调用。spring已经能够非常成熟的完成该项功能了。
2.spring远程调用的原理
客户端调用本地接口中的一个方法调用的时候将会被客户端代理拦截,并向远程服务器发起一个servlet请求(服务器中的web.xml文件中专门配置了该Servlet),服务器接受请求,并根据spring配置文件和请求的url找到对应的“导出器”,导出器将pojo转换成控制器controller,并最终完成请求的任务,并将结果以流的形式返回到客户端,客户端由此拿到额执行结果的数据。
服务端和客户端之间通信使用的是序列化对象类型,之后会说明该问题。
3.使用远程调用的好处是什么
实现了远程调用的程序能够对外提供一种“服务”,其它程序能够不必重写它的功能模块就能够实现某个功能,其它程序所需要做的仅仅只是一句调用的代码而已。这样做能够极大的提高开发效率。
以当前的数据采集系统为例,已经实现了对数据的统计功能,但是其它网站想要重用你的代码就很困难了,比如其它网站在我们的数据采集系统中新建了调查,调查完毕之后其它网站想要获取统计结果数据并在自己的应用程序中进行统计,这时候获取统计数据就是比较重要的事情了
4.获取统计结果的方法
(1).在数据采集系统中使用“导出到XML”文件或者“导出到Excel文件”的功能将数据导出到文件中,然后在自己的应用程序中对这些数据进行分析。使用这种方式不仅需要分析数据,还要自己进行统计代码的书写,是一种非常笨的方法。
(2).使用数据采集系统提供的公共接口,直接远程调用对应接口中的方法,实现过程对本地透明。获取的数据是已经完全封装好的数据,直接使用即可。但是使用这种方式需要两个程序都使用spring环境(java环境),而且客户端需要拥有接口和相关bean的class文件。
5.总结。
综合以上两方面使用第二种方式是更为理想的方式,但是缺点也是很明显的,那就是强制两端都使用spring环境。能够有折中方案呢?即能够有类似于远程调用的功能,但是不用强制限制客户端使用spring或者java环境,解决方案就是使用WebService,使用WebService虽然解决了以上的矛盾问题,但是它本身也有缺点,那就是效率比较低。从中可以看出使用远程调用和使用WebService各有优劣之处,应当根据不同的环境使用不同的方法。
当两端程序都是用Spring环境的情况下,使用远程调用提供外部服务;当其中有一端不使用Spring的时候,使用WebService
二、Spring实现远程调用Demo案例
源代码地址:https://github.com/kdyzm/day78_spring_rpc_demo/blob/master/readme.md
1.在Eclipse下创建一个Web项目,RPC_Server和一个普通java项目:RPC_Client
2.在RPC_Server上配置远程调用服务
首先将Spring的相关jar包加上:特别是下面强调部分的jar包,是远程实现远程调用的核心jar包。
com.springsource.com.mchange.v2.c3p0-0.9.1.2.jar
com.springsource.net.sf.cglib-2.2.0.jar
com.springsource.org.aopalliance-1.0.0.jar
com.springsource.org.apache.commons.codec-1.3.0.jar
com.springsource.org.apache.commons.logging-1.1.1.jar
com.springsource.org.aspectj.tools-1.6.6.RELEASE.jar
com.springsource.org.aspectj.weaver-1.6.8.RELEASE.jar
com.springsource.org.quartz-1.6.2.jar
commons-lang-2.5.jar
log4j.jar
org.springframework.aop-3.1.0.RELEASE.jar
org.springframework.asm-3.1.0.RELEASE.jar
org.springframework.aspects-3.1.0.RELEASE.jar
org.springframework.beans-3.1.0.RELEASE.jar
org.springframework.context-3.1.0.RELEASE.jar
org.springframework.context.support-3.1.0.RELEASE.jar
org.springframework.core-3.1.0.RELEASE.jar
org.springframework.expression-3.1.0.RELEASE.jar
org.springframework.jdbc-3.1.0.RELEASE.jar
org.springframework.orm-3.1.0.RELEASE.jar
org.springframework.transaction-3.1.0.RELEASE.jar
org.springframework.web-3.1.0.RELEASE.jar
org.springframework.web.servlet-3.1.0.RELEASE.jar
slf4j-api-1.5.8.jar
slf4j-log4j12.jar
3.配置web.xml文件(分发器配置),加入一个Servlet的配置
 1 <?xml version="1.0" encoding="UTF-8"?>
 2 <web-app xmlns:xsi="http://www.w3.org/2001/XMLSchema-instance" xmlns="http://java.sun.com/xml/ns/javaee" xsi:schemaLocation="http://java.sun.com/xml/ns/javaee http://java.sun.com/xml/ns/javaee/web-app_2_5.xsd" id="WebApp_ID" version="2.5">
 3   <display-name>RPC_Server</display-name>
 4   <servlet>
 5       <servlet-name>dispatcherServlet</servlet-name>
 6       <servlet-class>org.springframework.web.servlet.DispatcherServlet</servlet-class>
 7       <init-param>
 8           <param-name>contextConfigLocation</param-name>
 9           <param-value>classpath:applicationContext.xml</param-value>
10       </init-param>
11   </servlet>
12   <servlet-mapping>
13       <servlet-name>dispatcherServlet</servlet-name>
14       <url-pattern>*.service</url-pattern>
15   </servlet-mapping>
16   <welcome-file-list>
17     <welcome-file>index.html</welcome-file>
18     <welcome-file>index.htm</welcome-file>
19     <welcome-file>index.jsp</welcome-file>
20     <welcome-file>default.html</welcome-file>
21     <welcome-file>default.htm</welcome-file>
22     <welcome-file>default.jsp</welcome-file>
23   </welcome-file-list>
24 </web-app>
4.创建WelcomeService接口和WelcomeServiceImpl实现类
1 package com.kdyzm.rpc.server;
2
3 public interface WelcomeService {
4     public String say(String name);
5 }
 1 package com.kdyzm.rpc.server;
 2
 3 public class WelcomServiceImpl implements WelcomeService{
 4
 5     @Override
 6     public String say(String name) {
 7         System.out.println("你好,"+name);
 8         return name;
 9     }
10 }
5.将Service注入spring容器,最重要的还要配置好导出器
 1 <?xml version="1.0" encoding="UTF-8"?>
 2 <beans xmlns="http://www.springframework.org/schema/beans"
 3     xmlns:xsi="http://www.w3.org/2001/XMLSchema-instance" xmlns:aop="http://www.springframework.org/schema/aop"
 4     xmlns:context="http://www.springframework.org/schema/context" xmlns:tx="http://www.springframework.org/schema/tx"
 5     xsi:schemaLocation="http://www.springframework.org/schema/beans file:///D:程序javaSpringspring-framework-4.2.1spring-framework-4.2.1.RELEASEschema/beans/spring-beans-2.5.xsd
 6         http://www.springframework.org/schema/context file:///D:程序javaSpringspring-framework-4.2.1spring-framework-4.2.1.RELEASEschema/context/spring-context-2.5.xsd
 7         http://www.springframework.org/schema/aop file:///D:程序javaSpringspring-framework-4.2.1spring-framework-4.2.1.RELEASEschema/aop/spring-aop-2.5.xsd
 8         http://www.springframework.org/schema/tx file:///D:程序javaSpringspring-framework-4.2.1spring-framework-4.2.1.RELEASEschema/tx/spring-tx-2.5.xsd">
 9         <bean id="welcomeService" class="com.kdyzm.rpc.server.WelcomServiceImpl"></bean>
10         <bean class="org.springframework.remoting.httpinvoker.HttpInvokerServiceExporter" name="/ws.service">
11             <property name="serviceInterface">
12                 <value>com.kdyzm.rpc.server.WelcomeService</value>
13             </property>
14             <property name="service" ref="welcomeService"></property>
15         </bean>
16 </beans>
6.浏览器测试
(1)结果显示
将服务端的程序发布到tomcat,在浏览器上访问http://localhost:8080/RPC_Server/ws.service,观察浏览器显示结果。
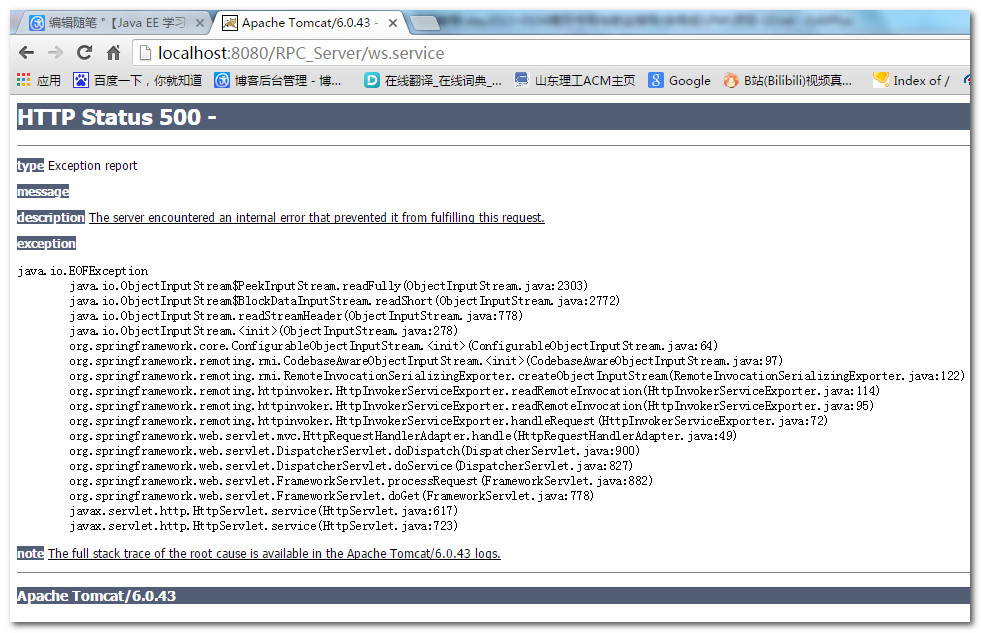
如果显示这样的信息表示服务端已经配置成功了。为什么会是这样呢?因为服务端提供的不是http服务,而是应用程序的服务,必须使用正确的客户端才能正确的访问。
(2)原因分析
先做好7.中的客户端程序,然后进行下面的流程。
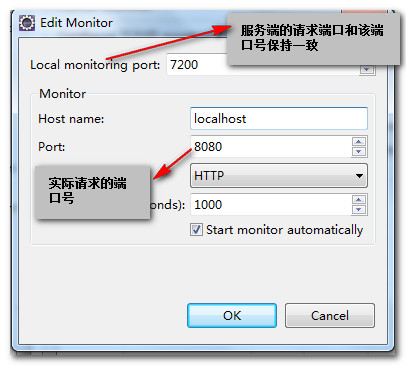
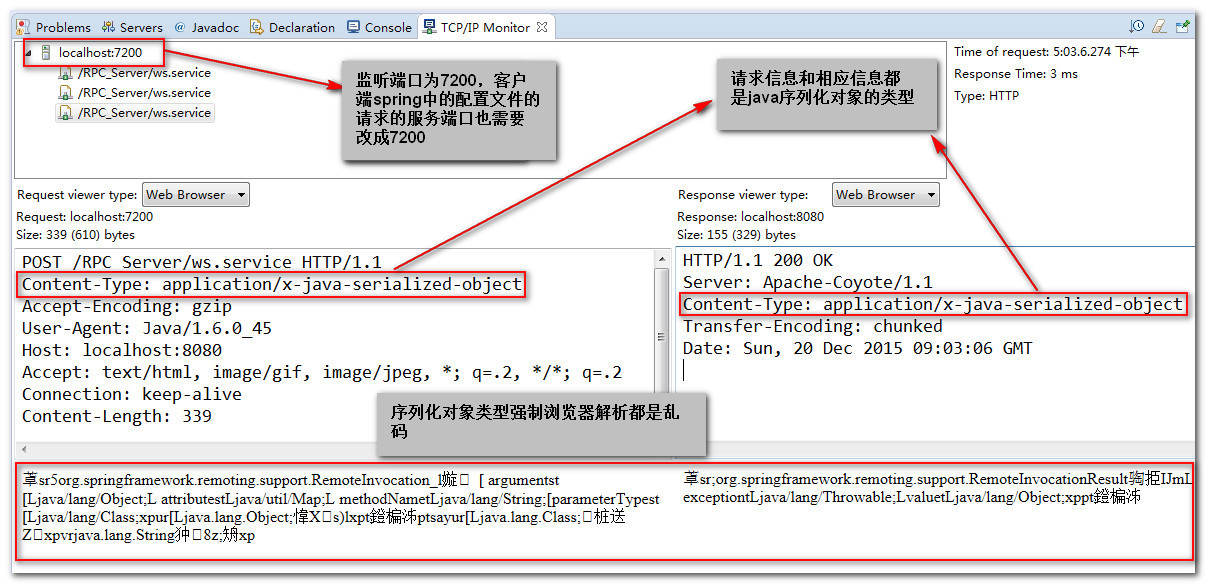
之所以会出现这种现象,是因为远程调用的时候客户端和服务端之间的数据传递使用的是序列化对象的形式,可以使用eclipse自带的TCP/IP监视器查看,关于它的用法就是将客户端的请求端口改成监视端口,该监视器会将从指定监听端口上监听到的流量转发到实际请求的端口号,服务器响应的时候则反过来。
最终捕获到到的请求和相应信息:
7.RPC_Client配置
(1)添加类库
将RPC_Server中的依赖类库完完整整的拷贝到RPC_Client中。然后将接口WelcomeService也拷贝到该项目中,但是实现类WelcomeServiceImpl就不要拷贝到项目中了。
(2)配置Spring的配置文件
实际上客户端的配置文件只需要配置一处地方就可以了,配置的是客户端代理。
1 <bean id="wsClient" class="org.springframework.remoting.httpinvoker.HttpInvokerProxyFactoryBean">
2     <property name="serviceInterface">
3         <value>com.kdyzm.rpc.client.WelcomeService</value>
4     </property>
5     <property name="serviceUrl">
6         <value>http://localhost:8080/RPC_Server/ws.service</value>
7     </property>
8 </bean>
该配置实际上建立了本地接口和远程Servlet之间的一个映射关系,当在本地访问配置的Service接口的时候,代理会向远程服务器发起远程访问,访问的正是之前在服务器中配置的servlet访问地址。
完整的配置为:
 1 <?xml version="1.0" encoding="UTF-8"?>
 2 <beans xmlns="http://www.springframework.org/schema/beans"
 3     xmlns:xsi="http://www.w3.org/2001/XMLSchema-instance" xmlns:aop="http://www.springframework.org/schema/aop"
 4     xmlns:context="http://www.springframework.org/schema/context" xmlns:tx="http://www.springframework.org/schema/tx"
 5     xsi:schemaLocation="http://www.springframework.org/schema/beans file:///D:程序javaSpringspring-framework-4.2.1spring-framework-4.2.1.RELEASEschema/beans/spring-beans-2.5.xsd
 6         http://www.springframework.org/schema/context file:///D:程序javaSpringspring-framework-4.2.1spring-framework-4.2.1.RELEASEschema/context/spring-context-2.5.xsd
 7         http://www.springframework.org/schema/aop file:///D:程序javaSpringspring-framework-4.2.1spring-framework-4.2.1.RELEASEschema/aop/spring-aop-2.5.xsd
 8         http://www.springframework.org/schema/tx file:///D:程序javaSpringspring-framework-4.2.1spring-framework-4.2.1.RELEASEschema/tx/spring-tx-2.5.xsd">
 9         <!-- 配置客户端代理 -->
10         <bean id="wsClient" class="org.springframework.remoting.httpinvoker.HttpInvokerProxyFactoryBean">
11             <property name="serviceInterface">
12                 <value>com.kdyzm.rpc.client.WelcomeService</value>
13             </property>
14             <property name="serviceUrl">
15                 <value>http://localhost:8080/RPC_Server/ws.service</value>
16             </property>
17         </bean>
18 </beans>
(3)接下来书写测试类,测试类非常简单,只需要拿到注入的Service对象,然后调用接口中的方法即可。
1 public class Main{
2 public static void main(String args[]){
3  ApplicationContext context=new ClassPathXmlApplicationContext("applicationContext.xml");
4  WelcomeService service=(WelcomeService) context.getBean("wsClient");
5  service.say("狗蛋");
6  }
7 }
(4)运行测试程序,查看客户端和服务端控制台的打印结果
这里是显示的是tomcat打印的结果,也就是说客户端已经正确访问了服务端的程序。调用了服务端的方法。
到这里spring远程调用的实现已经完成了。
三、将数据采集系统中的SurveyService接口配置为公共的服务接口。
已经有了之前的例子,将当前的数据采集系统中的SurveyService配置成为接口,实现spring的远程调用也就非常简单了。
1.首先还是在web.xml配置文件中配置分发器
 1 <!-- 配置spring远程调用使用的分发器 -->
 2 <servlet>
 3     <servlet-name>dispatcherServlet</servlet-name>
 4     <servlet-class>org.springframework.web.servlet.DispatcherServlet</servlet-class>
 5     <init-param>
 6          <param-name>contextConfigLocation</param-name>
 7           <param-value>classpath:spring/applicationContext.xml</param-value>
 8       </init-param>
 9 </servlet>
10 <servlet-mapping>
11     <servlet-name>dispatcherServlet</servlet-name>
12     <url-pattern>*.service</url-pattern>
13 </servlet-mapping>
2.将服务类纳入Spring容器管理。
服务接口是SurveyService,实现类是SurveyServiceImpl,在项目中之前都已经写好了,而且不需要使用XML的形式纳入Spring容器管理,它们都是用注解的形式纳入了Spring容器中并进行了配置。
3.配置spring配置文件,这里只需要进行一个导出器的配置即可。
1 <!-- 配置Spring远程调用服务端 -->
2 <bean name="/surveyService.service" class="org.springframework.remoting.httpinvoker.HttpInvokerServiceExporter">
3     <property name="serviceInterface" value="com.kdyzm.service.SurveyService"></property>
4     <property name="service" ref="surveyService"></property>
5 </bean>
4.浏览器测试,显示500错误,表示配置spring的远程调用没有问题。
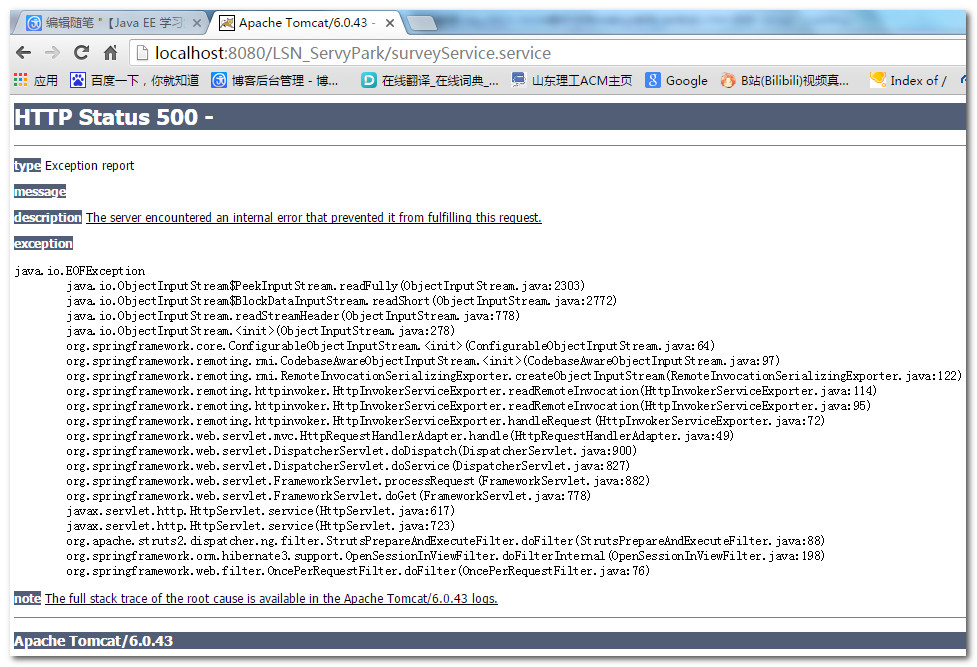
到此为止,服务端已经配置完成。
5.客户端的配置
(1)为了简化处理,将相关类能够直接使用,直接将服务端加入到客户端的classpath,这样就能够直接使用服务端自定义的类了。
方法:项目右键->build path->config build path->projects,选择LSN_surveypark项目,这样LSN_surveypark项目就变成了RPC_Client的依赖项目了。
(2)配置spring配置文件。
1 <bean id="surveyClient" class="org.springframework.remoting.httpinvoker.HttpInvokerProxyFactoryBean">
2     <property name="serviceInterface">
3         <value>com.kdyzm.service.SurveyService</value>
4     </property>
5     <property name="serviceUrl">
6         <value>http://localhost:8080/LSN_ServyPark/surveyService.service</value>
7     </property>
8 </bean>
(3)这样客户端就配置完成了。
6.直接在客户端进行测试即可。
这里以获取所有可用的调查为例进行测试,注意各个Bean对象最好都是先实现Serialize接口,这样才能进行网络传输。否则的话服务端首先会报错,因为无法序列化。
测试代码:
 1 package com.kdyzm.rpc.client;
 2
 3 import java.util.Collection;
 4
 5 import org.springframework.context.ApplicationContext;
 6 import org.springframework.context.support.ClassPathXmlApplicationContext;
 7
 8 import com.kdyzm.domain.Page;
 9 import com.kdyzm.domain.Question;
10 import com.kdyzm.domain.Survey;
11 import com.kdyzm.service.SurveyService;
12
13 public class Main {
14     public static void main(String[] args) {
15         ApplicationContext context=new ClassPathXmlApplicationContext("applicationContext.xml");
16         /*WelcomeService service=(WelcomeService) context.getBean("wsClient");
17         service.say("狗蛋");*/
18         SurveyService surveyService=(SurveyService) context.getBean("surveyClient");
19         Collection<Survey>surveys=surveyService.getAllAvailableSurveys();
20         for(Survey survey:surveys){
21             System.out.println(survey.getSurveyId()+"_"+survey.getTitle());
22             //使用transient关键字实现对字段的屏蔽(不序列化)
23             if(survey.getPages()!=null)
24             for(Page page:survey.getPages()){
25                 System.out.println("	"+page.getPageId()+"_"+page.getOrderNo());
26                 for(Question question:page.getQuestions()){
27                     System.out.println("		"+question.getQuestionId()+"_"+question.getTitle());
28                 }
29             }
30         }
31     }
32 }
运行程序,显示查看控制台显示的结果信息。

显示的结果是一共有8个可用的调查,这些打印结果都是封装到对象之后传输过来的。之前的错误信息提示就忽略即可,是jar包冲突导致的问题,不影响测试结果。
四、spring远程调用功能完成。