1.环境部署
| IP | 描述 |
| 192.168.253.100 | ansible |
| 192.168.253.53 192.168.253.55 | zabbix-agent |
2.ansible安装
这里就不多说了
3.playbook编写剧本
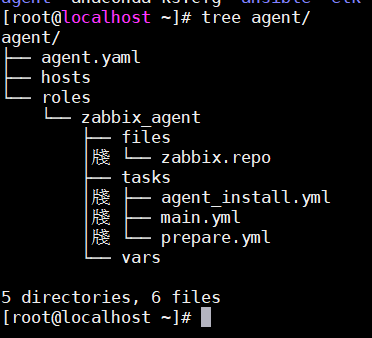
3.1 查看结构

3.2 hosts主机
[agent]
192.168.253.153 hostname=mysql-server1
192.168.253.155 hostname=mysql-server2
3.3 files/zabbix.repo
[zabbix]
name=Zabbix Official Repository - $basearch
baseurl=https://mirrors.aliyun.com/zabbix/zabbix/4.0/rhel/7/$basearch/
enabled=1
gpgcheck=1
gpgkey=file:///etc/pki/rpm-gpg/RPM-GPG-KEY-ZABBIX-A14FE591
[zabbix-non-supported]
name=Zabbix Official Repository non-supported - $basearch
baseurl=https://mirrors.aliyun.com/zabbix/non-supported/rhel/7/$basearch/
enabled=1
gpgkey=file:///etc/pki/rpm-gpg/RPM-GPG-KEY-ZABBIX
gpgcheck=1
3.4 tasks/prepare.yml
- name: 关闭firewalld
  service: name=firewalld state=stopped enabled=no

- name: 临时关闭 selinux
  shell: "setenforce 0"
  failed_when: false

- name: 永久关闭 selinux
  lineinfile:
    dest: /etc/selinux/config
    regexp: "^SELINUX="
    line: "SELINUX=disabled"

- name: 添加EPEL仓库
  copy:
    src: zabbix.repo
    dest: /etc/yum.repos.d/
3.5 tasks/agent_install.yml
- name: 添加GPGKEY_1
  shell: curl https://mirrors.aliyun.com/zabbix/RPM-GPG-KEY-ZABBIX-A14FE591 -o /etc/pki/rpm-gpg/RPM-GPG-KEY-ZABBIX-A14FE591

- name: 添加GPGKEY_2
  shell: curl https://mirrors.aliyun.com/zabbix/RPM-GPG-KEY-ZABBIX  -o /etc/pki/rpm-gpg/RPM-GPG-KEY-ZABBIX

- name: 加载缓存
  yum:
    update_cache: yes

- name: 下载zabbix-agent
  yum:
    name: zabbix-agent
    state: installed

- name: 修改配置文件_1
  lineinfile:
    dest: /etc/zabbix/zabbix_agentd.conf
    regexp: 'Server=127.0.0.1'
    line: 'Server=192.168.253.120'

- name: 修改配置文件_2
  lineinfile:
    dest: /etc/zabbix/zabbix_agentd.conf
    regexp: 'ServerActive=127.0.0.1'
    line: 'ServerActive=192.168.253.120'

- name: 修改配置文件_3
  lineinfile:
    dest: /etc/zabbix/zabbix_agentd.conf
    regexp: 'Hostname=Zabbix server'
    line: 'Hostname= {{ hostname }}'

- name: 启动zabbix_agent
  service:
    name: zabbix-agent
    enabled: yes
    state: started
3.6 tasks/main.yml
- include: prepare.yml
- include: agent_install.yml
3.7 agent.yml
- hosts: agent
  remote_user: root

  roles:
    - zabbix_agent
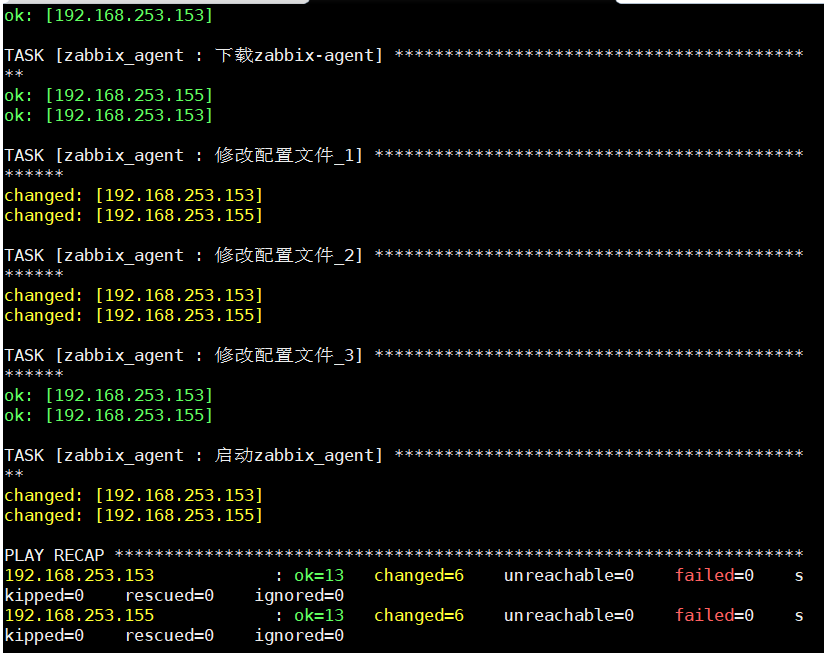
4.一键安装
cd agent
ansible-playbook -i hosts agent.yaml

执行成功!!