分客户端、服务端。
服务端也称分布式配置中心,是一个独立的微服务应用,用来连接配置服务器并为客户端提供获取配置信息,加密/解密信息等访问接口。
客户端则是通过指定配置中心来管理应用资源,以及与业务相关的配置内容,并在启动的时候从配置中心获取和加载配置信息。默认采用 git,并且可以通过 git 客户端工具来方便管理和访问配置内容。
      <dependency>
            <groupId>org.springframework.boot</groupId>
            <artifactId>spring-boot-starter-web</artifactId>
        </dependency>
        <dependency>
            <groupId>org.springframework.cloud</groupId>
            <artifactId>spring-cloud-config-server</artifactId>
        </dependency>
同样在启动项中需要添加注解 @EnableConfigServer 标记为服务配置中心
@SpringBootApplication
@EnableConfigServer
public class ConfigserviceApplication {

    public static void main(String[] args) {
        SpringApplication.run(ConfigserviceApplication.class, args);
    }

}
修改配置文件
spring.cloud.config.server.git.uri=https://XXXX/Text/
spring.cloud.config.server.git.searchPaths=respo
spring.cloud.config.label=master

spring.application.name=config-server
server.port=1006
spring cloud config 服务支持git仓库url读取配置
spring.cloud.config.server.git.url 指向githu配置仓库地址
spring.cloud.config.servier.git.searchpaths 设置搜索配置文件目录,可以同时指定多个固定路径,或者/**等匹配符
spring.cloud.config.label 配置仓库的分支
spring.cloud.config.servier.git.username 配置git访问的用户名 (如果配置仓库是公开项目,就不需要配置)
spring.cloud.config.servier.git.password 配置git访问的密码(如果配置仓库是公开项目,就不需要配置)
新建两个配置文件,内容如下
testconfgi =  version 1.1.1
democonfigclient.message=hello spring io
testconfgi =  version 2.2.2
democonfigclient.message=hello spring io
请求资源文件格式如下:
- /{application}/{profile}[/{label}]
- /{application}-{profile}.yml
- /{label}/{application}-{profile}.yml
- /{application}-{profile}.properties
- /{label}/{application}-{profile}.properties
根据规则,定义配置文件,将配置push到远程的git仓库中

然后启动config-service项目,访问配置资源 http://localhost:1006/config-client-dev.properties 页面打印dev文件的配置,说明配置读取成功
democonfigclient.message: hello spring io
testconfgi: version 1.1.1
可以修改路径http://localhost:1006/config-client-pro.properties 打印pro配置
democonfigclient.message: hello spring io
testconfgi: version 2.2.2
测试各个配置文件是否可以正常使用只需要在http://localhost:1006/配置文件名称 (包含文件后缀)就可以查看
confg客户端
新建一个configclient项目同样先添加引用,需要注意client这里添加的是spring-cloud-starter-config包
     <dependency>
            <groupId>org.springframework.boot</groupId>
            <artifactId>spring-boot-starter-web</artifactId>
        </dependency>
        <dependency>
            <groupId>org.springframework.cloud</groupId>
            <artifactId>spring-cloud-starter-config</artifactId>
        </dependency>
新建bootstrap.properties配置文件,boostrap 由父 ApplicationContext 加载,比 applicaton 优先加载
spring.application.name=config-client
spring.cloud.config.label=master
spring.cloud.config.profile=pro
spring.cloud.config.uri= http://localhost:1006/
server.port=1007
spring.cloud.config.uri 设置config服务端
spring.cloud.config.profile 设置加载环境
spring.cloud.config.label  设置配置中心的分支

  改造一下启动项将配置打印出来
 @Value("${testconfgi}")
    String testconfgi;

    @Value("${democonfigclient.message}")
    String message;

    @RequestMapping(value = "/hi")
    public String hi(){
        return  testconfgi+"    "+message;
    }
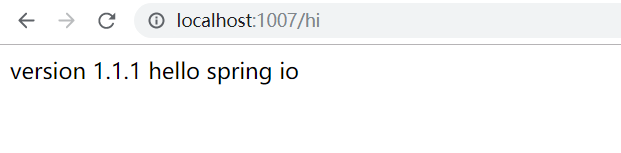
客户端切换配置分支时只需要修改 spring.cloud.config.profile 的值即可