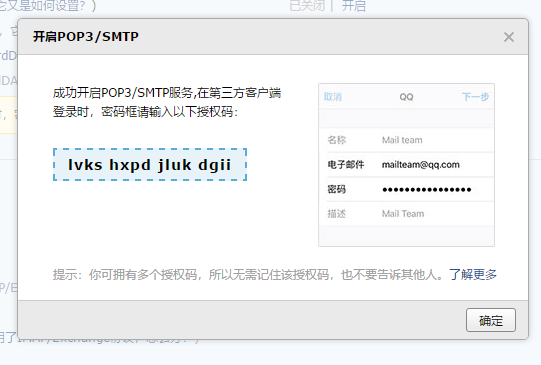
首先开启QQ邮箱的POP.SMTP服务器,获取授权码。
设置-->账户-->POP3/IMAP/SMTP/Exchange/CardDAV/CalDAV服务

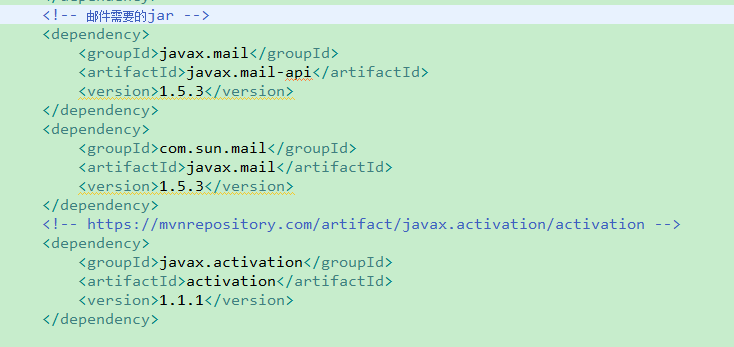
pom.xml需要加载三个jar,可以在这个网站里下载:https://mvnrepository.com/
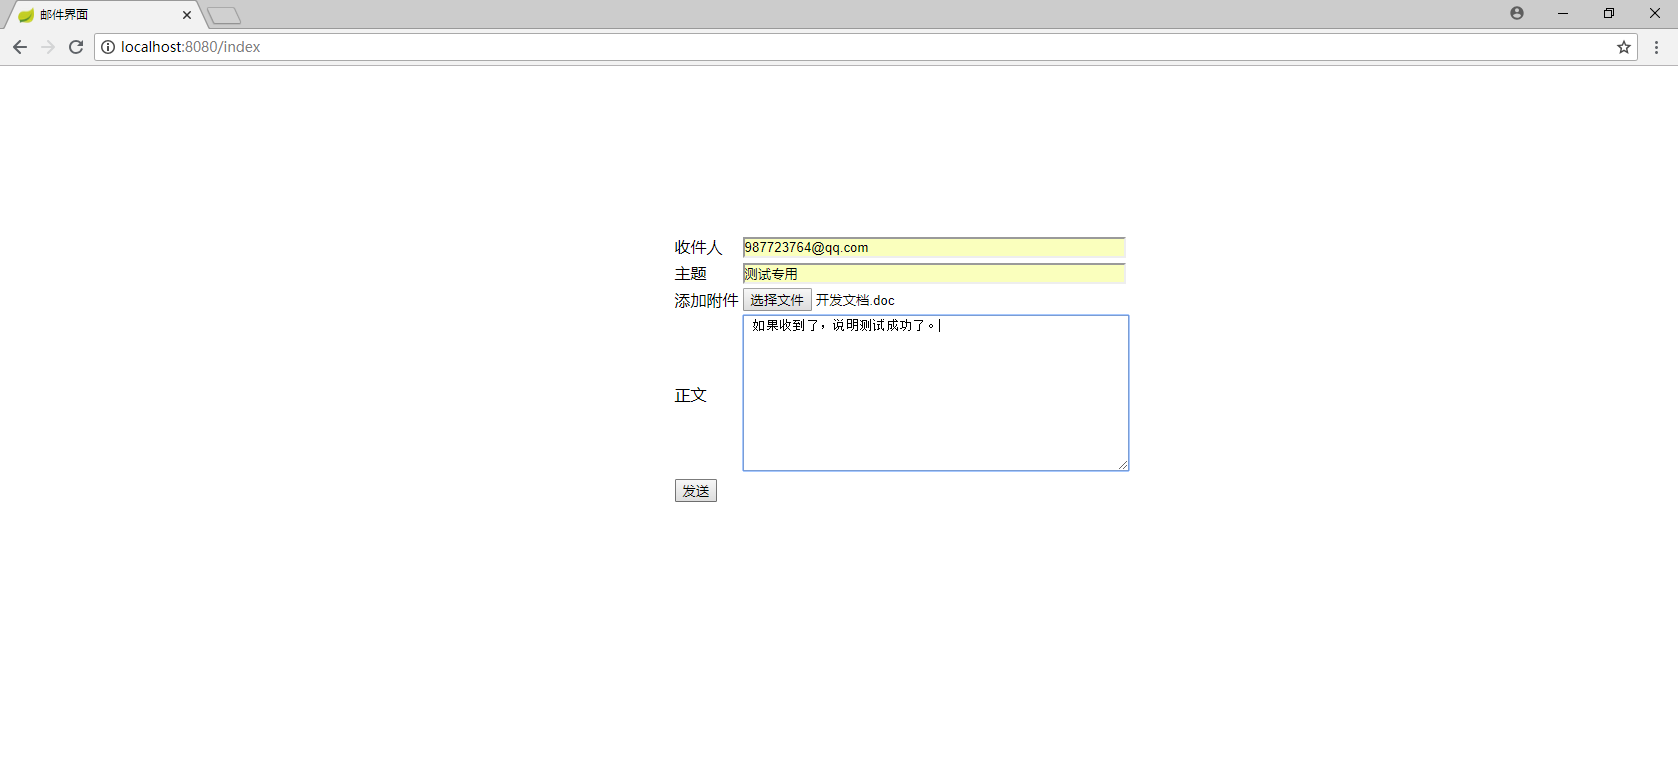
html页面
<form action="/send"  method="post" enctype="multipart/form-data">
		<table >
			<tr>
				<td>收件人</td>
				<td><input type="text" name="addressee" size="50"> </td>
			</tr>
			<tr>
				<td>主题</td>
				<td><input type="text" name="title" size="50"> </td>
			</tr>
			<tr>
				<td>添加附件</td>
				<td><input type="file" name="file" size="50" accept=".doc"> </td>
			</tr>
			<tr>
				<td>正文</td>
				<td><textarea type="text" name="context" > </textarea></td>
			</tr>
			<tr>
				<td ><input type="submit" value="发送"  ></td>
			</tr>
		</table>
	</form>
后台
package com.nenu.controller;
import java.io.File;
import java.util.Date;
import java.util.Properties;
import javax.activation.DataHandler;
import javax.activation.FileDataSource;
import javax.mail.Session;
import javax.mail.Transport;
import javax.mail.internet.InternetAddress;
import javax.mail.internet.MimeBodyPart;
import javax.mail.internet.MimeMessage;
import javax.mail.internet.MimeMessage.RecipientType;
import javax.mail.internet.MimeMultipart;
import javax.mail.internet.MimeUtility;
import javax.servlet.http.HttpServletRequest;
import org.springframework.stereotype.Controller;
import org.springframework.web.bind.annotation.RequestMapping;
import org.springframework.web.bind.annotation.RequestMethod;
import org.springframework.web.bind.annotation.RequestParam;
import org.springframework.web.multipart.MultipartFile;
@Controller
public class SendController {
@RequestMapping(value="index")
public String show() {
return "index";
}
@RequestMapping(value="send",method=RequestMethod.POST)
public String send(HttpServletRequest request,@RequestParam(value = "file")MultipartFile file) throws Exception {
String fileName = file.getOriginalFilename();
File uploadDir = new File("D:\txt");
// 创建一个目录 (它的路径名由当前 File 对象指定,包括任一必须的父路径。)
if (!uploadDir.exists())
uploadDir.mkdirs();
String path = "D:\txt\" + fileName;
// 新建一个文件
File tempFile = new File(path);
try {
// 将上传的文件写入新建的文件中
file.transferTo(tempFile);
} catch (Exception e) {
e.printStackTrace();
}
String addressee = request.getParameter("addressee");
String context = request.getParameter("context");
String title = request.getParameter("title");
// 发件人的 邮箱 和 密码(替换为自己的邮箱和密码)
String myEmailAccount = "2813412434@qq.com";
String myEmailPassword = "lvkshxpdjlukdgii";
// 收件人邮箱(替换为自己知道的有效邮箱)
String receiveMailAccount = addressee;
// 1. 创建参数配置, 用于连接邮件服务器的参数配置
Properties props = new Properties(); // 参数配置
props.setProperty("mail.transport.protocol", "smtp"); // 使用的协议(JavaMail规范要求)
props.setProperty("mail.smtp.host", "smtp.qq.com"); // 发件人的邮箱的 SMTP 服务器地址
props.setProperty("mail.smtp.port", "465");// 端口号
props.setProperty("mail.smtp.auth", "true");
props.setProperty("mail.smtp.ssl.enable", "true");
// 开启 SSL 连接,
// 2. 根据配置创建会话对象, 用于和邮件服务器交互
Session session = Session.getInstance(props);
session.setDebug(true); // 设置为debug模式, 可以查看详细的发送 log
// 3. 创建一封邮件
MimeMessage message = createMimeMessage(session, myEmailAccount, receiveMailAccount,title,path,context);
// 也可以保持到本地查看
// message.writeTo(file_out_put_stream);
// 4. 根据 Session 获取邮件传输对象
Transport transport = session.getTransport();
// 5. 使用 邮箱账号 和 授权码 连接邮件服务器
transport.connect(myEmailAccount, myEmailPassword);
// 6. 发送邮件, 发到所有的收件地址, message.getAllRecipients() 获取到的是在创建邮件对象时添加的所有收件人, 抄送人, 密送人
transport.sendMessage(message, message.getAllRecipients());
// 7. 关闭连接
transport.close();
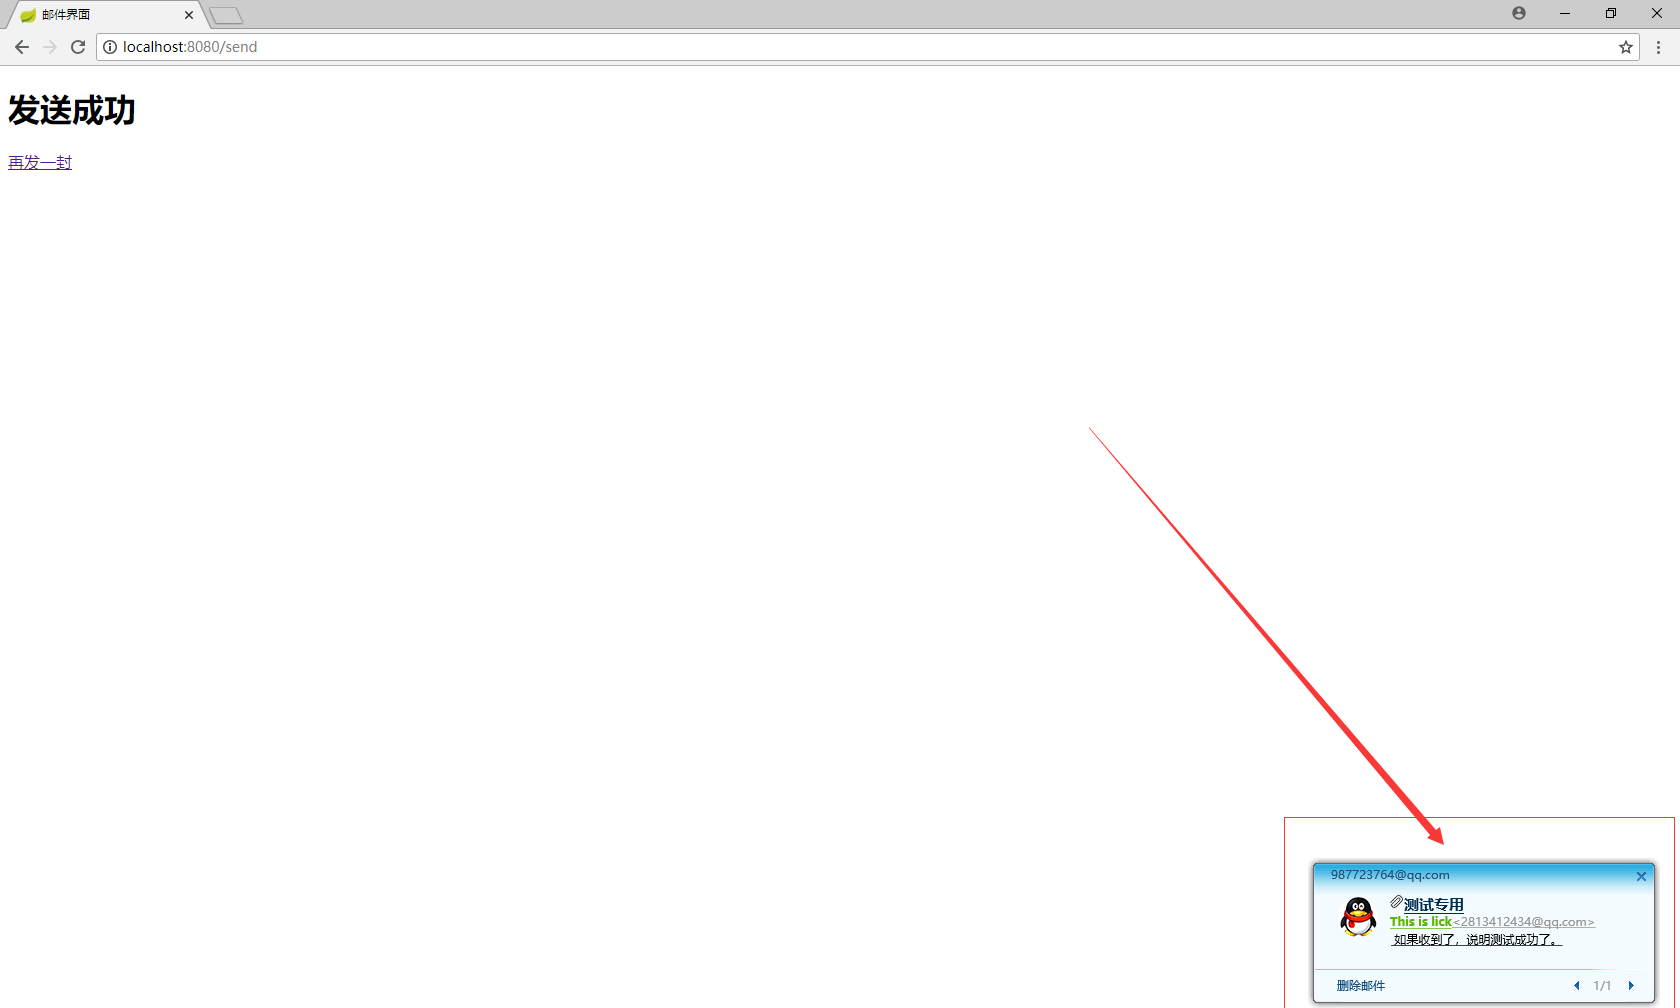
return "success";
}
/**
* 创建邮件(带附件)
*
* com.nenu.controller
* @param session
* @param sendMail
* @param receiveMail
* @param title
* @param path
* @param context
* @return
* @throws Exception MimeMessage
* created at 2018年12月6日
*/
public static MimeMessage createMimeMessage(Session session, String sendMail, String receiveMail,String title,String path,String context) throws Exception {
// 1. 创建邮件对象
MimeMessage message = new MimeMessage(session);
// 2. From: 发件人
message.setFrom(new InternetAddress(sendMail, "This is lick", "UTF-8"));
// 3. To: 收件人(可以增加多个收件人、抄送、密送)
message.addRecipient(RecipientType.TO, new InternetAddress(receiveMail, "This is lick", "UTF-8"));
// 4. Subject: 邮件主题
message.setSubject(title, "UTF-8");
/*
* 下面是邮件内容的创建:
*/
// 5. 创建图片“节点”
// MimeBodyPart image = new MimeBodyPart();
// DataHandler dh = new DataHandler(new FileDataSource("C:\Users\nenu\Desktop\ss.jpg")); // 读取本地文件
// image.setDataHandler(dh); // 将图片数据添加到“节点”
// image.setContentID("image_fairy_tail"); // 为“节点”设置一个唯一编号(在文本“节点”将引用该ID)
// // 6. 创建文本“节点”
MimeBodyPart text = new MimeBodyPart();
// // 这里添加图片的方式是将整个图片包含到邮件内容中, 实际上也可以以 http 链接的形式添加网络图片
// text.setContent("这是一张图片<br/><img src='cid:image_fairy_tail'/>", "text/html;charset=UTF-8");
text.setContent(context, "text/html;charset=UTF-8");
//
// // 7. (文本+图片)设置 文本 和 图片 “节点”的关系(将 文本 和 图片 “节点”合成一个混合“节点”)
// MimeMultipart mm_text_image = new MimeMultipart();
// mm_text_image.addBodyPart(text);
// mm_text_image.addBodyPart(image);
// mm_text_image.setSubType("related"); // 关联关系
// 8. 将 文本+图片 的混合“节点”封装成一个普通“节点”
// 最终添加到邮件的 Content 是由多个 BodyPart 组成的 Multipart, 所以我们需要的是 BodyPart,
// 上面的 mm_text_image 并非 BodyPart, 所有要把 mm_text_image 封装成一个 BodyPart
// MimeBodyPart text_image = new MimeBodyPart();
// text_image.setContent(mm_text_image);
// 9. 创建附件“节点”
MimeBodyPart attachment = new MimeBodyPart();
DataHandler dh2 = new DataHandler(new FileDataSource(path)); // 读取本地文件
attachment.setDataHandler(dh2); // 将附件数据添加到“节点”
attachment.setFileName(MimeUtility.encodeWord(dh2.getName())); // 设置附件的文件名(需要编码)
// 10. 设置(文本+图片)和 附件 的关系(合成一个大的混合“节点” / Multipart )
MimeMultipart mm = new MimeMultipart();
mm.addBodyPart(text);
mm.addBodyPart(attachment); // 如果有多个附件,可以创建多个多次添加
mm.setSubType("mixed"); // 混合关系
// 11. 设置整个邮件的关系(将最终的混合“节点”作为邮件的内容添加到邮件对象)
message.setContent(mm);
// 12. 设置发件时间
message.setSentDate(new Date());
// 13. 保存上面的所有设置
message.saveChanges();
return message;
}
}
效果演示